Oki C5400dn Guide: User's, C5400 Series (American English)
Oki C5400dn Manual
 |
View all Oki C5400dn manuals
Add to My Manuals
Save this manual to your list of manuals |
Oki C5400dn manual content summary:
- Oki C5400dn | Guide: User's, C5400 Series (American English) - Page 1
- Oki C5400dn | Guide: User's, C5400 Series (American English) - Page 2
and referred to in this Guide will not affect the applicability and manuals are available from the Oki Data web site http://www.okidata.com and http://my.okidata.com. Oki and Microline are registered trademarks of Oki Electric Industry Company Ltd. ENERGY STAR is a registered trademark of the United - Oki C5400dn | Guide: User's, C5400 Series (American English) - Page 3
Replacement 89 Fuser Replacement 95 Clearing Paper Jams 100 Troubleshooting 121 LCD messages 121 Problem Solving 127 Parallel Transmission Mode: Windows Only 137 Options 138 RAM Memory 138 Second Paper Tray 139 Duplex Unit 140 Hard Disk Drive 141 Specifications 142 Windows 144 Black - Oki C5400dn | Guide: User's, C5400 Series (American English) - Page 4
General Information 146 Choosing a Color Matching Method 149 Color matching: Postscript emulation driver 151 Color Matching: PCL Driver 158 PCL Emulation Driver 161 Windows 98/Me/XP/NT 4.0 162 Windows 2000 193 Postscript Emulation Driver 222 Windows 98/Me 222 Windows 2000 and XP 242 - Oki C5400dn | Guide: User's, C5400 Series (American English) - Page 5
the product. Important! An important message appears like this. An important message provides supplemental information which can prevent potential problems. CAUTION! A caution appears like this. A caution provides additional information which, if ignored, may result in equipment malfunction or - Oki C5400dn | Guide: User's, C5400 Series (American English) - Page 6
printing multiple copies. If the proof is okay, you can print the balance of the copies immediately without having to reprocess the document. Options: • Duplex Unit for automatic two-sided printing: see page 140. • Additional Memory-see page 138. - 64 MB - 128 MB - 256 MB • Internal 20 GB Hard Disk - Oki C5400dn | Guide: User's, C5400 Series (American English) - Page 7
300 sheets of 20-lb. US Bond (75 g/m²) paper. Multi-Purpose Tray Used for feeding heavier paper stocks, envelopes and other special media. Also for manual feeding of single sheets when required. Introduction • 7 - Oki C5400dn | Guide: User's, C5400 Series (American English) - Page 8
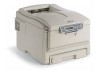
Rear View On/Off Switch Socket for Power Cord Parallel Interface USB Interface Network Interface Optional Duplex Unit Rear Stacker (face up), Capacity100 sheets 20-lb. US Bond (75 g/m²) paper When the rear paper stacker is folded down, paper exits the printer through - Oki C5400dn | Guide: User's, C5400 Series (American English) - Page 9
Changing the display language READY ATTENTION BACK ENTER MENU ON LINE CANCEL 1. Press MENU + repeatedly until you see SYSTEM CONFIG MENU POWER SAVE DELAY TIME 2. Press ENTER. 3. Press MENU + repeatedly until you see SYSTEM CONFIG MENU LANGUAGE 4. Press ENTER. 5. Press MENU + and/or MENU - - Oki C5400dn | Guide: User's, C5400 Series (American English) - Page 10
and use of media. CAUTION! Print media must be able to withstand 446°F (230°C) for 0.2 second. Media Weight Designations Weight Designation Weight Feed Tray Duplexer? Exit Tray Light Medium Heavy Ultra Heavy 16-19 lb. US Bond Tray 1 (60-71 g/m²) Tray 2 20-27 lb. US Bond Tray 1 (75-101 - Oki C5400dn | Guide: User's, C5400 Series (American English) - Page 11
Bond (75 g/m²) • Oki® 52206101 Bright White Proofing Paper, 32 lb. US Bond (120 g/m2) Recommendations • Check http://my.okidata.com for the latest information However, this will reduce the output speed and prevent the use of the duplex option. • Avoid: - Damp, damaged or curled paper. - Very smooth - Oki C5400dn | Guide: User's, C5400 Series (American English) - Page 12
Envelopes Yes No • Use only recommended envelopes (Oki 52206301 and 52206302: see "Selecting/Using OKI Print Media" in your Handy Reference Guide for more information). • Envelopes should be stored flat and away from moisture, direct sunlight and heat sources. • Don't use envelopes with windows - Oki C5400dn | Guide: User's, C5400 Series (American English) - Page 13
Labels • Avery 5161 White Laser Labels (letter size) work well with your printer. Check http://my.okidata.com for the latest information on media for your printer. • Use only labels designed for use in color laser printers and photocopiers. CAUTION! • Labels should - Oki C5400dn | Guide: User's, C5400 Series (American English) - Page 14
). b. Switch to the Rear Exit (Face Up Stacker) when you are printing paper heavier than 47 lb. US Bond (98 lb. Index, 177 g/m2). c. S = Simplex; D = Duplex (printing on both sides) Media Recommendations • 14 - Oki C5400dn | Guide: User's, C5400 Series (American English) - Page 15
loaded print side up, top edge facing into the printer. • Generally, the rear exit (Face Up Stacker) is used with the MP Tray. Important! The duplex unit can be used for paper only, at weights up to 28 lb. US Bond (105 g/m2 metric, 58 lb. Index). Do not use the - Oki C5400dn | Guide: User's, C5400 Series (American English) - Page 16
Media Sizes: Multi-Purpose Tray Feed Exit Paper size MP Tray Reara Topb Letter (8½ x 11'') Yes Legal-14 (8½ x 14'') Yes Legal-13.5 Yes (8½ x 13.5'') Legal-13 (8½ x 13'') Yes Executive Yes (7¼ x 10½'') A4 (210 x 297 mm) Yes A5 (145 x 210 mm) Yes B5 (182 x 257 mm) Yes Envelopes - Oki C5400dn | Guide: User's, C5400 Series (American English) - Page 17
Always use this stacker and the Multi-Purpose Tray for paper stocks heavier than 47 lb. US Bond (98 lb. Index, 176 g/m² metric). Optional Duplex Unit This option provides automatic two-sided printing on the same range of paper sizes as optional Tray 2 (i.e. all Tray 1 sizes except A6), using paper - Oki C5400dn | Guide: User's, C5400 Series (American English) - Page 18
Loading Paper Trays 1 and 2 NOTE If you have the optional second paper tray installed: • If you are printing from the 1st (upper) tray, you can pull out the 2nd (lower) tray and reload it while the printer is printing. • If you are printing from the 2nd (lower) tray, do not pull out the 1st (upper) - Oki C5400dn | Guide: User's, C5400 Series (American English) - Page 19
2. Fan the paper to be loaded at the edges (1) and in the middle (2), then tap the edges of the stack on a flat surface to make it flush again (3). 1 2 3 3. Load paper print side down, making sure the rear stopper (1) and paper guides (2) are snug against the paper. Loading Paper • 19 - Oki C5400dn | Guide: User's, C5400 Series (American English) - Page 20
NOTE Load letterhead paper face down, with the top edge aimed towards the front of the printer. 4. Gently close the paper tray. Loading Paper • 20 - Oki C5400dn | Guide: User's, C5400 Series (American English) - Page 21
NOTE To prevent paper jams: • Do not leave space between the paper and the guides and rear stopper. • Do not overfill the paper tray. Capacity depends on the type of paper stock. • Do not load damaged paper. • Do not load - Oki C5400dn | Guide: User's, C5400 Series (American English) - Page 22
Multi-Purpose (MP) Tray NOTE The MP Tray will take a stack of media about 3/8'' (10 mm) high, equivalent to about 10 envelopes or 50 transparencies. Do not exceed the 3/8'' (10 mm) media stack height. 1. Open the MP Tray. Loading Paper • 22 - Oki C5400dn | Guide: User's, C5400 Series (American English) - Page 23
guides (1) to the size media being used. • Letterhead stationery: - For single-sided printing, load with pre-printed side up and the top edge into the printer. - For two-sided (duplex ) printing, load with pre-printed side down and top edge away from the printer. (Optional duplex unit must - Oki C5400dn | Guide: User's, C5400 Series (American English) - Page 24
4. Press the blue tray latch (1) toward the paper stack to lift the paper platform into the feed position. Loading Paper • 24 - Oki C5400dn | Guide: User's, C5400 Series (American English) - Page 25
Menu Functions This section lists the menus accessed via the controls on the printer's operator panel and displayed in the LCD window. Many of these settings can be overridden by settings in the Windows printer drivers. However, several of the driver settings can be left at "Printer Setting," which - Oki C5400dn | Guide: User's, C5400 Series (American English) - Page 26
steps 5 though 7. - To change the setting for an item in a different menu, press BACK again, then follow steps 2 through 7. For Example: To engage duplex printing (default setting is OFF): 1. Press MENU + to enter the menu mode. 2. Press MENU + and/or MENU - repeatedly until you see PRINT MENU - Oki C5400dn | Guide: User's, C5400 Series (American English) - Page 27
6. Press MENU + to change the setting to ON: DUPLEX ON The second line of the display begins flashing. 7. Press ENTER to select the new setting: DUPLEX ON * An asterisk appears on the second line of the display. 8. Press ON LINE to engage the new setting and to exit the menu. The - Oki C5400dn | Guide: User's, C5400 Series (American English) - Page 28
Summary of Menu Defaults Menu Defaults Note: Menus/Items with a dagger (†) only appear when the appropriate option (e.g., Hard Disk Drive, Duplex Unit, Second Paper Tray, etc.) is installed. Menu PRINT JOBS MENU† INFORMATION MENU SHUTDOWN MENU† PRINT MENU Item ENTER PASSWORD SELECT JOB PRINT MENU - Oki C5400dn | Guide: User's, C5400 Series (American English) - Page 29
(†) only appear when the appropriate option (e.g., Hard Disk Drive, Duplex Unit, Second Paper Tray, etc.) is installed. Menu MEDIA MENU TRAY2 MEDIAWEIGHT† MP TRAY PAPERSIZE MP TRAY MEDIATYPE MP TRAY MEDIAWEIGHT UNIT OF MEASURE X DIMENSION Y DIMENSION DENSITY CONTROL ADJUST DENSITY COLOR TUNING - Oki C5400dn | Guide: User's, C5400 Series (American English) - Page 30
(†) only appear when the appropriate option (e.g., Hard Disk Drive, Duplex Unit, Second Paper Tray, etc.) is installed. Menu Item K HIGHLIGHT SAVE TIME PERSONALITY PARA PS-PROTOCOL USB PS-PROTOCOL CLRABLE WARNING AUTO CONTINUE MANUAL TIMEOUT WAIT TIMEOUT LOW TONER Default Setting 0 0 0 0 0 0 - Oki C5400dn | Guide: User's, C5400 Series (American English) - Page 31
Menu Defaults (continued) Note: Menus/Items with a dagger (†) only appear when the appropriate option (e.g., Hard Disk Drive, Duplex Unit, Second Paper Tray, etc.) is installed. Menu SYS CONFIG MENU (CONT.) PCL EMULATION PPR EMULATION Item JAM RECOVERY ERROR REPORT LANGUAGE FONT SOURCE FONT NO. - Oki C5400dn | Guide: User's, C5400 Series (American English) - Page 32
Menu Defaults (continued) Note: Menus/Items with a dagger (†) only appear when the appropriate option (e.g., Hard Disk Drive, Duplex Unit, Second Paper Tray, etc.) is installed. Menu PPR EMULATION (CONT.) FX EMULATION PARALLEL MENU Item LF FUNCTON LINE LENGTH FORM LENGTH TOF POSITION LEFT MARGIN - Oki C5400dn | Guide: User's, C5400 Series (American English) - Page 33
Menu Defaults (continued) Note: Menus/Items with a dagger (†) only appear when the appropriate option (e.g., Hard Disk Drive, Duplex Unit, Second Paper Tray, etc.) is installed. Menu USB MENU NETWORK MENU Item ACK WIDTH ACK/BUSY TIMING I-PRIME OFFLINE RECEIVE USB SOFT RESET SPEED OFFLINE - Oki C5400dn | Guide: User's, C5400 Series (American English) - Page 34
Menu Defaults (continued) Note: Menus/Items with a dagger (†) only appear when the appropriate option (e.g., Hard Disk Drive, Duplex Unit, Second Paper Tray, etc.) is installed. Menu Item HUB LINK SETTING MEMORY MENU† DISK MAINTENANCE† SYS ADJUST MENU† RECEIVE BUF SIZE RESOURCE SAVE FLASH - Oki C5400dn | Guide: User's, C5400 Series (American English) - Page 35
Menu Defaults (continued) Note: Menus/Items with a dagger (†) only appear when the appropriate option (e.g., Hard Disk Drive, Duplex Unit, Second Paper Tray, etc.) is installed. Menu Item USAGE MENU USAGE MENU (CONT) TOTAL PAGE COUNT TRAY1 PAGE COUNT TRAY2 PAGE COUNT† MPT PAGE COUNT - Oki C5400dn | Guide: User's, C5400 Series (American English) - Page 36
Printer Menus Print Jobs Menu This menu only appears if you have the optional Hard Disk Drive installed. Item Action ENTER PASSWORD **** SELECT JOB NO JOBS ALL JOBS FILE NAME #1 ... FILE NAME #n Explanation Use MENU + and MENU - to enter a digit of the password, then press ENTER to progress to - Oki C5400dn | Guide: User's, C5400 Series (American English) - Page 37
Information Menu Item PRINT MENU MAP Action EXECUTE PRINT FILE LIST EXECUTE PRINT PCL FONT EXECUTE PRINT PSE FONT EXECUTE PRINT PPR FONT EXECUTE PRINT FX FONT EXECUTE DEMO1 EXECUTE PRINT ERROR LOG EXECUTE Explanation Prints the MenuMap (menu listing) with current settings shown. - Oki C5400dn | Guide: User's, C5400 Series (American English) - Page 38
UP PAPER FEED TRAY DO NOT USE WHEN MISMATCH XXX ENABLE DISABLE Explanation Enter the number of copies of a document to be printed. Turns the duplex (2-sided) printing function on or off if this option is installed. Selects the default tray for paper feed. If two trays contain identical print media - Oki C5400dn | Guide: User's, C5400 Series (American English) - Page 39
Print Menu (continued) Note: Factory default settings are shown in bold. Item RESOLUTION TONER SAVE MODE MONO-PRINT SPEED ORIENTATION Settings 600x1200DPI 600DPI OFF ON AUTO SPEED MONO 24PPM COLOR SPEED MIXED SPEED PORTRAIT LANDSCAPE Explanation If you don't need 600x1200DPI resolution, switch to - Oki C5400dn | Guide: User's, C5400 Series (American English) - Page 40
Print Menu (continued) Note: Factory default settings are shown in bold. Item EDIT SIZE Settings Explanation CASSETTE SIZE LETTER EXECUTIVE LEGAL14 LEGAL13.5 LEGAL13 A4, A5, A6, B5 CUSTOM COM-9 ENVELOPE COM-10 ENVELOPE MONARCH ENV DL ENVELOPE C5 ENVELOPE Sets the size of the printable page area - Oki C5400dn | Guide: User's, C5400 Series (American English) - Page 41
default settings are shown in bold. • Menus/Items with an asterisk (†) only appear when the appropriate option (e.g., Hard Disk Drive, Duplex Unit, Second Paper Tray, etc.) is installed. Item Settings TRAY1 PAPERSIZE A4, A5, A6, B5 LEGAL14 LEGAL13.5 LEGAL13 LETTER EXECUTIVE CUSTOM TRAY1 - Oki C5400dn | Guide: User's, C5400 Series (American English) - Page 42
default settings are shown in bold. • Menus/Items with an asterisk (†) only appear when the appropriate option (e.g., Hard Disk Drive, Duplex Unit, Second Paper Tray, etc.) is installed. Item Settings Explanation TRAY2 MEDIAWEIGHT† LIGHT MEDIUM HEAVY Adjusts the printer for the weight of - Oki C5400dn | Guide: User's, C5400 Series (American English) - Page 43
• Factory default settings are shown in bold. • Menus/Items with an asterisk (†) only appear when the appropriate option (e.g., Hard Disk Drive, Duplex Unit, Second Paper Tray, etc.) is installed. Item Y-DIMENSION Settings 5 to 35.5 INCH Default = 11 INCH Explanation Defines the length of paper - Oki C5400dn | Guide: User's, C5400 Series (American English) - Page 44
values when the next print job is complete. Color Menu Note: Factory default settings are shown in bold. Item DENSITY CONTROL Settings AUTO MANUAL AUTO DENSITY EXECUTE COLOR TUNING PRINT PATTERN Explanation AUTO = image density is automatically adjusted: • at power on • when a new image drum or - Oki C5400dn | Guide: User's, C5400 Series (American English) - Page 45
Color Menu (continued) Note: Factory default settings are shown in bold. Item Settings Explanation C HIGHLIGHT C MID-TONE C DARK M HIGHLIGHT M MID-TONE M DARK Y HIGHLIGHT Y MID-TONE Y DARK K HIGHLIGHT K MID-TONE K DARK -3 to + 3 in Adjusts image density for each color increments of 1 - Oki C5400dn | Guide: User's, C5400 Series (American English) - Page 46
produced using 100% C, M, and Y instead of black. This results in a glossier finish. Postscript emulation only. Switch to OFF to shorten the processing time for CMYK data. Not available when the Ink Simulation menu item is set to a value other than OFF (the default). Menu Functions • 46 - Oki C5400dn | Guide: User's, C5400 Series (American English) - Page 47
industry standard emulation your printer uses. When set to AUTO, incoming data is examined and the correct emulation is automatically selected each time a the printer will automatically recover from a memory overflow condition. MANUAL TIMEOUT OFF 30 60 Specifies how many seconds the printer will - Oki C5400dn | Guide: User's, C5400 Series (American English) - Page 48
French Italian Spanish Swedish Norwegian Danish Dutch Turkish Portuguese Polish Explanation Specifies how many seconds the printer will wait when received data pauses before forcing a page eject. In Postscript emulation mode the job will be cancelled if timeout occurs. Specifies whether the printer - Oki C5400dn | Guide: User's, C5400 Series (American English) - Page 49
PCL Emulation Menu Note: Factory default settings are shown in bold. Item FONT SOURCE FONT NO. FONT PITCH Settings RESIDENT / DIMM0 / DIMM1 / DOWNLOADED I000 / C001 / S001 0.44 to 99.99 CPI Default = 10.00 CPI Explanation Specifies the location of the PCL default font. Change the setting - Oki C5400dn | Guide: User's, C5400 Series (American English) - Page 50
, PC-850, PC- source and number are 852, PC-855, PC-857 TK, changed to one which does PC-858, PC-866, PC-869, not support the selected PC-1004, Pi Font, Plska symbol set, this must be Mazvia, PS Math, PS Text, changed to an available Roman-8, Roman-9, Roman symbol - Oki C5400dn | Guide: User's, C5400 Series (American English) - Page 51
whether a received line feed character also causes a carriage return. Sets the non-printable page area. NORMAL is PCL compatible. Selects whether black image data is printed using black toner (ON) or 100% CMY (OFF). When switched ON, emphasizes the pen width to improve the appearance of lines - Oki C5400dn | Guide: User's, C5400 Series (American English) - Page 52
PPR Emulation Menu Note: Factory default settings are shown in bold. Item CHARACTER PITCH FONT CONDENSE CHARACTER SET Settings 10 CPI 12 CPI 17 CPI 20 CPI PROPROTIONAL 12CPI TO 20CPI 12CPI TO 12CPI SET 2 SET 1 Explanation Specifies character pitch (characters per inch). Specifies 12CPI pitch for - Oki C5400dn | Guide: User's, C5400 Series (American English) - Page 53
PPR Emulation Menu (continued) Note: Factory default settings are shown in bold. Item SYMBOL SET LETTER 0 STYLE Settings Explanation IBM-437, IBM-850, IBM-860, Specifies the symbol set to IBM-863, IBM-865, PC Set1, be used. PC Ext US, PC Ext D/N, PC Set2 US, PC Set2 D/N, Roma3n-8, ISO L1, PC-8, - Oki C5400dn | Guide: User's, C5400 Series (American English) - Page 54
ON if you do not wish to print blank pages. Not available for duplex printing. Sets functionality on receipt of CR code. Sets functionality on receipt the distance of print from the left hand edge of the paper. Fits print data, equivalent to 11 inches (66 lines), in the LETTER-size printable area. - Oki C5400dn | Guide: User's, C5400 Series (American English) - Page 55
FX Emulation Menu Note: Factory default settings are shown in bold. Item CHARACTER PITCH CHARACTER SET Settings 10 CPI 12 CPI 17 CPI 20 CPI PROPORTIONAL Set 2 SET 1 Explanation Specifies character pitch (characters per inch). Specifies which Epson character set is used. Menu Functions • 55 - Oki C5400dn | Guide: User's, C5400 Series (American English) - Page 56
FX Emulation Menu (continued) Note: Factory default settings are shown in bold. Item SYMBOL SET LETTER 0 STYLE Settings Explanation IBM-437, IBM-850, IBM860, IBM-863, IBM-865, PC Set1, PC Ext US, PC Ext D/ N, PC Set2 US, PC Set2 D/ N, Roman-8, ISO L1, PC-8, PC-8 Dan/Nor, PC-850, Legal, ISO-2 IRV - Oki C5400dn | Guide: User's, C5400 Series (American English) - Page 57
to ON if you do not wish to print blank pages Not available for duplex printing. Sets functionality on receipt of CR code. Specifies the number of left hand edge of the paper. Sets the printing mode that can fit print data, equivalent to 11 inches (66 lines), in the LETTER-size printable area. - Oki C5400dn | Guide: User's, C5400 Series (American English) - Page 58
Parallel Menu Note: Factory default settings are shown in bold. Item Settings Explanation PARALLEL ENABLE DISABLE Enables or disables the parallel port. BI-DIRECTION ENABLE DISABLE Enables or disables bi-directional functionality of the parallel port. ECP ENABLE DISABLE Enables or - Oki C5400dn | Guide: User's, C5400 Series (American English) - Page 59
USB Menu Note: Factory default settings are shown in bold. Item Settings USB SOFT RESET SPEED OFFLINE RECEIVE ENABLE DISABLE ENABLE DISABLE 480Mbps 12Mbps DISABLE ENABLE SERIAL NUMBER ENABLE DISABLE Explanation Enables or disables operation of the USB port. Enables or disables the SOFT RESET - Oki C5400dn | Guide: User's, C5400 Series (American English) - Page 60
. Item Settings Explanation FRAME TYPE AUTO 802.2 802.3 ETHERNET II SNAP Selects the Ethernet MAC layer frame type. IP ADDRESS AUTO SET MANUAL Change this to Manual to specify the IP address through the front panel.(see next entry) Required for non-DHCP networks. IP ADDRESS xxx.xxx.xxx - Oki C5400dn | Guide: User's, C5400 Series (American English) - Page 61
IP is set to DISABLE. ENABLE DISABLE Enables or disables SNMP protocol. NORMAL SMALL Normal = Global network Small = Local network AUTO Sets full or half duplex for NEGOTIATE communication via a network hub. 100BASE-TX FUL 100BASE-TX HALF 10BASE-T FULL 10BASE-T HALF Menu Functions • 61 - Oki C5400dn | Guide: User's, C5400 Series (American English) - Page 62
CAUTION! The Disk Maintenance Menu can be used to initialize the printer's internal hard disk drive, to reassign the partition contents, or to reformat the partitions. Unless you know what you are doing, please avoid this section of the Menu. It is recommended that disk maintenance be done through - Oki C5400dn | Guide: User's, C5400 Series (American English) - Page 63
Default = 0.00 increments. Y ADJUST -2.00MILLIMETER TO Adjusts overall print position +2.00MILLIMETER vertically in 0.25 increments. Default = 0.00 DUPLEX X ADJUST -2.00MILLIMETER TO Adjusts overall print position +2.00MILLIMETER of print face horizontally in Default = 0.00 0.25 increments - Oki C5400dn | Guide: User's, C5400 Series (American English) - Page 64
settings are shown in bold. Item HEX DUMP Settings [EXECUTE] Explanation Press ENTER to switch the printer to the Hexadecimal Dump mode in which all data received is printed in both Hexadecimal and ASCII format. To return to normal print mode, switch the printer off then on again. Menu Functions - Oki C5400dn | Guide: User's, C5400 Series (American English) - Page 65
Maintenance Menu Note: Factory default settings are shown in bold. Item Settings Explanation MENU RESET EXECUTE Resets menus to the default settings. SAVE MENU EXECUTE Saves current menu settings as default values. At confirmation prompt, press ENTER to confirm save, or CANCEL. POWER SAVE - Oki C5400dn | Guide: User's, C5400 Series (American English) - Page 66
Usage Menu This menu is for information only, and provides an indication of total usage of the printer and the expected life left in its consumable items. This is particularly useful if you do not have a full set of replacement consumables on hand and you need to know how soon you will need them - Oki C5400dn | Guide: User's, C5400 Series (American English) - Page 67
Setting Color Tuning from The Front Panel Important! • In most cases, using Color Tuning is not necessary as the printer is optimized for color printing at its default settings. • Once you change these settings, they remain in effect until you go back in and change them. • To return the settings to - Oki C5400dn | Guide: User's, C5400 Series (American English) - Page 68
1. Print the Color Tuning Pattern: a. Make sure letter-size paper is loaded in the tray. b. Press + repeatedly, until you see COLOR MENU c. Press ENTER. d. Press + one or more times, until you see COLOR TUNING PRINT PATTERN e. Press ENTER. The Color Tuning Pattern prints and the display reads. C - Oki C5400dn | Guide: User's, C5400 Series (American English) - Page 69
2. Adjust the Cyan highlight color. a. Press ENTER to select the Cyan Highlight item. The second line of the display begins flashing. b. Press + one or more times, until the new value you wish to use displays (e.g., +3). c. Press ENTER, to select the new value. An asterisk (*) appears at the right - Oki C5400dn | Guide: User's, C5400 Series (American English) - Page 70
4. Adjust the Cyan dark color: a. Press ENTER to select the Cyan Dark item. The second line of the display begins flashing. b. Press + one or more times, until the new value you wish to use displays (e.g., +3). c. Press ENTER, to select the new value. An asterisk (*) appears at the right of the new - Oki C5400dn | Guide: User's, C5400 Series (American English) - Page 71
drums will be used more quickly. See "Image Drum Replacement" on page 80. • Transfer Belt - Life expectancy about 50,000 letter-size pages. See "Belt Unit Replacement" on page 89. • Fuser - Life expectancy about 45,000 letter-size pages. See "Fuser Replacement" on page 95. Replacing Consumables • 71 - Oki C5400dn | Guide: User's, C5400 Series (American English) - Page 72
EMPTY * nnn: ZZZZ = 410: YELLOW 411: MAGENTA 412: CYAN 413: BLACK Type Standard High Capacity Toner Color Black, Cyan Magenta Yellow Black Cyan Magenta Yellow Oki Order # 42804504 42804503 42804502 42804501 42127404 42127403 42127402 42127401 Replacing Consumables • 72 - Oki C5400dn | Guide: User's, C5400 Series (American English) - Page 73
1. Press the cover release and open the printer's top cover fully. WARNING! If the printer has been powered on, the fuser is hot. This area is clearly labelled. Do not touch. Replacing Consumables • 73 - Oki C5400dn | Guide: User's, C5400 Series (American English) - Page 74
2. Note the positions of the four cartridges: Cyan (1), Magenta (2), Yellow (3), Black (4): 3. Pull the colored toner release lever on the cartridge to be replaced (here we are showing replacement of the black toner cartridge) towards the front of the printer. 4. Lift the right-hand end of the - Oki C5400dn | Guide: User's, C5400 Series (American English) - Page 75
toner cartridge and discard it in accordance with your local regulations. 5. Unpack the new toner cartridge and gently shake it from side to side to loosen and distribute the toner evenly inside the cartridge. Replacing Consumables • 75 - Oki C5400dn | Guide: User's, C5400 Series (American English) - Page 76
6. Remove the adhesive tape from the underside of the cartridge. Replacing Consumables • 76 - Oki C5400dn | Guide: User's, C5400 Series (American English) - Page 77
the right, insert the left end of the cartridge into the top of the image drum, pushing it firmly against the spring on the drum unit. Replacing Consumables • 77 - Oki C5400dn | Guide: User's, C5400 Series (American English) - Page 78
8. Lower the right end of the cartridge into the image drum unit, pressing it firmly down in place, then push the colored lock lever back to open the toner slot and lock it in place. Important! The - Oki C5400dn | Guide: User's, C5400 Series (American English) - Page 79
9. Gently wipe the corresponding LED head surface with the LED lens cleaner supplied with the toner cartridge. 10. Close and latch the top cover. Replacing Consumables • 79 - Oki C5400dn | Guide: User's, C5400 Series (American English) - Page 80
Replacement REPLACE IMAGE DRUM nnn: ZZZZ DRUM LIFE * nnn: ZZZZ = 350: YELLOW 351: MAGENTA 352: CYAN 353: BLACK Drum Color Black Cyan Magenta Yellow Oki Order # 42126604 42126603 42126602 42126601 1. Place two sheets of paper on your working surface to protect it. You will put the image drum and - Oki C5400dn | Guide: User's, C5400 Series (American English) - Page 81
2. Press the cover release and open the top cover fully. WARNING! If the printer has been powered on, the fuser is hot. This area is clearly labelled. Do not touch it. Replacing Consumables • 81 - Oki C5400dn | Guide: User's, C5400 Series (American English) - Page 82
3. Note the positions of the four image drums: Cyan (1), Magenta (2), Yellow (3), Black (4): 4. Lift the image drum, complete with its toner cartridge, out of the printer and put it down on one of the sheets of paper. Replacing Consumables • 82 - Oki C5400dn | Guide: User's, C5400 Series (American English) - Page 83
very delicate and light sensitive. Do not touch it and do not expose it to normal room light for more than 5 minutes. If the drum unit needs to be out of the printer for longer than this, please wrap the cartridge inside a black plastic bag to keep it away from light - Oki C5400dn | Guide: User's, C5400 Series (American English) - Page 84
8. Unpack the new image drum. CAUTION! Image drum handling: The image drum contains toner. To avoid spilling toner, be careful to keep it upright. Replacing Consumables • 84 - Oki C5400dn | Guide: User's, C5400 Series (American English) - Page 85
9. Grasp the white tape tab and peel the tape off the drum. 10. Remove the paper sheet, then the clear plastic film. Replacing Consumables • 85 - Oki C5400dn | Guide: User's, C5400 Series (American English) - Page 86
11. If present, remove the silica gel pack. 12. Place the image drum in the printer. Replacing Consumables • 86 - Oki C5400dn | Guide: User's, C5400 Series (American English) - Page 87
13. Remove the orange drum seal. 14. Install the toner cartridge in the image drum. Replacing Consumables • 87 - Oki C5400dn | Guide: User's, C5400 Series (American English) - Page 88
15. Push back the toner cartridge lock lever. 16. Gently wipe the corresponding LED with a lens cleaner pad or a soft cloth. 17. Close and latch the top cover. Replacing Consumables • 88 - Oki C5400dn | Guide: User's, C5400 Series (American English) - Page 89
Belt Unit Replacement Oki 42158711 REPLACE BELT 355: BELT LIFE The belt unit is located under the four image drums. This unit requires replacement approximately every 50,000 pages. 1. Press the cover release and open the top cover fully. WARNING! If the printer has been powered on, - Oki C5400dn | Guide: User's, C5400 Series (American English) - Page 90
the four image drums: Cyan (1), Magenta (2), Yellow (3), Black (4). It is essential that they go back in the correct order! 3. Lift each of the image drum units out of the printer and place them on a flat surface in a safe place away from direct sources of heat and light. CAUTION! The green surface - Oki C5400dn | Guide: User's, C5400 Series (American English) - Page 91
4. Locate the two blue locks (1) and the handle (2). 5. Turn the two locks about 45° counterclockwise to release the belt. Replacing Consumables • 91 - Oki C5400dn | Guide: User's, C5400 Series (American English) - Page 92
6. Pull up the handle and lift the belt unit out of the printer. 7. Unpack the new belt unit and hold it with the blue handle toward the front of the printer. 8. Place the drive gear at the back of the belt unit in the gear at the left rear corner of the printer, and - Oki C5400dn | Guide: User's, C5400 Series (American English) - Page 93
9. Turn the two belt locks about 45° clockwise to secure the belt unit in place. 10. Place the four image drums/toner cartridges back in the printer (1 = Cyan, 2 = Magenta, 3 = Yellow, 4 = Black): Replacing Consumables • 93 - Oki C5400dn | Guide: User's, C5400 Series (American English) - Page 94
11. Close and latch the top cover. Replacing Consumables • 94 - Oki C5400dn | Guide: User's, C5400 Series (American English) - Page 95
Fuser Replacement Oki 42625501 (120V) Oki 42625502 (230V) REPLACE FUSER 354: FUSER LIFE WARNING! If the printer has recently been powered on, some fuser components will be very hot. Handle the - Oki C5400dn | Guide: User's, C5400 Series (American English) - Page 96
1. Press the cover release and open the printer's top cover fully. 2. Pull the two blue fuser lock levers (1) towards the front of the printer. Replacing Consumables • 96 - Oki C5400dn | Guide: User's, C5400 Series (American English) - Page 97
3. Holding the fuser by its handle, lift the fuser out of the printer. If the fuser is still warm, place it on a flat surface which will not be damaged by heat. After letting the fuser cool down, discard it. 4. Remove the new fuser from its packaging, then remove any packing tape. 5. Push the orange - Oki C5400dn | Guide: User's, C5400 Series (American English) - Page 98
6. Holding the new fuser by the handle, with the fuser pressure release lever (1) on the right, lower the fuser into the printer. 7. Push the two blue retaining levers (1) toward the rear of the printer to lock the fuser in place. Replacing Consumables • 98 - Oki C5400dn | Guide: User's, C5400 Series (American English) - Page 99
8. Close and latch the top cover. Replacing Consumables • 99 - Oki C5400dn | Guide: User's, C5400 Series (American English) - Page 100
Clearing Paper Jams Jams can occur due to paper misfeeding from a paper tray or at any point along the paper path. When a jam occurs, the printer immediately stops, and the LCD display indicates the area where the first sheet is jammed. All jammed sheets must be removed in order to restore the - Oki C5400dn | Guide: User's, C5400 Series (American English) - Page 101
Jam 382 OPEN TOP COVER 382: PAPER JAM 1. Open the top cover. 2. Gently pull the sheet out. • If the sheet does not come out easily, go to the next step. • If the sheet does come out, close the cover. 3. Lower the rear exit tray. Clearing Paper Jams • 101 - Oki C5400dn | Guide: User's, C5400 Series (American English) - Page 102
4. Pull out the jammed sheet. Important! WARNING! The fuser may be HOT! If the sheet is difficult to remove, it is partially jammed in the fuser. To get it out, reach around the top cover and press down on the fuser pressure release lever (1) before pulling the sheet out. Then let go of the fuser - Oki C5400dn | Guide: User's, C5400 Series (American English) - Page 103
5. Close the rear exit. 6. Close the top cover. Clearing Paper Jams • 103 - Oki C5400dn | Guide: User's, C5400 Series (American English) - Page 104
Jam 381 OPEN TOP COVER 381: PAPER JAM 1. Press the cover release and open the printer's top cover fully. Clearing Paper Jams • 104 - Oki C5400dn | Guide: User's, C5400 Series (American English) - Page 105
2. Note the positions of the four image drums: Cyan (1), Magenta (2), Yellow (3), Black (4). It is essential that they go back in the correct order! WARNING! If the printer has been powered on, the fuser is hot. This area is clearly labelled. Do not touch it. Clearing Paper Jams • 105 - Oki C5400dn | Guide: User's, C5400 Series (American English) - Page 106
3. Lift each of the image drum/toner cartridge units out of the printer and place them on a flat surface in a safe place away from direct sources of heat and light. CAUTION! The green surface - Oki C5400dn | Guide: User's, C5400 Series (American English) - Page 107
4. Remove any sheets of paper on the belt unit. CAUTION! Do not use any sharp or abrasive objects to separate sheets from the belt. This may damage the belt surface. Clearing Paper Jams • 107 - Oki C5400dn | Guide: User's, C5400 Series (American English) - Page 108
NOTE Warning! If the printer has been printing, the fuser will be HOT! To remove a sheet trapped in the fuser, grasp the edge of the sheet, push the fuser pressure release lever (1) towards the front and down, and lift out the sheet. Then let go of the fuser pressure release lever. If the sheet is - Oki C5400dn | Guide: User's, C5400 Series (American English) - Page 109
5. Place the four image drums/toner cartridges back in the printer, being careful to place them in the proper sequence (1=Cyan, 2 = Magenta, 3 = Yellow, 4 = Black): 6. Close the top cover. Clearing Paper Jams • 109 - Oki C5400dn | Guide: User's, C5400 Series (American English) - Page 110
Jam 372 and 380 OPEN FRONT COVER nnn: PAPER JAM nnn = 372 or 380. 1. Lift the front cover release and pull open the front cover. 2. Remove any jammed sheets. Clearing Paper Jams • 110 - Oki C5400dn | Guide: User's, C5400 Series (American English) - Page 111
3. Close the front cover. Clearing Paper Jams • 111 - Oki C5400dn | Guide: User's, C5400 Series (American English) - Page 112
Jam 370, 373 and 383 OPEN DUPLEX COVER nnn: PAPER JAM nnn = 370, 373, 383 1. Press the duplex cover release and open the duplexer cover. Clearing Paper Jams • 112 - Oki C5400dn | Guide: User's, C5400 Series (American English) - Page 113
2. Remove any jammed sheets. Clearing Paper Jams • 113 - Oki C5400dn | Guide: User's, C5400 Series (American English) - Page 114
3. Close the duplex unit cover. Jam 371 OPEN DUPLEX COVER 371: PAPER JAM 1. Turn off the printer. 2. Pull out the duplexer. Clearing Paper Jams • 114 - Oki C5400dn | Guide: User's, C5400 Series (American English) - Page 115
3. Pull the duplexer lid to unlock it. 4. Open the lid and remove the jammed sheet. Clearing Paper Jams • 115 - Oki C5400dn | Guide: User's, C5400 Series (American English) - Page 116
5. Close the lid and push it back to lock it in place. 6. Push the duplexer back into the printer. 7. Turn on the printer Clearing Paper Jams • 116 - Oki C5400dn | Guide: User's, C5400 Series (American English) - Page 117
Jam 391 and 392 OPEN FRONT COVER nnn: PAPER JAM OPEN FRONT COVER 392: PAPER JAM 1. Pull out the appropriate tray (391 = Tray 1, 392 = Optional Tray 2) and remove any sheet jammed as it exited the tray. 391 392 Clearing Paper Jams • 117 - Oki C5400dn | Guide: User's, C5400 Series (American English) - Page 118
2. Open the front cover. 3. Remove any jammed sheets. 4. Close the front cover. Clearing Paper Jams • 118 - Oki C5400dn | Guide: User's, C5400 Series (American English) - Page 119
Jam 390 CHECK MP TRAY 390: PAPER JAM If the Sheet Has Just Begun to Enter the Printer 1. Gently pull the sheet out of the printer. If the Sheet Can't Easily Be Pulled Out from the Front 1. Lift the front cover release and pull open the front cover. Clearing Paper Jams • 119 - Oki C5400dn | Guide: User's, C5400 Series (American English) - Page 120
2. Remove any jammed sheets. 3. Close the front cover. Clearing Paper Jams • 120 - Oki C5400dn | Guide: User's, C5400 Series (American English) - Page 121
Troubleshooting LCD messages Message Meaning What to Do * TONER SENSOR ERROR Flashes across the Open in the menu has been changed to off and a paper jam has occurred. Any unprinted data is being deleted. Clear the jam and resend the missing pages of the print job. Troubleshooting • 121 - Oki C5400dn | Guide: User's, C5400 Series (American English) - Page 122
sure that the fuser unit is properly seated in the printer and that the lock levers are pushed all the way toward the back of the printer: CHECK MP TRAY 390: PAPER :JAM Paper has jammed Clear the jam: see while exiting the MP "Jam 390" on Tray. page 117. Troubleshooting • 122 - Oki C5400dn | Guide: User's, C5400 Series (American English) - Page 123
Message Meaning What to Do CLOSE COVER The duplex cover is Close the duplex 316: DUPLEX COVER OPEN open or not properly cover: latched. CLOSE COVER nnn: COVER OPEN HARD DISK FULL INSTALL Tray is empty. Load the requested media (mmm) in the MP Tray and press ON-LINE. Troubleshooting • 123 - Oki C5400dn | Guide: User's, C5400 Series (American English) - Page 124
duplexer. Clear the jam: see page 110. OPEN FRONT COVER nnn: PAPER JAM Paper jam. Clear the jam: see page 108 OPEN TOP COVER nnn: PAPER JAM Paper jam. Clear the jam: see page 99, ff. ORDER xxx Appears on the Make sure you have a second line of the replacement unit . Troubleshooting • 124 - Oki C5400dn | Guide: User's, C5400 Series (American English) - Page 125
REPLACE YYYY nnn: YYYY LIFE tttt EMPTY xxx LIFE Meaning What to Do The printer has received invalid data. Press ON-LINE. Reprocess and resend the print job. Applies to Postscript emulation only. An error drum) will need to be replaced soon. Replace the indicated item. Troubleshooting • 125 - Oki C5400dn | Guide: User's, C5400 Series (American English) - Page 126
. YYYY = the general cause. nnn = error number. Write down the message including the error number "nnn," then call your authorized Oki Data Service Dealer for service. Note: If you see a series of octets containing letters and numbers scrolling across the display, be sure to write these down also - Oki C5400dn | Guide: User's, C5400 Series (American English) - Page 127
Problem Solving Problems Printing If paper jams are frequent: • More than ). Remove the creased/wrinkled paper from the feed tray. Adjust tray or manual feed guides. Correct paper feed selection in the printer driver. Paper jam has been cleared from behind the front cover. Troubleshooting • 127 - Oki C5400dn | Guide: User's, C5400 Series (American English) - Page 128
is insufficient for application. Increase computer's memory. Insufficient free Delete unnecessary files. space on hard disk. Printer driver is incorrectly configured. Correctly configure printer driver. Troubleshooting • 128 - Oki C5400dn | Guide: User's, C5400 Series (American English) - Page 129
the printer d6 set high. Data is too complex. Simplify data. Printer requests paper size this does not clear the fault, call for service. Print processing does not start. Possible cause Printer an error message is displayed, correct the problem. Print processing cancels. Possible cause Remedy The - Oki C5400dn | Guide: User's, C5400 Series (American English) - Page 130
Remedy The computer does not support bi-directional parallel interface. There is no fix for this problem. You should only use a computer that does support a bi-directional parallel interface. Test by connecting printer and computer directly. or extension cable is being used. Troubleshooting • 130 - Oki C5400dn | Guide: User's, C5400 Series (American English) - Page 131
Cannot configure for USB connection. NOTE Windows 95 and NT 4.0 do not support USB; Windows 98 upgraded from Windows 95 may not support USB. Possible cause Remedy USB cable does not meet Use USB cable to the USB cable is plugged into the black USB port (1) on the printer: Troubleshooting • 131 - Oki C5400dn | Guide: User's, C5400 Series (American English) - Page 132
parallel connection. Possible cause Remedy Possible mismatch Change parallel transmission mode (see on parallel "Problem Solving" on page 127). connection between computer and printer. Cannot print. • LPT used. driver from the Drivers CD supplied with your printer. Troubleshooting • 132 - Oki C5400dn | Guide: User's, C5400 Series (American English) - Page 133
Print Quality Problems Longitudinal white stripes Remedy Clean LED head with lens cleaner or soft tissue. Change toner cartridge. Change image cause The paper is moist. Remedy Store paper within specified temperature and humidity levels (see "Specifications" on page 142). Troubleshooting • 133 - Oki C5400dn | Guide: User's, C5400 Series (American English) - Page 134
levels (see "Specifications" on page 142). Use recommended paper (see "Media Recommendations" on page 10). Replace toner cartridge (see "Toner Cartridge Replacement" on page 72). Troubleshooting • 134 - Oki C5400dn | Guide: User's, C5400 Series (American English) - Page 135
and check to be sure that all the packing materials were removed from the fuser. To remove the fuser see "Fuser Replacement" on page 93. Troubleshooting • 135 - Oki C5400dn | Guide: User's, C5400 Series (American English) - Page 136
Miscellaneous Problems Printer makes a strange noise. Possible cause Remedy The printer is fuser unit adjusts temperature, which takes time. Wait until this process has been completed. The printer is processing data from another interface. Wait until this data is processed. Troubleshooting • - Oki C5400dn | Guide: User's, C5400 Series (American English) - Page 137
The parallel port supports IEEE-1284 and ECP mode. If your computer's parallel port is not compatible with one of these modes, the printer may not print at all or it may print corrupted data. To correct Disable. 6. Press ENTER, then BACK to engage the setting. 7. Press ON LINE. Troubleshooting • 137 - Oki C5400dn | Guide: User's, C5400 Series (American English) - Page 138
options are available for your printer: • Additional RAM memory (see below) • Second Paper Tray (see page 139) • Duplex Unit, for two sided printing (see page 140) • 20 GB Hard Disk Drive (see page 141) Instructions for installing these options are found in the packaging with the option. RAM Memory - Oki C5400dn | Guide: User's, C5400 Series (American English) - Page 139
Second Paper Tray (Oki 42158511) The second paper tray takes: • Up to 530 sheets of 20-lb. paper. • All the same size media as Tray 1 except A6. • Paper weight range 16 to 47 lbs. US Bond (33 to 98 lbs Index, 60 to 177 g/m2 metric). Options • 139 - Oki C5400dn | Guide: User's, C5400 Series (American English) - Page 140
Duplex Unit (Oki 42158411) The duplex unit adds the function of two sided printing and enables booklet printing. The duplex unit slides straight into the rear of the printer and requires no tools to install. The duplex unit handles: • Paper sizes letter, legal-14, legal-13.5, legal-13, A4, A5, B5, - Oki C5400dn | Guide: User's, C5400 Series (American English) - Page 141
Hard Disk Drive (Oki 70043501) The Hard Disk Drive plugs into the printer's main circuit board and provides 20 GB of space. It is highly recommended if you plan - Oki C5400dn | Guide: User's, C5400 Series (American English) - Page 142
Specifications Item Specification Dimensions 16.61'' W x 22.09'' D x 13.58'' H (422 mm W x 561 mm D x 345 mm H) Net Weight 57.3 lbs. (26 Kg) Print speeds 16 pages per minute (ppm) color 24 ppm monochrome Resolution 600 dpi or 600 x 1200 dpi Emulations Postscript 3 emulation PCL 5c Epson - Oki C5400dn | Guide: User's, C5400 Series (American English) - Page 143
Item Specification Paper weight Range Tray 1: 17 to 32 lb. (64 to120 g/m²) Optional Tray 2: 17 to 47 lb. (64 to 177 g/m²) Multi-Purpose Tray: 20 to 54 lb. (75 to 203 g/m²) Paper output Top Exit (Face Down Stacker): 250 sheets 20-lb. 75 g/m² paper Rear Exit (Face Up Stacker): 100 sheets 20-lb. - Oki C5400dn | Guide: User's, C5400 Series (American English) - Page 144
Windows Black Printing Normally, the printer will print black using all four toner colors. If you are doing a lot of black-only printing, you can set the printer to use only black toner. To Select Black Printing for a Particular Job in the PCL Driver: Click Grayscale on the driver's Color tab as - Oki C5400dn | Guide: User's, C5400 Series (American English) - Page 145
Once Grayscale is set as the default, you must select either Auto Color or Manual Color on the Color tab (see "Color Matching: PCL Driver" on page 158 Grayscale is set as the default, you must select either Auto Color or Manual Color for the Color Control Method on the Color tab (see "Color matching - Oki C5400dn | Guide: User's, C5400 Series (American English) - Page 146
on how that particular program's color management functions. General Information Factors That Affect the Appearance of Printed Documents If you wish to manually adjust the color settings in your printer driver, please be aware that color reproduction is a complex topic, and there are many factors - Oki C5400dn | Guide: User's, C5400 Series (American English) - Page 147
next to a sunlit window, compared to how they look under standard office fluorescent lighting. Printer driver color settings The driver settings for Manual color can change the appearance of a print. There are several options available to help match the printed colors with those displayed on screen - Oki C5400dn | Guide: User's, C5400 Series (American English) - Page 148
Adobe® Photoshop® may display color differently from "office" applications such as Microsoft® Word. Please see your application's on-line help or user manual for more information. Paper Type The type of paper used can also significantly affect the printed color. For example, a printout on recycled - Oki C5400dn | Guide: User's, C5400 Series (American English) - Page 149
your document's color mode, assume that it is RGB. Typically CMYK documents are only supported in professional Desktop Publishing and Graphics applications. Matching Photographic Images RGB only Oki Color Matching is a generally a good choice. Select a matching method appropriate to your monitor - Oki C5400dn | Guide: User's, C5400 Series (American English) - Page 150
monitor. To do this, you can use the ICC-Profiles provided by Oki, and then print using the ICC profiles as the Print Space (or Output space). Matching Specific Colors (e.g., a Company logo): RGB only • Option 1: Select Oki Color Matching, and the sRGB setting on the Color tab in the PCL or - Oki C5400dn | Guide: User's, C5400 Series (American English) - Page 151
Color matching: Postscript emulation driver NOTE Model C5400n only. The Postscript emulation driver color matching options are found: • Windows 98 and Me: on the Graphics tab in the driver: Windows: Color Printing • 151 - Oki C5400dn | Guide: User's, C5400 Series (American English) - Page 152
• Windows 2000, XP and NT 4.0: on the Color tab in the driver: To change the Postscript emulation driver's color matching defaults from the Windows Control Panel: 1. Click Start →Settings →Printers [Printers and Faxes in Windows XP]. 2. Right-click the printer name and choose Properties. 3. Click - Oki C5400dn | Guide: User's, C5400 Series (American English) - Page 153
Color Matching Options: Windows Me and 98 The Graphics tab on the Postscript emulation driver in these Windows operating systems offers several rendering intents for controlling the color output of the printer. When a document is printed, a conversion takes place from the document's color to the - Oki C5400dn | Guide: User's, C5400 Series (American English) - Page 154
Simulation Windows ICM Matchinga Using ICC Profiles a. Not Windows NT 4. RGB data Yes Yes No Yes Yes CMYK data No Yes Yes No No Oki Color Matching This is Oki's proprietary color matching system, and affects RGB data only. • Perceptual settings are best for printing photographic images. • Vivid - Oki C5400dn | Guide: User's, C5400 Series (American English) - Page 155
are modified. Postscript Color Matching This uses Postscript Color Rendering Dictionaries built into the printer, and affects both RGB and CMYK data. Rendering Intents When a document is printed, a conversion takes place from the document's color space to the printer color space. The rendering - Oki C5400dn | Guide: User's, C5400 Series (American English) - Page 156
source white to the (usually) paper white. Unlike Absolute Colorimetric, this attempts to take the paper white into account. CMYK Ink Simulation Affects CMYK data only. This option simulates what the output will look like on a printing press using the ink types SWOP, Euroscale or Toyo. If using CMYK - Oki C5400dn | Guide: User's, C5400 Series (American English) - Page 157
The way in which this conversion is performed can be controlled via the ICM Intent control in the printer driver. Using ICC Profiles Affects RGB data only. This provides a method of matching RGB colors similar to Windows ICM matching. The main advantage it has over Windows ICM color matching is that - Oki C5400dn | Guide: User's, C5400 Series (American English) - Page 158
printed colors to the ones displayed on your monitor. NOTE The PCL driver's color options are only designed to work with RGB data. If you are printing CMYK data, we recommend you use the Postscript emulation driver (optional on Model C5400). The PCL driver color matching options are found on the - Oki C5400dn | Guide: User's, C5400 Series (American English) - Page 159
To set the color matching options manually, click Manual Color. The Color tab screen will change to: Choose from the following options: • Monitor (6500k) Perceptual Optimized for printing daylight photographs. • Monitor (6500k) Vivid Optimized - Oki C5400dn | Guide: User's, C5400 Series (American English) - Page 160
→Print. 2. In the Print dialog box, select the PCL printer. a. Windows 98/Me/NT4.0: click Properties. b. Windows XP: click Preferences. 3. Click the Color tab, select Manual Color and make your changes, then go back to the Print dialog box and print the document. Windows: Color Printing • 160 - Oki C5400dn | Guide: User's, C5400 Series (American English) - Page 161
The Print Color Swatch Utility For use with applications which allow you to set your own RGB values for colors. The Color Swatch utility prints out charts of sample colors. Listed below each color are the corresponding RGB (Red, Green, Blue) values to use in your application to match that printed - Oki C5400dn | Guide: User's, C5400 Series (American English) - Page 162
. • N-up Printing: multiple pages on one sheet (see page 163) • Custom Page Sizes (see page 164) • Selecting Print Resolution (see page 167) • Duplex Printing (see page 169) • Watermarks (see page 173) • Collating (see page 175) • Proof and Print (see page 177) • Secure Print: printing confidential - Oki C5400dn | Guide: User's, C5400 Series (American English) - Page 163
N-Up Printing (Printing Multiple Pages on One Sheet) 98 / Me / XP / NT 4.0 1. Open the file in your application and select File →Print. 2. In the Print dialog box, select the PCL printer, then: a. Windows 98/Me/NT4.0: click Properties. b. Windows XP: click Preferences. 3. On the Setup tab, under - Oki C5400dn | Guide: User's, C5400 Series (American English) - Page 164
Printing custom Page Sizes 98 / Me / XP / NT 4.0 The printer media size for the tray you're using must be manually set in the driver to the custom paper size before use (range 3½'' to 8½'' [89 to 216 mm] wide x 5'' to 14'' [127 to 356 mm] long). - Oki C5400dn | Guide: User's, C5400 Series (American English) - Page 165
5. On the Setup tab, under Media, select User Defined Size in the Size drop-down list. Define the custom size in the dialog box which appears, then click OK. NOTE You may see a Warning dialog box indicating a conflict. If you do, click OK and the driver will automatically make the needed changes to - Oki C5400dn | Guide: User's, C5400 Series (American English) - Page 166
Defined Size appears in the Size list. NOTE To save the setting for future use: • Click Paper Feed Options, then click Custom Size. • Select the unit, then enter the relevant information for Width and Height and give your custom size a name under Name. • Click Add. • Click OK. The Custom Page Size - Oki C5400dn | Guide: User's, C5400 Series (American English) - Page 167
Changing the Resolution for A Print Job 98 / Me / XP / NT 4.0 NOTE These instructions explain how to change the settings as you are printing a job. If you wish to change the settings to apply to all jobs (default settings): • - Oki C5400dn | Guide: User's, C5400 Series (American English) - Page 168
3. On the Job Options tab, select the required printing resolution under Quality: • Fine = high resolution, slower speed: choose this one for optimum results when printing graphics. • Normal = medium resolution, medium speed: the default. • Fast = low resolution, fast speed: choose this one for - Oki C5400dn | Guide: User's, C5400 Series (American English) - Page 169
on Both Sides of The Paper) 98 / Me / XP / NT 4.0 NOTE The optional duplex unit must be installed in the printer and enabled before duplex printing can be carried out. (See the instructions supplied with the duplex unit.) • Paper weight range 20 to 28 lb. US Bond (75 to 105 g/m²). • Paper must - Oki C5400dn | Guide: User's, C5400 Series (American English) - Page 170
3. On the Setup tab, under 2-Sided Printing, select Long Edge or Short Edge. 4. Click OK. 5. Windows 98/Me/NT4.0: click OK. Windows XP: click Print. Windows: PCL Emulation Driver • 170 - Oki C5400dn | Guide: User's, C5400 Series (American English) - Page 171
Booklets 98 / Me / XP / NT 4.0 NOTES • You must have the duplex unit installed and enabled in order to print booklets. • Not available on some network connections: see the Help file. • Some software applications may not support booklet printing. • The right-to-left setting allows a booklet to be - Oki C5400dn | Guide: User's, C5400 Series (American English) - Page 172
3. On the Setup tab, under Finishing Mode, select Booklet in the drop-down list. 4. Click Options, enter your settings, and click OK. 5. Click OK. 6. Windows 98/Me/NT4.0: click OK. Windows XP: click Print. Windows: PCL Emulation Driver • 172 - Oki C5400dn | Guide: User's, C5400 Series (American English) - Page 173
Printing Watermarks 98 / Me / XP / NT 4.0 1. Open the file in your application and select File →Print. 2. In the Print dialog box, click the PCL printer, then: a. Windows 98/Me/NT4.0: click Properties. b. Windows XP: click Preferences. 3. On the Job Options tab, click Watermark. 4. Select a name - Oki C5400dn | Guide: User's, C5400 Series (American English) - Page 174
NOTE To create a new watermark or edit an existing watermark: • Click the New or Edit button. • Enter the text for the watermark and select the font, size, angle, etc., to be used. • Click OK. The new watermark appears in the Watermark list. 5. If you wish to print the watermark only on the first - Oki C5400dn | Guide: User's, C5400 Series (American English) - Page 175
performance. Important If your software application has a collate option, use it instead of the collate option in the printer driver. The following instructions explain how to select collating using the printer driver. 1. Open the file in your application and select File →Print. 2. In the Print - Oki C5400dn | Guide: User's, C5400 Series (American English) - Page 176
3. On the Job Options tab, under Job Type, enter the number of copies required and select Collate. 4. Click OK. 5. Windows 98/Me/NT4.0: click OK. Windows XP: click Print. Windows: PCL Emulation Driver • 176 - Oki C5400dn | Guide: User's, C5400 Series (American English) - Page 177
the printer and enabled, to allow for spooling of the print job before final printing. • If the hard disk memory is insufficient for the spooled data, DISK FULL is displayed and only one copy is printed. • If the software application being used has a collate print option, it must be turned OFF - Oki C5400dn | Guide: User's, C5400 Series (American English) - Page 178
3. On the Job Options tab, under Job Type, select Proof and Print. 4. In the dialog box which appears, enter a Job Name and password (PIN) of your choice, then click OK. (If no dialog box appears, click PIN.) 5. Enter the number of copies and select Collate, if applicable, then click OK. 6. Windows - Oki C5400dn | Guide: User's, C5400 Series (American English) - Page 179
Printing The Additional Copies 1. Press + to enter the menu mode. PRINT JOBS MENU 2. Press ENTER. ENTER PASSWORD **** 3. Use +/ - to set the number for the first digit of the password, then press ENTER to engage the number and move to the next digit: ENTER PASSWORD 5*** 4. Repeat step 3 for each of - Oki C5400dn | Guide: User's, C5400 Series (American English) - Page 180
Deleting The Document If the proof is not ready for printing, the job must be deleted from the printer: 1. Press + to enter the menu mode. PRINT JOBS MENU 2. Press ENTER. ENTER PASSWORD **** 3. Use +/ - to set the number for the first digit of the password, then press ENTER to engage the number and - Oki C5400dn | Guide: User's, C5400 Series (American English) - Page 181
7. Press ENTER to delete the job, then press ON LINE. NOTE An alternative method of printing or deleting the remaining copies of the document is to use the Storage Device Manager. Please refer to the On-line help for Storage Device Manager. Windows: PCL Emulation Driver • 181 - Oki C5400dn | Guide: User's, C5400 Series (American English) - Page 182
the printer and enabled to allow for spooling of the print job before final printing. • If the hard disk memory is insufficient for the spooled data, DISK FULL is displayed and only one copy printed. • If the software application being used has a collate print option, this must be turned OFF for - Oki C5400dn | Guide: User's, C5400 Series (American English) - Page 183
3. On the Job Options tab, under Job Type, select Secure Print. 4. In the dialog box which appears, enter a Job Name and password (PIN) of your choice, then click OK. If no dialog box appears, click PIN.) 5. Enter the number of copies and select Collate, if applicable, then click OK. 6. Windows 98/ - Oki C5400dn | Guide: User's, C5400 Series (American English) - Page 184
Printing A Confidential Document from The Front Panel 1. Press + to enter the menu mode. PRINT JOBS MENU 2. Press ENTER. ENTER PASSWORD **** 3. Use +/ - to set the number for the first digit of the password, then press ENTER to engage the number and move to the next digit: ENTER PASSWORD 5*** 4. - Oki C5400dn | Guide: User's, C5400 Series (American English) - Page 185
Deleting The Confidential Document Before Printing It 1. Press + to enter the menu mode. PRINT JOBS MENU 2. Press ENTER. ENTER PASSWORD **** 3. Use +/ - to set the number for the first digit of the password, then press ENTER to engage the number and move to the next digit: ENTER PASSWORD 5*** 4. - Oki C5400dn | Guide: User's, C5400 Series (American English) - Page 186
7. Press ENTER to delete the job, then press ON LINE. NOTE An alternative method of printing or deleting the document is to use the Storage Device Manager. Please refer to the On-line help for Storage Device Manager. Windows: PCL Emulation Driver • 186 - Oki C5400dn | Guide: User's, C5400 Series (American English) - Page 187
stationery, etc. NOTE • The internal hard disk must be installed in the printer and enabled. • If the hard disk memory is insufficient for the spooled data, DISK FULL is displayed and only one copy printed. • If the software application being used has a collate print option, this must be turned OFF - Oki C5400dn | Guide: User's, C5400 Series (American English) - Page 188
3. On the Job Options tab, under Job Type, select Store to HDD. 4. In the dialog box which appears, enter a Job Name and password (PIN) of your choice, then click OK. (If no dialog box appears, click PIN.) 5. Enter the number of copies and select Collate, if applicable, then click OK. 6. Windows 98/ - Oki C5400dn | Guide: User's, C5400 Series (American English) - Page 189
To Print A Stored Document 1. Press + to enter the menu mode. PRINT JOBS MENU 2. Press ENTER. ENTER PASSWORD **** 3. Use +/ - to set the number for the first digit of the password, then press ENTER to engage the number and move to the next digit: ENTER PASSWORD 5*** 4. Repeat step 3 for each of the - Oki C5400dn | Guide: User's, C5400 Series (American English) - Page 190
To Delete A Stored Document from The Hard Disk Drive 1. Press + to enter the menu mode. PRINT JOBS MENU 2. Press ENTER. ENTER PASSWORD **** 3. Use +/ - to set the number for the first digit of the password, then press ENTER to engage the number and move to the next digit: ENTER PASSWORD 5*** 4. - Oki C5400dn | Guide: User's, C5400 Series (American English) - Page 191
7. Press ENTER to delete the job, then press ON LINE. NOTE An alternative method of printing or deleting the remaining copies of the document is to use the Storage Device Manager. Please refer to the On-line help for Storage Device Manager. Windows: PCL Emulation Driver • 191 - Oki C5400dn | Guide: User's, C5400 Series (American English) - Page 192
Printing Posters 98 / Me / XP / NT 4.0 This option allows you to configure and print posters by breaking up the document page into multiple pieces which print enlarged on separate sheets. Then the separate sheets are combined to produce a poster. It is only available with the PCL printer driver 1. - Oki C5400dn | Guide: User's, C5400 Series (American English) - Page 193
• N-up Printing: multiple pages on one sheet (see page 194) • Custom Page Sizes (see page 195) • Selecting Print Resolution (see page 198) • Duplex Printing (see page 200) • Watermarks (see page 203) • Collating (see page 205) • Proof and Print (see page 206) • Secure Print: printing confidential - Oki C5400dn | Guide: User's, C5400 Series (American English) - Page 194
N-Up Printing (Printing Multiple Pages on One Sheet) 2000 1. Open the file in your application and select File →Print. 2. In the Print dialog box, select the PCL printer. 3. On the Setup tab, under Finishing Mode (1), select the required number of pages per sheet in the drop-down list. To set - Oki C5400dn | Guide: User's, C5400 Series (American English) - Page 195
Printing Custom Page Sizes 2000 The printer media size for the tray you're using must be manually set in the driver to the custom paper size before use (range 3½'' to 8½'' [89 to 216 mm] wide x 5'' to 14'' [127 to 356 mm] long). - Oki C5400dn | Guide: User's, C5400 Series (American English) - Page 196
5. On the Setup tab, under Media, select User Defined Size in the Size drop-down list. Define the custom size in the dialog box which appears, then click OK. NOTE You may see a Warning dialog box indicating a conflict. If you do, click OK and the driver will automatically make the needed changes to - Oki C5400dn | Guide: User's, C5400 Series (American English) - Page 197
Size now appears in the Size list. NOTE To save the setting for future use: • Click Paper Feed Options, then click Custom Size. • Select the unit, then enter the relevant information for Width and Height and give your custom size a name under Name. • Click Add. • Click OK. The Custom Page Size - Oki C5400dn | Guide: User's, C5400 Series (American English) - Page 198
Changing the Resolution for A Print Job 2000 NOTE These instructions explain how to change the settings as you are printing a job. If you wish to change the settings to apply to all jobs (default settings): • - Oki C5400dn | Guide: User's, C5400 Series (American English) - Page 199
3. On the Job Options tab, select the required printing resolution under Quality: • Fine = high resolution, slower speed: choose this one for optimum results when printing graphics. • Normal = medium resolution, medium speed: the default. • Fast = low resolution, fast speed: choose this one for - Oki C5400dn | Guide: User's, C5400 Series (American English) - Page 200
duplex unit must be installed in the printer and enabled before duplex printing can be carried out. • Paper weight range 20 to 28 lb. US Bond (75 to 105 g/m²). • Paper must be loaded print side up. • Any tray (Tray 1, optional Tray 2, MP tray) can be used for duplex printing. NOTE These instructions - Oki C5400dn | Guide: User's, C5400 Series (American English) - Page 201
3. On the Setup tab, under 2-Sided Printing, select Long Edge or Short Edge. 4. Click Print. Windows: PCL Emulation Driver • 201 - Oki C5400dn | Guide: User's, C5400 Series (American English) - Page 202
Printing Booklets 2000 NOTES • You must have the duplex unit installed and enabled in order to print booklets. • Not available on some network connections: see the Help file. • Some software applications may not support booklet printing. • The right-to-left setting allows a booklet to be printed for - Oki C5400dn | Guide: User's, C5400 Series (American English) - Page 203
Printing Watermarks 2000 1. Open the file in your application and select File →Print. 2. In the Print dialog box, click the PCL printer. 3. On the Job Options tab, click Watermark. 4. Select a name from the Watermark list or click New to set up a new watermark. When you're finished setting up the - Oki C5400dn | Guide: User's, C5400 Series (American English) - Page 204
NOTE To create a new watermark or edit an existing watermark: • Click the New or Edit button. • Enter the text for the watermark and select the font, size, angle, etc., to be used. • Click OK. The new watermark appears in the Watermark list. 5. If you wish to print the watermark only on the first - Oki C5400dn | Guide: User's, C5400 Series (American English) - Page 205
performance. Important If your software application has a collate option, use it instead of the collate option in the printer driver. The following instructions explain how to select collating using the printer driver. 1. Open the file in your application and select File →Print. 2. In the Print - Oki C5400dn | Guide: User's, C5400 Series (American English) - Page 206
the printer and enabled, to allow for spooling of the print job before final printing. • If the hard disk memory is insufficient for the spooled data, DISK FULL is displayed and only one copy is printed. • If the software application being used has a collate print option, it must be turned OFF - Oki C5400dn | Guide: User's, C5400 Series (American English) - Page 207
3. On the Job Options tab, under Job Type, select Proof and Print. 4. In the dialog box which appears, enter a Job Name and password (PIN) of your choice, then click OK. (If no dialog box appears, click PIN.) 5. On the General tab, enter the number of copies and select Collate, if applicable, then - Oki C5400dn | Guide: User's, C5400 Series (American English) - Page 208
Printing The Additional Copies 1. Press + to enter the menu mode. PRINT JOBS MENU 2. Press ENTER. ENTER PASSWORD **** 3. Use +/ - to set the number for the first digit of the password, then press ENTER to engage the number and move to the next digit: ENTER PASSWORD 5*** 4. Repeat step 3 for each of - Oki C5400dn | Guide: User's, C5400 Series (American English) - Page 209
Deleting The Document If the proof is not ready for printing, the job must be deleted from the printer: 1. Press + to enter the menu mode. PRINT JOBS MENU 2. Press ENTER. ENTER PASSWORD **** 3. Use +/ - to set the number for the first digit of the password, then press ENTER to engage the number and - Oki C5400dn | Guide: User's, C5400 Series (American English) - Page 210
7. Press ENTER to delete the job, then press ON LINE. NOTE An alternative method of printing or deleting the remaining copies of the document is to use the Storage Device Manager. Please refer to the On-line help for Storage Device Manager. Windows: PCL Emulation Driver • 210 - Oki C5400dn | Guide: User's, C5400 Series (American English) - Page 211
the printer and enabled to allow for spooling of the print job before final printing. • If the hard disk memory is insufficient for the spooled data, DISK FULL is displayed and only one copy printed. • If the software application being used has a collate print option, this must be turned OFF for - Oki C5400dn | Guide: User's, C5400 Series (American English) - Page 212
3. On the Job Options tab, under Job Type, select Secure Print. 4. In the dialog box which appears, enter a Job Name and password (PIN) of your choice, then click OK. (If no dialog box appears, click PIN.) 5. Enter the number of copies and select Collate, if applicable. 6. Click Print. The document - Oki C5400dn | Guide: User's, C5400 Series (American English) - Page 213
Printing A Confidential Document from The Front Panel 1. Press + to enter the menu mode. PRINT JOBS MENU 2. Press ENTER. ENTER PASSWORD **** 3. Use +/ - to set the number for the first digit of the password, then press ENTER to engage the number and move to the next digit: ENTER PASSWORD 5*** 4. - Oki C5400dn | Guide: User's, C5400 Series (American English) - Page 214
Deleting The Confidential Document Before Printing It 1. Press + to enter the menu mode. PRINT JOBS MENU 2. Press ENTER. ENTER PASSWORD **** 3. Use +/ - to set the number for the first digit of the password, then press ENTER to engage the number and move to the next digit: ENTER PASSWORD 5*** 4. - Oki C5400dn | Guide: User's, C5400 Series (American English) - Page 215
7. Press ENTER to delete the job, then press ON LINE. NOTE An alternative method of printing or deleting the remaining copies of the document is to use the Storage Device Manager. Please refer to the On-line help for Storage Device Manager. Windows: PCL Emulation Driver • 215 - Oki C5400dn | Guide: User's, C5400 Series (American English) - Page 216
stationery, etc. NOTE • The internal hard disk must be installed in the printer and enabled. • If the hard disk memory is insufficient for the spooled data, DISK FULL is displayed and only one copy printed. • If the software application being used has a collate print option, this must be turned OFF - Oki C5400dn | Guide: User's, C5400 Series (American English) - Page 217
3. On the Job Options tab, under Job Type, select Store to HDD. 4. In the dialog box which appears, enter a Job Name and password (PIN) of your choice, then click OK. (If no dialog box appears, click PIN.) 5. Enter the number of copies and select Collate, if applicable. 6. Click Print. The document - Oki C5400dn | Guide: User's, C5400 Series (American English) - Page 218
To Print A Stored Document 1. Press + to enter the menu mode. PRINT JOBS MENU 2. Press ENTER. ENTER PASSWORD **** 3. Use +/ - to set the number for the first digit of the password, then press ENTER to engage the number and move to the next digit: ENTER PASSWORD 5*** 4. Repeat step 3 for each of the - Oki C5400dn | Guide: User's, C5400 Series (American English) - Page 219
To Delete A Stored Document from The Hard Disk Drive 1. Press + to enter the menu mode. PRINT JOBS MENU 2. Press ENTER. ENTER PASSWORD **** 3. Use +/ - to set the number for the first digit of the password, then press ENTER to engage the number and move to the next digit: ENTER PASSWORD 5*** 4. - Oki C5400dn | Guide: User's, C5400 Series (American English) - Page 220
7. Press ENTER to delete the job, then press ON LINE. NOTE An alternative method of printing or deleting the remaining copies of the document is to use the Storage Device Manager. Please refer to the On-line help for Storage Device Manager. Windows: PCL Emulation Driver • 220 - Oki C5400dn | Guide: User's, C5400 Series (American English) - Page 221
Printing Posters 2000 This option allows you to configure and print posters by breaking up the document page into multiple pieces which print enlarged on separate sheets. Then the separate sheets are combined to produce a poster. It is only available with the PCL printer driver 1. Open the file in - Oki C5400dn | Guide: User's, C5400 Series (American English) - Page 222
Up Printing: multiple pages on one sheet (see page 224) • Custom Page Sizes (see page 225) • Selecting Print Resolution (see page 229) • Duplex Printing (see page 231) • Collating (see page 233) • Secure Print: printing confidential documents (see page 234) Windows: Postscript Emulation Driver • 222 - Oki C5400dn | Guide: User's, C5400 Series (American English) - Page 223
• Storing Print Files to the Hard Disk Drive (see page 238) NOTE Most applications allow the printer properties to be accessed from within the document print dialog box. Windows: Postscript Emulation Driver • 223 - Oki C5400dn | Guide: User's, C5400 Series (American English) - Page 224
N-Up Printing (Printing Multiple Pages on One Sheet) Me and 98 You can print either 2 or 4 pages on one sheet of paper. 1. Open the file in your application and select File →Print. 2. In the Print dialog box, click the Postscript emulation printer, then click Properties. 3. On the Paper tab, under - Oki C5400dn | Guide: User's, C5400 Series (American English) - Page 225
be fed one sheet at a time. NOTE Three custom paper sizes can be defined in the Postscript emulation driver. The printer media size must be manually set in the driver to the custom paper size before use: 1. Open the rear exit path. Windows: Postscript Emulation Driver • 225 - Oki C5400dn | Guide: User's, C5400 Series (American English) - Page 226
2. Load the custom size paper in the tray you will be using. For example, the MP Tray: 3. Open the file in your application and select File →Print. 4. In the Print dialog box, select the Postscript emulation printer, then click Properties. Windows: Postscript Emulation Driver • 226 - Oki C5400dn | Guide: User's, C5400 Series (American English) - Page 227
5. On the Paper tab and select the tray you are using in the Paper source drop-down list. 6. Under Paper Size (1), scroll across and click one of the three Custom icons, then click Custom (2). Name and define your Windows: Postscript Emulation Driver • 227 - Oki C5400dn | Guide: User's, C5400 Series (American English) - Page 228
custom size in the dialog box which appears, then click OK twice to go back to the Print dialog box. 7. Click OK to print the document. Windows: Postscript Emulation Driver • 228 - Oki C5400dn | Guide: User's, C5400 Series (American English) - Page 229
Changing The Resolution for a Print Job Me and 98 NOTE These instructions explain how to change the settings as you are printing a job. If you wish to change the settings to apply to all jobs (default settings): • - Oki C5400dn | Guide: User's, C5400 Series (American English) - Page 230
3. On the Graphics tab, select the required printing resolution in the Resolution drop-down list, then click OK: • Fine = high resolution, slower speed: the default. Provides optimum results when printing graphics. • Normal = medium resolution, medium speed: choose this setting for documents with - Oki C5400dn | Guide: User's, C5400 Series (American English) - Page 231
duplex unit must be installed in the printer and enabled before duplex printing can be carried out. • Paper weight range 20 to 28 lb. US Bond (75 to 105 g/m²). • Paper must be loaded print side up. • Any tray (Tray 1, optional Tray 2, MP tray) can be used for duplex printing. NOTE These instructions - Oki C5400dn | Guide: User's, C5400 Series (American English) - Page 232
3. On the Paper tab, click More Options.... Select Flip on Long Edge or Flip on Short Edge, then click OK twice. 4. Click OK to print the document. Windows: Postscript Emulation Driver • 232 - Oki C5400dn | Guide: User's, C5400 Series (American English) - Page 233
Collating Me and 98 Collating can be carried out with or without a hard disk drive installed. However, printers with a hard disk drive will provide greater performance. 1. Open the file in your application and select File →Print. 2. In the Print dialog box, click the Postscript emulation printer, - Oki C5400dn | Guide: User's, C5400 Series (American English) - Page 234
the printer and enabled to allow for spooling of the print job before final printing. • If the hard disk memory is insufficient for the spooled data, DISK FULL is displayed and only one copy is printed. • If the software application being used has a collate print option, this must be turned OFF - Oki C5400dn | Guide: User's, C5400 Series (American English) - Page 235
4. Click the Device Options tab. In the Printer features list, click Job Type (1), then select Secure print under Change setting (2). 5. Enter your 4-digit password (0000 to 9999): In the Printer features list, click PASSWORD1, then select the value of your choice for that digit under Change setting - Oki C5400dn | Guide: User's, C5400 Series (American English) - Page 236
PRINT JOBS MENU 2. Press ENTER. ENTER PASSWORD **** 3. Use +/ - to set the number for the first digit of the password, then press ENTER to engage the number and move to the next digit: ENTER PASSWORD 5*** 4. Repeat step 3 for each of the remaining digits in the password. SELECT JOB ALL JOBS 5. To - Oki C5400dn | Guide: User's, C5400 Series (American English) - Page 237
3. Use +/ - to set the number for the first digit of the password, then press ENTER to engage the number and move to the next digit: ENTER PASSWORD 5*** 4. Repeat step 3 for each of the remaining digits in the password. SELECT JOB ALL JOBS 5. Press CANCEL. DELETE THE JOB Y=ENTER/N=CANCEL 6. Press - Oki C5400dn | Guide: User's, C5400 Series (American English) - Page 238
stationery, etc. NOTE • The internal hard disk must be installed in the printer and enabled. • If the hard disk memory is insufficient for the spooled data, DISK FULL is displayed and only one copy printed. • If the software application being used has a collate print option, this must be turned OFF - Oki C5400dn | Guide: User's, C5400 Series (American English) - Page 239
4. Click the Device Options tab. In the Printer features list (1), click Job Type, then select Store to HDD under Change settings (2). 5. Enter your 4-digit password (0000 to 9999): In the Printer features list, click PASSWORD1, then select the value of your choice for that digit under Change - Oki C5400dn | Guide: User's, C5400 Series (American English) - Page 240
Printing a Stored Document from The Front Panel 1. Press + to enter the menu mode. PRINT JOBS MENU 2. Press ENTER. ENTER PASSWORD **** 3. Use +/ - to set the number for the first digit of the password, then press ENTER to engage the number and move to the next digit: ENTER PASSWORD 5*** 4. Repeat - Oki C5400dn | Guide: User's, C5400 Series (American English) - Page 241
2. Press ENTER. ENTER PASSWORD **** 3. Use +/ - to set the number for the first digit of the password, then press ENTER to engage the number and move to the next digit: ENTER PASSWORD 5*** 4. Repeat step 3 for each of the remaining digits in the password. SELECT JOB ALL JOBS 5. Press CANCEL. DELETE - Oki C5400dn | Guide: User's, C5400 Series (American English) - Page 242
on one sheet (see page 243) • Booklets (see page 244) • Custom Page Sizes (see page 246) • Selecting Print Resolution (see page 248) • Duplex Printing (see page 250) • Watermarks (see page 252) • Collating (see page 253) • Secure Print: printing confidential documents (see page 254) • Storing Print - Oki C5400dn | Guide: User's, C5400 Series (American English) - Page 243
N-Up Printing (Printing Multiple Pages on One Sheet) 2000 and XP 1. Open the file in your application and select File →Print. 2. In the Print dialog box, select the Postscript emulation printer. 3. Windows XP only: click Preferences. 4. On the Layout tab, under Pages Per Sheet, select the required - Oki C5400dn | Guide: User's, C5400 Series (American English) - Page 244
8½'' booklet on 8½'' x 11'' paper. NOTE • You must have the duplex unit installed and enabled in order to print booklets. • Not available on some network connections: see the Help file. • Some software applications may not support booklet printing. • The right-to-left setting allows a booklet to - Oki C5400dn | Guide: User's, C5400 Series (American English) - Page 245
Per Sheet, select Booklet. 5. Select Portrait or Landscape under Orientation. 6. Make sure Flip on Long Edge is selected under Print on Both Sides(Duplex). 7. Select the desired Page Order. 8. Windows XP only: click OK to return to the Print dialog box. 9. Click Print. Windows: Postscript Emulation - Oki C5400dn | Guide: User's, C5400 Series (American English) - Page 246
Printing Custom Page Sizes 2000 and XP The printer media size for the tray you're using must be manually set in the driver to the custom paper size before use (range 3½'' to 8½'' [89 to 216 mm] wide x 5'' to 14'' [127 to 356 mm] long). - Oki C5400dn | Guide: User's, C5400 Series (American English) - Page 247
6. On the Layout tab., click Advanced. 7. In the Paper Size drop-down list, select Postscript Custom Page Size. 8. Define your custom size in the dialog box which appears, then click OK twice. 9. Click the Paper/Quality tab and select the feed tray you are using for the custom size paper from the - Oki C5400dn | Guide: User's, C5400 Series (American English) - Page 248
Changing The Resolution for A Print Job 2000 and XP NOTE These instructions explain how to change the settings as you are printing a job. If you wish to change the settings to apply to all jobs (default settings): • - Oki C5400dn | Guide: User's, C5400 Series (American English) - Page 249
4. On the Job Options tab, select the required printing resolution, then click OK: • Fine = high resolution, slower speed: the default. Provides optimum results when printing graphics. • Normal = medium resolution, medium speed: choose this setting for documents with lower resolution graphics, line - Oki C5400dn | Guide: User's, C5400 Series (American English) - Page 250
duplex unit must be installed in the printer and enabled before duplex printing can be carried out. • Paper weight range 20 to 28 lb. US Bond (75 to 105 g/m²). • Paper must be loaded print side up. • Any tray (Tray 1, optional Tray 2, MP tray) can be used for duplex printing. NOTE These instructions - Oki C5400dn | Guide: User's, C5400 Series (American English) - Page 251
4. On the Layout tab, under Print on Both Sides (Duplex), select Flip on Long Edge or Flip on Short Edge. 5. Windows XP only: click OK to return to the Print dialog box. 6. Click Print. Windows: Postscript Emulation Driver • 251 - Oki C5400dn | Guide: User's, C5400 Series (American English) - Page 252
Printing Watermarks 2000 and XP 1. Open the file in your application and select File →Print. 2. In the Print dialog box, select the Postscript emulation printer. 3. Windows XP only: click Preferences. 4. On the Job Options tab, click Watermark. 5. In the dialog box which appears, click New to define - Oki C5400dn | Guide: User's, C5400 Series (American English) - Page 253
Collating 2000 and XP Collating can be carried out with or without the optional hard disk drive installed. However, printers with a hard disk drive will provide greater performance. 1. Open the file in your application and select File →Print. 2. In the Print dialog box, select the Postscript - Oki C5400dn | Guide: User's, C5400 Series (American English) - Page 254
the printer and enabled to allow for spooling of the print job before final printing. • If the hard disk memory is insufficient for the spooled data, DISK FULL is displayed and only one copy printed. • If the software application being used has a collate print option, this must be turned OFF for - Oki C5400dn | Guide: User's, C5400 Series (American English) - Page 255
4. On the Job Options tab, select Secure Print. 5. In the dialog box which appears, enter a Job Name and 4-digit password (PIN) of your choice (0000 to 9999), then click OK. (If no dialog box appears, click PIN.) 6. Enter the number of copies to be printed, then select Collate if applicable. 7. - Oki C5400dn | Guide: User's, C5400 Series (American English) - Page 256
2. Press ENTER. ENTER PASSWORD **** 3. Use +/ - to set the number for the first digit of the password, then press ENTER to engage the number and move to the next digit: ENTER PASSWORD 5*** 4. Repeat step 3 for each of the remaining digits in the password. SELECT JOB ALL JOBS 5. Press +/- until the - Oki C5400dn | Guide: User's, C5400 Series (American English) - Page 257
ENTER PASSWORD 5*** 4. Repeat step 3 for each of the remaining digits in the password. SELECT JOB ALL JOBS 5. Press CANCEL. DELETE THE JOB Y=ENTER/N=CANCEL 6. Press ENTER to delete the job, then press ON LINE. NOTE An alternative method of printing or deleting a confidential document is to use the - Oki C5400dn | Guide: User's, C5400 Series (American English) - Page 258
the printer and enabled to allow for spooling of the print job before final printing. • If the hard disk memory is insufficient for the spooled data, DISK FULL is displayed and only one copy printed. • If the software application being used has a collate print option, this must be turned OFF for - Oki C5400dn | Guide: User's, C5400 Series (American English) - Page 259
4. On the Job Options tab, select Proof and Print. 5. In the dialog box which appears, enter a Job Name and 4-digit password (PIN) of your choice (0000 to 9999), then click OK. (If no dialog box appears, click PIN.) 6. Enter the number of copies to be printed, then select Collate if applicable. 7. - Oki C5400dn | Guide: User's, C5400 Series (American English) - Page 260
2. Press ENTER. ENTER PASSWORD **** 3. Use +/ - to set the number for the first digit of the password, then press ENTER to engage the number and move to the next digit: ENTER PASSWORD 5*** 4. Repeat step 3 for each of the remaining digits in the password. SELECT JOB ALL JOBS 5. Press +/- until the - Oki C5400dn | Guide: User's, C5400 Series (American English) - Page 261
3. Use +/ - to set the number for the first digit of the password, then press ENTER to engage the number and move to the next digit: ENTER PASSWORD 5*** 4. Repeat step 3 for each of the remaining digits in the password. SELECT JOB ALL JOBS 5. Press CANCEL. DELETE THE JOB Y=ENTER/N=CANCEL 6. Press - Oki C5400dn | Guide: User's, C5400 Series (American English) - Page 262
stationery, etc. NOTE • The internal hard disk must be installed in the printer and enabled. • If the hard disk memory is insufficient for the spooled data, DISK FULL is displayed and only one copy printed. • If the software application being used has a collate print option, this must be turned OFF - Oki C5400dn | Guide: User's, C5400 Series (American English) - Page 263
4. On the Job Options tab, select Store to HDD. 5. In the dialog box which appears, enter a Job Name and 4-digit password (PIN) of your choice (0000 to 9999), then click OK. (If no dialog box appears, click PIN.) 6. Enter the number of copies to be printed, then select Collate if applicable. 7. - Oki C5400dn | Guide: User's, C5400 Series (American English) - Page 264
2. Press ENTER. ENTER PASSWORD **** 3. Use +/ - to set the number for the first digit of the password, then press ENTER to engage the number and move to the next digit: ENTER PASSWORD 5*** 4. Repeat step 3 for each of the remaining digits in the password. SELECT JOB ALL JOBS 5. Press +/- until the - Oki C5400dn | Guide: User's, C5400 Series (American English) - Page 265
ENTER PASSWORD 5*** 4. Repeat step 3 for each of the remaining digits in the password. SELECT JOB ALL JOBS 5. Press CANCEL. DELETE THE JOB Y=ENTER/N=CANCEL 6. Press ENTER to delete the job, then press ON LINE. NOTE An alternative method of printing or deleting documents stored on the Hard Disk Drive - Oki C5400dn | Guide: User's, C5400 Series (American English) - Page 266
Printing Overlays 2000 and XP What are Overlays? An Overlay can be a combination of graphics, fonts, or text that is stored in the printer's flash memory or on the optional hard disk drive, and printed whenever required. The result is similar to the Watermark feature, but with the ability to be much - Oki C5400dn | Guide: User's, C5400 Series (American English) - Page 267
installed in the printer to allow for spooling of the print job before final printing. • If the hard disk memory is insufficient for the spooled data, DISK FULL is displayed and only one copy printed. • If the software application being used has a collate print option, this must be turned OFF for - Oki C5400dn | Guide: User's, C5400 Series (American English) - Page 268
4. Select the Overlay tab. 5. Choose Create Form from the drop-down list, then make your selections in the dialog box which appears and click OK. 6. Windows XP only: click OK to return to the Print dialog box. 7. Click Print. Instead of sending the print job to the printer, this prompts you to save - Oki C5400dn | Guide: User's, C5400 Series (American English) - Page 269
N-up Printing: multiple pages on one sheet (see page 270) • Custom Page Sizes (see page 271) • Selecting Print Resolution (see page 273) • Duplex Printing (see page 275) • Watermarks (see page 277) • Collating (see page 278) • Secure Print: printing confidential documents (see page 279) • Proof and - Oki C5400dn | Guide: User's, C5400 Series (American English) - Page 270
N-Up Printing (Printing Multiple Pages on One Sheet) NT 4.0 1. Open the file in your application and select File →Print. 2. In the Print dialog box, select the Postscript emulation printer, then click Properties. 3. On the Advanced tab, double click Document Options. 4. Click Page Layout (N-UP) - Oki C5400dn | Guide: User's, C5400 Series (American English) - Page 271
Printing Custom Page Sizes NT 4.0 The printer media size for the tray you're using must be manually set in the driver to the custom paper size before use (range 3½'' to 8½'' [89 to 216 mm] wide x 5'' to 14'' [127 to 356 mm] long). - Oki C5400dn | Guide: User's, C5400 Series (American English) - Page 272
5. On the Page Setup tab, select Postscript Custom Page Size at the bottom of the Paper Size drop-down list, then define the custom size in the dialog box which appears and click OK. 6. Select the tray you are using in the Paper Source drop-down box, then click OK. 7. Click OK to print the document - Oki C5400dn | Guide: User's, C5400 Series (American English) - Page 273
Changing The Resolution for A Print Job NT 4,0 NOTE These instructions explain how to change the settings as you are printing a job. If you wish to change the settings to apply to all jobs (default settings): • - Oki C5400dn | Guide: User's, C5400 Series (American English) - Page 274
3. On the Job Options tab, select the required print resolution under Quality, then click OK: • Fine = high resolution, slower speed: the default. Provides optimum results when printing graphics. • Normal = medium resolution, medium speed: choose this setting for documents with lower resolution - Oki C5400dn | Guide: User's, C5400 Series (American English) - Page 275
duplex unit must be installed in the printer and enabled before duplex printing can be carried out. • Paper weight range 20 to 28 lb. US Bond (75 to 105 g/m²). • Paper must be loaded print side up. • Any tray (Tray 1, optional Tray 2, MP tray) can be used for duplex printing. NOTE These instructions - Oki C5400dn | Guide: User's, C5400 Series (American English) - Page 276
3. On the Page Setup tab, under Print on Both Sides(Duplex), select Long Side or Short Side. 4. Click OK to print the document. Windows: Postscript Emulation Driver • 276 - Oki C5400dn | Guide: User's, C5400 Series (American English) - Page 277
Printing Watermarks NT 4.0 1. Open the file in your application and select File →Print. 2. In the Print dialog box, select the Postscript emulation printer, then click Properties. 3. On the Job Options tab, click Watermark. 4. In the dialog box which appears, click New to define a watermark or - Oki C5400dn | Guide: User's, C5400 Series (American English) - Page 278
Collating NT 4.0 Collating can be carried out with or without the optional hard disk drive installed. However, printers with a hard disk drive will provide greater performance. 1. Open the file in your application and select File →Print. 2. In the Print dialog box, select the Postscript emulation - Oki C5400dn | Guide: User's, C5400 Series (American English) - Page 279
the printer and enabled to allow for spooling of the print job before final printing. • If the hard disk memory is insufficient for the spooled data, DISK FULL is displayed and only one copy printed. • If the software application being used has a collate print option, this must be turned OFF for - Oki C5400dn | Guide: User's, C5400 Series (American English) - Page 280
3. On the Job Options tab, select Secure Print. 4. In the dialog box which appears, enter a Job Name and 4-digit password (PIN) of your choice (0000 to 9999), then click OK. (If no dialog box appears, click PIN.) 5. Enter the number of copies to be printed, then select Collate if applicable. 6. - Oki C5400dn | Guide: User's, C5400 Series (American English) - Page 281
2. Press ENTER. ENTER PASSWORD **** 3. Use +/ - to set the number for the first digit of the password, then press ENTER to engage the number and move to the next digit: ENTER PASSWORD 5*** 4. Repeat step 3 for each of the remaining digits in the password. SELECT JOB ALL JOBS 5. Press +/- until the - Oki C5400dn | Guide: User's, C5400 Series (American English) - Page 282
3. Use +/ - to set the number for the first digit of the password, then press ENTER to engage the number and move to the next digit: ENTER PASSWORD 5*** 4. Repeat step 3 for each of the remaining digits in the password. SELECT JOB ALL JOBS 5. Press CANCEL. DELETE THE JOB Y=ENTER/N=CANCEL 6. Press - Oki C5400dn | Guide: User's, C5400 Series (American English) - Page 283
the printer and enabled to allow for spooling of the print job before final printing. • If the hard disk memory is insufficient for the spooled data, DISK FULL is displayed and only one copy printed. • If the software application being used has a collate print option, this must be turned OFF for - Oki C5400dn | Guide: User's, C5400 Series (American English) - Page 284
3. On the Job Options tab, select Proof and Print. 4. In the dialog box which appears, enter a Job Name and 4-digit password (PIN) of your choice (0000 to 9999), then click OK. (If no dialog box appears, click PIN.) 5. Enter the number of copies to be printed, then select Collate if applicable. 6. - Oki C5400dn | Guide: User's, C5400 Series (American English) - Page 285
2. Press ENTER. ENTER PASSWORD **** 3. Use +/ - to set the number for the first digit of the password, then press ENTER to engage the number and move to the next digit: ENTER PASSWORD 5*** 4. Repeat step 3 for each of the remaining digits in the password. SELECT JOB ALL JOBS 5. Press +/- until the - Oki C5400dn | Guide: User's, C5400 Series (American English) - Page 286
3. Use +/ - to set the number for the first digit of the password, then press ENTER to engage the number and move to the next digit: ENTER PASSWORD 5*** 4. Repeat step 3 for each of the remaining digits in the password. SELECT JOB ALL JOBS 5. Press CANCEL. DELETE THE JOB Y=ENTER/N=CANCEL 6. Press - Oki C5400dn | Guide: User's, C5400 Series (American English) - Page 287
protected. NOTE • The internal hard disk must be installed in the printer and enabled. • If the hard disk memory is insufficient for the spooled data, DISK FULL is displayed and only one copy printed. • If the software application being used has a collate print option, this must be turned OFF - Oki C5400dn | Guide: User's, C5400 Series (American English) - Page 288
3. On the Job Options tab, select Store to HDD. 4. In the dialog box which appears, enter a Job Name and 4-digit password (PIN) of your choice (0000 to 9999), then click OK. (If no dialog box appears, click PIN.) 5. Enter the number of copies to be printed, then select Collate if applicable. 6. - Oki C5400dn | Guide: User's, C5400 Series (American English) - Page 289
2. Press ENTER. ENTER PASSWORD **** 3. Use +/ - to set the number for the first digit of the password, then press ENTER to engage the number and move to the next digit: ENTER PASSWORD 5*** 4. Repeat step 3 for each of the remaining digits in the password. SELECT JOB ALL JOBS 5. Press +/- until the - Oki C5400dn | Guide: User's, C5400 Series (American English) - Page 290
3. Use +/ - to set the number for the first digit of the password, then press ENTER to engage the number and move to the next digit: ENTER PASSWORD 5*** 4. Repeat step 3 for each of the remaining digits in the password. SELECT JOB ALL JOBS 5. Press CANCEL. DELETE THE JOB Y=ENTER/N=CANCEL 6. Press - Oki C5400dn | Guide: User's, C5400 Series (American English) - Page 291
Printing Overlays NT 4.0 What are Overlays? An Overlay can be a combination of graphics, fonts, or text that is stored in the printer's flash memory or on the optional hard disk drive, and printed whenever required. The result is similar to the Watermark feature, but with the ability to be much more - Oki C5400dn | Guide: User's, C5400 Series (American English) - Page 292
installed in the printer to allow for spooling of the print job before final printing. • If the hard disk memory is insufficient for the spooled data, DISK FULL is displayed and only one copy printed. • If the software application being used has a collate print option, this must be turned OFF for - Oki C5400dn | Guide: User's, C5400 Series (American English) - Page 293
(see page 327) NOTE Model C5400n also includes the Job Accounting utility: for more information, see the "Job Accounting Technical Reference" (English only) on the Manual CD supplied with your printer. Windows: Software Utilities • 293 - Oki C5400dn | Guide: User's, C5400 Series (American English) - Page 294
methods. • The color swatch samples do not show all the colors your Oki color printer can print. • Other factors influence how you see color: the Click Productivity Software →Color Swatch Utility and follow the on-screen instructions. Opening the Color Swatch utility Click Start →Programs →Color - Oki C5400dn | Guide: User's, C5400 Series (American English) - Page 295
Using the Color Swatch Utility Selecting Colors When you load the utility, a swatch page displays commonly used colors. Select print to print sample pages. Color Samples Use the color blocks to pick the specific colors that you want to appear in your printed document. Color Values Each color block, - Oki C5400dn | Guide: User's, C5400 Series (American English) - Page 296
Creating Custom Swatch Colors If you don't find your desired color, you can create or customize colors: 1. Select Custom Swatch from the File menu. 2. On the pop-up window, there are 3 slide bars that allow you to customize swatches: - Hue bar changes the hue of the swatches, for example, red to - Oki C5400dn | Guide: User's, C5400 Series (American English) - Page 297
Storage Device Manager Utility for Windows General Information NOTE Storage Device Manager requires Microsoft Internet Explorer 4.0 or higher to run. Storage Device Manager (SDM) lets you manage • The optional 20 GB internal hard disk drive. • The printer's built-in 2 MB flash memory. Windows: - Oki C5400dn | Guide: User's, C5400 Series (American English) - Page 298
Summary of Storage Device Manager Functions • Create or modify a project. • Download files to a printer. • Add or remove printers being administered. • Reboot the printer. • Manage the Proof & Print and Secure Print spooler queues on the internal hard disk drive. • Delete files from the internal - Oki C5400dn | Guide: User's, C5400 Series (American English) - Page 299
license agreement. 3. Click Productivity Software →Storage Device Mgr and follow the on-screen instructions. Opening Storage Device Manager 1. Click Start →Programs →Oki →Oki Storage Device Manager → Oki Storage Device Manager. The SDM - Printer Discovery dialog box opens. 2. Select the appropriate - Oki C5400dn | Guide: User's, C5400 Series (American English) - Page 300
3. Click Exit. The Storage Device Manager dialog box opens. Using Storage Device Manager On-Line Help • From the main Storage Device Manager window, click Help Topics from the Help pull-down menu. • From other Storage Device Manager windows, click the Help button. Administration On network systems, - Oki C5400dn | Guide: User's, C5400 Series (American English) - Page 301
Manager to format the partitions on the printer's hard drive, but this will wipe out all the contents of the partition and can cause serious problems. We recommend that you use the Show Resources and HDD Print Jobs features to maintain the disk. Windows: Software Utilities • 301 - Oki C5400dn | Guide: User's, C5400 Series (American English) - Page 302
Setting Up an Administrative Password 1. With the Storage Device Manager program open, click Administrator Functions in the Printers menu. NOTE Passwords consist of eight digits, letters or numbers, and are case sensitive. 2. Type in the default password (p1xs7d0m) under Enter Password, then click - Oki C5400dn | Guide: User's, C5400 Series (American English) - Page 303
Creating PostScript Forms NOTE PostScript forms are the ones to use if you are not experienced with PCL Macro commands. Creating & Downloading a PostScript Project Important! Remember that file names and paths are case sensitive. Step 1: Create the Forms in Your Software Application 1. Create the - Oki C5400dn | Guide: User's, C5400 Series (American English) - Page 304
The Project dialog box opens. 3. Click Projects →Save Project, enter the path/name for storing the project on your hard drive or your network, then click Save. Step 3: Add Files to the Project 1. Click Projects →Add File to Project. The Open dialog box appears. 2. Make sure PRN files (*.prn) is - Oki C5400dn | Guide: User's, C5400 Series (American English) - Page 305
Step 4: Check the Location for Storing the Files in the Printer's Memory • If your printer is equipped with an internal hard disk drive, the Storage Device Manager will automatically save the forms to the PostScript partition on the hard drive. • If your printer does not have an internal hard disk - Oki C5400dn | Guide: User's, C5400 Series (American English) - Page 306
Creating PCL Macros (Forms) Important! Unless you are experienced with PCL macro commands, it is best to stay with the PostScript Forms. There are two basic processes to producing PCL macros: • A: Creating and downloading the PCL project • B: Test printing the macro A: Creating and Downloading a PCL - Oki C5400dn | Guide: User's, C5400 Series (American English) - Page 307
, the black oval will print as a black rectangle when the overlay is used. To maintain the oval shape, turn off (deselect) the "Configure Image Data," "Palette ID," and "Palette Control" filters. 3. Click OK. The Open dialog box appears. 4. Make sure Print spool files (*.prn) is selected in the File - Oki C5400dn | Guide: User's, C5400 Series (American English) - Page 308
Step 4: Add the bin Files to the Project NOTE You can also add files to the project by opening either My Computer or Microsoft Explorer, browsing to the directory where the prn files are stored, then selecting the files and dragging them into the Project box. 1. Click Projects →Add File to Project. - Oki C5400dn | Guide: User's, C5400 Series (American English) - Page 309
. 2. Enter the ID number for the macro file you wish to print (you can get this from the File List printout: look under Volume 0; e.g., for 2:OKI.BIN, enter 2), then click OK. Command Issued appears. 3. Click OK and wait for the macro to print. Printing the File List To print out a list - Oki C5400dn | Guide: User's, C5400 Series (American English) - Page 310
Maintaining the Internal Hard Drive and Flash Memory HDD Print Jobs The HDD Print Jobs feature allows you to view and delete the Proof & Print and Secure Print files stored on the printer's internal hard drive. 1. Open Storage Device Manager and click the icon for the printer whose contents you wish - Oki C5400dn | Guide: User's, C5400 Series (American English) - Page 311
• Click Print Job(s) to print the files out before they are automatically deleted. Show Resources Use the Show Resources feature to delete files from the internal hard drive and flash memory. 1. Open Storage Device Manager and click the icon for the printer whose contents you wish to view. 2. Click - Oki C5400dn | Guide: User's, C5400 Series (American English) - Page 312
Using Overlays NOTE Before overlays can be printed, they must be created in a software application and saved as a print file, then downloaded to the printer's internal hard disk drive or flash memory using Storage Device Manager. General Information To use overlays, the Storage Device Manager - Oki C5400dn | Guide: User's, C5400 Series (American English) - Page 313
stored on the printer's hard drive using Storage Device Manager before they can be used. • If the hard disk memory is insufficient for the spooled data, the message DISK FULL appears. • If the software application has a collate print option, it must be turned OFF before you print overlays. • Overlay - Oki C5400dn | Guide: User's, C5400 Series (American English) - Page 314
4. Under Defined Overlays, click any overlays you wish to use (to select more than one, press the Ctrl key while selecting the names), then click Add. • Each name appears in the Active overlays box. • To print a sample of an overlay to see what it looks like, click the name under Defined Overlays, - Oki C5400dn | Guide: User's, C5400 Series (American English) - Page 315
Using Overlays: Windows Me/98/95 PCL Defining Overlays: Me/98/95 PCL 1. Click Start →Settings →Printers. 2. Right click the PCL printer icon, then click Properties. The Properties dialog box appears. 3. Click the Job Options tab, click the Overlay button. 4. Click Define overlays. 5. Under Overlay - Oki C5400dn | Guide: User's, C5400 Series (American English) - Page 316
• If you wish to add more overlays to the list, click Define overlays, then fill in the appropriate information in the Define overlays dialog box and click Close. 6. Click Print using active overlays, then click OK and print the document. Editing Defined Overlays: Me/98/95 PCL 1. Click Start → - Oki C5400dn | Guide: User's, C5400 Series (American English) - Page 317
Using Overlays: Windows Me/98/95/PostScript Defining Overlays: Me/98/95 PostScript 1. Click Start →Settings →Printers. 2. Right click the PostScript printer icon, then click Properties. The Properties dialog box appears. 3. Click the Job Options tab. Click the Overlay button. 4. Set up an Overlay - Oki C5400dn | Guide: User's, C5400 Series (American English) - Page 318
4. Click the Overlay tab. 5. Click Enable Overlay in the drop-down list. 6. Click up to four groups under Defined Overlay, then click Add. 7. Click OK and print the document. Editing Defined Overlays: Me/98/95 PostScript 1. Click Start →Settings →Printers. 2. Right click the PostScript printer icon, - Oki C5400dn | Guide: User's, C5400 Series (American English) - Page 319
Using Overlays: Windows NT 4.0 PCL Defining Overlays: NT 4.0 PCL 1. Click Start →Settings →Printers. 2. Right click the PCL printer icon, then click Document Defaults. The Default dialog box appears. 3. Click the Job Options tab. Click the Overlay button. 4. Click Define overlays. The Define - Oki C5400dn | Guide: User's, C5400 Series (American English) - Page 320
NOTE To print a sample of an overlay to see what it looks like, click its name in the Defined Overlays box, then click Test Print. If you wish to add more overlays to the list, click Define Overlays, then fill in the appropriate information in the Define overlays dialog box and click Close. 5. Click - Oki C5400dn | Guide: User's, C5400 Series (American English) - Page 321
7. Click OK and close the Printers dialog box. Defining Overlays: NT 4.0 PCL 1. Click Start →Settings →Printers. 2. Right click the PostScript printer icon, then click Document Defaults. The Default dialog box appears. 3. Scroll down to Layout, and click Overlay. 4. Under Change 'Overlay' Setting, - Oki C5400dn | Guide: User's, C5400 Series (American English) - Page 322
Using Overlays: Windows NT 4.0 PostScript Defining Overlays: NT 4.0 PostScript 1. Click Start →Settings →Printers. 2. Right click the PostScript printer icon, then click Document Defaults. The Default dialog box appears. 3. Click the Job Options, and click Overlay. 4. Click New. The Define Overlays - Oki C5400dn | Guide: User's, C5400 Series (American English) - Page 323
The Setting of Overlay dialog box appears. 5. Select the Overlay group(s) you wish to print, then click Add. The group will appear in the Active Overlay Groups list. 6. Click OK twice and print the document. Editing Defined Overlays: NT 4.0 PostScript 1. Click Start →Settings →Printers. 2. Right - Oki C5400dn | Guide: User's, C5400 Series (American English) - Page 324
data for monitoring, reporting and managing networked printers. It provides a full range of management functions for Oki and follow the on-screen instructions. Features • Provides real-time Monitors devices over time, including maintenance data, and saves data for statistical reports. • Sends mail - Oki C5400dn | Guide: User's, C5400 Series (American English) - Page 325
information: • See your on-line OkiLAN® 8100 SoftNIC User's Guide (on the Drivers CD supplied with your printer or • Click Status and follow the on-screen instructions. To Open The Network Printer Status Utility 1. Click Start →Settings →Printers. Right-click the Oki Printer icon, click Properties. - Oki C5400dn | Guide: User's, C5400 Series (American English) - Page 326
3. Click UPDATE to see the device settings. The following window displays: Click on an item to see this information: Trays: Duplex: Disk/Memory: Toner Remaining: Paper Type, weight, size Installed/not installed RAM size and % used; Flash Memory size and % used % toner remaining is shown for - Oki C5400dn | Guide: User's, C5400 Series (American English) - Page 327
2000, and Windows XP operating systems. How to Install The LPR Utility supports TCP/IP. Your network administrator will first need to set up an IP agreement. 3. Click Network Software →Administration Tools →Oki LPR and follow the on-screen instructions. LPR Status box The LPR Utility Status Box
-
 1
1 -
 2
2 -
 3
3 -
 4
4 -
 5
5 -
 6
6 -
 7
7 -
8
-
9
-
10
-
11
-
12
-
13
-
14
-
15
-
16
-
17
-
18
-
19
-
20
-
21
-
22
-
23
-
24
-
25
-
26
-
27
-
28
-
29
-
30
-
31
-
32
-
33
-
34
-
35
-
36
-
37
-
38
-
39
-
40
-
41
-
42
-
43
-
44
-
45
-
46
-
47
-
48
-
49
-
50
-
51
-
52
-
53
-
54
-
55
-
56
-
57
-
58
-
59
-
60
-
61
-
62
-
63
-
64
-
65
-
66
-
67
-
68
-
69
-
70
-
71
-
72
-
73
-
74
-
75
-
76
-
77
-
78
-
79
-
80
-
81
-
82
-
83
-
84
-
85
-
86
-
87
-
88
-
89
-
90
-
91
-
92
-
93
-
94
-
95
-
96
-
97
-
98
-
99
-
100
-
101
-
102
-
103
-
104
-
105
-
106
-
107
-
108
-
109
-
110
-
111
-
112
-
113
-
114
-
115
-
116
-
117
-
118
-
119
-
120
-
121
-
122
-
123
-
124
-
125
-
126
-
127
-
128
-
129
-
130
-
131
-
132
-
133
-
134
-
135
-
136
-
137
-
138
-
139
-
140
-
141
-
142
-
143
-
144
-
145
-
146
-
147
-
148
-
149
-
150
-
151
-
152
-
153
-
154
-
155
-
156
-
157
-
158
-
159
-
160
-
161
-
162
-
163
-
164
-
165
-
166
-
167
-
168
-
169
-
170
-
171
-
172
-
173
-
174
-
175
-
176
-
177
-
178
-
179
-
180
-
181
-
182
-
183
-
184
-
185
-
186
-
187
-
188
-
189
-
190
-
191
-
192
-
193
-
194
-
195
-
196
-
197
-
198
-
199
-
200
-
201
-
202
-
203
-
204
-
205
-
206
-
207
-
208
-
209
-
210
-
211
-
212
-
213
-
214
-
215
-
216
-
217
-
218
-
219
-
220
-
221
-
222
-
223
-
224
-
225
-
226
-
227
-
228
-
229
-
230
-
231
-
232
-
233
-
234
-
235
-
236
-
237
-
238
-
239
-
240
-
241
-
242
-
243
-
244
-
245
-
246
-
247
-
248
-
249
-
250
-
251
-
252
-
253
-
254
-
255
-
256
-
257
-
258
-
259
-
260
-
261
-
262
-
263
-
264
-
265
-
266
-
267
-
268
-
269
-
270
-
271
-
272
-
273
-
274
-
275
-
276
-
277
-
278
-
279
-
280
-
281
-
282
-
283
-
284
-
285
-
286
-
287
-
288
-
289
-
290
-
291
-
292
-
293
-
294
-
295
-
296
-
297
-
298
-
299
-
300
-
301
-
302
-
303
-
304
-
305
-
306
-
307
-
308
-
309
-
310
-
311
-
312
-
313
-
314
-
315
-
316
-
317
-
318
-
319
-
320
-
321
-
322
-
323
-
324
-
325
-
326
-
327
 |
 |
