Oki C6100dn Guide: User's, C6100 Series (Am English)
Oki C6100dn Manual
 |
View all Oki C6100dn manuals
Add to My Manuals
Save this manual to your list of manuals |
Oki C6100dn manual content summary:
- Oki C6100dn | Guide: User's, C6100 Series (Am English) - Page 1
59381701.jpg - Oki C6100dn | Guide: User's, C6100 Series (Am English) - Page 2
Information Copyright © 2006 by Oki Data. All Rights Reserved Document Information C6100 Series User's Guide P/N 59381701, Revision 1.0 drivers and manuals are available from the web site: http://www.okiprintingsolutions.com Trademark Information Oki and Microline are registered trademarks of Oki - Oki C6100dn | Guide: User's, C6100 Series (Am English) - Page 3
Trademark Information 2 Regulatory Information 2 Notes, Cautions, etc 6 Illustrations 6 Introduction 7 Features 7 Options 7 Parts of the Printer 8 Front 8 Rear 9 Paper (Print Media 10 General Information 10 Driver Settings 11 Paper, US Bond 18 Paper, Index 20 Letterhead 22 Envelopes - Oki C6100dn | Guide: User's, C6100 Series (Am English) - Page 4
Part Numbers 72 Replace a Toner Cartridge 73 Replace an Image Drum 79 Replace the Fuser 87 Replace the Belt Unit 91 Printer Printer Drivers 162 General Information 162 Install 162 Which Printer Driver to Use 163 Change Driver Settings 164 Save Driver Settings 165 C6100 Series User's Guide - Oki C6100dn | Guide: User's, C6100 Series (Am English) - Page 5
of Utilities 317 Installing the Utilities 320 Color Correction Utility 322 Color Swatch Utility 337 Direct Network Printing Utility (LPR 341 Display Language Utility 343 Network Printer Status Utility 344 Network Setup Utility 349 PS Gamma Adjuster Utility 350 C6100 Series User's Guide 5 - Oki C6100dn | Guide: User's, C6100 Series (Am English) - Page 6
like this. An important message provides supplemental information which can prevent potential problems. CAUTION! A caution appears like this. A caution provides additional information additional information which, if ignored, may result in a risk of personal injury. C6100 Series User's Guide 6 - Oki C6100dn | Guide: User's, C6100 Series (Am English) - Page 7
printer is designed with advanced features to give you clear, vibrant color printing and crisp black and white pages at high speed on a range of print media. Features • Up to 26 pages per minute full color resolution. • Single Pass Color Digital LED technology. • 10 Base C6100 Series User's Guide 7 - Oki C6100dn | Guide: User's, C6100 Series (Am English) - Page 8
Parts of the Printer Front c53_01_printerfull.jpg 1. Output Stacker, face down Standard printed copy delivery point. Holds up Used for feeding transparencies, heavier paper stocks, envelopes and other special media. Also for manual feeding of single sheets when required. C6100 Series User's Guide 8 - Oki C6100dn | Guide: User's, C6100 Series (Am English) - Page 9
When the rear paper stacker is folded down, paper exits the printer through the rear of the printer and is stacked face up. This is used for labels, heavy the Multi-Purpose Tray, the paper path through the printer is essentially straight. This avoids bending the print media around curves in - Oki C6100dn | Guide: User's, C6100 Series (Am English) - Page 10
characteristics about any paper (print media) you want to use with your printer: • Type • Weight • Size The type, weight, and size of • which paper feed tray can be used Choices are multipurpose tray (MP Tray/manual feed) or Trays 1 - 2 • which paper exit path can be used C6100 Series User's Guide 10 - Oki C6100dn | Guide: User's, C6100 Series (Am English) - Page 11
proper toner fusion, you can try the Label settings. The default printer menu setting is Medium. Choices are: Printer Setting, Light, Medium, Heavy, Ultra Heavy, Labels1, Labels2, Transparency, Glossy, User Type 1, User Type 2, User Type 3, User Type 4, and User Type 5. C6100 Series User's Guide 11 - Oki C6100dn | Guide: User's, C6100 Series (Am English) - Page 12
Choices Choices are: Printer Setting, Light, Medium, Heavy, Ultra Heavy, Labels1, Labels2, Transparency, Glossy, User Type 1, g/m2) 68-113 lb. Index If the Ultra Heavy setting does not give proper toner fusion, you can try the Label settings. Labels1 For labels 0.1 to 0.169 mm thick. Labels2 For labels 0. - Oki C6100dn | Guide: User's, C6100 Series (Am English) - Page 13
Actual Weight, Paper Tray, Duplex Option, and Paper Exit Driver Setting Actual Weight Feed Tray Exit Duplexer? Tray Light Medium c. If the Ultra Heavy setting does not give proper toner fusion, you can try the Label settings. d. 47 lb. (177 g/m²) maximum for Tray 2 C6100 Series User's Guide 13 - Oki C6100dn | Guide: User's, C6100 Series (Am English) - Page 14
the face up (straight through) paper feed path. For face up printing (straight-through path), make sure the rear exit is open and the paper support is extended. • Paper is stacked in reverse order. • Tray capacity is about 100 sheets. Actual capacity depends on paper weight. c53_72_rear3.jpg - Oki C6100dn | Guide: User's, C6100 Series (Am English) - Page 15
set, • print quality deteriorates • the fuser roller may be damaged. 2. If the settings in the printer differ from those selected on your computer, the printer does not print. An error message displays. 3. The following printer settings are given as a guide only. Some software applications require - Oki C6100dn | Guide: User's, C6100 Series (Am English) - Page 16
15. Click OK. 16. The document prints. C6100 Series User's Guide 16 - Oki C6100dn | Guide: User's, C6100 Series (Am English) - Page 17
fuser roller may be damaged. 2. If the settings in the printer differ from those selected on your computer, the printer does not print. An error message displays. 3. The following printer settings are given as a guide Select Printer Option. 4. At Media Weight, make your selection. See "Driver - Oki C6100dn | Guide: User's, C6100 Series (Am English) - Page 18
when using paper designed for use in copiers and laser printers. Suitable types include: • Hammermill® Laser Printer Radiant White, 24 lb. US Bond (90 g/m²) • Xerox® 4024, 20 lb.US Bond (75 g/m²) • Oki® 52206101 Bright White Proofing Paper, 32 lb. US Bond (120 g/m2) C6100 Series User's Guide 18 - Oki C6100dn | Guide: User's, C6100 Series (Am English) - Page 19
perforations, cut-outs or ragged edges. - Carbon paper, recycled paper, NCR paper, photosensitive paper, pressure sensitive paper or thermal transfer paper. Driver Settings To select a paper type in the driver, see: Windows: page 15 Macintosh OS 10.2 and 10.3: page 17 C6100 Series User's Guide 19 - Oki C6100dn | Guide: User's, C6100 Series (Am English) - Page 20
when using paper designed for use in copiers and laser printers. Suitable types include: • Hammermill® Laser Printer Radiant White, 24 lb. US Bond (90 g/m²) • Xerox® 4024, 20 lb.US Bond (75 g/m²) • Oki® 52206101 Bright White Proofing Paper, 32 lb. US Bond (120 g/m2) C6100 Series User's Guide 20 - Oki C6100dn | Guide: User's, C6100 Series (Am English) - Page 21
perforations, cut-outs or ragged edges. - Carbon paper, recycled paper, NCR paper, photosensitive paper, pressure sensitive paper or thermal transfer paper. Driver Settings To select a paper type in the driver, see: Windows: page 15 Macintosh OS 10.2 and 10.3: page 17 C6100 Series User's Guide 21 - Oki C6100dn | Guide: User's, C6100 Series (Am English) - Page 22
printer menu or in the printer driver. Application settings override driver settings. Driver settings override printer menu settings. When using heavily laid or textured paper • the life of the image drum does not give proper toner fusion, you can try the Label settings. C6100 Series User's Guide 22 - Oki C6100dn | Guide: User's, C6100 Series (Am English) - Page 23
230°C) for 0.2 second. Only use letterhead designed for color laser printers and photocopiers. Don't use very smooth, shiny or laid or textured paper will seriously affect the life of the image drum and give poor print quality. Print quality can be improved transfer paper. C6100 Series User's Guide 23 - Oki C6100dn | Guide: User's, C6100 Series (Am English) - Page 24
Driver Settings To select a paper type in the driver, see: Windows: page 15 Macintosh OS 10.2 and 10.3: page 17 Loading Trays 1 and 2 Long edge feed Face down, top toward the back of the printer. Letr_lef.bmp Short edge feed face down, top to the right ltrhd_se.jpg C6100 Series User's Guide 24 - Oki C6100dn | Guide: User's, C6100 Series (Am English) - Page 25
Loading Multi-purpose Tray (Manual Feed) Long edge feed Face up, top to the back of the printer manl_le.jpg Short edge feed Face up, top to the left manl_se.jp C6100 Series User's Guide 25 - Oki C6100dn | Guide: User's, C6100 Series (Am English) - Page 26
For more information, see "Print Media, Oki" in your Handy Reference Guide or www.okiprintingsolutions.com. 2. Store envelopes flat and away from • moisture • direct sunlight • heat sources 3. Don't use envelopes with • windows • metal clasps • self-sealing flaps C6100 Series User's Guide 26 - Oki C6100dn | Guide: User's, C6100 Series (Am English) - Page 27
a paper type in the driver, see: Windows: page 15 Macintosh OS 10.2 and 10.3: page 17 Loading Trays 1 - 2 Envelopes cannot be fed from paper trays 1 - 2. Multi-purpose Tray (Manual Feed) Face up (flap side down), top to the left (into the printer) C96_LoadPaperMPTray_Envelopes_crop.JPG Paper Exit - Oki C6100dn | Guide: User's, C6100 Series (Am English) - Page 28
• Tray capacity is about 100 sheets. Actual capacity depends on paper weight. c53_72_rear3.jpg C6100 Series User's Guide 28 - Oki C6100dn | Guide: User's, C6100 Series (Am English) - Page 29
. • Only use labels designed for color laser printers and photocopiers. • Labels must cover the entire carrier sheet. • The carrier sheet or adhesive must not be exposed to any part of the printer. Driver Settings To select a paper type in the driver, see: Windows: page 15 Macintosh OS 10.2 and - Oki C6100dn | Guide: User's, C6100 Series (Am English) - Page 30
Multi-purpose Tray (Manual Feed) Face up (print side up) Default = long edge feed. For face up printing (straight-through path), make sure the rear exit is open and the paper support is extended. • Paper is stacked in reverse order. • Tray capacity is about 100 sheets. Actual capacity - Oki C6100dn | Guide: User's, C6100 Series (Am English) - Page 31
for color laser printers and photocopiers. 2. Only use recommended transparencies Oki 52205701 3M CG3720 3. Avoid office transparencies designed for use by hand with marker pens. These will melt in the fuser and cause damage. Driver Settings To select a paper type in the driver, see: Windows: page - Oki C6100dn | Guide: User's, C6100 Series (Am English) - Page 32
Multi-purpose Tray (Manual Feed) Face up (print side up) Default = long edge feed. For face up printing (straight-through path), make sure the rear exit is open and the paper support is extended. • Paper is stacked in reverse order. • Tray capacity is about 100 sheets. Actual capacity - Oki C6100dn | Guide: User's, C6100 Series (Am English) - Page 33
a paper tray (Auto Select) • if a paper tray (Tray 1) runs out of paper, your printer can automatically switch to another paper tray (MP Tray, optional Tray 2) loaded with the same type of interact. For more information, see "Paper Size, Feed, and Exit" on page 37. C6100 Series User's Guide 33 - Oki C6100dn | Guide: User's, C6100 Series (Am English) - Page 34
driver Windows PostScript 1. Open the file you want to print. 2. Click File → Print. 3. Select your printer Paper, Envelopes. Automatically select The printer automatically selects the paper tray. Multi . Select the Multi Purpose Tray here (in the driver) when printing the job. 7. Change any other - Oki C6100dn | Guide: User's, C6100 Series (Am English) - Page 35
Windows PCL 1. Open the file you want to print. 2. Click File → Print. 3. Select your printer , Labels, Transparency Automatically select The printer automatically selects the paper tray. Multi Tray. Select the Multi Purpose Tray here (in the driver) when printing the job. 7. Change any other settings - Oki C6100dn | Guide: User's, C6100 Series (Am English) - Page 36
drop-down list below Presets. Select Paper Source. 4. Make your selection. Auto The printer automatically selects the paper tray. Multi Purpose Tray / Tray1 / Tray 2 Tray 2 (in the driver) when printing the job. 5. Change any other settings as desired. 6. Click Print. C6100 Series User's Guide 36 - Oki C6100dn | Guide: User's, C6100 Series (Am English) - Page 37
(Face Up Stacker) when you are printing paper heavier than 47 lb. US Bond (98 lb. Index, 177 g/ m2). c. S = Simplex; D = Duplex (printing on both sides) C6100 Series User's Guide 37 - Oki C6100dn | Guide: User's, C6100 Series (Am English) - Page 38
.9 mm) - Weight Range = 28 to 34 lb. US Bond (105 to 128 g/m2) - Path = Rear Exit (Face Up Stacker) only - Feed one sheet at a time. C6100 Series User's Guide 38 - Oki C6100dn | Guide: User's, C6100 Series (Am English) - Page 39
standard sizes, standard weights. If a paper tray (Tray 1) runs out of paper, your printer can automatically switch to another paper tray (MP Tray, optional Tray 2) loaded with the same " on page 40 Choose in the driver See Paper Trays, "Select in the driver" on page 34. C6100 Series User's Guide 39 - Oki C6100dn | Guide: User's, C6100 Series (Am English) - Page 40
Duplexing Restrictions Important! You can duplex • paper • paper weights up to 28 lb. US Bond 58 lb. Index 105 g/m2 metric You cannot duplex • labels • envelopes • transparencies • paper weights above 28 lb. US Bond 58 lb. Index 105 g/m2 metric C6100 Series User's Guide 40 - Oki C6100dn | Guide: User's, C6100 Series (Am English) - Page 41
(Face Up Stacker) when you are printing paper heavier than 47 lb. US Bond (98 lb. Index, 177 g/ m2). c. S = Simplex; D = Duplex (printing on both sides) C6100 Series User's Guide 41 - Oki C6100dn | Guide: User's, C6100 Series (Am English) - Page 42
standard sizes, standard weights. If a paper tray (Tray 1) runs out of paper, your printer can automatically switch to another paper tray (MP Tray, optional Tray 2) loaded with the same " on page 43 Choose in the driver See Paper Trays, "Select in the driver" on page 34. C6100 Series User's Guide 42 - Oki C6100dn | Guide: User's, C6100 Series (Am English) - Page 43
Duplexing Restrictions Important! You can duplex • paper • paper weights up to 28 lb. US Bond 58 lb. Index 105 g/m2 metric You cannot duplex • labels • envelopes • transparencies • paper weights above 28 lb. US Bond 58 lb. Index 105 g/m2 metric C6100 Series User's Guide 43 - Oki C6100dn | Guide: User's, C6100 Series (Am English) - Page 44
(Face Up Stacker) when you are printing paper heavier than 47 lb. US Bond (98 lb. Index, 177 g/ m2). c. S = Simplex; D = Duplex (printing on both sides) C6100 Series User's Guide 44 - Oki C6100dn | Guide: User's, C6100 Series (Am English) - Page 45
manual feed tray. Use the Multi-Purpose Tray (MP Tray) for printing card stock, labels, envelopes and transparencies. If a paper tray (Tray 1) runs out of paper, your printer Restrictions" on page 46 Choose in the driver See Paper Trays, "Select in the driver" on page 34. C6100 Series User's Guide 45 - Oki C6100dn | Guide: User's, C6100 Series (Am English) - Page 46
Duplexing Restrictions Important! You can duplex • paper • paper weights up to 28 lb. US Bond 58 lb. Index 105 g/m2 metric You cannot duplex • labels • envelopes • transparencies • paper weights above 28 lb. US Bond 58 lb. Index 105 g/m2 metric C6100 Series User's Guide 46 - Oki C6100dn | Guide: User's, C6100 Series (Am English) - Page 47
.9 mm) - Weight Range = 28 to 34 lb. US Bond (105 to 128 g/m2) - Path = Rear Exit (Face Up Stacker) only - Feed one sheet at a time. C6100 Series User's Guide 47 - Oki C6100dn | Guide: User's, C6100 Series (Am English) - Page 48
match the printer job's paper size to a paper tray (1-5 and Manual Feed [Multipurpose Tray]). NOTE The Paper Size for Manual Feed (Multipurpose Tray) must be set through the operator panel for Auto Tray Select to work. For more information, Windows, PostScript: see page 49 Windows, PCL: see - Oki C6100dn | Guide: User's, C6100 Series (Am English) - Page 49
Select. Windows XP/2000: On Paper Quality, next to Paper Source, click Automatically Select. 7. Change any other settings as desired. 8. Click OK. 9. The main Print screen appears. 10. Change any other settings as desired. 11. Click OK. 12. The document prints. C6100 Series User's Guide 49 - Oki C6100dn | Guide: User's, C6100 Series (Am English) - Page 50
your printer. 4. Click Properties. 5. On Setup, under Media, beside Source, click Automatically Select. 6. Change any other settings as desired. 7. Click OK. 8. The main Print screen appears. 9. Change any other settings as desired. 10. Click OK. 11. The document prints. C6100 Series User's Guide 50 - Oki C6100dn | Guide: User's, C6100 Series (Am English) - Page 51
Information" on page 48. 1. Open the file you want to print. 2. Click File → Print. 3. On the Paper Feed panel, select All Pages. 4. Select Automatic Selection. C6100 Series User's Guide 51 - Oki C6100dn | Guide: User's, C6100 Series (Am English) - Page 52
is enabled either through the printer menu or the printer driver. Application settings override driver settings. Driver settings override printer menu settings. For more information, Printer Menu: see page 53 Windows, PostScript: see page 54 Windows, PCL: see page 55 C6100 Series User's Guide 52 - Oki C6100dn | Guide: User's, C6100 Series (Am English) - Page 53
see page 56 Macintosh OS 10.1 & 10.2: see page 56 Macintosh OS 10.3: see page 56 Printer Menu This function is enabled in the Print Menu. The factory default is ON. To change the select the new setting. 7. Press ON LINE to exit the menu and return the printer to standby. C6100 Series User's Guide 53 - Oki C6100dn | Guide: User's, C6100 Series (Am English) - Page 54
tab. 6. Click Advanced. 7. Under Document Options, Printer Features, next to Tray Switch, select ON. 8. Change any other settings as desired. 9. Click OK. 10. The main Print screen appears. 11. Change any other settings as desired. 12. Click OK. 13. The document prints. C6100 Series User's Guide 54 - Oki C6100dn | Guide: User's, C6100 Series (Am English) - Page 55
Windows PCL For more information, see "General Information" on page 52. 1. Open the file you want to print. 2. Click File → Print. 3. Select your printer. 4. Click Properties. 5. Click the Setup tab. 6. Click Paper Feed as desired. 15. Click OK. 16. The document prints. C6100 Series User's Guide 55 - Oki C6100dn | Guide: User's, C6100 Series (Am English) - Page 56
information, see "General Information" on page 52. 1. Open the file you want to print. 2. Click File → Print. 3. Open the drop-down list below Presets. Select Printer Option. 4. At Auto tray switch, make your selection. If the box has a check mark, the feature is ON. If the box is empty, the feature - Oki C6100dn | Guide: User's, C6100 Series (Am English) - Page 57
If Paper Size Check is turned on (enabled), the printer checks whether the size paper loaded in the selected tray matches that required for the document being printed. For more information, Windows, PostScript: see page 58 Windows, PCL: see page 59 Macintosh: see page 60 C6100 Series User's Guide 57 - Oki C6100dn | Guide: User's, C6100 Series (Am English) - Page 58
Windows PostScript 1. Open the file you want to print. 2. Click File → Print. 3. Select your printer. 4. Click Properties. 5. Click the Layout tab. 6. Click Advanced. 7. Under Document Options, Printer Features, settings as desired. 15. Click OK. 16. The document prints. C6100 Series User's Guide 58 - Oki C6100dn | Guide: User's, C6100 Series (Am English) - Page 59
Windows PCL 1. Open the file you want to print. 2. Click File → Print. 3. Select your printer. 4. Click Properties. 5. Click the Setup tab. 6. Click Paper Feed Options. 7. Click in the box . 14. Change any other settings as desired. 15. Click OK. 16. The document prints. C6100 Series User's Guide 59 - Oki C6100dn | Guide: User's, C6100 Series (Am English) - Page 60
Macintosh 1. Open the file you want to print. 2. Click File → Print. 3. Open the drop-down list below Presets. Select Printer Option. 4. Make your selection for Paper size check. If the box has a check mark, the feature is ON. If the box is empty, the feature - Oki C6100dn | Guide: User's, C6100 Series (Am English) - Page 61
47 lb. US Bond 98 lb. Index, 176 g/m² metric • Print Sequence Pages are printed in reading order Page 1 first; last page on top, facing down C6100 Series User's Guide 61 - Oki C6100dn | Guide: User's, C6100 Series (Am English) - Page 62
(card stock etc.). c53_72_rear3.jpg Open the face up stacker at the rear of the printer and pull out the tray extension. When the face up stacker is open, paper exits via this path, regardless of driver settings. • Capacity up to 100 sheets of standard paper 20 lb. US Bond 42 lb - Oki C6100dn | Guide: User's, C6100 Series (Am English) - Page 63
-page documents, Select "Reverse print order" in your application Print dialog box (Click File → Print → Options). This puts the printed stack in the correct order. C6100 Series User's Guide 63 - Oki C6100dn | Guide: User's, C6100 Series (Am English) - Page 64
Duplex Unit General Information The Duplex Unit enables your printer to print on both sides of the page. See "Duplex Printing" on page 269. C6100 Series User's Guide 64 - Oki C6100dn | Guide: User's, C6100 Series (Am English) - Page 65
tray, you can pull out the 2nd (lower) tray and reload it while the printer is printing. • If you are printing from the 2nd (lower) tray, do while printing. This will cause a paper jam. 1. Remove the paper tray from the printer. c53_11_opntra.jpg 2. Fan the paper to be loaded at the edges (1) and in - Oki C6100dn | Guide: User's, C6100 Series (Am English) - Page 66
3. Load paper print side down. Make sure the rear stopper (1) and paper guides (2) are snug against the paper. c53_13_instlpapr.jpg NOTE Load letterhead paper face down. The top edge is aimed towards the front of the printer. c53_76_trayabc.jpg C6100 Series User's Guide 66 - Oki C6100dn | Guide: User's, C6100 Series (Am English) - Page 67
tray. c53_16_closetray.jpg NOTE To prevent paper jams: • Do not leave space between the paper and the guides and rear stopper. • Do not overfill the paper tray. Capacity depends on the type of paper stock out during printing (except as described above for the 2nd tray). C6100 Series User's Guide 67 - Oki C6100dn | Guide: User's, C6100 Series (Am English) - Page 68
(MP Tray/Manual Feed) NOTE The MP Tray will take • a stack of media about 3/8'' (10 mm) high • about 10 envelopes • about 50 transparencies. Do not exceed the 3/8'' (10 mm) media stack height. 1. Open the MP Tray. c53_40_mptrayopen1_crop.jpg c53_41_mptrayopen2_crop.jpg C6100 Series User's Guide 68 - Oki C6100dn | Guide: User's, C6100 Series (Am English) - Page 69
c53_42_mptrayopen3_crop.jpg 2. Press down on the loading platform. c53_87a_mptrayplatformdwn.jpg C6100 Series User's Guide 69 - Oki C6100dn | Guide: User's, C6100 Series (Am English) - Page 70
the printer. Double-sided printing (duplex) load with pre-printed side down and top edge away from the printer (duplex unit must be installed). Envelopes Load print side up (flap down) with top edge to the left and short edge into the printer. You cannot duplex envelopes. C6100 Series User's Guide - Oki C6100dn | Guide: User's, C6100 Series (Am English) - Page 71
4. Press the blue tray latch (1) toward the paper stack to lift the paper platform into the feed position. c53_86_mptraylevercolr.jpg C6100 Series User's Guide 71 - Oki C6100dn | Guide: User's, C6100 Series (Am English) - Page 72
Expectancy See "Specifications" on page 122 Part Numbers Toner Black 43324420 Cyan 43324419 Magenta Yellow 43324418 43324417 Image Drum Black Cyan Magenta Yellow 43381720 43381719 43381718 43381717 Fuser 120 V 230V 43363201 43363202 Belt Belt 43363401 C6100 Series User's Guide 72 - Oki C6100dn | Guide: User's, C6100 Series (Am English) - Page 73
Replace a Toner Cartridge ___________ c53_30_tonergroup.jpg REPLACE TONER nnn: zzzz TONER EMPTY nnn: ZZZZ = 410: YELLOW 411: MAGENTA 412: CYAN 413: BLACK 1. Press the cover release. Open the printer's top cover fully. c53_02_opencvr.jpg C6100 Series User's Guide 73 - Oki C6100dn | Guide: User's, C6100 Series (Am English) - Page 74
of the four cartridges: Cyan (1), Magenta (2), Yellow (3), Black (4). c53_09_lidup.jpg 3. Pull the colored toner release lever on the cartridge to be replaced towards the front of the printer. Shown: replacement of the black toner cartridge c53_74_tonerlvropen.jpg C6100 Series User's Guide 74 - Oki C6100dn | Guide: User's, C6100 Series (Am English) - Page 75
the toner cartridge. Discard it in accordance with your local regulations. c53_80_tonrout.jpg Install a Toner Cartridge 5. Unpack the new toner cartridge. Gently shake it from side to side to loosen and distribute the toner evenly inside the cartridge. c53_04_shk_tnr.jpg C6100 Series User's Guide 75 - Oki C6100dn | Guide: User's, C6100 Series (Am English) - Page 76
open the toner release slot and spill toner. 7. Hold the cartridge by its top center with the colored release lever to the right. Insert the left end of the cartridge into the top of the image drum. Push it firmly against the spring on the drum unit. c53_80_tonrout.jpg C6100 Series User's Guide 76 - Oki C6100dn | Guide: User's, C6100 Series (Am English) - Page 77
c53_73_tonerdrum.jpg 8. Lower the right end of the cartridge into the image drum unit. Press it firmly down in place. Then, push the colored lock lever back to open the toner slot and lock it in place. c53_75_tonrlvrclose.jpg C6100 Series User's Guide 77 - Oki C6100dn | Guide: User's, C6100 Series (Am English) - Page 78
lever again. To avoid toner spillage, DO NOT open the toner release lever until the toner cartridge is firmly seated in the image drum. 9. Use the provided LED lens cleaner. Gently wipe the LED. c5x_ledarray_bw.jpg 10. Close and latch the top cover. c53_45_latchcvr.jp g C6100 Series User's Guide 78 - Oki C6100dn | Guide: User's, C6100 Series (Am English) - Page 79
352: CYAN 353: BLACK Important! You must replace the toner cartridge when you replace the image drum. The life expectancy of the cartridge will be reduced as the toner charges the new drum. 1. Press the cover release and open the top cover fully. c53_02_opencvr.jpg C6100 Series User's Guide 79 - Oki C6100dn | Guide: User's, C6100 Series (Am English) - Page 80
it. 2. Note the positions of the four image drums: Cyan (1), Magenta (2), Yellow (3), Black (4). c53_09_lidup.jpg 3. Lift the image drum, complete with its toner cartridge, out of the printer. Discard it in accordance with your local regulations. c53_53_drumremove.jpg C6100 Series User's Guide 80 - Oki C6100dn | Guide: User's, C6100 Series (Am English) - Page 81
4. Unpack the new image drum. CAUTION! Image drum handling The image drum contains toner. To avoid spilling toner, be careful to keep it upright. c53_31_drum.jpg, Checkmark.bmp c53_79_drumtilt_3.jpg c53_78_drumtilt_2.jpg C6100 Series User's Guide 81 - Oki C6100dn | Guide: User's, C6100 Series (Am English) - Page 82
the printer for longer than 5 minutes, place the image drum inside a black plastic bag or carefully place it in a drawer or cabinet to keep it away from light. 5. Grasp the white tape tab and peel the tape off the drum. c53_28_removedrumtape.jpg 6. Remove the paper sheet. c53_26removepaper.jpg C6100 - Oki C6100dn | Guide: User's, C6100 Series (Am English) - Page 83
7. Remove the clear plastic film. c53_25_removeclearsheet.jpg 8. If present, remove the silica gel pack. c53_24_removejell.jpg C6100 Series User's Guide 83 - Oki C6100dn | Guide: User's, C6100 Series (Am English) - Page 84
9. Place the image drum in the printer. c53_84_removedrumwithorange.jpg 10. Remove the orange drum seal. c53_83_removeorangething.jpg C6100 Series User's Guide 84 - Oki C6100dn | Guide: User's, C6100 Series (Am English) - Page 85
11. Install the new toner cartridge in the image drum. See "Install a Toner Cartridge" on page 75. c53_04_shk_tnr_CROP.JPG c53_05_remv_tape_CROP.jpg c53_80_tonrout_CROP.JPG c53_75crop_tonrlvrclose.jpg C6100 Series User's Guide 85 - Oki C6100dn | Guide: User's, C6100 Series (Am English) - Page 86
12. Use the provided LED lens cleaner. Gently wipe the LED. c5x_ledarray_bw.jpg 13. Close and latch the top cover. c53_45_latchcvr.jpg C6100 Series User's Guide 86 - Oki C6100dn | Guide: User's, C6100 Series (Am English) - Page 87
. Hold it only by its handle, which is only mildly warm to the touch. If in doubt, switch the printer off. Wait at least 10 minutes for the fuser to cool before opening the printer cover. 1. Press the cover release. Fully open the printer's top cover. c53_02_opencvr.jpg C6100 Series User's Guide 87 - Oki C6100dn | Guide: User's, C6100 Series (Am English) - Page 88
the front of the printer. c53_59_fuser1.jpg 3. Hold the fuser by its handle. Lift the fuser out of the printer. If the fuser is still warm, place it on a flat surface which will not be damaged by heat. After letting the fuser cool down, discard it. c53_60_fuser2.jpg C6100 Series User's Guide 88 - Oki C6100dn | Guide: User's, C6100 Series (Am English) - Page 89
the orange transport lock to the left to release it. You'll hear it snap. Remove it. c53_104_fuser_transport_loc.jpg 6. Hold the new fuser by the handle. The fuser pressure release lever (1) should be on the right. Lower the fuser into the printer. c53_60a_fuser2.jpg C6100 Series User's Guide 89 - Oki C6100dn | Guide: User's, C6100 Series (Am English) - Page 90
7. Push the two blue retaining levers (1) toward the rear of the printer to lock the fuser in place. c53_61a_fuser3.jpg 8. Close and latch the top cover. c53_45_latchcvr.jpg C6100 Series User's Guide 90 - Oki C6100dn | Guide: User's, C6100 Series (Am English) - Page 91
! If the printer has been powered on, the fuser is HOT. This area is clearly labelled. Do not touch it. 2. Note the positions of the four image drums: Cyan (1), Magenta (2), Yellow (3), Black (4). It is essential that they go back in the correct order! c53_09_lidup.jpg C6100 Series User's Guide 91 - Oki C6100dn | Guide: User's, C6100 Series (Am English) - Page 92
to very bright room lighting. • Do not expose it to normal room light for more than 5 minutes. • If the image drum must be out of the printer for longer than 5 minutes, place the image drum inside a black plastic bag or carefully place it in a drawer or cabinet to keep it away from light. 4. Locate - Oki C6100dn | Guide: User's, C6100 Series (Am English) - Page 93
5. Turn the two locks about 45° counterclockwise to release the belt. c53_49_belt2.jpg 6. Pull up the handle and lift the belt unit out of the printer. c53_50_belt3.jpg 7. Unpack the new belt unit. Hold it with the blue handle toward the front of the printer. C6100 Series User's Guide 93 - Oki C6100dn | Guide: User's, C6100 Series (Am English) - Page 94
8. Place the drive gear at the back of the belt unit in the gear at the left rear corner of the printer. Lower the belt unit into the printer. c53_51_belt4.jpg 9. Turn the two belt locks about 45° clockwise to secure the belt unit in place. c53_48_belt1.jpg C6100 Series User's Guide 94 - Oki C6100dn | Guide: User's, C6100 Series (Am English) - Page 95
10. Place the four image drums/toner cartridges back in the printer (1 = Cyan, 2 = Magenta, 3 = Yellow, 4 = Black). It is essential that they go back in the correct order! c53_09_lidup.jpg 11. Close and latch the top cover. c53_45_latchcvr.jpg C6100 Series User's Guide 95 - Oki C6100dn | Guide: User's, C6100 Series (Am English) - Page 96
printer's operator panel and displayed in the LCD window. Many of these settings can be overridden by settings in the printer driver. However, several of the driver settings can be left at "Printer 3. Press ENTER. 4. The Menu Map prints. The printer goes back on line. C6100 Series User's Guide 96 - Oki C6100dn | Guide: User's, C6100 Series (Am English) - Page 97
the display. NOTE The menus and their various listings vary depending on which options you have installed on your printer. 3. Press ENTER to enter the menu. 4. Use +/ - to move up and down through the in a different menu, press BACK again, then follow steps 2 through 7. C6100 Series User's Guide 97 - Oki C6100dn | Guide: User's, C6100 Series (Am English) - Page 98
Example: Power Save Time To change the time interval for the printer to wait before going into Power Save mode (default setting is 60 MIN): 1. Press + to enter the * 7. Press ON LINE to engage the new setting and to exit the menu. The printer returns to standby mode. C6100 Series User's Guide 98 - Oki C6100dn | Guide: User's, C6100 Series (Am English) - Page 99
Reset to Factory Defaults NOTE ... = keep pressing the button repeatedly until you see the display indicated. To reset the printer menu to its original default settings: 1. Press + to enter the Menu mode. 2. Press + ... MAINTENANCE MENU 3. Press ENTER. MENU RESET Execute 4. Press ENTER. 5. The - Oki C6100dn | Guide: User's, C6100 Series (Am English) - Page 100
Menu ____ Information Menu Item PRINT MENU MAP DEMO1 Action EXECUTE EXECUTE Explanation Prints the MenuMap (menu listing) with current settings shown. Information about your printer is also shown at the top of each MenuMap page. Prints the built-in Demo page. C6100 Series User's Guide 100 - Oki C6100dn | Guide: User's, C6100 Series (Am English) - Page 101
contain identical print media, the printer can switch to an alternate COLOR SPEED Sets the print engine speed. If you are printing only color documents, switch to COLOR SPEED. AUTO SPEED sets the speed of printing based on whether the first page is color or monochrome. C6100 Series User's Guide - Oki C6100dn | Guide: User's, C6100 Series (Am English) - Page 102
loaded in optional Tray 2. ROUGH LIGHT, MEDIUM, HEAVY, ULTRA HEAVY Adjusts the printer for the weight of paper stock loaded in the tray. See "Driver Settings" on page 11. If the Ultra Heavy setting does not give proper toner fusion, you can try the Label settings. C6100 Series User's Guide 102 - Oki C6100dn | Guide: User's, C6100 Series (Am English) - Page 103
HEAVY, ULTRA HEAVY Adjusts the printer for the weight of paper stock loaded in the tray. See "Driver Settings" on page 11. If the Ultra Heavy setting does not give proper toner fusion, you can try one sheet at a time from the Multi-Purpose Tray- for banner printing. C6100 Series User's Guide 103 - Oki C6100dn | Guide: User's, C6100 Series (Am English) - Page 104
: • at power on • when a new image drum or toner cartridge is installed • at intervals of 100, 300 and 500 drum counts Auto adjustment takes up to 55 seconds. Switch to manual only if you wish to initiate Density Control manually using the printer menu. ADJUST DENSITY [EXECUTE] Selecting this will - Oki C6100dn | Guide: User's, C6100 Series (Am English) - Page 105
will wait for paper to be fed before cancelling the job. Specifies how many seconds the printer will wait when received data pauses before forcing a page eject. Specifies whether the printer should continue printing after a low toner condition is detected. If you change this to STOP, when low - Oki C6100dn | Guide: User's, C6100 Series (Am English) - Page 106
SERIAL NUMBER Settings ENABLE DISABLE 480Mbps 12Mbps ENABLE DISABLE Explanation Enables or disables the SOFT RESET command. Sets the maximum transfer speed for the USB interface. ENABLE allows your computer to identify the printer by its USB interface serial number. C6100 Series User's Guide 106 - Oki C6100dn | Guide: User's, C6100 Series (Am English) - Page 107
settings are shown in bold. Item TCP/IP NETBEUI IP ADDRESS SET Settings ENABLE DISABLE ENABLE DISABLE AUTO MANUAL IP ADDRESS xxx.xxx.xxx.xxx Default = 198.168.100.100 SUBNET MASK xxx.xxx.xxx.xxx Default will not appear in the menu if TCP/IP is set to DISABLE. C6100 Series User's Guide 107 - Oki C6100dn | Guide: User's, C6100 Series (Am English) - Page 108
Small = Local network AUTO NEGOTIATE 100BASE-TX FUL 100BASE-TX HALF 10BASE-T FULL 10BASE-T HALF Sets full or half duplex for communication via a network hub. C6100 Series User's Guide 108 - Oki C6100dn | Guide: User's, C6100 Series (Am English) - Page 109
Memory Menu Note: Factory default settings are shown in bold. Item Settings RECEIVE BUF SIZE AUTO 0.5MB 1MB 2MB 4MB 8MB 16MB Explanation Sets the size of the receive buffer. C6100 Series User's Guide 109 - Oki C6100dn | Guide: User's, C6100 Series (Am English) - Page 110
Explanation X ADJUST Y ADJUST DUPLEX X ADJUST† DUPLEX Y ADJUST† DRUM CLEANING -2.00MILLIMETER TO +2.00MILLIMETER Default = 0.00 -2.00MILLIMETER TO sheet to print, cleaning the drum prior to printing. Careful! Leaving this set to ON will reduce the image drum life. C6100 Series User's Guide 110 - Oki C6100dn | Guide: User's, C6100 Series (Am English) - Page 111
COLOR SETTING Settings Explanation [EXECUTE] Resets menus to the default settings. [EXECUTE] Saves current menu settings as default values. At confirmation prompt, press ENTER to confirm save, or CANCEL. ENABLE DISABLE Change this setting to Disable if you do not want the printer for color - Oki C6100dn | Guide: User's, C6100 Series (Am English) - Page 112
installed. Item TOTAL PAGE COUNT TRAY1 PAGE COUNT TRAY2 PAGE COUNT† MPT PAGE COUNT COLOR PAGE COUNT MONO PAGE COUNT K DRUM LIFE C DRUM LIFE M DRUM LIFE Y DRUM LIFE BELT LIFE FUSER LIFE K TONER C TONER M TONER Y TONER Explanation The total number of pages printed. The total number of pages fed from - Oki C6100dn | Guide: User's, C6100 Series (Am English) - Page 113
[EXECUTE] [EXECUTE] 1 OFF TRAY1 ON DOWN DO NOT USE ENABLE AUTO SPEED LETTER PLAIN MEDIUM LETTER PLAIN MEDIUM LETTER PLAIN MEDIUM INCH 8.5 INCH 11.0 INCH C6100 Series User's Guide 113 - Oki C6100dn | Guide: User's, C6100 Series (Am English) - Page 114
C REG FINE AJST M REG FINE AJST Y REG FINE AJST POW SAVE TIME CLRABLE WARNING MANUAL TIMEOUT WAIT TIMEOUT LOW TONER JAM RECOVERY ERROR REPORT SOFT RESET SPEED Default Setting AUTO [EXECUTE] [EXECUTE] 0 0 0 60 MIN ON 60 SEC 90 SEC CONTINUE ON OFF DISABLE 480Mbps C6100 Series User's Guide 114 - Oki C6100dn | Guide: User's, C6100 Series (Am English) - Page 115
ENABLE DISABLE AUTO 192.168.100.100 255.255.255.000 192.168.100.254 [EXECUTE] ENABLE ENABLE ENABLE ENABLE NORMAL AUTO NEGOTIATE AUTO [EXECUTE] C6100 Series User's Guide 115 - Oki C6100dn | Guide: User's, C6100 Series (Am English) - Page 116
DUPLEX X ADJUST† DUPLEX Y ADJUST† DRUM CLEANING MENU RESET SAVE MENU POWER SAVE PAPER BLACK SET PAPER COLOR SET TRNSPR BLACK SET TRANSPR COLOR SET Default Setting 0.00 MILLIMETER 0.00 MILLIMETER 0.00 MILLIMETER 0.00 MILLIMETER OFF [EXECUTE] [EXECUTE] ENABLE 0 0 0 0 C6100 Series User's Guide 116 - Oki C6100dn | Guide: User's, C6100 Series (Am English) - Page 117
DRUM LIFE M DRUM LIFE Y DRUM LIFE BELT LIFE FUSER LIFE K TONER C TONER M TONER Y TONER Default Setting nnnn nnnn nnnn nnnn nnnn nnnn REMAINING nn% REMAINING nn% REMAINING nn% REMAINING nn% REMAINING nn% REMAINING nn% REMAINING nn% REMAINING nn% REMAINING nn% REMAINING nn% C6100 Series User's Guide - Oki C6100dn | Guide: User's, C6100 Series (Am English) - Page 118
.jpg Oki 70051601 (256 MB) Oki 70051701 (512 MB) The basic printer comes equipped with 256 MB of main memory. This can be upgraded with an additional memory board containing • 256 MB, increasing the memory to 512 MB or • 512 MB, increasing the memory to 768 MB. C6100 Series User's Guide 118 - Oki C6100dn | Guide: User's, C6100 Series (Am English) - Page 119
Duplex Unit Oki 43347501 The Duplex Unit enables your printer to print on both sides of the page. See "Duplex Printing" on page 269. C6100 Series User's Guide 119 - Oki C6100dn | Guide: User's, C6100 Series (Am English) - Page 120
Hard Disk Drive Oki 70043502 The hard disk drive enables • spooled printing • verified printing C6100 Series User's Guide 120 - Oki C6100dn | Guide: User's, C6100 Series (Am English) - Page 121
Second Paper Tray c53_43_opttray2.jpg Oki 43347601 The second paper tray takes: • Up to 530 sheets of 20-lb. paper. • All the same size media as Tray 1 except A6. • Paper weight range 16 to 57 lbs. (60 to 203 g/m2). C6100 Series User's Guide 121 - Oki C6100dn | Guide: User's, C6100 Series (Am English) - Page 122
(20-lb. [75 g/ m²] paper) Paper weight Range Paper output Printer life 17.13'' W x 24.45'' D x 15.73'' 63.3 lbs. (28.7 Kg) • 26 pages per minute (ppm) color • 32 ppm monochrome • For Transparencies: 9 ppm color, 10 ppm monochrome 600 dpi or 600 x 1200 dpi PCL5e, IBM PPR C6100 Series User's Guide 122 - Oki C6100dn | Guide: User's, C6100 Series (Am English) - Page 123
at 5% coverage (equivalent to an average business letter) Average: 6,000 pages per month Toner life Approximately 5,000 pages at 5% coverage Image drum life 20,000 pages at 3 pages per job Belt life 60,000 letter-size pages Fuser life 60,000 letter-size pages C6100 Series User's Guide 123 - Oki C6100dn | Guide: User's, C6100 Series (Am English) - Page 124
information to help you deal with problems that may arise when using the printer. Troubleshooting is divided into the following sections: • "Display Panel Messages" see page 125 • "Paper Jams" see page 129 • "Print Quality Problems" see page 150 • "USB Problems" see page 154 • "Application error - Oki C6100dn | Guide: User's, C6100 Series (Am English) - Page 125
belt unit is not properly installed. Open the top cover and lift out the black (K) and Yellow (Y) image drums, placing them on a flat surface. Check to be sure that the belt unit latches are fully in the latched position: c53_48_belt1.jpg then reinstall the image drums. C6100 Series User's Guide - Oki C6100dn | Guide: User's, C6100 Series (Am English) - Page 126
be sure that the fuser unit is properly seated in the printer and that the lock levers are pushed all the way toward the back of the printer: CHECK MP TRAY 390 are firmly closed. Tray 1 is not installed in the printer. Install the missing tray. Tray 1 is not Make sure the tray is properly installed - Oki C6100dn | Guide: User's, C6100 Series (Am English) - Page 127
, fuser, toner, image drum) is nearing end of life. Make sure you have a replacement unit on hand. POWER ON/OFF 300: NETWORK ERROR An error has occurred involving the network. Shut the printer off, then turn it back on. If the message still appears, check with your network administrator. C6100 - Oki C6100dn | Guide: User's, C6100 Series (Am English) - Page 128
xxx (e.g., belt, fuser, image drum) will need to be replaced soon. Replace the indicated item. An error has occurred which requires service. YYYY = the general cause. nnn = error number. Try turning off the printer then turning it back on. If this does not remedy the problem, write down - Oki C6100dn | Guide: User's, C6100 Series (Am English) - Page 129
tells you where the first sheet is jammed. All jammed sheets must be removed in order to restore the printer to normal operation. Once you clear a jam and close the cover, you may see a new jam message Jam 390: see page 146 • Jam 391: see page 148 • Jam 392: see page 148 C6100 Series User's Guide 129 - Oki C6100dn | Guide: User's, C6100 Series (Am English) - Page 130
on page 122. Remove the creased / wrinkled paper from the feed tray. Adjust tray or manual feed guides. Correct paper feed selection in the Properties Setup tab in the printer driver. Jam is cleared, but printer does not print. Possible cause Remedy The top cover has not remained open until all - Oki C6100dn | Guide: User's, C6100 Series (Am English) - Page 131
Jam 370, 373 and 383 OPEN DUPLEX COVER nnn: PAPER JAM nnn = 370, 373, 383 1. Press the duplex cover release. Open the duplexer cover. c53_54_duplex1.jpg 2. Remove any jammed sheets. c53_65a_jamduplex1.jpg C6100 Series User's Guide 131 - Oki C6100dn | Guide: User's, C6100 Series (Am English) - Page 132
c53_99a_jam37x.jpg c53_88a_jam.jpg 3. Close the duplex unit cover. c53_95a_duplexjam.jpg C6100 Series User's Guide 132 - Oki C6100dn | Guide: User's, C6100 Series (Am English) - Page 133
Jam 371 OPEN DUPLEX COVER 371: Paper Jam 1. Turn off the printer. 2. Pull out the duplexer. c53_96_jam371a.jpg 3. Pull the duplexer lid to unlock it. c53_97_jam371b.jpg C6100 Series User's Guide 133 - Oki C6100dn | Guide: User's, C6100 Series (Am English) - Page 134
4. Open the lid. Remove the jammed sheet. c53_98_jam371c.jpg 5. Close the lid. Push it back to lock it in place. c53_97_jam371b.jpg 6. Push the duplexer back into the printer. c53_96_jam371a.jpg 7. Turn on the printer. C6100 Series User's Guide 134 - Oki C6100dn | Guide: User's, C6100 Series (Am English) - Page 135
Jam 372 and 380 OPEN FRONT COVER nnn: PAPER JAM nnn = 372 or 380. 1. Lift the front cover release. Pull open the front cover. c53_58_frcvropen.jpg 2. Remove any jammed sheets. c53_66_jamfront.jpg C6100 Series User's Guide 135 - Oki C6100dn | Guide: User's, C6100 Series (Am English) - Page 136
3. Close the front cover. c53_57_frcvrclose.jpg C6100 Series User's Guide 136 - Oki C6100dn | Guide: User's, C6100 Series (Am English) - Page 137
COVER 381: Paper Jam 1. Press the cover release. Fully open the printer's top cover. c53_02_opencvr.jpg 2. Note the positions of the four image drums: Cyan (1), Magenta (2), Yellow (3), Black (4). It is essential that they go back in the correct order! c53_09_lidup.jpg C6100 Series User's Guide 137 - Oki C6100dn | Guide: User's, C6100 Series (Am English) - Page 138
has been powered on, the fuser is hot. This area is clearly labelled. Do not touch it. 3. Lift each of the image drum/toner cartridge units out of the printer. Place them on a flat surface in a safe place away from direct sources of heat and light. c53_53_drumremove.jpg C6100 Series User's Guide 138 - Oki C6100dn | Guide: User's, C6100 Series (Am English) - Page 139
be out of the printer for longer than 5 minutes, place the image drum inside a black plastic bag or carefully place it in a drawer or cabinet to keep it away from light. 4. Remove any sheets of paper on the belt unit. c53_63_jambelt1.jpg CAUTION! Do not use any sharp or abrasive objects to separate - Oki C6100dn | Guide: User's, C6100 Series (Am English) - Page 140
back. See step 4 under "Jam 382" . To remove a sheet trapped in the fuser: 1. Grasp the edge of the sheet. 2. Push the fuser pressure release lever (1) towards the front and down. 3. Lift out the sheet. 4. Let go of the fuser pressure release lever. c53_64_jambelt2.jpg C6100 Series User's Guide 140 - Oki C6100dn | Guide: User's, C6100 Series (Am English) - Page 141
5. Place the four image drums/toner cartridges back in the printer. Be sure to place them in the proper sequence (1 = Cyan, 2 = Magenta, 3 = Yellow, 4 = Black). c53_09_lidup.jpg 6. Close the top cover. c53_45_latchcvr.jpg C6100 Series User's Guide 141 - Oki C6100dn | Guide: User's, C6100 Series (Am English) - Page 142
Jam 382 OPEN TOP COVER 382: Paper Jam 1. Open the top cover. c53_02_opencvr.jpg 2. Gently pull the sheet out. • If the sheet does not come out easily, go to the next step. • If the sheet does come out, close the cover. c53_68_jamtop_crop.jpg C6100 Series User's Guide 142 - Oki C6100dn | Guide: User's, C6100 Series (Am English) - Page 143
3. Lower the rear exit tray. c53_70a_rear1.jpg 4. Pull out the jammed sheet. c53_67a_jamrear.jpg C6100 Series User's Guide 143 - Oki C6100dn | Guide: User's, C6100 Series (Am English) - Page 144
partially jammed in the fuser. To get it out, reach around the top cover and press down on the fuser pressure release lever (1) before pulling the sheet out. Then let go of the fuser pressure release lever. c53_91_jam382_3.jpg 5. Close the rear exit. c53_70a_rear1.jpg C6100 Series User's Guide 144 - Oki C6100dn | Guide: User's, C6100 Series (Am English) - Page 145
6. Close the top cover. c53_45_latchcvr.jpg C6100 Series User's Guide 145 - Oki C6100dn | Guide: User's, C6100 Series (Am English) - Page 146
Jam 390 CHECK MP TRAY 390: Paper Jam Sheet has just entered the printer 1. Gently pull the sheet out of the printer. c53_81_jammptray.jpg Sheet can't easily be pulled out from the front 1. Lift the front cover release. Pull open the front cover. c53_102_jam390.jpg C6100 Series User's Guide 146 - Oki C6100dn | Guide: User's, C6100 Series (Am English) - Page 147
2. Remove any jammed sheets. c53_94_jam390.jpg 3. Close the front cover. c53_102_jam390.jpg C6100 Series User's Guide 147 - Oki C6100dn | Guide: User's, C6100 Series (Am English) - Page 148
Jam 391 and 392 OPEN FRONT COVER nnn: PAPER JAM nnn = 391 or 392 1. Pull out the appropriate tray. 391 = Tray 1 392 = Optional Tray 2. 2. Remove any sheet jammed as it exited the tray. c53_101a_jam392.jpg, c53_100a_jam391.jpg 391 392 C6100 Series User's Guide 148 - Oki C6100dn | Guide: User's, C6100 Series (Am English) - Page 149
3. Open the front cover. c53_58_frcvropen.jpg 4. Remove any jammed sheets. c53_66_jamfront_crop.jpg 5. Close the front cover. c53_57a_frcvrclose.jpg C6100 Series User's Guide 149 - Oki C6100dn | Guide: User's, C6100 Series (Am English) - Page 150
Problems Blurred print (letter edges) Possible cause Remedy LED is dirty. Clean LED with lens cleaner or soft tissue. Cannot print desired Replace toner cartridge. See "Replace a Toner color because toner sure that each toner cartridge is fully seated and that each toner cartridge lock lever - Oki C6100dn | Guide: User's, C6100 Series (Am English) - Page 151
cartridge. See "Replace a Toner Cartridge" on page 73. The paper is moist. Store paper within specified temperature and humidity levels. See "Specifications" on page 122. Paper is unsuitable for Use recommended paper. See "Paper (Print printer. Media)" on page 10. C6100 Series User's Guide 151 - Oki C6100dn | Guide: User's, C6100 Series (Am English) - Page 152
the printer and store it in a dark place for several hours. If this does not work, replace the image drum. See "Replace an Image Drum" on page 79. Lines, White (Vertical) Remedy Clean LED head with lens cleaner or soft tissue. Change toner cartridge. Change image drum. C6100 Series User's Guide - Oki C6100dn | Guide: User's, C6100 Series (Am English) - Page 153
Careful! Fuser my be HOT! Open the top cover and check to be sure that all the packing materials were removed from the fuser. See "Replace the Fuser" on page 87. Ultra Heavy If the Ultra Heavy setting does not give proper toner fusion, you can try the Label settings. C6100 Series User's Guide 153 - Oki C6100dn | Guide: User's, C6100 Series (Am English) - Page 154
Problems Cannot configure for USB connection NOTE Windows NT 4.0 does not support USB. Windows 98 upgraded from Windows 95 may not support another cable. A USB hub is being used. The printer cannot be used with a USB hub. Connect the printer and computer directly. The USB cable is installed in - Oki C6100dn | Guide: User's, C6100 Series (Am English) - Page 155
cable is connected. Printer is not selected in the printer driver. Select the printer or set to default printer. Incorrect printer Delete this printer driver and install correct driver is being used. printer driver from the CD supplied with your printer. C6100 Series User's Guide 155 - Oki C6100dn | Guide: User's, C6100 Series (Am English) - Page 156
. Print file is corrupted. Memory is insufficient for application. Printer driver is incorrectly configured. Remedy Upgrade the application. Close all other applications. Correct or recreate the file. Increase computer's memory. Correctly configure printer driver. C6100 Series User's Guide 156 - Oki C6100dn | Guide: User's, C6100 Series (Am English) - Page 157
. Place the printer on a stable, level surface. There are scraps of Check the inside of the printer and remove paper or other foreign any such objects. matter inside the printer. The top cover is not firmly shut. Press the left and right sides of the top cover. C6100 Series User's Guide 157 - Oki C6100dn | Guide: User's, C6100 Series (Am English) - Page 158
TIME). The image drum carries out a cleaning process to ensure print quality, which takes time. Wait until this process has been completed. The fuser unit adjusts temperature, which takes time. Wait until this process has been completed. The printer is processing data from another interface - Oki C6100dn | Guide: User's, C6100 Series (Am English) - Page 159
correct the problem. Printing is slow Possible cause Remedy Print processing is carried out by the computer. Print resolution is set high. Data is too complex. Use a computer with a faster processor. Set lower print resolution in the printer driver Job Options tab. Simplify data. C6100 Series - Oki C6100dn | Guide: User's, C6100 Series (Am English) - Page 160
printed pages. For more information, Windows: See page 160 Macintosh: See page 161 Windows 1. Open the file you want to print. 2. Click File → Print. 3. Select your printer. 4. Click Properties. 5. Click other settings as desired. 12. Click OK. 13. The document prints. C6100 Series User's Guide 160 - Oki C6100dn | Guide: User's, C6100 Series (Am English) - Page 161
Macintosh 1. Open the file you want to print. 2. Click File → Print. 3. Open the drop-down list below Presets. Select Printer Option. 4. Select "Run maintenance cycle before printing". If the box has a check mark, the feature is ON. If the box is empty, the feature is - Oki C6100dn | Guide: User's, C6100 Series (Am English) - Page 162
driver settings. Driver settings override printer menu settings. Install Windows and Macintosh See your printed Setup Guide for information on installing printer drivers. The CD(s) supplied with your printer contain: Drivers Color Utilities Network Utilities Manuals C6100 Series User's Guide - Oki C6100dn | Guide: User's, C6100 Series (Am English) - Page 163
during the installation. Set the driver you plan to use most of the time to be your Windows default driver. Most applications allow you to choose a different printer from within the print dialog, so you can use the alternative driver for printing whenever you need to. C6100 Series User's Guide 163 - Oki C6100dn | Guide: User's, C6100 Series (Am English) - Page 164
to a single print job, 1. Open the file you want to print. 2. Click File → Print. 3. Select your printer. 4. Click Properties. 5. Proceed with changing the driver settings. 6. Click OK until you return to the main Printers screen. 7. Click OK. 8. The document prints. C6100 Series User's Guide 164 - Oki C6100dn | Guide: User's, C6100 Series (Am English) - Page 165
the driver settings you use for various printing situations. You can save up to 14 named drivers. For more information, Windows, PostScript: You cannot make changes to the driver settings and save them under a named driver. Windows, PCL: see page 166 Macintosh: see page 169 C6100 Series User's Guide - Oki C6100dn | Guide: User's, C6100 Series (Am English) - Page 166
and save them under a named driver. PCL 1. Next: Windows XP: Click Start → Settings → Control Panel → Printer and Other Hardware → Printers & Faxes. Windows Me/NT/XP/98/2000: Click Start → Settings → Printer. 2. Next: Windows XP: Right click OKI C6100 Series (PCL). Select Printing Preferences - Oki C6100dn | Guide: User's, C6100 Series (Am English) - Page 167
drivers. Before making changes to driver settings, always check to see if a Named Driver is being used. To do this: 1. Open the file you want to print. 2. Click File → Print. 3. Select your printer Driver. proceed with your changes and save them under a new Named Driver. C6100 Series User's Guide 167 - Oki C6100dn | Guide: User's, C6100 Series (Am English) - Page 168
Restore Default Driver Settings _______ Windows Single Print Jobs When working in the drivers, many of the screens have a Default button. Click Default to restore the driver settings to the factory defaults. C6100 Series User's Guide 168 - Oki C6100dn | Guide: User's, C6100 Series (Am English) - Page 169
Macintosh General Information Summary Macintosh OS 10.2 and 10.3 The "Summary" lists all the printer settings currently made for your print job. See "Summary" on page 170. Presets heavy paper, labels, envelopes and transparencies. See "Paper Handling" on page 172. C6100 Series User's Guide 169 - Oki C6100dn | Guide: User's, C6100 Series (Am English) - Page 170
Summary" lists all the printer settings currently made for part of the Standard Preset. Create a New Preset 1. Make all the printer settings you wish to save as a Preset. 2. Select Summary. Review any needed changes in the printer settings. 3. Review the Summary screen to confirm that the settings are - Oki C6100dn | Guide: User's, C6100 Series (Am English) - Page 171
urgency of your print job. If your job competes with other documents in the print queue, this setting determines the printing priority of your job. C6100 Series User's Guide 171 - Oki C6100dn | Guide: User's, C6100 Series (Am English) - Page 172
transparencies. Print All Pages Odd numbered pages Even numbered pages Use this to print only the odd or only the even pages in your document. C6100 Series User's Guide 172 - Oki C6100dn | Guide: User's, C6100 Series (Am English) - Page 173
Printer Features Overview Banners: see page 174 Black Finish: see page 178 Black Overprint: see page 181 Black Printing: see page 184 Booklets: see page 191 Collating: see page 196 Color Save as File: see page 296 Toner Saving: see page 301 Watermarks: see page 305 C6100 Series User's Guide 173 - Oki C6100dn | Guide: User's, C6100 Series (Am English) - Page 174
) [Manual Feed], on page 45 Face Up (Rear Exit), on page 62 Specifications • Length: up to 47'' (1.2 m) • Width Range = 8¼ to 8½'' (210 to 215.9 mm) • Weight Range = 28 to 34 lb. US Bond (105 to 128 g/m2) • Path = Rear Exit (Face Up Stacker) only • Feed one sheet at a time. C6100 Series User's Guide - Oki C6100dn | Guide: User's, C6100 Series (Am English) - Page 175
Windows PostScript For important information about printing banners, see General Information, on page 174. Before you print a banner, you must set Multi Purpose Tray is Manual feed to ON in the printer driver. The default is OFF. The printer OK. 16. The document prints. C6100 Series User's Guide 175 - Oki C6100dn | Guide: User's, C6100 Series (Am English) - Page 176
Windows PCL For important information about printing banners, see General Information, on page 174. Before you print a banner, you must set Multi Purpose Tray is Manual feed to ON in the printer driver. The default is OFF. The printer . Click OK. 16. The document prints. C6100 Series User's Guide 176 - Oki C6100dn | Guide: User's, C6100 Series (Am English) - Page 177
→ Print. 3. Open the drop-down list below Presets. Select Printer Option. 4. Select "Multi Purpose Tray is Manual feed". If the box has a check mark, the feature is ON. If the box is empty, the feature is OFF. 5. Change any other settings as desired. 6. Click Print. C6100 Series User's Guide 177 - Oki C6100dn | Guide: User's, C6100 Series (Am English) - Page 178
Your printer can print black with either a glossy (shiny) finish or a matte (dull/flat finish). Windows: Individual Print Jobs NOTE The driver's color options are only designed to work with RGB data. 1. other settings as desired. 7. Click Print. 8. The document prints. C6100 Series User's Guide 178 - Oki C6100dn | Guide: User's, C6100 Series (Am English) - Page 179
Printers [Printers and Faxes in Windows XP]. 2. Right-click the printer name. 3. Next Windows 98/Me: Select Properties. Click Printer Properties. Windows 2000/XP: Select Properties. Click Printing Preferences. Windows NT 4.0: Select Document Defaults. 4. Click on the Color tab. 5. At Advanced Color - Oki C6100dn | Guide: User's, C6100 Series (Am English) - Page 180
Mode, select Advanced Color. 5. Choose the type of black finish. Gloss This option produces printing with a more glossy finish. Matte This option uses more Black and less CMYK while producing a flatter black. 6. Change any other settings as desired. 7. Click Print. C6100 Series User's Guide 180 - Oki C6100dn | Guide: User's, C6100 Series (Am English) - Page 181
application • a True Type font • Windows XP, 2000, or NT 4.0 Black Overprint won't work. Replace the True Type font with a printer font. 3. When the background color is very dark, the toner may not fuse correctly. Change the background color to a lighter color. 4. Black Overprint can only be used - Oki C6100dn | Guide: User's, C6100 Series (Am English) - Page 182
printer. 4. Next: Windows XP: Click Advanced. Windows 2000: Go to the next step. Windows Me/98/NT: Click Properties. 5. On the Color tab, click Advanced. 6. Check Black Overprint. Windows 3. Select your printer. 4. Next: Windows XP: Click Advanced. Windows 2000: Go to the next step. Windows Me/98/NT - Oki C6100dn | Guide: User's, C6100 Series (Am English) - Page 183
and you are using PostScript Color Matching. 1. Open the file you want to print. 2. Click File → Print. 3. Select your printer. 4. Open the drop-down menu. Select Printer Functions. 5. By Color Options, select Black Overprint. Click the checkbox to enable the option. C6100 Series User's Guide 183 - Oki C6100dn | Guide: User's, C6100 Series (Am English) - Page 184
General Information NOTE To use Black Generation, Office Color or GraphicPro must be the selected Print Mode. Your printer prints the color black in one of two ways: • Composite Black • True Black Composite Black The cyan, magenta, yellow, and black toners are combined to create composite black. Use - Oki C6100dn | Guide: User's, C6100 Series (Am English) - Page 185
printer. 4. Next: Windows 98 / Me / NT4.0: Click Properties. Windows XP: Click Properties. Windows 2000: Go to the next step. 5. Click the Color tab. 6. Click Office Color Black can appear as a brownish-black. True Black (K) Only black toner is used to print true black. Use True Black when printing - Oki C6100dn | Guide: User's, C6100 Series (Am English) - Page 186
11. The Color tab screen appears. 12. Change any other settings as desired. 13. Click OK. 14. The main Print screen appears. 15. Change any other settings as desired. 16. Click OK. 17. The document prints. C6100 Series User's Guide 186 - Oki C6100dn | Guide: User's, C6100 Series (Am English) - Page 187
. 3. Select your printer. 4. Next: Windows 98 / Me / NT4.0/XP: Click Properties. Windows 2000: Go to the next step. 5. Click the Color tab. 6. Click Graphic 9. Change any other settings as desired. 10. Click OK. 11. The Color tab screen appears. 12. Change any other settings as desired. 13. Click OK - Oki C6100dn | Guide: User's, C6100 Series (Am English) - Page 188
Print. 3. Select your printer. 4. Next: Windows 98 / Me / NT4.0/XP: Click Properties. Windows 2000: Go to the next step. 5. Click the Job Options tab. 6. Click Advanced. 7. At "Always use K toner for 100% Black areas", as desired. 15. Click OK. 16. The document prints. C6100 Series User's Guide 188 - Oki C6100dn | Guide: User's, C6100 Series (Am English) - Page 189
driver operations, for example the AdobePS™ driver. 1. Open the file you want to print. 2. Click File → Print. 3. Select your printer. 4. Open the drop-down menu directly underneath the printer. 5. At Color Option, select Office Color from Black (K) Toner (True Black) Only black toner is used to - Oki C6100dn | Guide: User's, C6100 Series (Am English) - Page 190
Color or Graphic Pro 3. 6. At Black Generation, choose a method. Automatic If Auto is selected, your printer automatically uses the best method (Composite or True Black) to print black, depending on the type of document you are printing. Generation from CMYK Toner Toner (True Black) Only black toner - Oki C6100dn | Guide: User's, C6100 Series (Am English) - Page 191
support booklet printing. Please read "Restrictions", on page 192. For more information, Windows, PostScript: see page 193 Windows, PCL: see page 194 Macintosh OS 9.x: see page 195 Macintosh OS 10.1, 10.2, and 10.3: This feature is not available in these operating systems C6100 Series User's Guide - Oki C6100dn | Guide: User's, C6100 Series (Am English) - Page 192
side]. Example: print a 5½ x 8½ inch booklet on 8½ x 11 inch paper 8. Most applications allow the printer properties to be accessed from within the document print dialog box. Application settings override driver settings. Driver settings override printer menu settings. C6100 Series User's Guide 192 - Oki C6100dn | Guide: User's, C6100 Series (Am English) - Page 193
2. Click File → Print. 3. Select your printer. 4. Next: Windows 98/Me/NT/XP: Click the Properties button. Windows 2000: Go to the next step. 5. Click the Layout tab. 6. Next: Windows 98/Me/NT/XP: Under Pages Per Sheet as desired. 12. Click OK. 13. The document prints. C6100 Series User's Guide 193 - Oki C6100dn | Guide: User's, C6100 Series (Am English) - Page 194
- Print. 3. Select your printer. 4. Next: Windows 2000: Click the Setup button. Windows 98/Me/Nt/XP: Click Properties (or Setup, or your application's equivalent). 5. Next: Windows 2000: Under Finishing Mode, in as desired. 14. Click OK. 15. The document prints. C6100 Series User's Guide 194 - Oki C6100dn | Guide: User's, C6100 Series (Am English) - Page 195
. 6. In the Layout panel, check the box for Duplex print. Macintosh OS 10.1, 10.2, and 10.3 This feature is not available in these operating systems. C6100 Series User's Guide 195 - Oki C6100dn | Guide: User's, C6100 Series (Am English) - Page 196
printer driver. This prevents any conflicts between the software application and the printer driver. NOTE Most applications allow the printer override driver settings. Driver settings override printer menu printers with a hard disk drive will provide greater performance. For more information, Windows - Oki C6100dn | Guide: User's, C6100 Series (Am English) - Page 197
Windows For more information, see "General Information" on page 196. Important If your software application has a collate option, use it instead of the collate option in the printer driver. This prevents any conflicts between the software application and the printer driver. NOTE Most applications - Oki C6100dn | Guide: User's, C6100 Series (Am English) - Page 198
. Driver settings override printer menu settings. 1. Open the file you want to print. 2. Click File → Print. 3. In the General Controls box, by Number of Copies, select the number of copies you want to print. 4. In the Print Option panel, select Collate. 5. Click OK. 6. Print the document. C6100 - Oki C6100dn | Guide: User's, C6100 Series (Am English) - Page 199
. Driver settings override printer menu settings. 1. Open the file you want to print. 2. Click File → Print. 3. By Number of Copies, select the number of copies you want to print. 4. In the Print Function panel, select Collate. 5. Click OK. 6. Print the document. C6100 Series User's Guide 199 - Oki C6100dn | Guide: User's, C6100 Series (Am English) - Page 200
. Application settings override driver settings. Driver settings override printer menu settings. Color reproduction is a complex color matching. See page 203. • how-to information The how-to information explains how to perform color matching with your printer. See page 218. C6100 Series User's Guide - Oki C6100dn | Guide: User's, C6100 Series (Am English) - Page 201
, Me, 2000 and XP have Windows ICM color Management. Mac OS and Mac OS X have Apple ColorSync. 3. Printer Color Management (3). When you print your document and modify settings in the printer driver, the printer performs color adjustments. Important! Only use one color management system if you want - Oki C6100dn | Guide: User's, C6100 Series (Am English) - Page 202
This user guide only discusses the printer color management system. 1 3 2 Windows / Macintosh If you wish to learn more about your application program or operating system color management, please see the documentation that was supplied with your application software or computer. C6100 Series User - Oki C6100dn | Guide: User's, C6100 Series (Am English) - Page 203
the document print dialog box. Application settings override driver settings. Driver settings override printer menu settings. Color reproduction is a complex topic. This background information explains the factors that affect color matching. Background information is divided into these sections - Oki C6100dn | Guide: User's, C6100 Series (Am English) - Page 204
. See page 206. • color settings in your software application. See page 207. • how your software application displays color. See page 207. • color settings in your printer driver. See page 208. • viewing (lighting) conditions. See page 209. • paper type. See page 209. C6100 Series User's Guide 204 - Oki C6100dn | Guide: User's, C6100 Series (Am English) - Page 205
are certain colors (for example, some yellows), that can be printed, but cannot be displayed accurately on a monitor. These differences between monitor colors and printer colors are the main reasons why printed colors do not always match the colors displayed on screen. C6100 Series User's Guide 205 - Oki C6100dn | Guide: User's, C6100 Series (Am English) - Page 206
The default setting for many monitors and television sets. *k = degrees Kelvin, a measurement of temperature Macintosh OS 10.1, 10.2, and 10.3 You can calibrate your monitor's color regimen in System Preferences → Displays → Color. C6100 Series User's Guide 206 - Oki C6100dn | Guide: User's, C6100 Series (Am English) - Page 207
displays color Some graphics applications such as CorelDRAW®, Adobe® Photoshop®, or Macromedia Freehand® may display color differently from "office" applications such as Microsoft® Word. For more information, please see your application's online help or user manual. C6100 Series User's Guide 207 - Oki C6100dn | Guide: User's, C6100 Series (Am English) - Page 208
produce good results for most documents. For Macintosh The install utility provides • a color matching profile for your printer and • a Color Option utility in the print driver. The Auto settings produce good results for most documents. See "Automatic" on page 221. C6100 Series User's Guide 208 - Oki C6100dn | Guide: User's, C6100 Series (Am English) - Page 209
window compared to how they look under standard office fluorescent lighting. Paper Type The type of paper used can also significantly affect the printed color. For example, a printout on recycled paper can look duller than one on specially formulated glossy paper. C6100 Series User's Guide 209 - Oki C6100dn | Guide: User's, C6100 Series (Am English) - Page 210
printing. Some applications override, without warning, any color matching settings in the printer driver. There is no one way to achieve a • photographic images. See page 212. • specific colors (i.e., a company logo). See page 213. • printing vivid colors. See page 214. C6100 Series User's Guide 210 - Oki C6100dn | Guide: User's, C6100 Series (Am English) - Page 211
documents are typically only supported in professional Desktop Publishing and Graphics applications. About the Printer Drivers PCL driver (Windows) PostScript driver (Windows) PostScript driver (Mac) Support for RGB data Yes Yes Yes Support for CMYK Data No Yes Yes C6100 Series User's Guide 211 - Oki C6100dn | Guide: User's, C6100 Series (Am English) - Page 212
a Color Matching Method Matching Photographs RGB only Select a matching method appropriate to your monitor. Windows Natural is images from a graphics application such as Adobe Photoshop, you may be able to use Soft-Proofing to simulate the printed image on your monitor. C6100 Series User's Guide - Oki C6100dn | Guide: User's, C6100 Series (Am English) - Page 213
Swatch Utility to print out a chart of RGB swatches. Select your desired RGB values from the swatches. Enter the values in your application's color picker See "Color Swatch Utility" on page 337. RGB or CMYK If you are printing from a graphics application such as Adobe Photoshop, you may be able - Oki C6100dn | Guide: User's, C6100 Series (Am English) - Page 214
Choosing a Color Matching Method Printing Vivid Colors RGB only Choices are • Monitor 6500k Vivid • sRGB • Digital Camera settings. See "Color Settings" on page 215. RGB or CMYK Auto is a generally a good choice. See "Automatic" on page 221. C6100 Series User's Guide 214 - Oki C6100dn | Guide: User's, C6100 Series (Am English) - Page 215
possible options. The list you see varies according to your computer platform, operating system, color production method, and printer driver type. You can modify these settings by selecting Advanced Color, then Natural. Monitor (6500k) Auto The default setting (in Macintosh) that selects the best - Oki C6100dn | Guide: User's, C6100 Series (Am English) - Page 216
colors. sRGB This option attempts to simulate RGB color. Optimized for matching specific colors, such as a company logo color. The colors within the printer's color gamut are printed without any modification. Only colors that fall outside the printable colors are modified. C6100 Series User's Guide - Oki C6100dn | Guide: User's, C6100 Series (Am English) - Page 217
Scale: see page 253 Saturation The degree of saturation of a color is its relative purity, or freedom from, mixture with white. Windows and Macintosh 10.3 Saturation can be adjusted when using the Gray Scale color mode (color matching method). Gray Scale: see page 253 C6100 Series User's Guide 217 - Oki C6100dn | Guide: User's, C6100 Series (Am English) - Page 218
box. Application settings override driver settings. Driver settings override printer menu settings. Color reproduction is a complex topic. This how-to information explains how to perform color matching with your printer. Color Match Precision When the printer performs color matching, it must do - Oki C6100dn | Guide: User's, C6100 Series (Am English) - Page 219
such as Microsoft Office. See page 219 Graphic Pro This is a powerful color management system based on ICC color profiles. Profiles can be downloaded to the printer hard disk using a special utility, and then color matching can be applied to all incoming print jobs. C6100 Series User's Guide 219 - Oki C6100dn | Guide: User's, C6100 Series (Am English) - Page 220
source data" on page 242. See page 220 Grayscale This option prints all documents as monochrome. No color prints. The printer interprets all colors as a variation of grays. See page 220 Mac ColorSynch This is the colour matching system built into the Mac OS See page 255. C6100 Series User's Guide - Oki C6100dn | Guide: User's, C6100 Series (Am English) - Page 221
Automatic Your printer automatically uses the best method to match color, depending on the type of document you are printing. Windows Individual Print Jobs 1. Open the file you want to print. 2. Click File → Print. 3. Click on the Color tab. 4. At Automatic, make your selection. If the box has a - Oki C6100dn | Guide: User's, C6100 Series (Am English) - Page 222
→ Settings → Printers [Printers and Faxes in Windows XP]. 2. Right-click the printer name. 3. Next Windows 98/Me: select Properties. Click Printer Properties. Windows 2000/XP: select Properties. Click Printing Preferences. Windows NT 4.0: select Document Defaults. 4. Click on the Color tab. 5. At - Oki C6100dn | Guide: User's, C6100 Series (Am English) - Page 223
(9300K) Digital Camera sRGB Important! The options for CMYK data are not present in the Windows PCL printer drivers. These printer drivers only support RGB color data. Although the Office Color options contain controls for CMYK data, it is strongly recommended that you use the Graphic Pro - Oki C6100dn | Guide: User's, C6100 Series (Am English) - Page 224
provides a collection of several different color matching presets for RGB data. These presets each change the color of your print in a slightly different way. These RGB color matching options are available in all printer drivers. Preset Monitor (6500K) - Auto Monitor (6500K) - Perceptual Monitor - Oki C6100dn | Guide: User's, C6100 Series (Am English) - Page 225
to the Windows PCL and PostScript drivers. 1. On the printer driver [Color] tab, select [Office Color] (1) and click the [Options] button. 2. Select a preset from [Color matching options] (2). Mac OS 9 1. Choose [File] → [Print]. 2. From the [Printer] menu, select your printer model. 3. Select - Oki C6100dn | Guide: User's, C6100 Series (Am English) - Page 226
printer model. 3. Select [Printer Features]. 4. From the [Feature Sets] menu, select [Color Options]. 5. From the [Color Mode] menu, select [Office Color]. 6. From the [Feature Sets] menu, select [Color - Office Color]. 7. Select the [Office Color] Preset you wish to use. C6100 Series User's Guide - Oki C6100dn | Guide: User's, C6100 Series (Am English) - Page 227
, Saturation and Gamma. 2. You can adjust the specific palette colors used in Microsoft Office applications. These adjustments only affect one specific palette color at a time. NOTE The Color Correct Utility is available for Windows only. For more details, see page 337. C6100 Series User's Guide 227 - Oki C6100dn | Guide: User's, C6100 Series (Am English) - Page 228
utility and then selected in the printer driver. When a job is sent to the printer, the ICC profiles are applied to the print job on the printer. Important! Some features of Graphic Pro color matching can only be used if your printer is fitted with a hard disk. The printer hard disk is required if - Oki C6100dn | Guide: User's, C6100 Series (Am English) - Page 229
the color output of a commercial printing press (SWOP, Euroscale or Japan Color inks). More accurate printer color If you have created your own profiles with third-party ICC profile creation software, these can be downloaded to the printer and used when printing. C6100 Series User's Guide 229 - Oki C6100dn | Guide: User's, C6100 Series (Am English) - Page 230
four classes of ICC profile supported by the Graphic Pro color matching system: Profile type RGB Source (RGB Input) CMYK Simulation (CMYK input) Printer (CMYK Output) Link Profile Description These profiles describe the device that was used to capture RGB data (e.g. scanner or digital camera). The - Oki C6100dn | Guide: User's, C6100 Series (Am English) - Page 231
- overview There are three steps to using the Graphic Pro color matching system: 1. Gather or create ICC profiles (see below) 2. Download ICC profiles to the printer hard disk (page 232) 3. Select the ICC profiles in the printer driver when printing (page 233) Step 1 - Gather or create the ICC - Oki C6100dn | Guide: User's, C6100 Series (Am English) - Page 232
a CMYK profile, you may only be able to add this to the printer as a CMYK Simulation or Printer output profile. d. Select a number from 1 to 12. This number is used to identify the profile in the printer driver. e. Click [OK] to download the ICC profile to the printer. C6100 Series User's Guide 232 - Oki C6100dn | Guide: User's, C6100 Series (Am English) - Page 233
disk using Profile Assistant. See "Using Profile Assistant" on page 232. Once the profile(s) have been downloaded, make the appropriate selections in the printer driver. These are described in the next section (Windows page 234, Mac OS 9 page 235. Mac OS X page 236). C6100 Series User's Guide 233 - Oki C6100dn | Guide: User's, C6100 Series (Am English) - Page 234
information applies to the Windows PCL and PostScript drivers. 1. To match the color of an input RGB device such as a monitor, scanner or digital camera, make the following selections in the printer driver: 2. On the printer driver [Color] tab, select [Graphic Pro] and click [Options]. 3. Select - Oki C6100dn | Guide: User's, C6100 Series (Am English) - Page 235
Profile] menu, select your printer profile. If [Auto] is selected, the factory default profiles that are embedded in the printer will be used. If you have created a printer profile yourself using profile creation software, select it here and choose a rendering intent. C6100 Series User's Guide 235 - Oki C6100dn | Guide: User's, C6100 Series (Am English) - Page 236
Profile] menu, select your printer profile. If Auto is selected, the factory default profiles that are embedded in the printer will be used. If you have created a printer profile yourself using profile creation software, select it here and choose a rendering intent. C6100 Series User's Guide 236 - Oki C6100dn | Guide: User's, C6100 Series (Am English) - Page 237
the color output of other printers, you are strongly advised to use CMYK data as a source. See CMYK Ink Simulations on page 242. To simulate the output of another printer, you need to download at least 2 profiles to your printer using Profile Assistant: • RGB Source Profile C6100 Series User's Guide - Oki C6100dn | Guide: User's, C6100 Series (Am English) - Page 238
• Simulation Target Profile • Printer Output Profile (optional) Once the profile(s) have been downloaded, make the appropriate selections in the printer driver. These are described in the next section (Windows page 239, Mac OS 9 page 240, Mac OS X page 241). C6100 Series User's Guide 238 - Oki C6100dn | Guide: User's, C6100 Series (Am English) - Page 239
information applies to the Windows PCL 5c, PCL 6 and PostScript drivers. If you are using a source RGB document, simulate the output of another printer by making the following selections in the printer driver: 1. On the printer driver [color] tab, select [Graphic Pro] and click [Options]. 2. Select - Oki C6100dn | Guide: User's, C6100 Series (Am English) - Page 240
following selections in the printer driver: 1. Choose [File] → [Print]. 2. From the [Printer] menu, select your printer model. 3. Select [Color Options]. 4. Choose [Color Mode] → [Graphic Pro]. 5. Choose [Color] → [Graphic Pro 1]. 6. Choose [color Matching Task] → [Printer Simulation]. 7. From the - Oki C6100dn | Guide: User's, C6100 Series (Am English) - Page 241
select [Graphic Pro]. 6. From the [Feature Sets] menu, select [color - Graphic Pro 1]. 7. From the [color Matching Task] menu, select [Printer Simulation]. If you wish to produce black and grey colors that are printed using only black toner, enable the [Preserve Black] option. Although this produces - Oki C6100dn | Guide: User's, C6100 Series (Am English) - Page 242
, as this provides additional controls, such as using the "Preserve Black" feature, or specifying an alternative printer output profile. Instructions on how to apply Ink Simulations appear in the next section (Windows page 243, Mac OS 9 page 245, Mac OS X page 247). C6100 Series User's Guide 242 - Oki C6100dn | Guide: User's, C6100 Series (Am English) - Page 243
NOTE This information applies to the Windows PostScript driver only. If you are using a source CMYK document, use the following printer driver settings to perform a CMYK Ink Simulation: 1 2 4 3 5 1. On the printer driver [color] tab, select [Graphic Pro] (1) and click [Options]. 2. Select - Oki C6100dn | Guide: User's, C6100 Series (Am English) - Page 244
is selected, the factory default profiles that are embedded in the printer will be used. If you have created a printer profile yourself using profile creation software, select it here. If you have selected a profile other than [Auto], select the [Rendering Intent] (5). C6100 Series User's Guide 244 - Oki C6100dn | Guide: User's, C6100 Series (Am English) - Page 245
printer driver settings to perform a CMYK Ink Simulation: 1 2 3 4 1. Choose [File] → [Print]. 2. From the [Printer] menu (1), select your printer model. 3. Select [color Options] (2). 4. From the [color grey component (K channel) information. If [Preserve Black] is C6100 Series User's Guide 245 - Oki C6100dn | Guide: User's, C6100 Series (Am English) - Page 246
disabled, the grey components may be printed using a mixture of CMYK toner, instead of just K (black) toner. 8. Select [color - Graphic Pro 2] (7). 7 8 9 9. From the [Printer Output Profile] menu (8), select your printer profile. If [Auto] is selected, the factory default profiles that are embedded - Oki C6100dn | Guide: User's, C6100 Series (Am English) - Page 247
(6), select [ICC Profile color Matching]. Use the [Preserve Black] option to keep the original grey component (K channel) information. If [Preserve Black] is disabled, the grey components may be printed using a mixture of CMYK toner, instead of just K (black) toner. C6100 Series User's Guide 247 - Oki C6100dn | Guide: User's, C6100 Series (Am English) - Page 248
] menu (11), select your printer profile. If [Auto] is selected, the factory default profiles that are embedded in the printer will be used. If you have created a printer profile yourself using profile creation software, select it here and choose a rendering intent. C6100 Series User's Guide 248 - Oki C6100dn | Guide: User's, C6100 Series (Am English) - Page 249
color management and also prevents the printer from restricting toner layer thickness. If you are using your application color matching, select [Use Application color Matching]. This option switches off all printer color management. (Mac OS 9 page 251, Mac OS X page 252.) C6100 Series User's Guide - Oki C6100dn | Guide: User's, C6100 Series (Am English) - Page 250
Windows 1. On the printer driver [Color] tab, select [Graphic Pro] (1) and click [Options]. 2. Select [Disable Color Matching for Profile Creation] (2) if you are creating an ICC profile using third-party profile creation software. Select [Use Application color Matching] (3) if you wish to switch - Oki C6100dn | Guide: User's, C6100 Series (Am English) - Page 251
select [Disable color Matching for Profile Creation] if you are creating an ICC profile using third-party profile creation software. Select [Use Application color Matching] if you wish to switch off all printer color management and use your application's color matching. C6100 Series User's Guide 251 - Oki C6100dn | Guide: User's, C6100 Series (Am English) - Page 252
select [Disable color Matching for Profile Creation] if you are creating an ICC profile using third-party profile creation software. Select [Use Application color Matching] if you wish to switch off all printer color management and use your application's color matching. C6100 Series User's Guide 252 - Oki C6100dn | Guide: User's, C6100 Series (Am English) - Page 253
Preferences. Windows NT 4.0: select Document Defaults. 4. Click on the Color tab. 5. At Grayscale, make your selection. If the box has a check mark, the feature is ON. If the box is empty, the feature is OFF. 6. Change any other settings as desired. 7. Click Print. C6100 Series User's Guide 253 - Oki C6100dn | Guide: User's, C6100 Series (Am English) - Page 254
Color or Manual Color on the Color tab when you print color Color. 4. Below Color Mode, at Gray Scale, make your selection. If the box has a check mark, the feature is ON. If the box is empty, the feature is OFF. 5. Change any other settings as desired. 6. Click Print. C6100 Series User's Guide - Oki C6100dn | Guide: User's, C6100 Series (Am English) - Page 255
the print features, open your print driver from within an application by selecting File → Print. 2. Open the drop-down list below Presets. Select Color Synch. 3. At Color Conversion, select Standard. 4. At Quartz Add Filters. Click the filter in the list. Click Apply. C6100 Series User's Guide 255 - Oki C6100dn | Guide: User's, C6100 Series (Am English) - Page 256
Color Matching Color Synch Macintosh OS 10.3 Filters None The default. No filters are applied to the document. C32_Mac_10.3_11a.jpg Black & White Converts the document to black and white, with no gray shades. C32_Mac_10.3_11b.jpg C6100 Series User's Guide 256 - Oki C6100dn | Guide: User's, C6100 Series (Am English) - Page 257
(A) / Lightness Increase (B) Darkens or lightens the document. The middle picture below is with no filters applied. C32_Mac_10.3_11e.jpg, C32_Mac_10.3_11a.jpg, C32_Mac_10.3_11f.jpg C6100 Series User's Guide 257 - Oki C6100dn | Guide: User's, C6100 Series (Am English) - Page 258
Reduce File Size This filters the document to reduce its file size. Sepia Tone Converts the document to shades of brown. C32_Mac_10.3_11g.jpg C6100 Series User's Guide 258 - Oki C6100dn | Guide: User's, C6100 Series (Am English) - Page 259
in the Filters box. Then, click Apply. You can also • add New filters of your choice • Delete filters you have added to the list • set color conversion options such as Rendering Intent (Automatic, Perceptual, Relative, Saturation, Absolute), etc. C32_Mac_10.3_11.jpg - Oki C6100dn | Guide: User's, C6100 Series (Am English) - Page 260
must set up your custom page in your printer driver. This is also known as registering the Windows PostScript: see page 264 Windows PCL: see page 266 Macintosh OS 9.x: see page 268 Macintosh OS 10.1, 10.2, and 10.3: This feature does not work with these operating systems. C6100 Series User's Guide - Oki C6100dn | Guide: User's, C6100 Series (Am English) - Page 261
] Length: 5 to 47.25 inches [128 to 1200 mm] MP Tray The range varies slightly, depending on the printer driver. Printing may not work on papers longer than 18 inches (457.2 mm). Width: 2 to 12.9 inches [51 to 47¼'' (1.2 m) long. Banners must be fed one sheet at a time. C6100 Series User's Guide 261 - Oki C6100dn | Guide: User's, C6100 Series (Am English) - Page 262
Me/98, NT: up to 32 8. Most applications allow the printer properties to be accessed from within the document print dialog box. Settings in your applications override settings in the printer driver. Settings in the printer driver override settings in the printer menus. C6100 Series User's Guide 262 - Oki C6100dn | Guide: User's, C6100 Series (Am English) - Page 263
setting does not give proper toner fusion, you can try the Label settings.See "Driver Settings" on page 11 support is extended. • Paper is stacked in reverse order. • Tray capacity is about 100 sheets. Actual capacity depends on paper weight. C96_StraightThruStackerOpen1.jpg C6100 Series User's Guide - Oki C6100dn | Guide: User's, C6100 Series (Am English) - Page 264
Windows PostScript For more information, General Information: see page 260 Custom Size Ranges: see page 261 Restrictions: see page 262 Special Print Media (Paper): see page 263 1. Open the file you want to print. 2. Click File → Print. 3. Select your printer . Click OK. C6100 Series User's Guide 264 - Oki C6100dn | Guide: User's, C6100 Series (Am English) - Page 265
17. The Paper Quality tab screen appears. 18. Change any other settings as desired. 19. Click OK. 20. The main Print screen appears. 21. Change any other settings as desired. 22. Click OK. The document prints. C6100 Series User's Guide 265 - Oki C6100dn | Guide: User's, C6100 Series (Am English) - Page 266
Windows PCL For more information, General Information: see page 260 Restrictions: see page 262 Custom Size Ranges: see page 261 Special Print Media (Paper): see page 263 1. Open the file you want to print. 2. Click File → Print. 3. Select your printer driver C6100 Series User's Guide 266 - Oki C6100dn | Guide: User's, C6100 Series (Am English) - Page 267
settings as desired. 9. Click OK. 10. The main Print screen appears. 11. Change any other settings as desired. 12. Click OK. 13. The document prints. C6100 Series User's Guide 267 - Oki C6100dn | Guide: User's, C6100 Series (Am English) - Page 268
on the Page Attribute panel. 7. Click OK. 8. Print the document. Macintosh OS 10.1, 10.2, and 10.3 This feature does not work with these operating systems. C6100 Series User's Guide 268 - Oki C6100dn | Guide: User's, C6100 Series (Am English) - Page 269
Edge vs. Short Edge: see page 270 Duplexing Restrictions: see page 271 Windows, PostScript All Jobs (Default): see page 272 Single Job: see page 274 Windows, PCL All Jobs (Default) see page 276 Single Job: see page 278 US Bond 42 to 58 lb. Index 75 to 105 g/m² metric C6100 Series User's Guide 269 - Oki C6100dn | Guide: User's, C6100 Series (Am English) - Page 270
215.9 x 279.4 215.9 x 355.6 215.9 x 342.9 215.9 x 330.2 184.15 x 210 x 297 145 x 210 182 x 257 Long Edge vs. Short Edge Long Edge Short Edge C6100 Series User's Guide 270 - Oki C6100dn | Guide: User's, C6100 Series (Am English) - Page 271
(Tray 1, optional Tray 2, MP tray) can be used for duplex printing. 6. Most applications allow the printer properties to be accessed from within the document print dialog box. Application settings override driver settings. Driver settings override printer menu settings. C6100 Series User's Guide 271 - Oki C6100dn | Guide: User's, C6100 Series (Am English) - Page 272
(Windows XP, 2000) or 2-Sided Printing (Windows Me/98/NT). 7. Select Windows XP, 2000: Flip on Long Edge or Flip on Short Edge. Windows Me/98/NT: Long Edge Binding or Short Edge Binding. See "Long Edge vs. Short Edge" on page 270. 8. Change any other settings as desired. C6100 Series User's Guide - Oki C6100dn | Guide: User's, C6100 Series (Am English) - Page 273
9. Click OK. 10. The General tab screen appears. 11. Change any other settings as desired. 12. Click OK. 13. The Printers and Faxes screen appears. 14. Close the screen. C6100 Series User's Guide 273 - Oki C6100dn | Guide: User's, C6100 Series (Am English) - Page 274
Sides Windows Me/98/NT: 2-Sided Printing. 7. Select Windows XP, 2000: Flip on Long Edge or Flip on Short Edge. Windows Me/98/NT: Long Edge Binding or Short Edge Binding. See "Long Edge vs. Short Edge" on page 270. 8. Change any other settings as desired. 9. Click OK. C6100 Series User's Guide 274 - Oki C6100dn | Guide: User's, C6100 Series (Am English) - Page 275
10. The main Print screen appears. 11. Change any other settings as desired. 12. Click OK. 13. The document prints. C6100 Series User's Guide 275 - Oki C6100dn | Guide: User's, C6100 Series (Am English) - Page 276
on Both Sides. Windows Me/98/NT: 2-Sided Printing. 7. Under 2-Sided Printing, select Windows XP/2000/NT: Long Edge or Short Edge. Windows Me/98: Long Edge Binding or Short Edge Binding. See "Long Edge vs. Short Edge" on page 270. 8. Change any other settings as desired. C6100 Series User's Guide 276 - Oki C6100dn | Guide: User's, C6100 Series (Am English) - Page 277
9. Click OK. 10. The Properties screen appears. 11. Change any other settings as desired. 12. Click OK. 13. The Printers and Faxes screen appears. 14. Close the screen. C6100 Series User's Guide 277 - Oki C6100dn | Guide: User's, C6100 Series (Am English) - Page 278
. Windows Me/98: Long Edge Binding or Short Edge Binding. See "Long Edge vs. Short Edge" on page 270. 7. Change any other settings as desired. 8. Click OK. 9. The main Print screen appears. 10. Change any other settings as desired. 11. Click OK. 12. The document prints. C6100 Series User's Guide 278 - Oki C6100dn | Guide: User's, C6100 Series (Am English) - Page 279
→ Print. 3. In the Layout panel, select Duplex. 4. Select the appropriate binding. See "Long Edge vs. Short Edge" on page 270. 5. Click OK. 6. Print the document. C6100 Series User's Guide 279 - Oki C6100dn | Guide: User's, C6100 Series (Am English) - Page 280
Restrictions: see page 271 1. Open the file you want to print. 2. Click File → Print. 3. Select your printer. 4. Open the drop-down menu at left. 5. Select Duplex. 6. From the Duplex screen, make your choices. Short Edge" on page 270. 7. Click OK. 8. Print the document. C6100 Series User's Guide 280 - Oki C6100dn | Guide: User's, C6100 Series (Am English) - Page 281
Edge vs. Short Edge: see page 270 1. Open the file you want to print. 2. Click File → Print. 3. Select your printer. 4. Open the drop-down menu directly below your printer name. 5. Select Layout. 6. Under Two Sided Printing, select the binding. See "Long Edge vs. Short Edge" on page 270. 7. Click - Oki C6100dn | Guide: User's, C6100 Series (Am English) - Page 282
Grayscale This feature is described in the Color Matching section. See "Grayscale" on page 253. C6100 Series User's Guide 282 - Oki C6100dn | Guide: User's, C6100 Series (Am English) - Page 283
One Sheet General Information N-Up printing allows you to reduce several full-size pages and print them on a single sheet. NUp.jpg For more information, Windows, PostScript: see page 284 Windows, PCL: see page 285 Macintosh: see page 286 C6100 Series User's Guide 283 - Oki C6100dn | Guide: User's, C6100 Series (Am English) - Page 284
Windows PostScript NOTE Most applications allow the printer properties to be accessed from within the document print dialog box. Settings in your applications override settings in the printer driver. Settings in the printer driver override settings in the printer prints. C6100 Series User's Guide 284 - Oki C6100dn | Guide: User's, C6100 Series (Am English) - Page 285
Windows PCL NOTE Most applications allow the printer properties to be accessed from within the document print dialog box. Settings in your applications override settings in the printer driver. Settings in the printer driver override settings in the printer prints. C6100 Series User's Guide 285 - Oki C6100dn | Guide: User's, C6100 Series (Am English) - Page 286
ONLY applies to the LaserWriter® 8 driver (Mac OS 9.x) or Oki Printer Driver (Max OS 10.x). For other drivers, refer to the guidelines provided by each driver's manufacturer. 1. Open the file you Print. or To save, click Save Settings. 8. Close the printer dialog box. C6100 Series User's Guide 286 - Oki C6100dn | Guide: User's, C6100 Series (Am English) - Page 287
Photographs General Information For the best quality when printing photographs, select Photo Enhance in the driver. For more information, see "Print Resolution" on page 291. C6100 Series User's Guide 287 - Oki C6100dn | Guide: User's, C6100 Series (Am English) - Page 288
driver override settings in the printer menus. For more information, Windows, PostScript: This feature is not available in this operating system Windows, PCL: see page 289 Macintosh OS 9.x: see page 290 Macintosh OS 10.1, 10.2, and 10.3: This feature is not available in these operating systems C6100 - Oki C6100dn | Guide: User's, C6100 Series (Am English) - Page 289
in this operating system Windows PCL For more information, see "General Information" on page 288. 1. Open the file you want to print. 2. Click File → Print. 3. Select your printer. 4. Click Properties any other settings as desired. 13. Click OK. 14. The document prints. C6100 Series User's Guide 289 - Oki C6100dn | Guide: User's, C6100 Series (Am English) - Page 290
, see "General Information" on page 288. 1. Open the file you want to print. 2. Click File → Print. 3. Select your printer. 4. Open the drop-down menu directly underneath the printer. 5. Select Layout. 6. From the Layout screen, select the number of pages per sheet. Macintosh OS 10.1, 10.2, and 10 - Oki C6100dn | Guide: User's, C6100 Series (Am English) - Page 291
the wear on the image drum. This increases the mileage of your toner and drum. Raising the print resolution can maximize the image quality of a print job. You usually do this for final versions of documents or when printing images (photographs). For more information, Windows, All Print Jobs (Default - Oki C6100dn | Guide: User's, C6100 Series (Am English) - Page 292
the jagged or blurred appearance of images and/ or text that often results after scaling an image. Draft (600 x 600) PCL only lower resolution Photo Enhance PCL only The best quality when printing photographs Choose this for optimum results when printing photographs. C6100 Series User's Guide 292 - Oki C6100dn | Guide: User's, C6100 Series (Am English) - Page 293
Windows, All Print Jobs (Default) For more information, see "General Information" on page 291. 1. Click Start → Settings → Printers (Printers and Faxes for XP). 2. Right click on your printer 12. Click OK. 13. The Printers and Faxes screen appears. 14. Close the screen. C6100 Series User's Guide 293 - Oki C6100dn | Guide: User's, C6100 Series (Am English) - Page 294
Windows, Single Print Job For more information, see "General Information" on page 291. 1. Open the file you want to print. 2. Click File → Print. 3. Select your printer. 4. Click Properties. 5. Click any other settings as desired. 11. Click OK. 12. The document prints. C6100 Series User's Guide 294 - Oki C6100dn | Guide: User's, C6100 Series (Am English) - Page 295
.1, 10.2, and 10.3 For more information, see "General Information" on page 291. 1. Open the file you want to print. 2. On File, click Print. 3. In the Printer Function panel, under Print Quality, make your choice. Fast: 600 x 600 dpi Fine: 600 x 1200 dpi 4. Click OK. 5. Print the document - Oki C6100dn | Guide: User's, C6100 Series (Am English) - Page 296
File) General Information Use Save as File to save print data to a file, without actually printing a hardcopy. Save Direct Network Printing Utility (LPR)" on page 341. For more information, Windows, Single Print Job: see page 297 Windows, All Print Jobs (Default): see page 298 Macintosh OS 9.x: see - Oki C6100dn | Guide: User's, C6100 Series (Am English) - Page 297
Windows, Single Print Job For more information, see "General Information" on page 296. 1. Open the file you want to print. 2. Click File → Print. 3. Select your printer. 4. At Print to File, make your selection. If type of the file 7. Click OK. 8. The document "prints." C6100 Series User's Guide 297 - Oki C6100dn | Guide: User's, C6100 Series (Am English) - Page 298
Windows, All Print Jobs (Default) For more information, see "General Information" on page 296. 1. Click Start → Settings → Printers (Printers and Faxes for XP). 2. Right click on your printer. 3. Click Properties. 4. On the Ports tab, select File: Print to File. 5. Click OK. C6100 Series User's - Oki C6100dn | Guide: User's, C6100 Series (Am English) - Page 299
Binary, make sure that binary data transfer is supported. Font Data: specify downloading fonts to the file. If you are only using PostScript fonts, select None. 5. At Name, enter the desired filename. 6. Specify where you want the file saved (location). 7. Click Save. C6100 Series User's Guide 299 - Oki C6100dn | Guide: User's, C6100 Series (Am English) - Page 300
binary data transfer is supported. Font Data: specify downloading fonts to the file. If you are only using PostScript fonts, select None. 6. Click Save. 7. At Save as a new name, enter the desired filename. 8. Specify where you want the file saved (location). 9. Click Save. C6100 Series User's Guide - Oki C6100dn | Guide: User's, C6100 Series (Am English) - Page 301
does not work if Gray Scale is the selected print mode. 3. Toner Save does not work with applications that allow CMYK printing when using a PostScript driver. 4. Toner Save does not work with applications and operating systems that create print data in CIE color space. C6100 Series User's Guide 301 - Oki C6100dn | Guide: User's, C6100 Series (Am English) - Page 302
Windows, Single Print Job For more information, see "General Information" on page 301. 1. Open the file you want to print. 2. Click File → Print. 3. Select your printer. 4. Click Properties. 5. Click the Color tab. 6. At Toner Saving, make your selection. Print quality is reduced when toner saving - Oki C6100dn | Guide: User's, C6100 Series (Am English) - Page 303
Windows, All Print Jobs (Default) For more information, see "General Information" on page 301. 1. Click Start → Settings → Printers (Printers and Faxes for XP). 2. Right click on your printer. 3. Click Printing Preferences. 4. Click the Color tab. 5. At Toner Saving, make your selection. Print - Oki C6100dn | Guide: User's, C6100 Series (Am English) - Page 304
. 3. Open the drop-down menu. Select Printer Features. 4. In Feature Sets, select Set 3. 5. At Toner Saving, make your selection. Print quality is reduced when toner saving is used. If the box has a check mark, the feature is ON. If the box is empty, the feature is OFF. C6100 Series User's Guide 304 - Oki C6100dn | Guide: User's, C6100 Series (Am English) - Page 305
which can only be seen if it is held against the light. Your printer can print an element that performs as a watermark. This element is separate watermark. 3. Print, using a watermark. For more information, Windows, PostScript: see page 306 Windows, PCL: see page 309 Macintosh OS 9.x: see page 312 - Oki C6100dn | Guide: User's, C6100 Series (Am English) - Page 306
your printer. 4. Click Properties. 5. Click the Job Options tab. 6. Click Watermarks. 7. Click New. 8. Enter the text for your watermark. 9. Select the attributes (font, size, angle) for your watermark. 10. Click OK. The new watermark appears in the Watermark list. C6100 Series User's Guide 306 - Oki C6100dn | Guide: User's, C6100 Series (Am English) - Page 307
Windows PostScript Edit a Watermark For more information, see "General Information" on page 305. 1. Open the file you want to print. 2. Click File → Print. 3. Select your printer. 4. Click Properties. 5. Click settings as desired. 20. Click OK. 21. The document prints. C6100 Series User's Guide 307 - Oki C6100dn | Guide: User's, C6100 Series (Am English) - Page 308
Windows PostScript Print, using a Watermark For more information, see "General Information" on page 305. 1. Open the file you want to print. 2. Click File → Print. 3. Select your printer. 4. Click Properties settings as desired. 16. Click OK. 17. The document prints. C6100 Series User's Guide 308 - Oki C6100dn | Guide: User's, C6100 Series (Am English) - Page 309
File → Print. 3. Select your printer. 4. Next: Windows Me/98/NT/XP: Click Properties (or Setup, or your application's equivalent). Windows 2000: Click the Job Options button. 5. Next: Windows Me/98/NT/XP: Click Job settings as desired. 17. Click OK. The document prints. C6100 Series User's Guide 309 - Oki C6100dn | Guide: User's, C6100 Series (Am English) - Page 310
the file you want to print. 2. Click File → Print. 3. Select your printer. 4. Next: Windows 2000: Click the Job Options tab. Windows Me/98/NT/XP: Click Properties (or Setup, or your application's equivalent). other settings as desired. 19. Click OK. The document prints. C6100 Series User's Guide 310 - Oki C6100dn | Guide: User's, C6100 Series (Am English) - Page 311
File → Print. 3. Select your printer. 4. Next: Windows Me/98/NT/XP: Click Properties (or Setup, or your application's equivalent). Windows 2000: Click the Job Options tab. 5. Next: Windows Me/98/NT/XP: Click Job settings as desired. 15. Click OK. 16. The document prints. C6100 Series User's Guide 311 - Oki C6100dn | Guide: User's, C6100 Series (Am English) - Page 312
your printer. 4. Open the drop-down menu directly underneath the printer. watermark. 11. Click Preview to review your choices before saving. 12. Images For more information, see "General Information" on page 305. 1. Create an image file (PICT or EPS) to use as a watermark. C6100 Series User's Guide - Oki C6100dn | Guide: User's, C6100 Series (Am English) - Page 313
only: Select First. All Pages: Select All. 5. Click OK. 6. Print the document. Print, using a Watermark Images For more information, see "General Information" on page 305. 1. Open the file you want to print. 2. page. First Page only: Select First. All Pages: Select All. C6100 Series User's Guide 313 - Oki C6100dn | Guide: User's, C6100 Series (Am English) - Page 314
5. Click OK. 6. Print the document. Macintosh OS 10.1, 10.2, and 10.3 This feature is not available in these operating systems. C6100 Series User's Guide 314 - Oki C6100dn | Guide: User's, C6100 Series (Am English) - Page 315
Color Swatch Utility Direct Network Printing Utility (LPR) Display Language Utility Network Print Status Utility Network Setup Utility OKI Profile Assistant Print Job Accounting Utility PrintSuperVision PS Gamma Adjuster Utility Storage Device Manager Web Driver Installer C6100 Series User's Guide - Oki C6100dn | Guide: User's, C6100 Series (Am English) - Page 316
the utilities provided on the CD shipped with your printer. Color Correction Utility see page 322 Color Swatch Utility see page 337 Direct Network Printing OKI Profile Assistant Print Job Accounting Utility PrintSuperVision Storage Device Manager Web Driver Installer C6100 Series User's Guide 316 - Oki C6100dn | Guide: User's, C6100 Series (Am English) - Page 317
so you can monitor printer status. The Direct Network Printing Utility (LPR) operates in Windows Me/98, Windows NT 4.0, Windows 2000, and Windows XP operating systems. See of disk/memory. • percentage of toner remaining. See "Network Printer Status Utility" on page 344. C6100 Series User's Guide 317 - Oki C6100dn | Guide: User's, C6100 Series (Am English) - Page 318
provides an easy way to configure your printer on a network. See the online Network User's Guide for details on how to use this utility. See "Network Setup Utility" on page 349. 7. Oki Profile Assistant This utility helps you to load and manage color profiles. For more information, see the on - Oki C6100dn | Guide: User's, C6100 Series (Am English) - Page 319
a web page • Sending users e-mail notification of the URL that permits the downloading of printer driver installation programs for discovered printers. Administrators can use this utility to manage printers and users organized in groups, such as departments or floors. C6100 Series User's Guide 319 - Oki C6100dn | Guide: User's, C6100 Series (Am English) - Page 320
Installing the Utilities Windows Utilities on the CD Load the utilities from the Menu Installer located on the CD supplied with your printer. Download Utilities Download the utilities from the internet, accessed through the Menu Installer on the CD. C6100 Series User's Guide 320 - Oki C6100dn | Guide: User's, C6100 Series (Am English) - Page 321
OS 9.x Utilities on the CD 1. Insert the CD supplied with your printer into the CD-ROM drive. 2. Double-click the CD icon that up by your Network Administrator, it is transparent to the operation of the printer driver on your OS X system. Download Utilities Download the utilities from the internet, accessed through - Oki C6100dn | Guide: User's, C6100 Series (Am English) - Page 322
the Color Correct Utility to: • Change the Pallet Color: see page 323 • Adjust the Gamma Value and Hue: see page 333 How to Install Load this program from the Menu Installer located on the CD. Additional Information For more information, see the on-line help in the utility. C6100 Series User's Guide - Oki C6100dn | Guide: User's, C6100 Series (Am English) - Page 323
This feature is not available for Windows Me/98. This feature is not available for shared printers. When test printing, use paper larger than B5 size. There are four steps in changing the Pallet Color. 1. Print the Sample Color Chart. See page 324. 2. Print the Color Adjustment Chart. See page 325 - Oki C6100dn | Guide: User's, C6100 Series (Am English) - Page 324
. Windows XP Click Start → Programs → Okidata → Color Correct Utility → Color Adjustment Utility. 2. Select Adjust Pallet Color. Click Next. 3. The Select Printer screen appears. Select the printer you are using. Click Next. The Color Correct Utility starts. Installed printer drivers display - Oki C6100dn | Guide: User's, C6100 Series (Am English) - Page 325
Change the Pallet Color Step 2: Print the Color Adjustment Chart First, you must perform the steps in "Step 1: Print the Sample Color Chart" see page 324. 6. Click Next. 7. The Pallet Color Matching screen appears. cadjust1.jpg C6100 Series User's Guide 325 - Oki C6100dn | Guide: User's, C6100 Series (Am English) - Page 326
8. Click Test print. The Color Adjustment Chart prints. Fig5-17.jpg 9. Compare the printed Color Adjustment Chart to the Pallet Color Matching screen. If the printed colors do not match the screen, perform an adjustment. You cannot adjust colors marked with an X. C6100 Series User's Guide 326 - Oki C6100dn | Guide: User's, C6100 Series (Am English) - Page 327
. When making the adjustments, you are obtaining the best possible match between the values for Hue and Brightness on your Sample Color Chart and the Pallet Color Matching screen. 10. On the Pallet Color Matching screen, click the color you want to adjust. cadjust1.jpg C6100 Series User's Guide 327 - Oki C6100dn | Guide: User's, C6100 Series (Am English) - Page 328
the available ranges for both Hue (X) and Brightness (Y). The available ranges (values) vary according to color. 12. Use the Sample Color Chart. Find the color you want to adjust. Locate the desired color within the identified available ranges (values) from Step 10. Find the values for both Hue - Oki C6100dn | Guide: User's, C6100 Series (Am English) - Page 329
the Pallet Color Matching screen, click the color you want to adjust. The Enter Adjustment Value screen appears. View the pull down menus for the Hue (X) and Brightness (Y) values. Adjust the values for Hue and Brightness to match the values from Step 11. cadjust1.jpg C6100 Series User's Guide 329 - Oki C6100dn | Guide: User's, C6100 Series (Am English) - Page 330
14. Click OK. 15. The Pallet Color Matching screen appears. cadjust1.jpg C6100 Series User's Guide 330 - Oki C6100dn | Guide: User's, C6100 Series (Am English) - Page 331
step 17. If you are not satisfied, repeat steps 10 through 16. 18. If you have another color you want to adjust, repeat 10 through 16. 19. When you have finished adjusting all desired colors, click Next. 20. Enter the setting name. Remember the name for future use. 21. Click Save. 22 - Oki C6100dn | Guide: User's, C6100 Series (Am English) - Page 332
your printer. 4. Next: Windows XP: Click Properties. Click Advanced. Windows 2000: go to the next step. 5. On the Color tab, under Color Mode, under User Setting, select the Color Matching name you created using the Color Correct Utility 6. Click OK. 7. Print the document. C6100 Series User's Guide - Oki C6100dn | Guide: User's, C6100 Series (Am English) - Page 333
Okidata → Color Correct Utility → All Applications. Windows 2000: Go to the next step. 3. Select Correct gamma and hue. 4. Click Next. 5. The "Select printer" screen appears. Select the printer you want to adjust. 6. Click Next. 7. The Color Correct Utility starts. The installed printer drivers - Oki C6100dn | Guide: User's, C6100 Series (Am English) - Page 334
saturation to adjust the color. Use primary colors of ink Select this to adjusts the settings to the standard hues for the printer. Hue Toner printing R (Red) 50 bar adjusts output color. Use the printer color buttons to switch to a different color. Brightness For Brighter color, slide the Gamma - Oki C6100dn | Guide: User's, C6100 Series (Am English) - Page 335
. 15. Enter the setting name. 16. Click OK. 17. Click OK. NOTE When you update or reinstall a printer driver, the Color Correct Utility reloads the created Color Matching names. Make sure that the Color Matching names appear in the [Setting Selection]. Click Complete. 18. Click Complete to exit the - Oki C6100dn | Guide: User's, C6100 Series (Am English) - Page 336
the Color Correct Utility. NOTE When you update or reinstall a printer driver, the Color Correct Utility reloads the created Color Matching names. Make sure that the Color Matching names appear in the [Setting Selection]. Click End. 6. Click OK. 7. Print the document. C6100 Series User's Guide 336 - Oki C6100dn | Guide: User's, C6100 Series (Am English) - Page 337
may need to use other matching methods. • The color swatch samples do not show all the colors your printer can print. • Other factors influence how you see color: the color and finish of the paper, ambient light, even the color surrounding the one you are looking at. C6100 Series User's Guide 337 - Oki C6100dn | Guide: User's, C6100 Series (Am English) - Page 338
. • The printer may not be able to print the exact color that you desire. 1. Install the utility from the CD using the Menu Installer (Windows). 2. Click Start → Programs → Color Swatch → Color Swatch Utility. 3. A swatch page displays, showing commonly used colors. C6100 Series User's Guide 338 - Oki C6100dn | Guide: User's, C6100 Series (Am English) - Page 339
your software package needs to reproduce that color accurately. The numbers under each block specify the amounts of the primary colors-red (R), green (G), and blue (B)-that mix to form each particular shade. The amounts are given as a numerical value between 0 and 255. C6100 Series User's Guide 339 - Oki C6100dn | Guide: User's, C6100 Series (Am English) - Page 340
swatch page. 6. Repeat these steps until you find the desired printed color. 7. For additional information, see the Swatch Utility Read-me file located in the Windows Programs list. The file includes: •Applying Color Value in your Application •Setting Monitor Color C6100 Series User's Guide 340 - Oki C6100dn | Guide: User's, C6100 Series (Am English) - Page 341
Optional Utilities → Install Direct Network Printing Utility. Follow the on-screen instructions. Direct Network Printing Utility (LPR) Status Box LPR_status_no_Oki.bmp The Direct Network Printing Utility (LPR) Status Box displays the following information: • Printers C6100 Series User's Guide 341 - Oki C6100dn | Guide: User's, C6100 Series (Am English) - Page 342
to 30 printers) • Status Direct Network Printing Utility (LPR) status (empty, connecting, sending, paused, checking status, not connected) • Finish Number of completed jobs. • Queue Number of jobs waiting to be printed. Additional Information For help, click on HELP in the program. C6100 Series User - Oki C6100dn | Guide: User's, C6100 Series (Am English) - Page 343
Information This utility allows you to change the language of the front panel of your printer. How to Install Load this program from the Menu Installer located on the CD. Follow the onscreen instructions to change the language of the messages on the front panel. Additional Information For help - Oki C6100dn | Guide: User's, C6100 Series (Am English) - Page 344
the printer for the latest status information every time you open the Properties dialog box. This causes a significant delay until the Properties dialog box opens. To avoid this, use the Update Status button in the Status tab to manually update the information on demand. C6100 Series User's Guide - Oki C6100dn | Guide: User's, C6100 Series (Am English) - Page 345
the Drivers, Color, and Network Utilities disk into the CD-ROM drive. If CD does not AutoPlay, click Start → Run → Browse. Browse to your CD-ROM. Double-click Install.exe. Click OK. 2. Click Network Software → Administration Tools → Network Printer Status. Follow the on-screen instructions. C6100 - Oki C6100dn | Guide: User's, C6100 Series (Am English) - Page 346
Using 1. Click Start → Settings → Printers. Right-click the Sharp Printer icon. Click Properties. 2. Click on the STATUS tab. 3. Click the UPDATE button to see device settings. The following screen displays: NetStatus2K.tif C6100 Series User's Guide 346 - Oki C6100dn | Guide: User's, C6100 Series (Am English) - Page 347
Memory size and % used % toner remaining in all cartridges NOTE If the Automatic Status Check box is checked, this utility "pings" the printer every time you open the Printer Properties dialog in the printer driver. This severely slows opening Printer Properties. C6100 Series User's Guide 347 - Oki C6100dn | Guide: User's, C6100 Series (Am English) - Page 348
Printer Status Click the WEB SETTING button. The following screen displays: NetStatusK.tif Click on the items listed on the left to see: • Network Summary • Login for Administrators • Job Login • Printer Menu To see real-time printer status, click the UPDATE STATUS button. C6100 Series User's Guide - Oki C6100dn | Guide: User's, C6100 Series (Am English) - Page 349
configure your printer on a network. How to Install Load this program from the Menu Installer located on the CD. Additional Information See the online Network User's Guide for details on how to use this utility. The Network User's Guide is found on the CD shipped with your printer. C6100 Series User - Oki C6100dn | Guide: User's, C6100 Series (Am English) - Page 350
Utility is available in Windows and Mac OS 10.1 or above. It only works with CMYK. The PS Gamma Adjuster Utility allows you to customize the CMYK data curves used with your printer driver. Once you have For more information, see the on-line help in the utility. C6100 Series User's Guide 350
-
 1
1 -
 2
2 -
 3
3 -
 4
4 -
 5
5 -
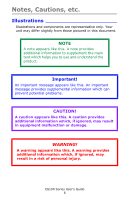 6
6 -
 7
7 -
8
-
9
-
10
-
11
-
12
-
13
-
14
-
15
-
16
-
17
-
18
-
19
-
20
-
21
-
22
-
23
-
24
-
25
-
26
-
27
-
28
-
29
-
30
-
31
-
32
-
33
-
34
-
35
-
36
-
37
-
38
-
39
-
40
-
41
-
42
-
43
-
44
-
45
-
46
-
47
-
48
-
49
-
50
-
51
-
52
-
53
-
54
-
55
-
56
-
57
-
58
-
59
-
60
-
61
-
62
-
63
-
64
-
65
-
66
-
67
-
68
-
69
-
70
-
71
-
72
-
73
-
74
-
75
-
76
-
77
-
78
-
79
-
80
-
81
-
82
-
83
-
84
-
85
-
86
-
87
-
88
-
89
-
90
-
91
-
92
-
93
-
94
-
95
-
96
-
97
-
98
-
99
-
100
-
101
-
102
-
103
-
104
-
105
-
106
-
107
-
108
-
109
-
110
-
111
-
112
-
113
-
114
-
115
-
116
-
117
-
118
-
119
-
120
-
121
-
122
-
123
-
124
-
125
-
126
-
127
-
128
-
129
-
130
-
131
-
132
-
133
-
134
-
135
-
136
-
137
-
138
-
139
-
140
-
141
-
142
-
143
-
144
-
145
-
146
-
147
-
148
-
149
-
150
-
151
-
152
-
153
-
154
-
155
-
156
-
157
-
158
-
159
-
160
-
161
-
162
-
163
-
164
-
165
-
166
-
167
-
168
-
169
-
170
-
171
-
172
-
173
-
174
-
175
-
176
-
177
-
178
-
179
-
180
-
181
-
182
-
183
-
184
-
185
-
186
-
187
-
188
-
189
-
190
-
191
-
192
-
193
-
194
-
195
-
196
-
197
-
198
-
199
-
200
-
201
-
202
-
203
-
204
-
205
-
206
-
207
-
208
-
209
-
210
-
211
-
212
-
213
-
214
-
215
-
216
-
217
-
218
-
219
-
220
-
221
-
222
-
223
-
224
-
225
-
226
-
227
-
228
-
229
-
230
-
231
-
232
-
233
-
234
-
235
-
236
-
237
-
238
-
239
-
240
-
241
-
242
-
243
-
244
-
245
-
246
-
247
-
248
-
249
-
250
-
251
-
252
-
253
-
254
-
255
-
256
-
257
-
258
-
259
-
260
-
261
-
262
-
263
-
264
-
265
-
266
-
267
-
268
-
269
-
270
-
271
-
272
-
273
-
274
-
275
-
276
-
277
-
278
-
279
-
280
-
281
-
282
-
283
-
284
-
285
-
286
-
287
-
288
-
289
-
290
-
291
-
292
-
293
-
294
-
295
-
296
-
297
-
298
-
299
-
300
-
301
-
302
-
303
-
304
-
305
-
306
-
307
-
308
-
309
-
310
-
311
-
312
-
313
-
314
-
315
-
316
-
317
-
318
-
319
-
320
-
321
-
322
-
323
-
324
-
325
-
326
-
327
-
328
-
329
-
330
-
331
-
332
-
333
-
334
-
335
-
336
-
337
-
338
-
339
-
340
-
341
-
342
-
343
-
344
-
345
-
346
-
347
-
348
-
349
-
350
 |
 |
59381701.jpg