Oki B410d B410//B420/B430 User Guide (English) - Page 72
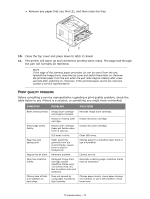
Lower the top cover but do not press down to latch it closed yet. This will protect
 |
View all Oki B410d manuals
Add to My Manuals
Save this manual to your list of manuals |
Page 72 highlights
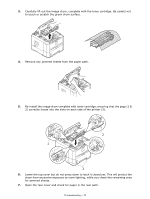
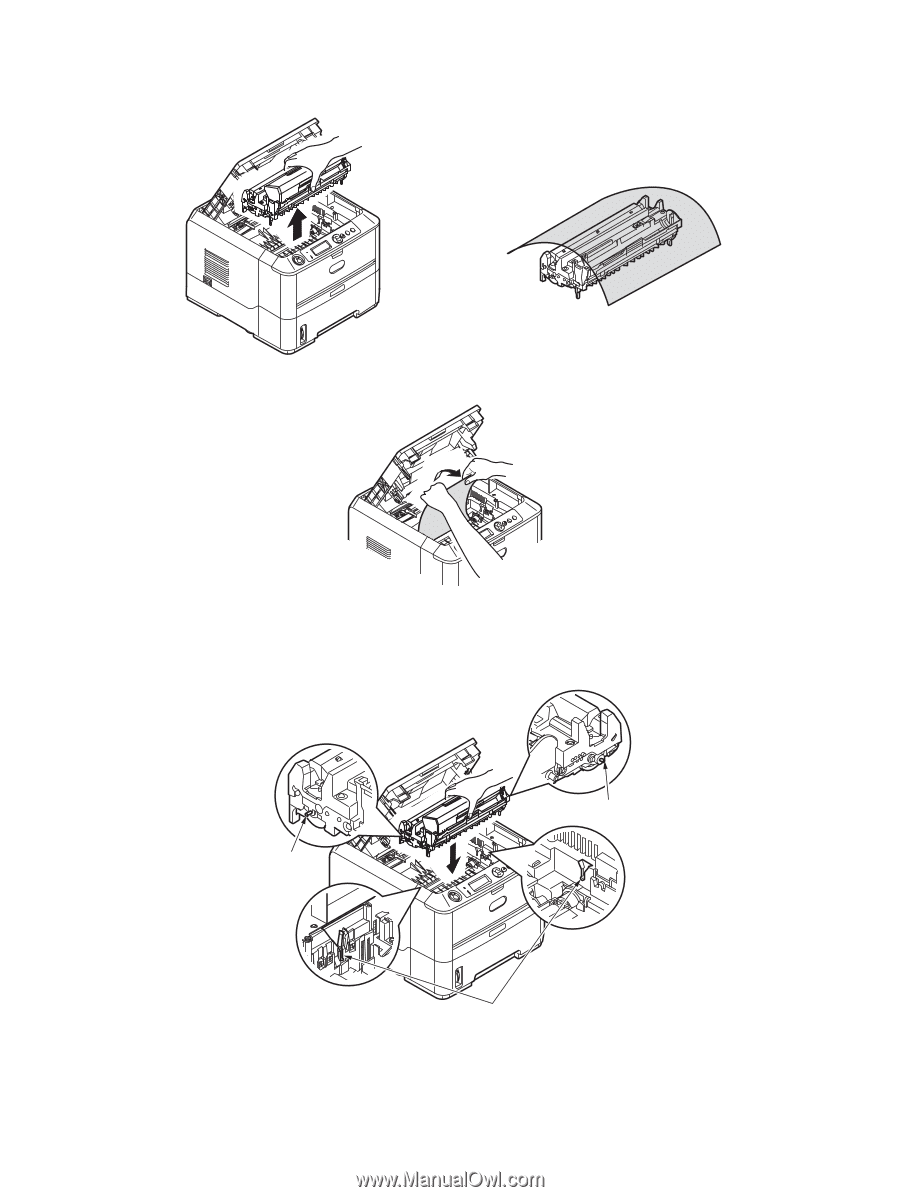
3. Carefully lift out the image drum, complete with the toner cartridge. Be careful not to touch or scratch the green drum surface. 4. Remove any jammed sheets from the paper path. 5. Re-install the image drum complete with toner cartridge, ensuring that the pegs (1 & 2) correctly locate into the slots on each side of the printer (3). 2 1 3 6. Lower the top cover but do not press down to latch it closed yet. This will protect the drum from excessive exposure to room lighting, while you check the remaining area for jammed sheets. 7. Open the rear cover and check for paper in the rear path. Troubleshooting > 72
-
 1
1 -
2
-
3
-
4
-
5
-
6
-
7
-
8
-
9
-
10
-
11
-
12
-
13
-
14
-
15
-
16
-
17
-
18
-
19
-
20
-
21
-
22
-
23
-
24
-
25
-
26
-
27
-
28
-
29
-
30
-
31
-
32
-
33
-
34
-
35
-
36
-
37
-
38
-
39
-
40
-
41
-
42
-
43
-
44
-
45
-
46
-
47
-
48
-
49
-
50
-
51
-
52
-
53
-
54
-
55
-
56
-
57
-
58
-
59
-
60
-
61
-
62
-
63
-
64
-
65
-
66
-
 67
67 -
 68
68 -
 69
69 -
 70
70 -
 71
71 -
 72
72 -
 73
73 -
 74
74 -
 75
75 -
 76
76 -
 77
77 -
78
-
79
-
80
-
81
-
82
-
83
-
84
 |
 |
Troubleshooting > 72
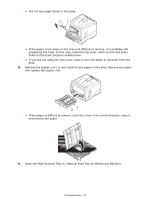
3.
Carefully lift out the image drum, complete with the toner cartridge. Be careful not
to touch or scratch the green drum surface.
4.
Remove any jammed sheets from the paper path.
5.
Re-install the image drum complete with toner cartridge, ensuring that the pegs (1 &
2) correctly locate into the slots on each side of the printer (3).
6.
Lower the top cover but do not press down to latch it closed yet. This will protect the
drum from excessive exposure to room lighting, while you check the remaining area
for jammed sheets.
7.
Open the rear cover and check for paper in the rear path.
3
1
2