Oki B420dn B410//B420/B430 User Guide (English) - Page 31
Face up and face down printing, Automatic feed sequence
 |
View all Oki B420dn manuals
Add to My Manuals
Save this manual to your list of manuals |
Page 31 highlights
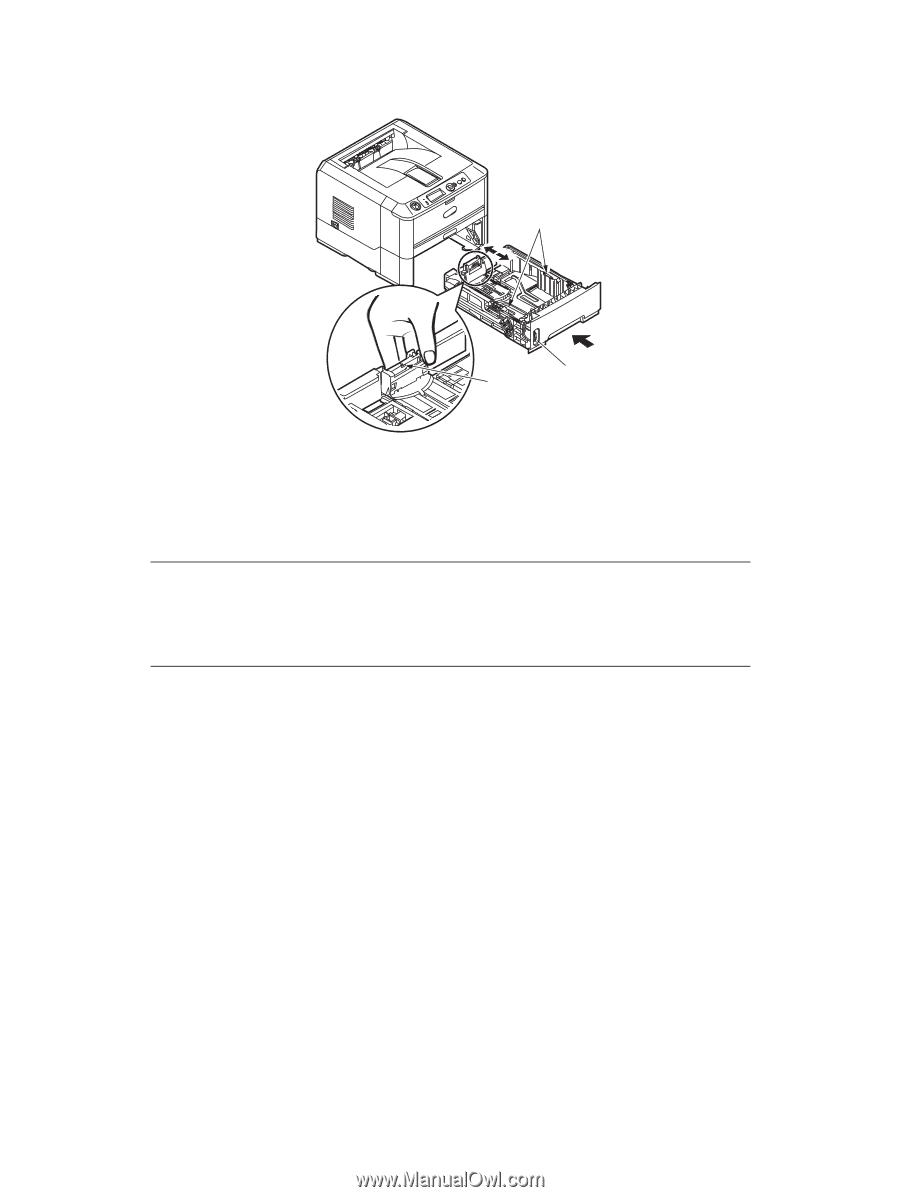
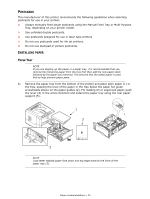
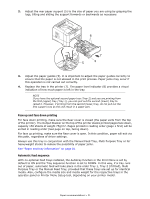
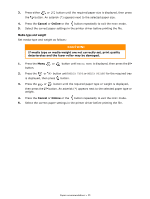
2. Adjust the rear paper support (5) to the size of paper you are using by gripping the lugs, tilting and sliding the support forwards or backwards as necessary. 6 7 5 8 3. Adjust the paper guides (5). It is important to adjust the paper guides correctly to ensure that the paper is not skewed in the print process. Paper jams may occur if this operation is not carried out correctly. 4. Replace the tray in the printer (7). The paper level indicator (8) provides a visual indication of how much paper is left in the tray. NOTE If you have the optional second paper tray (Tray 2) and you are printing from the first (upper) tray (Tray 1), you can pull out the second (lower) tray to reload it. However, if printing from the second (lower) tray, do not pull out the first (upper) tray as this will result in a paper jam. Face up and face down printing For face down printing, make sure the Rear cover is closed (the paper exits from the top of the printer). The Output Stacker on the top of the printer stacks printed pages face down, capacity 150 sheets of weight 75g/m². Pages printed in reading order (page 1 first) will be sorted in reading order (last page on top, facing down). For face up printing, make sure the Rear cover is open. In this condition, paper will exit via this path, regardless of driver settings. Always use this tray in conjunction with the Manual Feed Tray, Multi Purpose Tray or for heavyweight stocks to reduce the possibility of paper jams. See "Paper and tray information" on page 81. Automatic feed sequence With no optional feed trays installed, the Autotray function in the Print Menu is set by default to ON and the Tray sequence function is set to DOWN. In this way, if a tray runs out of paper, automatic feed will take place in the order Tray 1, Tray 2 (if fitted), Multi Purpose Tray or the Manual Feed Tray, provided that these trays are set up for identical media. Also, configure the media size and media weight for the respective trays in the operator panel or Printer Menu Setup tool, depending on your printer model. Paper recommendations > 31
-
 1
1 -
2
-
3
-
4
-
5
-
6
-
7
-
8
-
9
-
10
-
11
-
12
-
13
-
14
-
15
-
16
-
17
-
18
-
19
-
20
-
21
-
22
-
23
-
24
-
25
-
 26
26 -
 27
27 -
 28
28 -
 29
29 -
 30
30 -
 31
31 -
 32
32 -
 33
33 -
 34
34 -
 35
35 -
 36
36 -
37
-
38
-
39
-
40
-
41
-
42
-
43
-
44
-
45
-
46
-
47
-
48
-
49
-
50
-
51
-
52
-
53
-
54
-
55
-
56
-
57
-
58
-
59
-
60
-
61
-
62
-
63
-
64
-
65
-
66
-
67
-
68
-
69
-
70
-
71
-
72
-
73
-
74
-
75
-
76
-
77
-
78
-
79
-
80
-
81
-
82
-
83
-
84
 |
 |