Oki B6500 Guide: User's, B6500 (English) - Page 21
Printing on Transparencies, Paper P. 40.
 |
View all Oki B6500 manuals
Add to My Manuals
Save this manual to your list of manuals |
Page 21 highlights
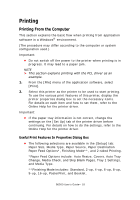
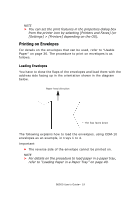
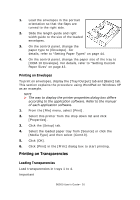
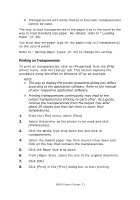
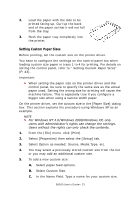
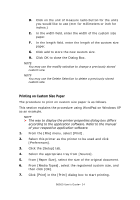
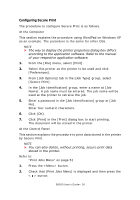
• Transparencies with white frames or full-color transparencies cannot be used. The way to load transparencies in the paper tray is the same as the way to load standard size paper. For details, refer to " Loading Paper" (P. 40). You must also set paper type for the paper tray to [Transparency] on the control panel. Refer to " Setting Paper Types" (P. 44) to change the setting. Printing on Transparencies To print on transparencies, click on [Properties] from the [File] [Print] menu, click the [Setup] tab. This section explains the procedure using WordPad on Windows XP as an example. NOTE > The way to display the printer properties dialog box differs according to the application software. Refer to the manual of your respective application software. > Printing transparencies continuously may lead to the output transparencies sticking to each other. As a guide, remove the transparencies from the output tray after about 20 sheets and then fan them to lower their temperatures. 1. From the [File] menu, select [Print]. 2. Select this printer as the printer to be used and click [Preferences]. 3. Click the Media Type drop down box and click on transparencies. 4. Select the loaded paper tray from Source Drop down and click on the tray that contains the transparencies. 5. Click the Paper Size drop down. 6. From [Paper Size], select the size of the original document. 7. Click [OK]. 8. Click [Print] in the [Print] dialog box to start printing. B6500 User's Guide> 21
-
 1
1 -
2
-
3
-
4
-
5
-
6
-
7
-
8
-
9
-
10
-
11
-
12
-
13
-
14
-
15
-
 16
16 -
 17
17 -
 18
18 -
 19
19 -
 20
20 -
 21
21 -
 22
22 -
 23
23 -
 24
24 -
 25
25 -
 26
26 -
27
-
28
-
29
-
30
-
31
-
32
-
33
-
34
-
35
-
36
-
37
-
38
-
39
-
40
-
41
-
42
-
43
-
44
-
45
-
46
-
47
-
48
-
49
-
50
-
51
-
52
-
53
-
54
-
55
-
56
-
57
-
58
-
59
-
60
-
61
-
62
-
63
-
64
-
65
-
66
-
67
-
68
-
69
-
70
-
71
-
72
-
73
-
74
-
75
-
76
-
77
-
78
-
79
-
80
-
81
-
82
-
83
-
84
-
85
-
86
-
87
-
88
-
89
-
90
-
91
-
92
-
93
-
94
-
95
-
96
-
97
-
98
-
99
-
100
-
101
-
102
-
103
-
104
-
105
-
106
-
107
-
108
-
109
-
110
-
111
-
112
-
113
-
114
-
115
-
116
-
117
-
118
-
119
-
120
-
121
-
122
-
123
-
124
-
125
-
126
-
127
-
128
-
129
-
130
-
131
-
132
-
133
-
134
-
135
-
136
 |
 |