Oki B6500 Guide: User's, B6500 (English) - Page 24
Printing on Custom Size Paper, Click OK to close the Dialog Box.
 |
View all Oki B6500 manuals
Add to My Manuals
Save this manual to your list of manuals |
Page 24 highlights
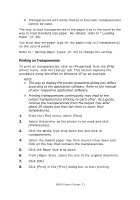
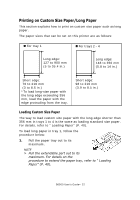
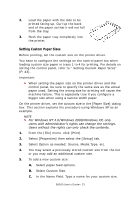
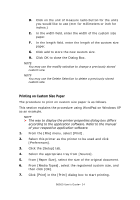
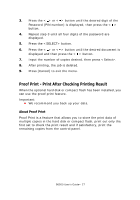
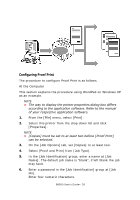
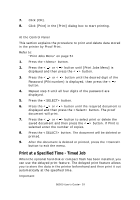
D. Click on the unit of measure radio button for the units you would like to use (mm for millimeters or inch for inches.) E. In the width field, enter the width of the custom size paper. F. In the length field, enter the length of the custom size paper. G. Click add to store the new custom size. H. Click OK to close the Dialog Box. NOTE You may use the modify selection to change a previously stored custom size. NOTE You may use the Delete Selection to delete a previously stored custom size. Printing on Custom Size Paper The procedure to print on custom size paper is as follows. This section explains the procedure using WordPad on Windows XP as an example. NOTE > The way to display the printer properties dialog box differs according to the application software. Refer to the manual of your respective application software. 1. From the [File] menu, select [Print]. 2. Select this printer as the printer to be used and click [Preferences]. 3. Click the [Setup] tab. 4. Select the appropriate tray from [Source]. 5. From [Paper Size], select the size of the original document. 6. From [Media Types], select the registered custom size, and then click [OK]. 7. Click [Print] in the [Print] dialog box to start printing. B6500 User's Guide> 24
-
 1
1 -
2
-
3
-
4
-
5
-
6
-
7
-
8
-
9
-
10
-
11
-
12
-
13
-
14
-
15
-
16
-
17
-
18
-
 19
19 -
 20
20 -
 21
21 -
 22
22 -
 23
23 -
 24
24 -
 25
25 -
 26
26 -
 27
27 -
 28
28 -
 29
29 -
30
-
31
-
32
-
33
-
34
-
35
-
36
-
37
-
38
-
39
-
40
-
41
-
42
-
43
-
44
-
45
-
46
-
47
-
48
-
49
-
50
-
51
-
52
-
53
-
54
-
55
-
56
-
57
-
58
-
59
-
60
-
61
-
62
-
63
-
64
-
65
-
66
-
67
-
68
-
69
-
70
-
71
-
72
-
73
-
74
-
75
-
76
-
77
-
78
-
79
-
80
-
81
-
82
-
83
-
84
-
85
-
86
-
87
-
88
-
89
-
90
-
91
-
92
-
93
-
94
-
95
-
96
-
97
-
98
-
99
-
100
-
101
-
102
-
103
-
104
-
105
-
106
-
107
-
108
-
109
-
110
-
111
-
112
-
113
-
114
-
115
-
116
-
117
-
118
-
119
-
120
-
121
-
122
-
123
-
124
-
125
-
126
-
127
-
128
-
129
-
130
-
131
-
132
-
133
-
134
-
135
-
136
 |
 |