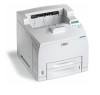
Oki B6500 Guide: User's, B6500 (English) - Page 30
Registering Timed Job, Cancelling Timed Job, From [Job Type] on the [Job Options] tab, select [Timed
 |
View all Oki B6500 manuals
Add to My Manuals
Save this manual to your list of manuals |
Page 30 highlights
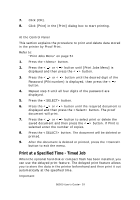
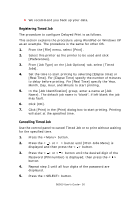
• We recommend you back up your data. Registering Timed Job The procedure to configure Delayed Print is as follows. This section explains the procedure using WordPad on Windows XP as an example. The procedure is the same for other OS. 1. From the [File] menu, select [Print]. 2. Select this printer as the printer to be used and click [Preferences]. 3. From [Job Type] on the [Job Options] tab, select [Timed Jobs]. 4. Set the time to start printing by selecting [Elapse time] or [Real Time]. For [Elapse Time] specify the number of minutes to delay before printing. For [Real Time] specify the Year, Month, Day, Hour, and Minute to start printing. 5. In the [Job Identification] group, enter a name at [Job Name]. The default job name is "blank", if left blank the job may fault. 6. Click [OK]. 7. Click [Print] in the [Print] dialog box to start printing. Printing will start at the specified time. Cancelling Timed Job Use the control panel to cancel Timed Job or to print without waiting for the specified time. 1. Press the button. 2. Press the < > or < > button until [Print Jobs Menu] is displayed and then press the < > button. 3. Press the < > or < > button until the desired digit of the Password (PIN number) is displayed, then press the < > button. 4. Repeat step 3 until all four digits of the password are displayed. 5. Press the button. B6500 User's Guide> 30
-
 1
1 -
2
-
3
-
4
-
5
-
6
-
7
-
8
-
9
-
10
-
11
-
12
-
13
-
14
-
15
-
16
-
17
-
18
-
19
-
20
-
21
-
22
-
23
-
24
-
 25
25 -
 26
26 -
 27
27 -
 28
28 -
 29
29 -
 30
30 -
 31
31 -
 32
32 -
 33
33 -
 34
34 -
 35
35 -
36
-
37
-
38
-
39
-
40
-
41
-
42
-
43
-
44
-
45
-
46
-
47
-
48
-
49
-
50
-
51
-
52
-
53
-
54
-
55
-
56
-
57
-
58
-
59
-
60
-
61
-
62
-
63
-
64
-
65
-
66
-
67
-
68
-
69
-
70
-
71
-
72
-
73
-
74
-
75
-
76
-
77
-
78
-
79
-
80
-
81
-
82
-
83
-
84
-
85
-
86
-
87
-
88
-
89
-
90
-
91
-
92
-
93
-
94
-
95
-
96
-
97
-
98
-
99
-
100
-
101
-
102
-
103
-
104
-
105
-
106
-
107
-
108
-
109
-
110
-
111
-
112
-
113
-
114
-
115
-
116
-
117
-
118
-
119
-
120
-
121
-
122
-
123
-
124
-
125
-
126
-
127
-
128
-
129
-
130
-
131
-
132
-
133
-
134
-
135
-
136
 |
 |
