Oki B6500 Guide: User's, B6500 (English) - Page 44
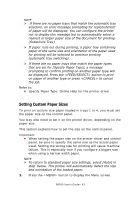
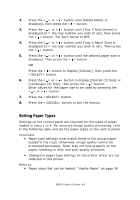
Setting Paper Types, > button. Set Auto Sense to OFF.
 |
View all Oki B6500 manuals
Add to My Manuals
Save this manual to your list of manuals |
Page 44 highlights
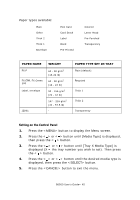
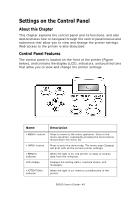
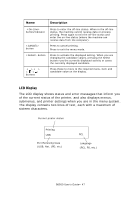
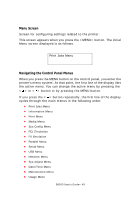
2. Press the < > or < > button until [Media Menu] is displayed, then press the < > button. 3. Press the < > or < > button until [Tray X Auto Sense] is displayed (X = the tray number you wish to set), then press the < > button. Set Auto Sense to OFF. 4. Press the < > or < > button until [Tray X Paper Size] is displayed (X = the tray number you wish to set). Then press the < > button. 5. Press the < > or < > button until the desired paper size is displayed, Then press the < > button. OR Press the < > button to display [Custom], then press the button. 6. Press the < > or < > button to display [Portrait (Y) Size] or [Landscape (X) Size], then press the < > button. Enter values for the paper size to be used by pressing the < > or < > button 7. Press the button. 8. Press the button to exit the menus. Setting Paper Types Settings on the control panel are required for the types of paper loaded in trays 1 to 4. For accurate image quality processing, refer to the following table and set the paper types on the control panel. Important: • Paper type settings must match those of the actual paper loaded in the trays. Otherwise, image quality cannot be processed accurately. Toner may not fuse properly on the paper, resulting in dirty and poor quality printouts. • Changes in paper type settings on the printer driver are not reflected in this printer. Refer to: • Paper sizes that can be loaded: "Usable Paper" on page 36 B6500 User's Guide> 44
-
 1
1 -
2
-
3
-
4
-
5
-
6
-
7
-
8
-
9
-
10
-
11
-
12
-
13
-
14
-
15
-
16
-
17
-
18
-
19
-
20
-
21
-
22
-
23
-
24
-
25
-
26
-
27
-
28
-
29
-
30
-
31
-
32
-
33
-
34
-
35
-
36
-
37
-
38
-
 39
39 -
 40
40 -
 41
41 -
 42
42 -
 43
43 -
 44
44 -
 45
45 -
 46
46 -
 47
47 -
 48
48 -
 49
49 -
50
-
51
-
52
-
53
-
54
-
55
-
56
-
57
-
58
-
59
-
60
-
61
-
62
-
63
-
64
-
65
-
66
-
67
-
68
-
69
-
70
-
71
-
72
-
73
-
74
-
75
-
76
-
77
-
78
-
79
-
80
-
81
-
82
-
83
-
84
-
85
-
86
-
87
-
88
-
89
-
90
-
91
-
92
-
93
-
94
-
95
-
96
-
97
-
98
-
99
-
100
-
101
-
102
-
103
-
104
-
105
-
106
-
107
-
108
-
109
-
110
-
111
-
112
-
113
-
114
-
115
-
116
-
117
-
118
-
119
-
120
-
121
-
122
-
123
-
124
-
125
-
126
-
127
-
128
-
129
-
130
-
131
-
132
-
133
-
134
-
135
-
136
 |
 |