Oki C5650n C5650n/C5650dn User's Guide - Page 211
Print Resolution, General Information, Windows, All Print Jobs (Default)
 |
View all Oki C5650n manuals
Add to My Manuals
Save this manual to your list of manuals |
Page 211 highlights
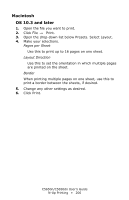
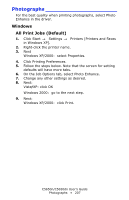
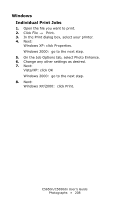
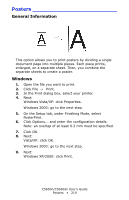
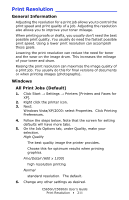
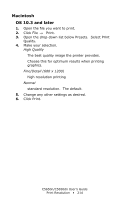
Print Resolution General Information Adjusting the resolution for a print job allows you to control the print speed and print quality of a job. Adjusting the resolution also allows you to improve your toner mileage. When printing proofs or drafts, you usually don't need the best possible print quality. You usually do need the fastest possible print speed. Using a lower print resolution can accomplish these goals. Lowering the print resolution can reduce the need for toner and the wear on the image drum. This increases the mileage of your toner and drum. Raising the print resolution can maximize the image quality of a print job. You usually do this for final versions of documents or when printing images (photographs). Windows All Print Jobs (Default) 1. Click Start → Settings → Printers [Printers and Faxes for XP]. 2. Right click the printer icon. 3. Next: Windows Vista/XP/2000: select Properties. Click Printing Preferences. 4. Follow the steps below. Note that the screen for setting defaults will have more tabs. 5. On the Job Options tab, under Quality, make your selection. High Quality The best quality image the printer provides. Choose this for optimum results when printing graphics. Fine/Detail (600 x 1200) high resolution printing Normal standard resolution. The default. 6. Change any other settings as desired. C5650n/C5650dn User's Guide Print Resolution • 211
-
 1
1 -
2
-
3
-
4
-
5
-
6
-
7
-
8
-
9
-
10
-
11
-
12
-
13
-
14
-
15
-
16
-
17
-
18
-
19
-
20
-
21
-
22
-
23
-
24
-
25
-
26
-
27
-
28
-
29
-
30
-
31
-
32
-
33
-
34
-
35
-
36
-
37
-
38
-
39
-
40
-
41
-
42
-
43
-
44
-
45
-
46
-
47
-
48
-
49
-
50
-
51
-
52
-
53
-
54
-
55
-
56
-
57
-
58
-
59
-
60
-
61
-
62
-
63
-
64
-
65
-
66
-
67
-
68
-
69
-
70
-
71
-
72
-
73
-
74
-
75
-
76
-
77
-
78
-
79
-
80
-
81
-
82
-
83
-
84
-
85
-
86
-
87
-
88
-
89
-
90
-
91
-
92
-
93
-
94
-
95
-
96
-
97
-
98
-
99
-
100
-
101
-
102
-
103
-
104
-
105
-
106
-
107
-
108
-
109
-
110
-
111
-
112
-
113
-
114
-
115
-
116
-
117
-
118
-
119
-
120
-
121
-
122
-
123
-
124
-
125
-
126
-
127
-
128
-
129
-
130
-
131
-
132
-
133
-
134
-
135
-
136
-
137
-
138
-
139
-
140
-
141
-
142
-
143
-
144
-
145
-
146
-
147
-
148
-
149
-
150
-
151
-
152
-
153
-
154
-
155
-
156
-
157
-
158
-
159
-
160
-
161
-
162
-
163
-
164
-
165
-
166
-
167
-
168
-
169
-
170
-
171
-
172
-
173
-
174
-
175
-
176
-
177
-
178
-
179
-
180
-
181
-
182
-
183
-
184
-
185
-
186
-
187
-
188
-
189
-
190
-
191
-
192
-
193
-
194
-
195
-
196
-
197
-
198
-
199
-
200
-
201
-
202
-
203
-
204
-
205
-
 206
206 -
 207
207 -
 208
208 -
 209
209 -
 210
210 -
 211
211 -
 212
212 -
 213
213 -
 214
214 -
 215
215 -
 216
216 -
217
-
218
-
219
-
220
-
221
-
222
-
223
-
224
-
225
 |
 |
