Oki ML421 Network User's Guide for OkiLAN 6020e - Page 172
Add Local, Cancel, The ESI Print Server Status Screen will
 |
View all Oki ML421 manuals
Add to My Manuals
Save this manual to your list of manuals |
Page 172 highlights
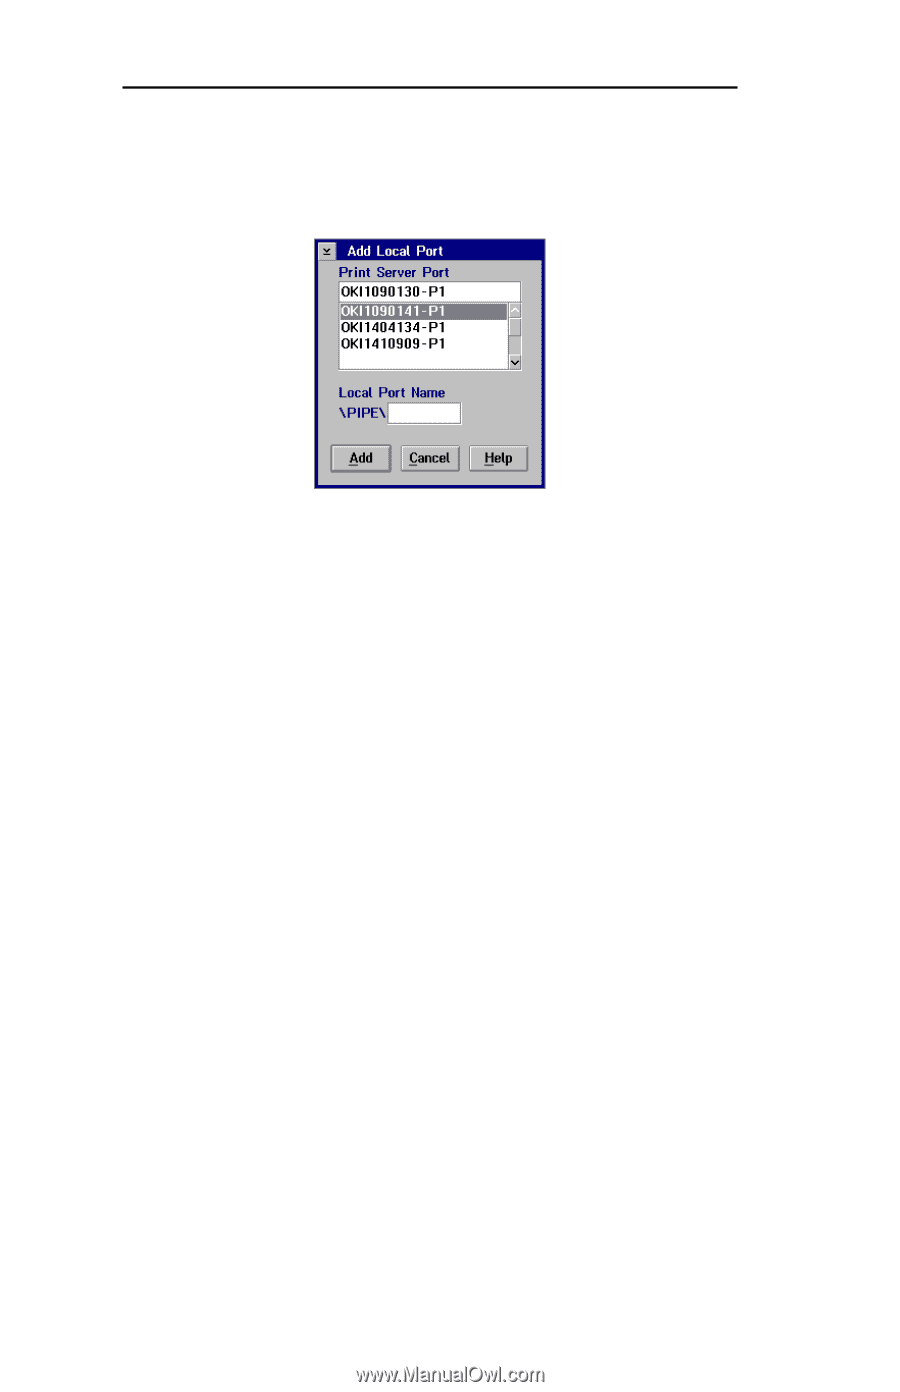
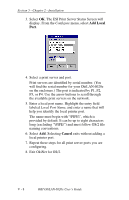
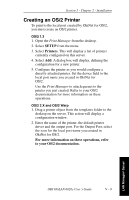
Section 5 - Chapter 2 - Installation 3. Select OK. The ESI Print Server Status Screen will display. From the Configure menu, select Add Local Port. 4. Select a print server and port. Print servers are identified by serial number. (You will find the serial number for your OkiLAN 6020e on the enclosure.) The port is indicated by P1, P2, P3, or P4. Use the arrow buttons to scroll through the available print servers on the network. 5. Enter a local port name. Highlight the entry field labeled Local Port Name, and enter a name that will help you identify the local printer port. The name must begin with "\PIPE\", which is provided by default. It can be up to eight characters long (excluding "\PIPE\") and must follow OS/2 file naming conventions. 6. Select Add. Selecting Cancel exits without adding a local printer port. 7. Repeat these steps for all print server ports you are configuring. 8. Exit OkiNet for OS/2. V - 8 OKI OkiLAN 6020e User's Guide
-
 1
1 -
2
-
3
-
4
-
5
-
6
-
7
-
8
-
9
-
10
-
11
-
12
-
13
-
14
-
15
-
16
-
17
-
18
-
19
-
20
-
21
-
22
-
23
-
24
-
25
-
26
-
27
-
28
-
29
-
30
-
31
-
32
-
33
-
34
-
35
-
36
-
37
-
38
-
39
-
40
-
41
-
42
-
43
-
44
-
45
-
46
-
47
-
48
-
49
-
50
-
51
-
52
-
53
-
54
-
55
-
56
-
57
-
58
-
59
-
60
-
61
-
62
-
63
-
64
-
65
-
66
-
67
-
68
-
69
-
70
-
71
-
72
-
73
-
74
-
75
-
76
-
77
-
78
-
79
-
80
-
81
-
82
-
83
-
84
-
85
-
86
-
87
-
88
-
89
-
90
-
91
-
92
-
93
-
94
-
95
-
96
-
97
-
98
-
99
-
100
-
101
-
102
-
103
-
104
-
105
-
106
-
107
-
108
-
109
-
110
-
111
-
112
-
113
-
114
-
115
-
116
-
117
-
118
-
119
-
120
-
121
-
122
-
123
-
124
-
125
-
126
-
127
-
128
-
129
-
130
-
131
-
132
-
133
-
134
-
135
-
136
-
137
-
138
-
139
-
140
-
141
-
142
-
143
-
144
-
145
-
146
-
147
-
148
-
149
-
150
-
151
-
152
-
153
-
154
-
155
-
156
-
157
-
158
-
159
-
160
-
161
-
162
-
163
-
164
-
165
-
166
-
 167
167 -
 168
168 -
 169
169 -
 170
170 -
 171
171 -
 172
172 -
 173
173 -
 174
174 -
 175
175 -
 176
176 -
 177
177 -
178
-
179
-
180
-
181
-
182
-
183
-
184
-
185
-
186
-
187
-
188
-
189
-
190
-
191
-
192
-
193
-
194
-
195
-
196
-
197
-
198
-
199
-
200
-
201
-
202
-
203
-
204
-
205
-
206
-
207
-
208
-
209
-
210
-
211
-
212
-
213
-
214
-
215
-
216
-
217
-
218
-
219
-
220
-
221
-
222
-
223
-
224
-
225
-
226
 |
 |