Oki ML421 Network User's Guide for OkiLAN 6020e - Page 80
Create., NDPS Printer, Define, Additional Properties, Novell, Printer Gateway, Novell Port, Handler
 |
View all Oki ML421 manuals
Add to My Manuals
Save this manual to your list of manuals |
Page 80 highlights
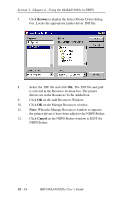
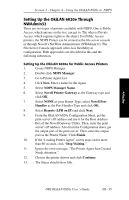
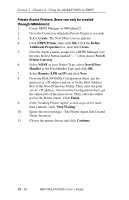
Section 3 - Chapter 4 - Using the OkiLAN 6020e in NDPS Private Access Printers: these can only be created through NWAdmin32 1. Create NDPS Manager in NWAdmin32. 2. Go to the Context in which the Private Printer is to reside. 3. Select Create. The New Object screen appears. 4. Click NDPS Printer, then click OK. Click the Define Additional Properties box, and click Create. 5. Give the Agent a name, assign it to a NDPS Manager (use the gray browse button marked "..."), then choose Novell Printer Gateway. 6. Select NONE as your Printer Type, select Novell Port Handler as the Port Handler Type and click OK. 7. Select Remote (LPR on IP) and click Next. 8. From the OkiLAN 6020e Configuration Sheet, get the print server's IP address and use it for the Host Address Box of the Novell Gateway Utility. Then, enter the print server's IP address. Also from the Configuration sheet, get the output port of the print server. Then, enter the output port as the Printer Name. Click Finish. 9. If the "Loading Printer Agent" screen stays on for more than a minute, click "Stop Waiting." 10. Ignore the error message, "The Printer Agent Just Created Needs Attention." 11. Choose the printer drivers and click Continue. III - 36 OKI OkiLAN 6020e User's Guide
-
 1
1 -
2
-
3
-
4
-
5
-
6
-
7
-
8
-
9
-
10
-
11
-
12
-
13
-
14
-
15
-
16
-
17
-
18
-
19
-
20
-
21
-
22
-
23
-
24
-
25
-
26
-
27
-
28
-
29
-
30
-
31
-
32
-
33
-
34
-
35
-
36
-
37
-
38
-
39
-
40
-
41
-
42
-
43
-
44
-
45
-
46
-
47
-
48
-
49
-
50
-
51
-
52
-
53
-
54
-
55
-
56
-
57
-
58
-
59
-
60
-
61
-
62
-
63
-
64
-
65
-
66
-
67
-
68
-
69
-
70
-
71
-
72
-
73
-
74
-
 75
75 -
 76
76 -
 77
77 -
 78
78 -
 79
79 -
 80
80 -
 81
81 -
 82
82 -
 83
83 -
 84
84 -
 85
85 -
86
-
87
-
88
-
89
-
90
-
91
-
92
-
93
-
94
-
95
-
96
-
97
-
98
-
99
-
100
-
101
-
102
-
103
-
104
-
105
-
106
-
107
-
108
-
109
-
110
-
111
-
112
-
113
-
114
-
115
-
116
-
117
-
118
-
119
-
120
-
121
-
122
-
123
-
124
-
125
-
126
-
127
-
128
-
129
-
130
-
131
-
132
-
133
-
134
-
135
-
136
-
137
-
138
-
139
-
140
-
141
-
142
-
143
-
144
-
145
-
146
-
147
-
148
-
149
-
150
-
151
-
152
-
153
-
154
-
155
-
156
-
157
-
158
-
159
-
160
-
161
-
162
-
163
-
164
-
165
-
166
-
167
-
168
-
169
-
170
-
171
-
172
-
173
-
174
-
175
-
176
-
177
-
178
-
179
-
180
-
181
-
182
-
183
-
184
-
185
-
186
-
187
-
188
-
189
-
190
-
191
-
192
-
193
-
194
-
195
-
196
-
197
-
198
-
199
-
200
-
201
-
202
-
203
-
204
-
205
-
206
-
207
-
208
-
209
-
210
-
211
-
212
-
213
-
214
-
215
-
216
-
217
-
218
-
219
-
220
-
221
-
222
-
223
-
224
-
225
-
226
 |
 |