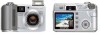
Olympus C5500 C-5500 Sport Zoom Quick Start Guide
Olympus C5500 - Camedia 5.1MP Digital Camera Manual
 |
UPC - 050332153271
View all Olympus C5500 manuals
Add to My Manuals
Save this manual to your list of manuals |
Olympus C5500 manual content summary:
- Olympus C5500 | C-5500 Sport Zoom Quick Start Guide - Page 1
instructions to set up and quickly begin using your new Digital Camera. Digital Camera AA (R6) alkaline batteries (four) Card Strap CD-ROM (OLYMPUS Master software) AV Cable USB Cable The following items are also included in the Digital Camera package: Basic Manual, warranty card, Advanced - Olympus C5500 | C-5500 Sport Zoom Quick Start Guide - Page 2
Alternatively, you can print your pictures by connecting your PictBridge*compatible camera directly to a PictBridge*-compatible printer, such as the Olympus P-10 Digital Photo Printer. This permits fast, easy printing without using a computer. * For detailed instructions on using PictBridge, please
-
 1
1 -
 2
2
 |
 |

UNPACK THE BOX CONTENTS
Please gather the items shown in the illustration. You’ll need these
to complete the procedures that follow.
Digital Camera
AA (R6) alkaline
batteries (four)
Card
Strap
CD-ROM (OLYMPUS
Master software)
AV Cable
USB Cable
The following items are also included in the Digital Camera package: Basic
Manual, warranty card, Advanced Manual on CD-ROM and registration card.
S
T
E
P
REVIEW THE DOCUMENTATION
Quick Start Guide
(this document)
Getting started with your digital camera.
Quick Reference Guide
(reverse side of this document)
Quick guide to using common features and functions.
Basic Manual
(printed booklet)
Guide to mastering the basics of taking and viewing pictures.
Advanced Manual
(CD-ROM)
Detailed instructions on all camera features and functions.
Software Installation Guide
(Separate document on OLYMPUS Master
CD-ROM)
Detailed instructions on installing the OLYMPUS Master software.
S
T
E
P
INSERT THE BATTERY
a.
Make sure the camera is off.
b.
Open the battery compartment cover.
c.
Insert the battery.
d.
Close the battery compartment cover.
TIPS: The alkaline batteries included are only intended for start up and initial usage.
For extended battery life, we recommend using NiMH rechargeable batteries.
S
T
E
P
2
Slide the cover inwards.
1
Slide the battery compartment
cover lock to the
)
position.
3
Lift up the
cover.
2
Slide the cover outwards.
1
Close the battery
compartment
cover.
3
Slide the cover lock to
the
=
position.
INSERT THE xD-PICTURE CARD
a.
Make sure the camera is off.
b.
Open the card cover.
c.
Insert the card.
d.
Close the card cover.
S
T
E
P
Index area
Notch
ATTACH THE STRAP
S
T
E
P
TURN ON THE CAMERA
a.
Set the mode dial to
h
and press the
POWER
switch.
The lens extends and the
monitor turns on.
b.
Press the flash button. The
flash pops up.
Note: To turn the camera off,
press the
POWER
switch
again. The lens retracts and
the monitor turns off. Push
the flash into the camera.
S
T
E
P
POWER
switch
Mode dial
Flash
Flash button
SET THE DATE AND TIME
a.
With the camera on, press
N
.
b.
Use the arrow pad to select [SETUP] on the
monitor.
c.
Select [
X
], and press
d
.
d.
Select the date format and press
d
.
e.
Use
a
c
to set each item and press
d
to move
to the next item.
f.
Press
N
when you have finished entering the date
and time.
S
T
E
P
MONITOR OFF
SETUP
SETUP
VIDEO OUT
NTSC
SET
GO
OK
SELECT
’05.01.01
00:00
2005
.
01
01
00
00
:
Y
M
D
.
GO
OK
SET
SELECT
TAKING A PICTURE
a.
Place the AF target mark on your subject using
the monitor or viewfinder.
b.
Press the shutter button halfway to lock the
focus and exposure, then press the shutter button
completely to take the picture.
S
T
E
P
2594
1944
2594 1944
HQ
HQ
30
30
30
AF target mark
Shutter button
REVIEWING A PICTURE
a.
Press the
QUICK VIEW
button. The last picture
taken is displayed.
b.
Use the arrow pad to
display the picture you
want.
c.
Press the
QUICK VIEW
button again when you are
ready to take another
picture.
S
T
E
P
QUICK VIEW
button
Arrow pad
ERASING A PICTURE
a.
Select the picture you want to erase
and press
S
.
b.
Select [YES] and press
N
.
S
T
E
P
S
button
YES
NO
SELECT
SELECT
GO
GO
OK
OK
SELECT
GO
OK
ERASE
CONNECTING THE CAMERA
TO A COMPUTER
a.
Make sure the camera is off.
b.
Connect the camera to the computer using the USB cable (included). The
camera turns on automatically.
c.
Select [PC] on the camera’s monitor and
press
N
.
S
T
E
P
USB
P
C
PRINT
EXIT
SELECT
GO
OK
VERIFY CAMERA CONNECTION
WINDOWS:
a.
From the desktop (“Start”
menu for XP), open “My
Computer.”
b.
Verify that the “Removable
Disk” icon representing the
camera is displayed.
MACINTOSH:
a.
Verify that the “NO_NAME”
icon representing the camera is displayed.
• The above steps confirm that the camera has been installed
correctly. You can transfer your images immediately using the
standard drag and drop procedure, or enhance your experience using
OLYMPUS Master (included).
S
T
E
P
ABOUT THE CD-ROM DISCS
Now that you’ve mastered the basic functionality of your new
Olympus Digital Camera, you are ready to begin exploring the
possibilities that digital photography brings to your computer.
Activities such as photo editing, printing and much more are only steps
away!
CD-ROM1
OLYMPUS Master software:
Download pictures from the camera,
view, organize, retouch, e-mail and print your digital photos and
movies and more! This CD also contains the complete software users
manual in Adobe Acrobat (PDF) format.
CD-ROM2
Advanced Manual:
A complete camera guide in Adobe Acrobat
(PDF) format. This manual contains detailed instructions on the
camera’s features and functions which are not covered in the printed
Basic Manual or Quick Start/Quick Reference Guides.
S
T
E
P
INSTALLING THE CAMERA
SOFTWARE
a.
Insert the OLYMPUS Master
CD-ROM into your computer’s
CD-ROM drive.
b.
For Windows:
Click the “OLYMPUS Master”
button in the “Setup” window.
For Macintosh:
Double-click the “Installer”
icon.
c.
Follow the on-screen instructions. For more details, click “Please Read First”.
Please refer to the Quick Reference Guide on the reverse side of
this sheet to familiarize yourself with the commonly used features
and functions of your new Olympus Digital Camera.
S
T
E
P
Printed in Japan
1AG6P1P2419--
VE906901
Quick Start Guide
C-5500 ZOOM
It is strongly recommended that you follow
these step-by-step instructions to set up and
quickly begin using your new Digital
Camera.
Start Here