Olympus DM-620 DM-620 Detailed Instructions (English)
Olympus DM-620 Manual
 |
View all Olympus DM-620 manuals
Add to My Manuals
Save this manual to your list of manuals |
Olympus DM-620 manual content summary:
- Olympus DM-620 | DM-620 Detailed Instructions (English) - Page 1
DIGITAL VOICE RECORDER DETAILED INSTRUCTIONS Thank you for purchasing an Olympus Digital Voice Recorder. Please read these instructions for information about using the product correctly and safely. Keep the instructions handy for future reference. To ensure successful recordings, we recommend that - Olympus DM-620 | DM-620 Detailed Instructions (English) - Page 2
may be changed in the future without advanced notice. Contact our Customer Support Center for the latest information relating to product names and model numbers. • The illustration of the screen and the recorder shown in this manual may differ from the actual product. The utmost care has been taken - Olympus DM-620 | DM-620 Detailed Instructions (English) - Page 3
10 Identification of parts 11 Display (LCD panel 12 Power supply 15 Inserting batteries 15 Battery settings 16 Charging by connecting to a computer via USB......17 Connect to the USB connecting AC adapter (optional) to charge 18 Turning on/off the power 20 HOLD 21 Setting time and date [Time - Olympus DM-620 | DM-620 Detailed Instructions (English) - Page 4
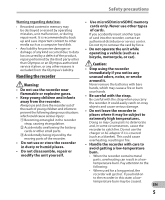
or high voltage, such as near a TV set, microwave, video game, loud speakers, large monitor unit, TV/radio tower, or transmission towers. In such cases, turn the recorder off and on again before further operation. • Avoid recording or playing back near cellular phones or other wireless equipment, as - Olympus DM-620 | DM-620 Detailed Instructions (English) - Page 5
Olympus or an Olympus authorized service station, or any other reasons is excluded from the Olympus's liability. Handling the recorder f Warning: • Do not use the recorder and, in some circumstances, cause the recorder to catch fire. Do not use the charger or AC adapter if it is covered (such as a - Olympus DM-620 | DM-620 Detailed Instructions (English) - Page 6
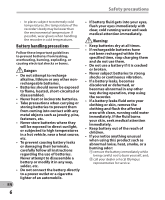
etc. • Never store batteries where they will be exposed to direct sunlight, or subjected to high temperatures in a hot vehicle, near a heat source, etc. • To prevent causing battery leaks or damaging their terminals, carefully follow all instructions regarding the use of batteries. Never attempt to - Olympus DM-620 | DM-620 Detailed Instructions (English) - Page 7
when using it for the first time, or if it has not been used for a long period. • Rechargeable battery have limited lifetime. When the operating time becomes shorter even if the rechargeable battery is fully charged under the specified condition, replace it with a new one. Safety precautions EN 7 - Olympus DM-620 | DM-620 Detailed Instructions (English) - Page 8
variety of features that support audio recording. With this recorder you can customize a variety of recording functions such as the recording level and microphone sensitivity to suit the recording conditions and personal preferences (☞ P.53). s It has a built-in Variable Control Voice Actuator (VCVA - Olympus DM-620 | DM-620 Detailed Instructions (English) - Page 9
to easily operate various in the "Olympus Sonority", the latest functions with the support of voice broadcasting content will be received guidance (☞ P.75). automatically. Open the [Podcast] folder s You may assign your own names to on the recorder to quickly listen to the folders (☞ P.64 - Olympus DM-620 | DM-620 Detailed Instructions (English) - Page 10
. If anything is missing or damaged, contact the dealer from whom you purchased the recorder. 1 Voice Recorder USB cable Strap • Ni-MH Rechargeable batteries (2) • Olympus Sonority CD-ROM • INSTRUCTIONS • Warranty card Carrying case Earphone • Contents may vary depending on purchase location - Olympus DM-620 | DM-620 Detailed Instructions (English) - Page 11
& LIST button * Built-in speaker ( EAR (Earphone) jack ) REMOTE jack Connect the receiver for the exclusive remote control set RS30W (optional). This enables operation of the start and stop recording functions through the remote control. - POWER/HOLD switch = Battery cover q USB connector EN 11 - Olympus DM-620 | DM-620 Detailed Instructions (English) - Page 12
Current folder name 3 Battery indicator EN 4 File name 5 Function guide indicator 12 Identification of parts File display 1 2 34 5 8 6 9 0 7 ! @ 1 Recording media indicator 2 Current file name 3 Current file number/ Total number of recorded files in the folder 4 Battery indicator 5 Folder - Olympus DM-620 | DM-620 Detailed Instructions (English) - Page 13
the folder 1 Recording media indicator 2 Current folder name 3 Battery indicator 4 File name 5 Function guide indicator 0 1 Recording media indicator 2 Current file name 3 Current file number/ Total number of recorded files in the folder 4 Battery indicator 5 File format 6 Recorder status indicator - Olympus DM-620 | DM-620 Detailed Instructions (English) - Page 14
of parts Icon display (For all modes) [«]: Timer [A]: Alarm [?]: Microphone Sensitivity [û]: VCVA [Æ]: Voice sync 1 [†]: Rec Level [0]: Low Cut Filter [≤]: Zoom Mic [%]: Noise Cancel [$]: Voice Filter Playback mode [∞] EUPHONY [≥]: Reverb Identification of parts • Remove the screen - Olympus DM-620 | DM-620 Detailed Instructions (English) - Page 15
be sure to use the supplied Ni-MH 1 rechargeable batteries (BR404). • The supplied rechargeable batteries are not fully charged. Before using the recorder or after long periods of disuse, it is recommended that you continuously charge them until full (☞ P.17). 1 Lightly press down on the - Olympus DM-620 | DM-620 Detailed Instructions (English) - Page 16
case, the [Battery] screen will appear. For more details, see "Battery settings". • Remove the batteries if you are not going to use the recorder for an extended period of time. • When replacing rechargeable batteries, [Ni-MH] (õ): Select when using the Olympus NiMH rechargeable batteries (BR404 - Olympus DM-620 | DM-620 Detailed Instructions (English) - Page 17
supply Note 3 While the recorder is during stop • When playing a voice/music file, the mode or turned off, connect recorder may be reset due to the the USB cable to the connecting reduction of the voltage output of the terminal on the bottom of the batteries depending on the volume level - Olympus DM-620 | DM-620 Detailed Instructions (English) - Page 18
(A514) USB connector 2 Plug the AC adapter into AC outlet. To the AC outlet EN 18 • While [Press OK to start charging] is flashing, press the `OK button. 5 Charging is completed when [Battery Full] is displayed. Notes • The recorder cannot be charged when the PC is not turned on. It may not also be - Olympus DM-620 | DM-620 Detailed Instructions (English) - Page 19
will not be using them for a long time, and store them separately. connect the USB cable to the recorder. Select [AC adapter] at the [USB Connect] Notes display to start charging (☞ P.76). • This recorder is designed to fully charge batteries regardless of their energy level. However, for best - Olympus DM-620 | DM-620 Detailed Instructions (English) - Page 20
on/off the power When the recorder is not being used, turn the power off to reduce battery consumption to a minimum. Even if the power is turned off, existing data, mode settings, and clock settings will be maintained. Turning on the power While the recorder is turned off, slide the POWER/HOLD - Olympus DM-620 | DM-620 Detailed Instructions (English) - Page 21
mode, the clock display lights for 2 seconds, but it will not operate the recorder. • If HOLD is applied during playback (recording), operation is disabled with the playback (recording) state unchanged (When playback has ended or the recording has ended due to the remaining memory being used up - Olympus DM-620 | DM-620 Detailed Instructions (English) - Page 22
file management. When you use the recorder for 1 the first time after purchasing it, or when the batteries have been inserted without the device having and "Day" with a flashing point. • The clock will start from the set date and time. Press the `OK button according to the time signal. EN - Olympus DM-620 | DM-620 Detailed Instructions (English) - Page 23
tab cursor. • After setup, a message will sound saying that If the guidance is not required, select [Off], and the screen goes into [Voice Guide] (☞ P.75) setup. If you don't want the guidance feature, select [Off]. 1 Changing the time and date While the recorder is during stop mode, press - Olympus DM-620 | DM-620 Detailed Instructions (English) - Page 24
instruction manual refers to both microSD and microSDHC. With this recorder, besides the built-in memory, you can store the data in the commercially available microSD card. Inserting a microSD card 1 1 While the recorder card, the recording media changeover display will appear. 4 To record on a - Olympus DM-620 | DM-620 Detailed Instructions (English) - Page 25
out of the slot. • Check the Olympus website regarding microSD cards which are confirmed 1 operation with this recorder. • This recorder may not recognize correctly on some microSD [Memory Select] is set to [microSD Card], it will be automatically changed to [Built-in Memory Selected]. EN 25 - Olympus DM-620 | DM-620 Detailed Instructions (English) - Page 26
as a digital voice recorder, as well as a digital music player. 3 Press the `OK button. 1 + − button `OK button LIST button 1 Press the LIST button repeatedly to set the [Home] display. • [Home] will appear on the display. When [Recorder] is selected: The recorder will go into [Recorder] mode - Olympus DM-620 | DM-620 Detailed Instructions (English) - Page 27
organized in a branching tree-style. About the folders for voice recordings [Folder A] - [Folder E] within the [Recorder] folder are the folders for voice recordings. When recording with this recorder, select any one of the five folders and then record. 1 Home You can change the mode on the - Olympus DM-620 | DM-620 Detailed Instructions (English) - Page 28
Notes on the folders About the folder for music playback When transferring music files to the device using Windows Media Player, a folder is automatically created within the music playback folder which has a layered structure as shown in the diagram below. Music files that are in the same folder - Olympus DM-620 | DM-620 Detailed Instructions (English) - Page 29
prepared in advance. Programs (files) transmitted from the "Olympus Sonority" can be played. With the recorder stopped, open the [Podcast] folder at the [Home] Audible files to this recorder using the Audible Manager, an [Audible] folder for playing Audible files will automatically be created in the - Olympus DM-620 | DM-620 Detailed Instructions (English) - Page 30
(☞ P.27). [Home] display Operation of the folders for voice recordings 1 Folder list display File list display File display Operation of you press and hold the LIST button while moving in a hierarchy of folders, it will return to the file display. { Proceed: `OK button Each time you press this - Olympus DM-620 | DM-620 Detailed Instructions (English) - Page 31
the recording folder (☞ P.27). 2 Press the REC (s) button to start recording. • The LED indicator light glows and [K] will appear on the display. • Turn the significantly. However, even higher sound quality recordings can be achieved by adjusting the recording level manually (☞ P.54). • Placing the - Olympus DM-620 | DM-620 Detailed Instructions (English) - Page 32
even if the volume of a single file exceeds 2 GB in the linear PCM format recording. • The file is saved every 2 GB in separate files. It will be treated as multiple files when playing back. • When the recording exceeds 2 GB, the number of files in the folder may exceed 200 files. The 201st file and - Olympus DM-620 | DM-620 Detailed Instructions (English) - Page 33
level for the Variable Control Voice Actuator (VCVA). Sets the start level for voice sync recording. • [≠] will appear on the display. • The recorder will time out after 120 minutes when left in [Rec Pause]. Resume Recording: Press the REC (s) button again. • Recording will resume at the point of - Olympus DM-620 | DM-620 Detailed Instructions (English) - Page 34
as this may cause feedback. • When the external speaker is connected while recording, there is a risk that audio feedback will occur. It is recommended that you use earphones for the recording monitor, or turn [Rec Monitor] to [Off] while recording (☞ P.59). 3 Press the `OK button. 4 Press the + or - Olympus DM-620 | DM-620 Detailed Instructions (English) - Page 35
file name extensions for 1 2 3 the recording format when recording with this device. 1 User ID: The user ID name that has been set on the Digital Voice Recorder. • Linear PCM format .WAV • MP3 format .MP3 • WMA format .WMA 2 File number: A file number is consecutively assigned regardless of - Olympus DM-620 | DM-620 Detailed Instructions (English) - Page 36
. The voice or conversation over the phone can be clearly recorded. Applicable recordings such as outdoor recording 36 of wild birds singing. Notes • The built-in microphone will become inoperable when an external microphone is plugged into the recorder's MIC jack. • Microphones supported - Olympus DM-620 | DM-620 Detailed Instructions (English) - Page 37
recorder with the connecting cord KA333 (optional) for dubbing. Recording the sound of this recorder with other devices: The sound of this recorder can be recorded a clear recording with this recorder even after adjusting the recording level (☞ connected, perform a test recording and then adjust the - Olympus DM-620 | DM-620 Detailed Instructions (English) - Page 38
. When the resume function is activated the stopped location will be registered, even if the power is turned off. The next time the power is turned on, playback may be resumed from the registered stopped location. e a Recording media indicator, File name, Folder indicator b File length c Elapsed - Olympus DM-620 | DM-620 Detailed Instructions (English) - Page 39
recorder speaker will be switched-off. [EUPHONY] (☞ P.60) The EUPHONY setting can be set to one of the 4 levels according to your preference. The recorder has a Voice To EAR jack Filter Function to cut low [Voice to the ear, insert the earphone after turning down the volume level. • When you - Olympus DM-620 | DM-620 Detailed Instructions (English) - Page 40
. • If there is an index mark or temp mark in the middle of the file, the recorder will stop at that location (☞ P.45). • The recorder stops when it reaches the beginning of the file. Continue pressing the 0 button to proceed with the review from the end of the previous file. Playback EN 40 - Olympus DM-620 | DM-620 Detailed Instructions (English) - Page 41
in the linear PCM format. WAV files other than these cannot be played back. • Even if the format of the file is compatible for playback on this recorder, the recorder does not support every encoder. Notes • When you skip to the beginning of the file during playback, the recorder will stop at the - Olympus DM-620 | DM-620 Detailed Instructions (English) - Page 42
you select an empty file, move to the other folder, or turn the recorder off, the playback starts from the last memorized position when you play position. While the recorder is during playback mode, press and hold the 9 button. ➥ When you release the button the recorder will resume normal playback. - Olympus DM-620 | DM-620 Detailed Instructions (English) - Page 43
. Continue pressing mode, press the 9 button. the 0 button to proceed with the review from the end of the previous file. • If the 0 button is kept pressed while the recorder is stopped at the start of the top file, the recorder will fast rewind starting from the end of the last file. ➥ It skips to - Olympus DM-620 | DM-620 Detailed Instructions (English) - Page 44
reviewing spots that you couldn't catch in a language lesson at a slow speed. The tone will be automatically adjusted digitally without changing the voice so it sounds natural. 3 + − button `OK button 1 While the recorder or fast playback is available even if either [Voice Filter] is set (☞ P.60). • - Olympus DM-620 | DM-620 Detailed Instructions (English) - Page 45
file. Index marks can only be placed on files created by Olympus voice recorders, but temp marks can be placed instead to temporarily remember desired or temp mark is erased. • Index or temp numbers after the erased index or temp number will be automatically decreased by 1. Notes • Temp marks - Olympus DM-620 | DM-620 Detailed Instructions (English) - Page 46
the position where you want to end segment repeat playback. • The recorder continuously plays back the segment until the segment repeat playback is canceled. button at the point you want to start segment repeat playback. • [w] will flash on the display. Note • As in normal playback mode, playback - Olympus DM-620 | DM-620 Detailed Instructions (English) - Page 47
to skip to the beginning of the next file. d Press the 0 button Pressing the 0 button will release segment repeat playback, and make the recorder to skip to the beginning of the current file. 1 While the recorder is during stop mode or playback mode, press and hold the MENU/SCENE button. 2 Press - Olympus DM-620 | DM-620 Detailed Instructions (English) - Page 48
start. • [Erase Done] is displayed when the file is erased. File numbers will be reassigned automatically. Erasing + − button `OK button 3 ERASE button 1 Select the file you want to erase (☞ P.30). 2 While the recorder is during stop mode in the file display, press the ERASE button. • If an - Olympus DM-620 | DM-620 Detailed Instructions (English) - Page 49
the `OK button. • The display changes to [Erase!] and erasing will start. • [Erase Done] is displayed when the folder is erased. Partially erasing a file An unwanted part of a file can be erased. Only a PCM file recorded in the recorder can be partially erased. • While [Erase start] is flashing - Olympus DM-620 | DM-620 Detailed Instructions (English) - Page 50
, replace the battery with a new one in order to ensure that the battery will not run out while processing. 1 Disconnecting the AC Adapter while before erasing. • When an microSD card is inserted in the recorder, be sure to confirm the recording media as either [Built-in Memory] or [microSD Card] - Olympus DM-620 | DM-620 Detailed Instructions (English) - Page 51
F2 button + − button `OK button 4 Press the + or − button to move to the item you want to set. 4 1 While the recorder is during stop mode, press the MENU/SCENE button. • The menu will appear on the display. 5 Press the `OK button. • Moves to the setting of the selected item. 6 Press the + or - Olympus DM-620 | DM-620 Detailed Instructions (English) - Page 52
] Setting • When in the menu screen during [Noise Cancel] recording or playback, pressing the F2 (EXIT) button will allow you to [EUPHONY] return to the recording or playback [Voice Filter] screen without interrupting recording or playback. [Play Mode] To menu item options [Skip Space - Olympus DM-620 | DM-620 Detailed Instructions (English) - Page 53
or low volume, such as conferences with a large number of people. [Middle]: Suitable for recording meetings and seminars with a small number of people. [Low]: Lowest recording sensitivity suitable for dictation. • When you would like to clearly record a speaker's voice, set [Mic Sense] to [Low] and - Olympus DM-620 | DM-620 Detailed Instructions (English) - Page 54
high bit rate equivalent or superior to that of [Manual]: a music CD is possible. Moreover, it also supports Recording is performed by manually the MP3 and WMA formats. adjusting the recording level. 1 Select the recording format. [PCM]: This is an uncompressed audio format which is used for - Olympus DM-620 | DM-620 Detailed Instructions (English) - Page 55
recording level is set to [Auto]. • The level can be adjusted from [01] to [16]. The higher the number, the higher the level and the larger the indicator position on the level meter. Zoom , the built-in Variable Control Voice Actuator (VCVA) starts recording automatically, and stops when the volume - Olympus DM-620 | DM-620 Detailed Instructions (English) - Page 56
set to any of 23 different values. • The higher the value, the more sensitive the recorder will be to sounds. At the highest value, even the faintest sound will activate recording. [On]: Enables the Voice sync recording function. [Off]: Disables this function. • If you select [On], proceed to the - Olympus DM-620 | DM-620 Detailed Instructions (English) - Page 57
sync level continues for the specified to or below the specified level for time, voice sync recording will end longer than the specified detection automatically, and the recorder time, the recorder will return to the will return to the standby mode of standby mode. Step 3. Every time the - Olympus DM-620 | DM-620 Detailed Instructions (English) - Page 58
User Setting 1], [User Setting 2] and [User Setting 3]. When [Scene Select] is selected: 4 Select a recording scene. Menu setting method 4 [Scene Select]: Select a recording scene from the templates which will suit the recording scene and conditions. For details ] [Rec Level] [Zoom Mic] [Low Cut - Olympus DM-620 | DM-620 Detailed Instructions (English) - Page 59
[Mic Sense] [Rec Mode] [Rec Level] [Zoom Mic] [Low Cut Filter] [VCVA] [V-Sync. speaker is connected while recording, there is a risk that audio feedback will occur. It is recommended that you use earphones for the recording monitor, or turn [Rec Monitor] to [Off] while recording. 4 [DNS]: For Dragon - Olympus DM-620 | DM-620 Detailed Instructions (English) - Page 60
are not available. • Slow/Fast speed playback (☞ P.44) • [Noise Cancel] • [Voice Filter] • [Reverb] (☞ P.62) • When playing back using the builtin speaker, the EUPHONY function is disabled. Voice Filter The recorder has a Voice Filter Function to cut low and high frequency tones during normal, fast - Olympus DM-620 | DM-620 Detailed Instructions (English) - Page 61
the start of the first file in the folder. • In [All] mode, after playing the last file in the folder, the recorder will start playing 2 Press the 9 or 0 button. • The recorder will skip (forward) or reverse skip (rewind) a set space and start playing back. • If there is an index mark/temp mark or - Olympus DM-620 | DM-620 Detailed Instructions (English) - Page 62
Menu setting method Play Scene Voice files recorded in the recorder and music files downloaded from the PC can be saved in the playback settings of your choice to suit the different sound qualities and playback methods. 1 Select [Scene Select] - Olympus DM-620 | DM-620 Detailed Instructions (English) - Page 63
recorder. [English] [Français] [Español] 4 [Português (BR)]: • The selectable languages differ depending on the region. Contrast Voice Guide LED indicator light does not turn on. [On]: LED light will be set. [Off]: LED light will be canceled. See "Guidance [Voice Guide]" (☞ P.75). Intro Play - Olympus DM-620 | DM-620 Detailed Instructions (English) - Page 64
turns off will start over again. Battery Select to match the battery you are using. [Ni-MH] (õ): Select when using the Olympus Ni-MH rechargeable batteries (BR404). [Alkaline] (ú): Select when using alkaline batteries time settings, file numbers and folder name will be preserved, will not return to - Olympus DM-620 | DM-620 Detailed Instructions (English) - Page 65
capacity will be shown less than the total capacity of the card due to characteristic of the microSD card, but this is not a malfunction. System Info. You can check the recorder's information on the menu screen. [Model] (Model Name), [Version] (System version) and [Serial No.] 4 (Serial Number - Olympus DM-620 | DM-620 Detailed Instructions (English) - Page 66
to rearrange the file order (☞ P.30). 2 Select [Replace] from the menu 6 Press the `OK button to complete the 0 button without pressing the `OK button will cancel the settings and return you to the previous menu screen. on the [File Menu]. • For details on how to enter the menu settings, see " - Olympus DM-620 | DM-620 Detailed Instructions (English) - Page 67
you want to move or copy is saved (☞ P.30). 5 Press the + or − button to select the number of files to move or copy. 2 Select [File Move/Copy] from the menu on the [File Menu]. • For details on how to enter the menu settings, see "Menu setting method" (☞ P.51). 3 Press the + or − button - Olympus DM-620 | DM-620 Detailed Instructions (English) - Page 68
will be shown in percentage. The process is completed when [File move completed] or [File copy completed] is displayed. Notes • The recorder cannot copy when the memory capacity is not sufficient. • The recorder cannot move or copy when the number of files exceeds 200. • Do not remove the batteries - Olympus DM-620 | DM-620 Detailed Instructions (English) - Page 69
to select [Start]. F2 button + − button `OK button Only MP3 files and PCM files recorded on this recorder can be divided. 4 Press the `OK button. • [Dividing!] will appear and file dividing will start. • File dividing is completed when [File divide completed] appears. 4 Menu setting method - Olympus DM-620 | DM-620 Detailed Instructions (English) - Page 70
divided even if it is a MP3 file or PCM file. • Do not remove the battery while dividing a file. This may damage the data. 4 Press the + or − button to select the item to set. Timer recording [Timer Rec] Timer recording is the function to execute a recording at a set time. You can program up to - Olympus DM-620 | DM-620 Detailed Instructions (English) - Page 71
in use at the preset start time, the timer recording will start directly after stopping the recorder. • Even if the power is turned off or the recorder is put on Hold, timer recording will start at a specified time. • If three timer recordings have the same starting times, [Preset 1] has the - Olympus DM-620 | DM-620 Detailed Instructions (English) - Page 72
batteries run out while recording based on the timer setting, the recorder will stop recording. Check the battery power before starting the timer recording. • If the [Time & Date] is not correct, timer recording menu on the [Play Menu]. • For details on how to enter the menu settings, see "Menu - Olympus DM-620 | DM-620 Detailed Instructions (English) - Page 73
Sounds alarm only. [File Select]: Plays back a selected file after the alarm. • When [File Select] is selected and the `OK button is pressed, the recorder will move to the [Memory Select] setting. • Select the memory with an alarm playback file using the + or - button and press the `OK button. The - Olympus DM-620 | DM-620 Detailed Instructions (English) - Page 74
not be performed and only the alarm will sound. • If the starting times for timer recording • Programmed settings will be applied and the display will return to the preset number selection menu. • To set other preset numbers, repeat the abovementioned procedure. • When the 9 button is pressed - Olympus DM-620 | DM-620 Detailed Instructions (English) - Page 75
power is turned On/Off (☞ P.20) can be canceled if you set the guidance to [Off]. • If you format the recorder (☞ P.77), voice guide data will be erased as well. If you want to recover the voice guide data, connect to a PC and copy the guide data to the recorder by using supplied "Olympus Sonority - Olympus DM-620 | DM-620 Detailed Instructions (English) - Page 76
) or [AC Adapter] (Connect to AC adapter to recharge the battery), you can AC Adapter]: Setting for when the recorder is connected to the PC for charging or to the AC Adapter (A514) (optional). [Optional]: Setting to confirm the connection method each time a USB connection is made. • For details - Olympus DM-620 | DM-620 Detailed Instructions (English) - Page 77
your PC as an external storage device, the driver for the recorder will be automatically installed in your PC. • The PC cannot recognize when the recorder is connected to the PC when setting for the [USB Connect] is set to [AC Adapter]. • When the recorder is not recognized by the PC as an external - Olympus DM-620 | DM-620 Detailed Instructions (English) - Page 78
will turn on. 4 • [Format Done] appears when formatting ends. Menu setting method 6 Press the + button again to select [Start]. Notes • Never format the recorder from a PC. • When the recorder -only files, are erased. • After formatting, recorded voice file names may start from [0001]. • For - Olympus DM-620 | DM-620 Detailed Instructions (English) - Page 79
, replace the battery with a new one in order to ensure that the battery will not run out while processing. 1 Disconnecting the AC Adapter while processing. 2 Removing the battery while processing. 3 Remove the microSD card during processing when [microSD Card] is being used as the recording media - Olympus DM-620 | DM-620 Detailed Instructions (English) - Page 80
recorder enables you to do the following: • Voice files recorded on the recorder can be played and managed on the PC using the "Olympus Sonority". If an upgrade (Optional) to the "Olympus where the Internet can be utilized. Notes • The support service will not cover if your PC has been updated from - Olympus DM-620 | DM-620 Detailed Instructions (English) - Page 81
, follow the instructions in the [Format] display of the recorder (☞ P.77). • Folder (directory) names displayed by file management tools such as Explorer in Microsoft Windows and Finder in Macintosh are different from the folder names that can be set with the recorder or the "Olympus Sonority - Olympus DM-620 | DM-620 Detailed Instructions (English) - Page 82
out noise reduction in any specified area. One designated voice file can be 5 Changing the User ID: split into the two files in "Olympus Sonority". The user ID will be automatically given to files that are recorded with the recorder. Changing a folder name: You can change a folder name - Olympus DM-620 | DM-620 Detailed Instructions (English) - Page 83
[Olympus Sonority Setup] is clicked, the Installer Opening display will start up. Follow the Installer Wizard instructions. Olympus Sonority". After checking the [Agree] box, click [Next]. 7 [Registration of User Registration Information] • Please enter your name, company 5 name and serial number - Olympus DM-620 | DM-620 Detailed Instructions (English) - Page 84
starting up the "Olympus Sonority", the serial number entry dialog box will appear. Enter the serial number which is listed on the separate sheet. After entering, click 5 display will start up. Follow the Installer wizard instructions. [OK] and the "Olympus Sonority" will start up. 6 Confirm - Olympus DM-620 | DM-620 Detailed Instructions (English) - Page 85
/Remove programs] in the application folder. the control panel window. 3 The Uninstaller will start up. 4 When the installed application Follow the wizard instructions. list is displayed, select [Olympus 4 When the administrator Sonority]. password is asked, enter the 5 Click [Change/Remove - Olympus DM-620 | DM-620 Detailed Instructions (English) - Page 86
of the voice guide data will be completed. { Using Olympus Sonority Notes • The alarm sound (☞ P.72), the Starting tune that plays when the recorder is starting up, and the Closing tune that plays when the recorder is turning off (☞ P.20), will be copied EN together with the voice guide data - Olympus DM-620 | DM-620 Detailed Instructions (English) - Page 87
. Please operate according to guidance analyzer functions. For details, please refer to the Online Help (☞ P.89). on the screen. When the purchase procedure is completed, the Upgrade Key will be issued by mail. 3 Select [Upgrade to Olympus Sonority Plus] from the [Help] menu. • The [Upgrade - Olympus DM-620 | DM-620 Detailed Instructions (English) - Page 88
writing function. Creating music CD: Function to create music CD from voice files registered in the CD writable folder. Recorder menu setting: 5 Function for settings in this recorder (detailed settings such as alarm setting, timer recording, etc.). Effect functions: You can use more than 20 - Olympus DM-620 | DM-620 Detailed Instructions (English) - Page 89
online help To open Online Help: • While "Olympus Sonority" is running, select [Contents] from the [Olympus Sonority Help] menu. 4 Search by contents: . • An explanation of the topic is displayed. 1 Using Olympus Sonority 2 Note EN • For more information on menus and operations, refer - Olympus DM-620 | DM-620 Detailed Instructions (English) - Page 90
the included Software CD (☞ P.83). 1 Boot the PC. 2 Connect the USB cable to the USB port of the PC. 5 • [Remote (Storage)] is displayed on the recorder if the USB cable is connected. • When the recorder is using the USB connection setting, it will not be connected to the PC when [AC Adapter] is - Olympus DM-620 | DM-620 Detailed Instructions (English) - Page 91
the screen. Click [Safely remove USB Mass Storage Device]. Macintosh 1 Drag and drop the drive icon for this recorder displayed on the desktop to the Recycle Bin icon. • The drive letter will differ depending on the PC being used. • When the window indicating that it is safe to remove hardware - Olympus DM-620 | DM-620 Detailed Instructions (English) - Page 92
E], and the recorded voice files are saved in these folders. Windows 1 Connect the recorder to your PC (☞ P.90). 4 Drive names and folder names when a PC is connected: Built-in flash memory 2 Open the Explorer window. • When you connect the recorder to Windows and open [My Computer], it will be - Olympus DM-620 | DM-620 Detailed Instructions (English) - Page 93
of the PC In addition to its uses as a voice recorder and a music player, this recorder can also be used as external memory for a computer by storing data from a computer and reading it back out. With the recorder connected to your PC, you can download data from the memory to your PC and upload - Olympus DM-620 | DM-620 Detailed Instructions (English) - Page 94
Audible content onto the recorder. Playback, management, and transfer of Audible content to the recorder can be done using the 2 Start up the downloaded executable file. • The AudibleManager Setup screen will be displayed. Select the name of the device in use (OLYMPUS DM-620) and click the [ - Olympus DM-620 | DM-620 Detailed Instructions (English) - Page 95
add a device in order to handle the recorder in the AudibleManager. Follow the procedure described below. displayed, check the name of the device in use (DM-620) and click the [OK] 5 button. Using Audible content will be downloaded to the Library folder in the AudibleManager. When download has - Olympus DM-620 | DM-620 Detailed Instructions (English) - Page 96
to the recorder and click the [Add to Device] button. 5 4 When the [Activate Your Device] entry screen is displayed, enter the user name and file. EN • When a content file is transferred to the recorder, a system file will be created as a hidden file inside the Audible folder. When this - Olympus DM-620 | DM-620 Detailed Instructions (English) - Page 97
from a computer. The operating method for Audible mode differs from when other folders on the recorder are selected (Normal mode). See the "Operating the Recorder in Audible Mode" (☞ P.99) for details. File display screen in Audible mode: In the Audible mode, [Play Mode] (☞ P.61) becomes the - Olympus DM-620 | DM-620 Detailed Instructions (English) - Page 98
or segments of news) are set arbitrarily for each file by the distributor of the content. Notes • When a content file is transferred to the recorder, a [.pos] file will be automatically created 5 for each content file in the Audible folder. • You can not set the Index marks or the Temp marks in - Olympus DM-620 | DM-620 Detailed Instructions (English) - Page 99
the `OK button is pressed playback resumes from that position. Press and hold the 9 button while playing a file. ➥ When you release the 9 button the recorder will resume normal playback. • If the starting position of a section (☞ P.98) and the playback position are in the middle of a file, the - Olympus DM-620 | DM-620 Detailed Instructions (English) - Page 100
there is no playback position or a starting position of a section, the recorder will skip to a playback position in the next file then stop. Press the 0 button when the recorder has stopped at the beginning of a file. ➥ The recorder skips to the Playback Position of the previous file and then stops - Olympus DM-620 | DM-620 Detailed Instructions (English) - Page 101
Charge the batteries or replace with new batteries (☞ P.15, P.17). Unlock the file (☞ P.53). [Cannot record in this Not an audio-recording folder] folder. Recording the memory. Error in the memory. you purchased the recorder or an Olympus service station for repair (☞ P.112). [Card Error] - Olympus DM-620 | DM-620 Detailed Instructions (English) - Page 102
created due to a shortage of capacity for remaining memory. Connect the recorder to a computer and delete any unnecessary files. Incompatible format. Please confirm to split a file other than MP3 or PCM files recorded in this recorder. Please select another file. Alarm message list EN 102 - Olympus DM-620 | DM-620 Detailed Instructions (English) - Page 103
high Voice files are not recorded in stereo Probable cause The batteries are not loaded properly. Battery power is getting low. Action Verify that the batteries' polarities = and - are correct (☞ P.15). Charge the batteries or replace with new batteries (☞ P.15, P.17). The power is off. Turn the - Olympus DM-620 | DM-620 Detailed Instructions (English) - Page 104
occurring. monitor When the built-in speaker amps and the like are connected there is a risk that audio feedback will occur while recording. It is recommended that you use earphones for the recording monitor, or turn the [Rec Monitor] to [Off] while recording (☞ P.59). Perform adjustments, such as - Olympus DM-620 | DM-620 Detailed Instructions (English) - Page 105
using the USB connection, follow the confirmation display and press the `OK button. Set [USB Class] to [Storage class] (☞ P.76). [USB Connect] is set to [AC Adapter]. Set [USB Connect] to [PC] (☞ P.76). 6 Troubleshooting EN 105 - Olympus DM-620 | DM-620 Detailed Instructions (English) - Page 106
be plugged into your ear while phoning. The voice or conversation over the phone can be clearly recorded. s Ni-MH rechargeable battery: BR404 High-efficiency rechargeable long life batteries. s USB connecting AC adapter: A514 DC5V AC Adapter for USB connection. s Connecting cord: KA333 Connecting - Olympus DM-620 | DM-620 Detailed Instructions (English) - Page 107
dynamic speaker 4 MIC jack: ø 3.5 mm mini-jack, impedance 2.2 kΩ 4 EAR jack: ø 3.5 mm mini-jack, impedance 8 Ω or more 4 Input power requirement: Batteries: 6 AAA battery (LR03) or Olympus Ni-MH rechargeable battery External power supply: USB connecting AC adapter(A514) 5 V 4 External - Olympus DM-620 | DM-620 Detailed Instructions (English) - Page 108
Frequency response: 4 During recording mode (Microphone jack): Linear PCM format 48 kHz 16 bit 44.1 kHz 16 bit 40 Hz to to 16 kHz 32 kbps 40 Hz to 9 kHz mono 40 Hz to 3 kHz 6 4 During recording mode (Built-in microphone): 20 Hz to 20 kHz ([Central Mic ON]) 70 Hz to 20 kHz ([Central Mic - Olympus DM-620 | DM-620 Detailed Instructions (English) - Page 109
microphone Earphone playback (During recording mode) (During playback mode) Linear PCM format 44.1 kHz 16 bit 29h. 30h. MP3 format 320 kbps 27h. 34h. 128 kbps 28h. WMA format mono 33h. 33h. 37h. 6 Specifications Note • Battery life is measured by Olympus. It varies greatly according - Olympus DM-620 | DM-620 Detailed Instructions (English) - Page 110
Guide to recording times The following values are strictly references. 4 Linear PCM format: Recording mode 48 kHz 16 bit 44.1 kHz 16 bit Built-in memory (4 GB) 5h. 25min. 5h. 55min. 2 GB 2h. 45min. 2h. 55min. 4 MP3 format: Recording mode Built-in memory (4 GB) 2 GB 320 kbps 26h. 13h. 256 - Olympus DM-620 | DM-620 Detailed Instructions (English) - Page 111
Maximum recording time per file Guide to recordable number of songs • The maximum capacity for a single file is limited to approx. 4 GB for WMA and MP3. • Regardless of the memory remaining amount, the longest sound recording time per file is restricted to the following value. Linear PCM format - Olympus DM-620 | DM-620 Detailed Instructions (English) - Page 112
Charged numbers for the Rest of Europe + 49 180 567 1083 + 49 40 23773 4899 s User Support E-mail address in Europe [email protected] Technical assistance and support Declaration of Conformity: Model Number: DM-620 6 Trade Name: DIGITAL VOICE RECORDER Responsible Party: OLYMPUS - Olympus DM-620 | DM-620 Detailed Instructions (English) - Page 113
IMAGING CORP. Shinjuku Monolith, 3-1 Nishi-Shinjuku 2-chome, Shinjuku-ku, Tokyo 163-0914, Japan. Tel. +81 (0)3-3340-2111 http://www.olympus.com OLYMPUS IMAGING AMERICA INC. 3500 Corporate Parkway, P.O. Box 610, Center Valley, PA 18034-0610, U.S.A. Tel. 1-888-553-4448 http://www.olympusamerica
-
 1
1 -
 2
2 -
 3
3 -
 4
4 -
 5
5 -
 6
6 -
 7
7 -
8
-
9
-
10
-
11
-
12
-
13
-
14
-
15
-
16
-
17
-
18
-
19
-
20
-
21
-
22
-
23
-
24
-
25
-
26
-
27
-
28
-
29
-
30
-
31
-
32
-
33
-
34
-
35
-
36
-
37
-
38
-
39
-
40
-
41
-
42
-
43
-
44
-
45
-
46
-
47
-
48
-
49
-
50
-
51
-
52
-
53
-
54
-
55
-
56
-
57
-
58
-
59
-
60
-
61
-
62
-
63
-
64
-
65
-
66
-
67
-
68
-
69
-
70
-
71
-
72
-
73
-
74
-
75
-
76
-
77
-
78
-
79
-
80
-
81
-
82
-
83
-
84
-
85
-
86
-
87
-
88
-
89
-
90
-
91
-
92
-
93
-
94
-
95
-
96
-
97
-
98
-
99
-
100
-
101
-
102
-
103
-
104
-
105
-
106
-
107
-
108
-
109
-
110
-
111
-
112
-
113
 |
 |
DETAILED
INSTRUCTIONS
DIGITAL VOICE
RECORDER
Thank you for purchasing an Olympus
Digital Voice Recorder.
Please read these instructions for information
about using the product correctly and safely.
Keep the instructions handy for future reference.
To ensure successful recordings, we recommend that
you test the record function and volume before use.
EN
Register your product on
www.olympus-consumer.com/register
and get additional benefits from Olympus!