Olympus SP-810UZ SP-810UZ Instruction Manual (English) - Page 41
Saving print settings to the image data, Print Order], Protecting images, Rotating images
 |
View all Olympus SP-810UZ manuals
Add to My Manuals
Save this manual to your list of manuals |
Page 41 highlights
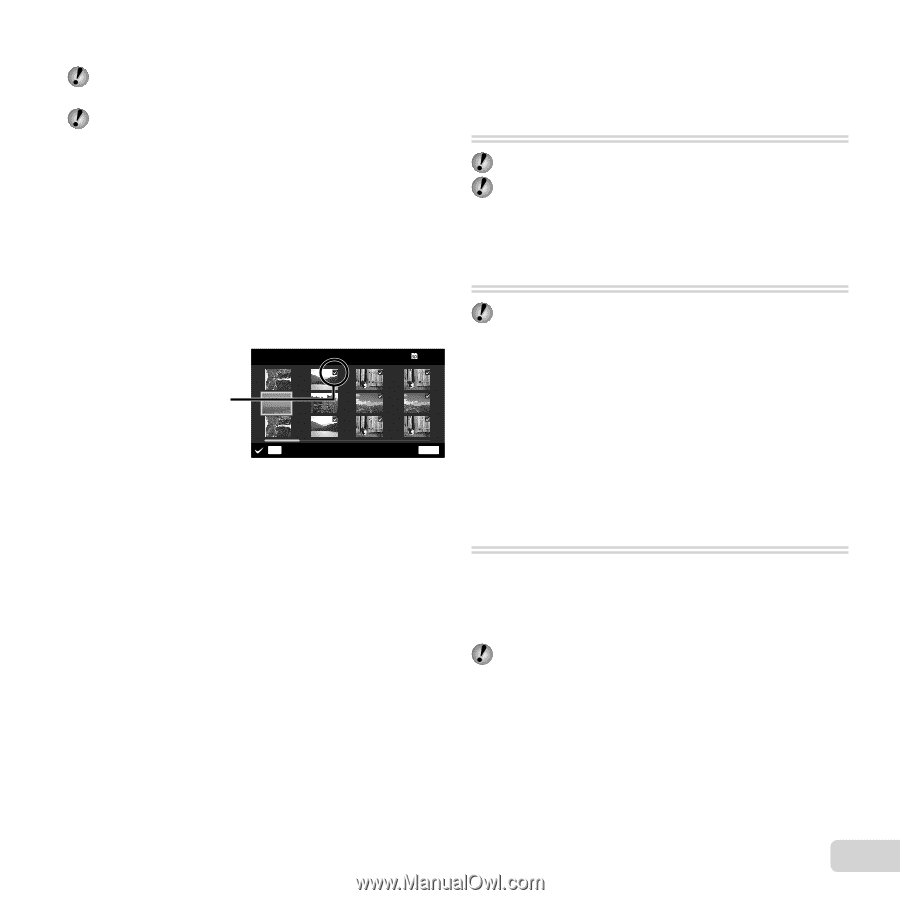
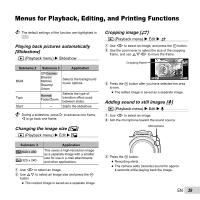
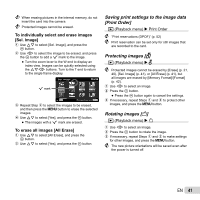
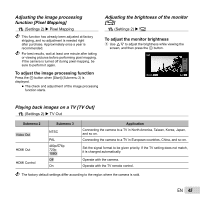
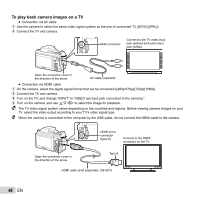
When erasing pictures in the internal memory, do not insert the card into the camera. Protected images cannot be erased. To individually select and erase images [Sel. Image] 1 Use FG to select [Sel. Image], and press the A button. 2 Use HI to select the image to be erased, and press the A button to add a R mark to the image. ● Turn the zoom lever to the W end to display an index view. Images can be quickly selected using the FGHI buttons. Turn to the T end to return to the single frame display. Sel. Image 5/30 R mark OK Erase/Cancel MENU 3 Repeat Step 2 to select the images to be erased, and then press the button to erase the selected images. 4 Use FG to select [Yes], and press the A button. ● The images with a R mark are erased. To erase all images [All Erase] 1 Use FG to select [All Erase], and press the A button. 2 Use FG to select [Yes], and press the A button. Saving print settings to the image data [Print Order] q (Playback menu) Print Order "Print reservations (DPOF)" (p. 52) Print reservation can be set only for still images that are recorded to the card. Protecting images [R] q (Playback menu) R Protected images cannot be erased by [Erase] (p. 21, 40), [Sel. Image] (p. 41), or [All Erase] (p. 41), but all images are erased by [Memory Format]/[Format] (p. 42). 1 Use HI to select an image. 2 Press the A button. ● Press the A button again to cancel the settings. 3 If necessary, repeat Steps 1 and 2 to protect other images, and press the button. Rotating images [y] q (Playback menu) y 1 Use HI to select an image. 2 Press the A button to rotate the image. 3 If necessary, repeat Steps 1 and 2 to make settings for other images, and press the button. The new picture orientations will be saved even after the power is turned off. EN 41
-
 1
1 -
2
-
3
-
4
-
5
-
6
-
7
-
8
-
9
-
10
-
11
-
12
-
13
-
14
-
15
-
16
-
17
-
18
-
19
-
20
-
21
-
22
-
23
-
24
-
25
-
26
-
27
-
28
-
29
-
30
-
31
-
32
-
33
-
34
-
35
-
 36
36 -
 37
37 -
 38
38 -
 39
39 -
 40
40 -
 41
41 -
 42
42 -
 43
43 -
 44
44 -
 45
45 -
 46
46 -
47
-
48
-
49
-
50
-
51
-
52
-
53
-
54
-
55
-
56
-
57
-
58
-
59
-
60
-
61
-
62
-
63
-
64
-
65
-
66
-
67
-
68
-
69
-
70
-
71
-
72
-
73
-
74
-
75
-
76
-
77
 |
 |