Olympus SP-810UZ SP-810UZ Instruction Manual (English) - Page 53
Resetting the print reservation data, for selected images
 |
View all Olympus SP-810UZ manuals
Add to My Manuals
Save this manual to your list of manuals |
Page 53 highlights
Resetting the print reservation data for selected images 1 Follow Steps 1 and 2 in [
-
 1
1 -
2
-
3
-
4
-
5
-
6
-
7
-
8
-
9
-
10
-
11
-
12
-
13
-
14
-
15
-
16
-
17
-
18
-
19
-
20
-
21
-
22
-
23
-
24
-
25
-
26
-
27
-
28
-
29
-
30
-
31
-
32
-
33
-
34
-
35
-
36
-
37
-
38
-
39
-
40
-
41
-
42
-
43
-
44
-
45
-
46
-
47
-
 48
48 -
 49
49 -
 50
50 -
 51
51 -
 52
52 -
 53
53 -
 54
54 -
 55
55 -
 56
56 -
 57
57 -
 58
58 -
59
-
60
-
61
-
62
-
63
-
64
-
65
-
66
-
67
-
68
-
69
-
70
-
71
-
72
-
73
-
74
-
75
-
76
-
77
 |
 |
53
EN
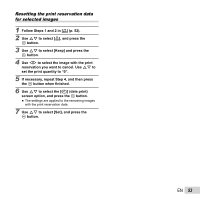
Resetting the print reservation data
for selected images
1
Follow Steps 1 and 2 in [
<
] (p. 52).
2
Use
FG
to select [
<
], and press the
A
button.
3
Use
FG
to select [Keep] and press the
A
button.
4
Use
HI
to select the image with the print
reservation you want to cancel. Use
FG
to
set the print quantity to “0”.
5
If necessary, repeat Step 4, and then press
the
A
button when
fi
nished.
6
Use
FG
to select the [
X
] (date print)
screen option, and press the
A
button.
●
The settings are applied to the remaining images
with the print reservation data.
7
Use
FG
to select [Set], and press the
A
button.