Olympus STYLUS TOUGH-6020 STYLUS TOUGH-3000 Instruction Manual (English) - Page 27
Point the camera toward the, subject. Check the frame appearing - skin
 |
UPC - 769118339999
View all Olympus STYLUS TOUGH-6020 manuals
Add to My Manuals
Save this manual to your list of manuals |
Page 27 highlights
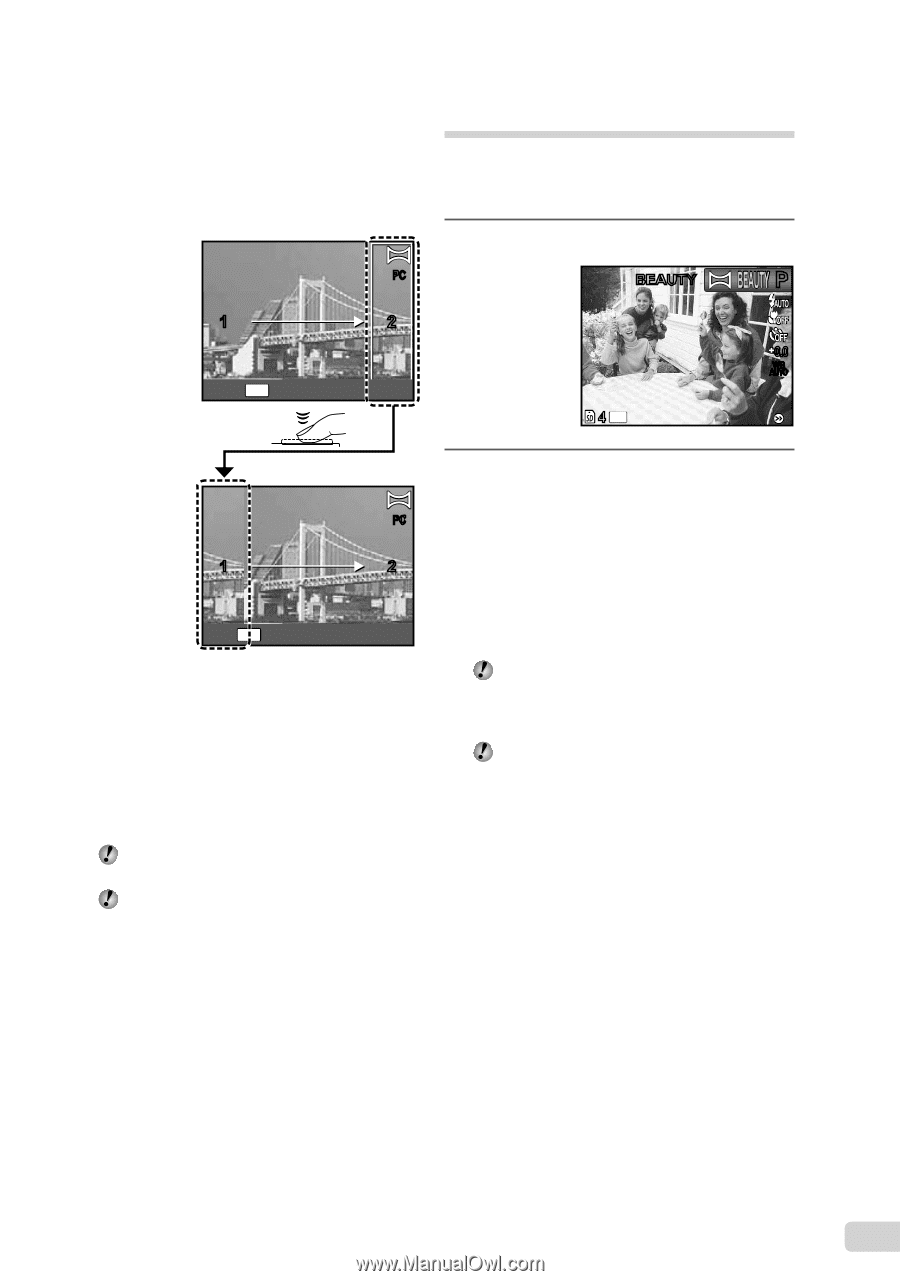
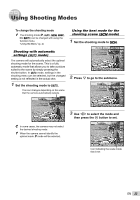
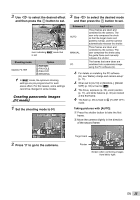
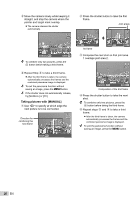
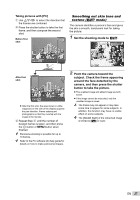
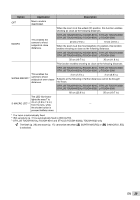
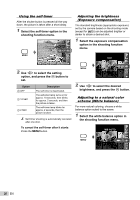
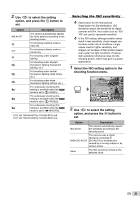
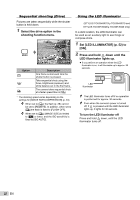
Taking pictures with [PC] 1 Use FGHI to select the direction that the frames are combined. 2 Press the shutter button to take the first frame, and then compose the second shot. Before first shot PC Smoothing out skin tone and texture (Q mode) The camera identifies a person's face and gives the skin a smooth, translucent look for taking the picture. 1 Set the shooting mode to Q. BEAUTY P 1 2 BACK MENU 0.0 WB AUTO 4 14M After first shot PC 1 2 EXIT MENU ● After the first shot, the area shown in white reappears on the side of the display opposite the pan direction. Frame subsequent photographs so that they overlap with the image in the monitor. 3 Repeat Step 2 until the number of desired frames is taken, and then press the A button or m button when finished. Panorama shooting is possible for up to 10 frames. Refer to the PC software (ib) help guide for details on how to make panorama images. 2 Point the camera toward the subject. Check the frame appearing around the face detected by the camera, and then press the shutter button to take the picture. ● The unedited image and edited image are both saved. ● If the image cannot be retouched, only the unedited image is saved. The frame may not appear or may take some time to appear for some subjects. In addition, this function may have no visible effect on some subjects. The [IMAGE SIZE] of the retouched image is limited to [n] or lower. EN 27
-
 1
1 -
2
-
3
-
4
-
5
-
6
-
7
-
8
-
9
-
10
-
11
-
12
-
13
-
14
-
15
-
16
-
17
-
18
-
19
-
20
-
21
-
 22
22 -
 23
23 -
 24
24 -
 25
25 -
 26
26 -
 27
27 -
 28
28 -
 29
29 -
 30
30 -
 31
31 -
 32
32 -
33
-
34
-
35
-
36
-
37
-
38
-
39
-
40
-
41
-
42
-
43
-
44
-
45
-
46
-
47
-
48
-
49
-
50
-
51
-
52
-
53
-
54
-
55
-
56
-
57
-
58
-
59
-
60
-
61
-
62
-
63
-
64
-
65
-
66
-
67
-
68
-
69
-
70
-
71
-
72
-
73
-
74
-
75
-
76
-
77
-
78
-
79
-
80
-
81
-
82
-
83
 |
 |