Olympus STYLUS TOUGH-6020 STYLUS TOUGH-3000 Instruction Manual (English) - Page 54
Follow Steps 1 and 2 for [EASY, BORDERLESS] or [PICS/SHEET]
 |
UPC - 769118339999
View all Olympus STYLUS TOUGH-6020 manuals
Add to My Manuals
Save this manual to your list of manuals |
Page 54 highlights
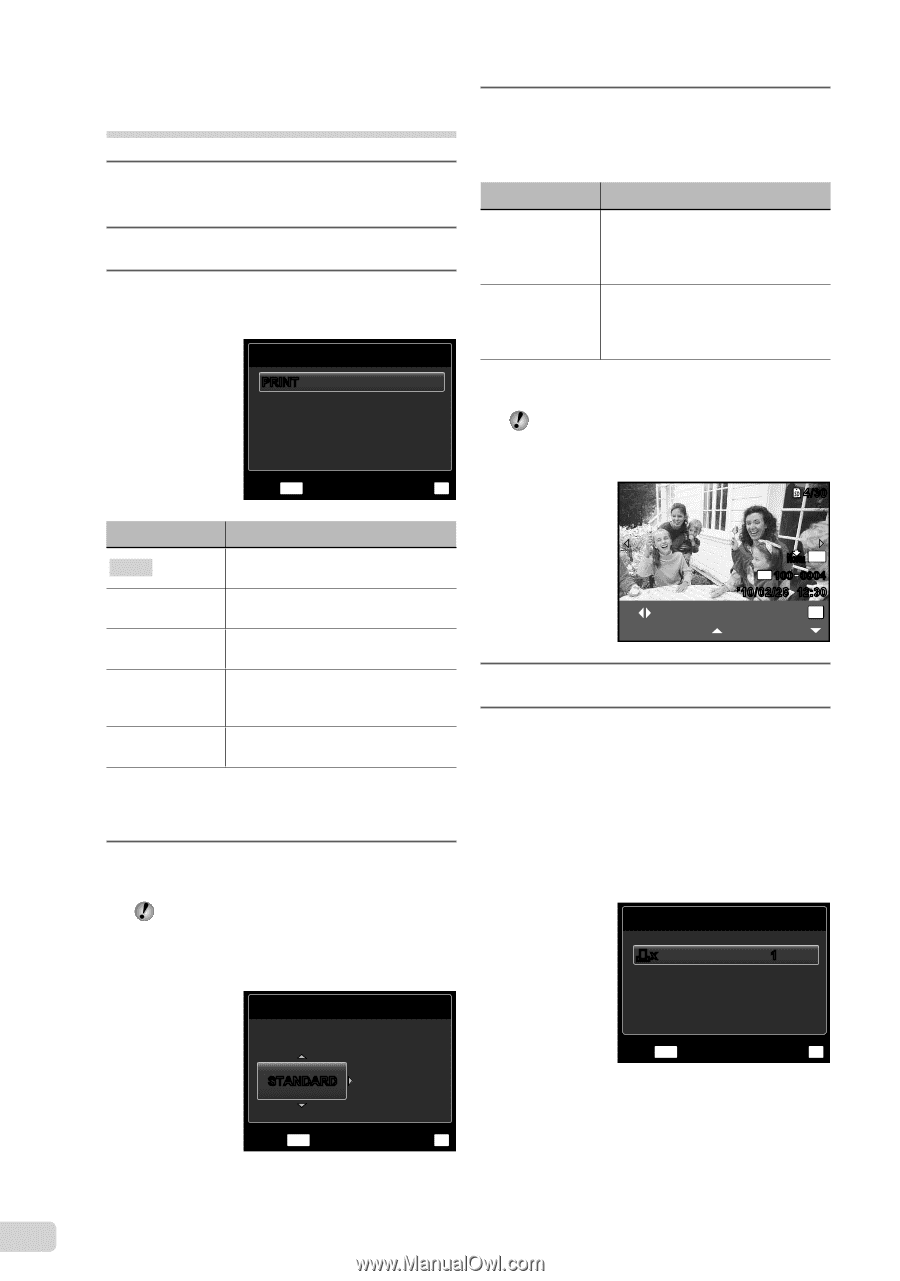
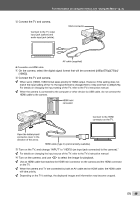
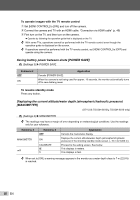
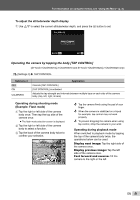
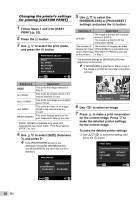
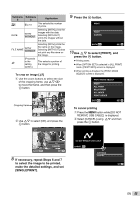
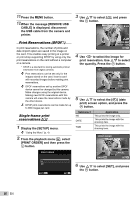
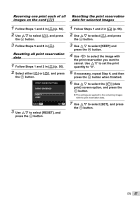
Changing the printer's settings for printing [CUSTOM PRINT] 1 Follow Steps 1 and 2 for [EASY PRINT] (p. 53). 2 Press the A button. 3 Use FG to select the print mode, and press the A button. PRINT MODE SELECT PRINT ALL PRINT MULTI PRINT ALL INDEX PRINT ORDER EXIT MENU SET OK 5 Use FG to select the [BORDERLESS] or [PICS/SHEET] settings, and press the A button. Submenu 4 Application OFF/ON*1 The image is printed with a border around it ([OFF]). The image is printed to fill the entire paper ([ON]). (The number of The number of images per sheet images per sheet ([PICS/SHEET]) is selectable only varies depending when [MULTI PRINT] is selected on the printer.) in Step 3. *1 The available settings for [BORDERLESS] vary depending on the printer. If [STANDARD] is selected in Steps 4 and 5, the image is printed at the printer's standard settings. 4/30 Submenu 2 Application PRINT This prints the image selected in Step 6. ALL PRINT This prints all images stored in the internal memory or card. MULTI PRINT This prints one image in a multiple layout format. ALL INDEX This prints an index of all images stored in the internal memory or card. PRINT ORDER*1 This prints images based on the print reservation data on the card. *1 [PRINT ORDER] is available only when print reservations have been made. "Print Reservations (DPOF)" (p. 56) 4 Use FG to select [SIZE] (Submenu 3), and press I. If the [PRINTPAPER] screen is not displayed, the [SIZE], [BORDERLESS], and [PICS/SHEET] are set to the printer's standard. PRINTPAPER SINGLE PRINT NORM 14M FILE 100 0004 '10/02/26 12:30 PRINT OK MORE 6 Use HI to select an image. 7 Press F to make a print reservation for the current image. Press G to make the detailed printer settings for the current image. To make the detailed printer settings 1 Use FGHI to select the setting, and press the A button. PRINT INFO
-
 1
1 -
2
-
3
-
4
-
5
-
6
-
7
-
8
-
9
-
10
-
11
-
12
-
13
-
14
-
15
-
16
-
17
-
18
-
19
-
20
-
21
-
22
-
23
-
24
-
25
-
26
-
27
-
28
-
29
-
30
-
31
-
32
-
33
-
34
-
35
-
36
-
37
-
38
-
39
-
40
-
41
-
42
-
43
-
44
-
45
-
46
-
47
-
48
-
 49
49 -
 50
50 -
 51
51 -
 52
52 -
 53
53 -
 54
54 -
 55
55 -
 56
56 -
 57
57 -
 58
58 -
 59
59 -
60
-
61
-
62
-
63
-
64
-
65
-
66
-
67
-
68
-
69
-
70
-
71
-
72
-
73
-
74
-
75
-
76
-
77
-
78
-
79
-
80
-
81
-
82
-
83
 |
 |