Olympus Stylus 400 Stylus 300 Digital Basic Manual (English, Français
Olympus Stylus 400 - Stylus 400 4MP Digital Camera Manual
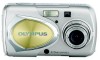 |
UPC - 050332140226
View all Olympus Stylus 400 manuals
Add to My Manuals
Save this manual to your list of manuals |
Olympus Stylus 400 manual content summary:
- Olympus Stylus 400 | Stylus 300 Digital Basic Manual (English, Français - Page 1
DIGITAL CAMERA APPAREIL PHOTO NUMÉRIQUE DIGITALKAMERA CÁMERA DIGITAL BASIC MANUAL MANUEL DE BASE EINFACHE ANLEITUNG MANUAL BÁSICO ENGLISH FRANÇAIS DEUTSCH ESPAÑOL - Olympus Stylus 400 | Stylus 300 Digital Basic Manual (English, Français - Page 2
40 SPECIFICATIONS 41 These instructions are only for quick reference. For more details on the functions described here, refer to the "Reference Manual" on CD-ROM. This basic manual contains guidelines for using Olympus Stylus 300/400 DIGITAL (µ [mju:] 300/400 DIGITAL). Except where otherwise - Olympus Stylus 400 | Stylus 300 Digital Basic Manual (English, Français - Page 3
to the Software Installation Guide included in the CD-ROM package. For customers in North and South America For customers in USA Declaration of Conformity Model Number : Stylus 300 DIGITAL, Stylus 400 DIGITAL RM-2 (Remote control) Trade Name : OLYMPUS Responsible Party : Olympus America Inc - Olympus Stylus 400 | Stylus 300 Digital Basic Manual (English, Français - Page 4
GETTING STARTED J NAMES OF PARTS Lens barrier Turns the camera on and off in the shooting mode. Shutter button Flash En Card cover Self-timer/ Remote control lamp Remote Lens control receiver Extends automatically when you open the lens barrier. VIDEO OUT jack DC-IN jack cover - Olympus Stylus 400 | Stylus 300 Digital Basic Manual (English, Français - Page 5
mode button Macro button Flash mode button Self-timer button Monitor Zoom button (W/T ) En Strap eyelet OK/Menu button ( ) Monitor button (QUICK VIEW ) Playback button ( ) Battery compartment cover Tripod socket Viewfinder Orange lamp Green lamp AF target mark En 5 - Olympus Stylus 400 | Stylus 300 Digital Basic Manual (English, Français - Page 6
16 Movie Items Indications 1 Shooting mode En 2 Battery check , ,, , , , , 3 Green lamp 4 Flash stand-by/ Camera movement warning/ Flash charge (Lights) (Blinks) 5 balance , , , 14 AF target mark [ ] 15 Memory gauge , , , 16 Number of storable still pictures 16 Seconds remaining 16'' - Olympus Stylus 400 | Stylus 300 Digital Basic Manual (English, Français - Page 7
mode Screens with the information display set to ON are shown below. 2 1 4 1 5 2048 1536 6 7 8 9 10 Still picture Movie Items 1 Battery check 2 Print reservation, Number of prints 3 Movie 4 Protect 5 Record mode 6 Resolution 7 Exposure compensation 8 White balance 9 Date and time 10 File - Olympus Stylus 400 | Stylus 300 Digital Basic Manual (English, Français - Page 8
. • Movie recording ends automatically when the whole memory gauge is lit. Battery check If the remaining battery power is low, the battery check indication on the monitor changes as follows when the camera is turned on or while the camera is in use. No indication Lights (Green) Pictures - Olympus Stylus 400 | Stylus 300 Digital Basic Manual (English, Français - Page 9
camera. • Wipe any water off the camera before changing the battery or card. • Keep the lens out of the water when taking pictures. (The camera may not focus correctly.) • If the camera Olympus service center. (A charge is made for replacement of parts.) • If the rubber packing of the battery - Olympus Stylus 400 | Stylus 300 Digital Basic Manual (English, Français - Page 10
an Olympus lithium ion battery (LI-10B). The battery is dedicated to this camera and other batteries do not work. The battery is not fully charged when the camera is purchased. Fully charge the battery on the specified charger (LI-10C) before first use. For details, read the charger's instructions - Olympus Stylus 400 | Stylus 300 Digital Basic Manual (English, Français - Page 11
. 1 Make sure that: • The monitor is off. • The lens barrier is closed. • The lamp on the right of the viewfinder is off. 2 Slide the battery compartment Battery compartment cover cover in the direction of (the direction indicated by the mark on the cover), and lift it up in the direction of - Olympus Stylus 400 | Stylus 300 Digital Basic Manual (English, Français - Page 12
J INSERTING A CARD "Card" in this manual refers to the xD-Picture Card. The camera uses the card to record pictures. 1 Make sure that: • The monitor is off. • The lens barrier is closed. • The lamp on the right of the viewfinder is off. 2 - Olympus Stylus 400 | Stylus 300 Digital Basic Manual (English, Français - Page 13
way and then stops. En Note Releasing your finger quickly after pushing the card all the way in may cause it to eject forcefully out of the slot. 3 Hold the card straight and pull it out. • Do not press on the card with hard or pointed items such as ballpoint pens. Note En 13 - Olympus Stylus 400 | Stylus 300 Digital Basic Manual (English, Français - Page 14
barrier is not fully open. Open the lens barrier fully until you feel it click. When using the camera for the first time or after the camera has been left for about 1 hour with the battery removed, the date and time are reset. In this event, "SET DATE & TIME" appears on the monitor - Olympus Stylus 400 | Stylus 300 Digital Basic Manual (English, Français - Page 15
. The monitor turns on and the last picture taken is displayed. Power off: Press . The monitor and the camera turn off. En • Never open the card cover, remove the card or the battery, or connect or disconnect the AC adapter while the camera is turned on. Note Doing so could destroy all data on the - Olympus Stylus 400 | Stylus 300 Digital Basic Manual (English, Français - Page 16
press . • The first two digits of the year are fixed. 8 Repeat this procedure until the date and time are completely set. • The camera only displays the time in 24- camera off • The date and time settings will be canceled if the camera is left without batteries for approximately one day. Note - Olympus Stylus 400 | Stylus 300 Digital Basic Manual (English, Français - Page 17
, the top menu is displayed on the monitor. The functions of this camera are set from the menus. This chapter explains how the menus work, using tab on the left of the screen by pressing . SEt CARD CAMERA CANCEL + 0.0 SELECt GO ESP/ ESP Tab DRIVE DIGItAL ZOOM OFF PANORAMA 2 IN 1 En 17 - Olympus Stylus 400 | Stylus 300 Digital Basic Manual (English, Français - Page 18
a tab, then press . Top menu MODE MENU WB CAMERA tab SEt CARD CAMERA ESP/ DRIVE DIGItAL ZOOM PANORAMA 2 IN 1 ESP OFF En Arrow pad ( CARD tab ) CARD%SEtUP Press to return to the tab selection screen. SEt CARD CAM SETUP tab SEtUP CARD CAM ALL RESEt REC VIEW PIXEL MAPPING ON ENGLISH ON - Olympus Stylus 400 | Stylus 300 Digital Basic Manual (English, Français - Page 19
ESP OFF 4 Press to select a setting. Press to complete setting. Press again to exit the menu and return to shooting. En SEt CARD CAMERA SEt CARD CAMERA ESP/ DRIVE DIGItAL ZOOM PANORAMA 2 IN 1 ESP OFF The green frame moves to the selected item. or To return to select an item, press or - Olympus Stylus 400 | Stylus 300 Digital Basic Manual (English, Français - Page 20
Shortcut menus Shooting mode Adjusts the brightness of the picture. Sets the image quality and resolution. Still picture : SHQ, HQ, SQ1, SQ2 Movie : HQ, SQ En Sets the appropriate white balance according to the light source. Playback mode Runs through all saved pictures one after another as slide - Olympus Stylus 400 | Stylus 300 Digital Basic Manual (English, Français - Page 21
a tab and These instructions are only for quick reference. For more details on the functions described here, refer to the "Reference Manual" on CD-ROM. Shooting mode SEt CARD CAMERA CAMERA tab ESP/ ESP CARD tab DRIVE SETUP tab DIGItAL ZOOM OFF PANORAMA En 2 IN 1 CAMERA tab ESP/ DRIVE - Olympus Stylus 400 | Stylus 300 Digital Basic Manual (English, Français - Page 22
whether to display pictures on the monitor while saving them to a card. Checks the CCD and image processing functions for errors. Adjusts the pictures 90 degrees clockwise or counterclockwise. Stores print reservation information on the card. Creates a black and white picture and saves it as a new - Olympus Stylus 400 | Stylus 300 Digital Basic Manual (English, Français - Page 23
SETUP tab ALL RESET VIDEO OUT Selects whether to keep the current camera settings when you turn off the power. Selects a language for on-screen display. Turns the beep sound (used for warnings, etc.) on and off. Adjusts - Olympus Stylus 400 | Stylus 300 Digital Basic Manual (English, Français - Page 24
Other functions, such as the flash mode and metering, can be adjusted manually. PORTRAIT Suitable for taking a portrait-style shot of a person. Importance is placed on reproducing skin texture. The camera automatically sets the optimal shooting conditions. LANDSCAPE + PORTRAIT Suitable for taking - Olympus Stylus 400 | Stylus 300 Digital Basic Manual (English, Français - Page 25
sets the optimal shooting conditions. The zoom is fixed in the En Wide position and cannot be changed. MOVIE Lets you record movies. The camera maintains the correct exposure even if your subject moves. You cannot record movies with sound. J TAKING STILL PICTURES You can take still pictures - Olympus Stylus 400 | Stylus 300 Digital Basic Manual (English, Français - Page 26
as for shooting using the monitor. En • Never open the card cover, remove the battery or disconnect the AC adapter while the orange lamp is blinking and you cannot position the AF target mark on it, you can focus the camera on another point at roughly the same distance (focus lock) and take the - Olympus Stylus 400 | Stylus 300 Digital Basic Manual (English, Français - Page 27
the virtual dial screen. 3 Press to select , then press . • Movie recording is set and the camera returns to the shooting mode. • The mark and the total recordable time depending on the card memory capacity are displayed on the monitor. 4 Decide the composition while looking at the image on - Olympus Stylus 400 | Stylus 300 Digital Basic Manual (English, Français - Page 28
on the record mode and the amount of space available on the card. • You cannot record movies with sound. J ZOOMING IN ON 35 mm camera). By combining the optical zoom with the digital zoom, zoom magnification can be increased to a maximum of approximately 15x. En Magnification of the digital zoom When - Olympus Stylus 400 | Stylus 300 Digital Basic Manual (English, Français - Page 29
(sold separately in some regions). This is useful when you want to take a picture with yourself in it or a night scene, without touching the camera. 1 Mount the camera on a tripod or place it on a stable, flat surface. 2 Open the lens barrier fully. • The lens extends and the monitor turns on - Olympus Stylus 400 | Stylus 300 Digital Basic Manual (English, Français - Page 30
device, point it at the remote control receiver on the camera and then press the shutter button on the device. Self- (0.7 ft. to 1.6 ft.) from your subject. Regular photographs can be taken, but the camera may take time to focus on distant subjects. En 1 Open the lens barrier fully. • The - Olympus Stylus 400 | Stylus 300 Digital Basic Manual (English, Français - Page 31
on a PC or printing in postcard size. • The resolutions are smaller than in SHQ or HQ. • A standard quality mode. • More images can be saved to a card. Uses • Attaching images to e-mail or simply viewing them on a PC. Normal Smaller 1 In the shooting mode top menu, press to select . 2 Press to - Olympus Stylus 400 | Stylus 300 Digital Basic Manual (English, Français - Page 32
available in normal playback mode are also available in QUICK VIEW. 1 Press twice quickly (double-click) while in the shooting mode. • The camera immediately enters the playback mode and displays the last picture taken. (Single-frame playback) 2 Press the shutter button halfway to return to the - Olympus Stylus 400 | Stylus 300 Digital Basic Manual (English, Français - Page 33
Close-up playback Pictures displayed on the monitor can be enlarged in steps up to 4 times the original size. This function is useful when you want to check the details of a picture. 1 Use the arrow pad to display the still picture you want to enlarge. • You cannot enlarge pictures with . 2 Press - Olympus Stylus 400 | Stylus 300 Digital Basic Manual (English, Français - Page 34
again after playback ends to display the MOVIE PLAYBACK menu. PLAYBACK : Plays back the entire movie again. FRAME BY FRAME : Plays back the movie manually one frame at a time. EXIT : Leaves the movie playback mode. Press to select from PLAYBACK, FRAME BY FRAME or EXIT, then press . When - Olympus Stylus 400 | Stylus 300 Digital Basic Manual (English, Français - Page 35
non-Olympus cards or cards which have been formatted on a PC, you must format them with this camera. • All existing data, including protected data, is erased when the card is formatted. Once erased, pictures cannot be restored, so make Note sure that you do not erase important image data. Download - Olympus Stylus 400 | Stylus 300 Digital Basic Manual (English, Français - Page 36
, press to select YES. 3 Press . • The BUSY bar is displayed and the card is formatted. En J PLAYBACK ON A TV Use the Video cable provided with the camera to play back recorded images on your TV. 1 Make sure that the camera and the TV are turned off. Connect the Video cable to the VIDEO - Olympus Stylus 400 | Stylus 300 Digital Basic Manual (English, Français - Page 37
printer or at a DPOF photo lab. What is DPOF? DPOF is short for Digital Print Order Format. DPOF is a format used to record automatic print information from cameras. By storing the print reservation data on the card on the card. For more details, refer to the "Reference Manual" on CD-ROM. En 37 - Olympus Stylus 400 | Stylus 300 Digital Basic Manual (English, Français - Page 38
that support the JPEG file format (Paint Shop Pro, Photoshop, etc.); Internet Note browsers (Netscape Communicator, Microsoft Internet Explorer, etc.); CAMEDIA Master software; or other software. For details on using commercial graphics applications, refer to their instruction manuals. 38 - Olympus Stylus 400 | Stylus 300 Digital Basic Manual (English, Français - Page 39
slot? No Yes Use the optional PC card adapter. *Not supported by Windows NT4.0 or lower. Consult your nearest Olympus representative. For more details, refer to the "Reference Manual" on CD-ROM. For connection to the PC, refer to the "Software Installation Guide" included in the CD-ROM package - Olympus Stylus 400 | Stylus 300 Digital Basic Manual (English, Français - Page 40
pictures. Before erasing, download important images to a PC. NO PICTURE There are no pictures on the card. The card contains no pictures. Record pictures. PICTURE ERROR There is a problem with the selected picture and it cannot be displayed. Use image processing software to view the picture - Olympus Stylus 400 | Stylus 300 Digital Basic Manual (English, Français - Page 41
Motion JPEG support : xD-Picture Card (16 - 256MB) No. of storable pictures (when a 16 MB Card is used) : Resolution 2272 × 1704 2048 × 1536 1600 × 1200 1280 × 960 1024 × 768 640 × 480 Record mode/ No. of storable pictures Stylus/µ[mju:] 400 DIGITAL Stylus/µ[mju:] 300 DIGITAL SHQ 5 HQ - Olympus Stylus 400 | Stylus 300 Digital Basic Manual (English, Français - Page 42
Stylus/µ[mju:] : 1/2.5'' CCD solid-state image pickup, 4,230,000 400 DIGITAL pixels (gross) Lens : Olympus lens 5.8 mm to 17.4 mm (equivalent to 35 mm to 105 mm lens on 35 mm camera), F3.1 to F5.2 Photometric system : Digital ESP metering, Spot metering Shutter speed : 1/2 to 1/1000 sec. (max - Olympus Stylus 400 | Stylus 300 Digital Basic Manual (English, Français - Page 43
MEMO En En 43 - Olympus Stylus 400 | Stylus 300 Digital Basic Manual (English, Français - Page 44
taillé des fonctions dans le "Manuel de référence" sur le CD-ROM. Ce manuel de référence contient les instructions pour l'utilisation de l'appareil Olympus Stylus 300/400 DIGITAL (µ [mju:] 300/400 DIGITAL). Sauf indication différente, les explications du manuel concernent les deux modèles. 44 Fr - Olympus Stylus 400 | Stylus 300 Digital Basic Manual (English, Français - Page 45
uniquement des instructions de base Guide d'installation du logiciel sur le CD-ROM. Pour les utilisateurs en Amérique du Nord et du Sud Pour les utilisateurs aux États-Unis Déclaration de conformité Numéro de modèle : Stylus 300 DIGITAL, Stylus 400 DIGITAL RM-2 (Télécommande) Marque : OLYMPUS - Olympus Stylus 400 | Stylus 300 Digital Basic Manual (English, Français - Page 46
GUIDE RAPIDE DE DÉMARRAGE J NOMENCLATURE DES PIÈCES Capot de protection d'objectif Permet d'activer ou désactiver le mode de prise de vues de l'appareil. Déclencheur Flash - Olympus Stylus 400 | Stylus 300 Digital Basic Manual (English, Français - Page 47
(W/T ) Œillet de courroie Fr Touche OK/Menu ( ) Touche de l'écran ACL (QUICK VIEW ) Touche d'affichage ( ) Embase filetée de trépied Couvercle du compartiment de la batterie Viseur Voyant orange Voyant vert Repères de mise au point automatique Fr 47 - Olympus Stylus 400 | Stylus 300 Digital Basic Manual (English, Français - Page 48
9 SHQ 10 Vue fixe 1 11 2 12 13 5 6 14 15 9 16 11 13 14 15 16 Vidéo Éléments 1 Mode prise de vue 2 Contrôle de la batterie 3 Voyant vert 4 Flash en attente/ Fr Avertissement de bougé Chargement du flash 5 Mode gros plan 6 Mode de flash 7 Prise de vue séquentielle 8 Retardateur - Olympus Stylus 400 | Stylus 300 Digital Basic Manual (English, Français - Page 49
ON sont montrés cidessous. 2 3 1 4 1 4 5 2048 1536 6 5 6 7 7 8 8 9 10 Vue fixe 9 10 Vidéo Éléments Indications 1 Contrôle de la batterie , 2 Réservation d'impression, nombre ×10 de copies Fr 3 Vidéo 4 Protection 5 Mode d'enregistrement SHQ, HQ, SQ1, SQ2 6 Résolution 2272 - Olympus Stylus 400 | Stylus 300 Digital Basic Manual (English, Français - Page 50
est pas complètement éteint. • L'enregistrement vidéo s'arrête automatiquement lorsque le bloc mémoire est entièrement allumé. Contrôle de la batterie Si la batterie est presque déchargée, le voyant de contrôle sur l'écran ACL prend l'aspect indiqué ci-dessous lorsque l'appareil est mis en marche - Olympus Stylus 400 | Stylus 300 Digital Basic Manual (English, Français - Page 51
CC. • Si la protection en caoutchouc est usée ou endommagée, adressezvous au centre S.A.V. Olympus le plus proche (le remplacement des pièces sera facturé). • Si la protection en caoutchouc du couvercle du compartiment de la batterie, du connecteur ou de la prise d'entrée CC contient de la poussière - Olympus Stylus 400 | Stylus 300 Digital Basic Manual (English, Français - Page 52
le chargeur indiqué (LI-10C) avant la première utilisation. Reportez-vous aux instructions fournies avec le chargeur pour plus d'informations. À propos de la batterie Vérifiez que les bornes + et - de la batterie illustrée Bornes du connìecteur dans la figure à droite sont bien orientées lorsque - Olympus Stylus 400 | Stylus 300 Digital Basic Manual (English, Français - Page 53
rieur . Tout en appuyant sur la marque , faites glisser le couvercle vers . • Si vous avez du mal à fermer le couvercle du compartiment de la batterie, ne forcez pas. Lorsqu'il est refermé, appuyez fermement sur la marque et poussez le couvercle dans le sens indiqué sur l'illustration. Fr 53 - Olympus Stylus 400 | Stylus 300 Digital Basic Manual (English, Français - Page 54
J INSERTION D'UNE CARTE Le terme "carte" dans ce manuel désigne une carte xD-Picture Card. L'appareil utilise la carte pour enregistrer les images. 1 Assurez-vous que : • L'écran ACL est éteint. • Le capot de protection d'objectif est fermé. • Le voyant à droite - Olympus Stylus 400 | Stylus 300 Digital Basic Manual (English, Français - Page 55
6 Fermez le couvercle du connecteur. • Appuyez sur la marque indiqués dans l'illustration en fermant le couvercle du connecteur. Remarque Ne fermez pas le couvercle du connecteur avant d'avoir refermé le couvercle logement de carte. Retrait de la carte 1 Ouvrez le couvercle du connecteur et le - Olympus Stylus 400 | Stylus 300 Digital Basic Manual (English, Français - Page 56
de protection jusqu'à ce qu'il se bloque avec un déclic. Lorsque vous utilisez l'appareil photo pour la première fois ou s'il a été laissé sans batterie pendant 1 heure ou plus, la date et l'heure ont été réinitialisées. Le message "SET DATE & TIME" s'affiche alors sur l'écran ACL au moment de - Olympus Stylus 400 | Stylus 300 Digital Basic Manual (English, Français - Page 57
L'écran ACL et l'appareil photo s'éteignent. • Il ne faut jamais ouvrir le couvercle du logement de carte, retirer la carte ou la batterie, déconnecter ou connecter l'adaptateur secteur Remarque tandis que l'appareil est sous tension. Toutes les données de la carte risqueraient d'être détruites - Olympus Stylus 400 | Stylus 300 Digital Basic Manual (English, Français - Page 58
J RÉGLAGE DE LA DATE ET DE I'HEURE 1 Ouvrez complètement le capot de protection d'objectif. • L'objectif se déploie et l'écran ACL s'allume. 2 Appuyez sur . • Le menu principal s'affiche. 3 Appuyez sur pour sélectionner MODE MENU. 4 Appuyer sur pour sélectionner l'onglet SETUP et appuyez sur - Olympus Stylus 400 | Stylus 300 Digital Basic Manual (English, Français - Page 59
. pour MODE MENU • Organise les paramètres en onglets. • Affiche les onglets de chaque menu. Sélectionnez l'onglet souhaité à gauche de l'écran en appuyant sur . SEt CARD CAMERA CANCEL + 0.0 SELECt GO Onglet ESP/ DRIVE DIGItAL ZOOM PANORAMA 2 IN 1 ESP OFF Fr 59 - Olympus Stylus 400 | Stylus 300 Digital Basic Manual (English, Français - Page 60
onglet, puis appuyez sur . Onglet CAMERA SEt CARD CAMERA ESP/ DRIVE DIGItAL ZOOM PANORAMA 2 IN 1 ESP OFF Onglet CARD Appuyer sur pour revenir à Fr Molette de défilement ( ) CARD%SEtUP l'écran de sélection des onglets. SEt CARD CAM Onglet SETUP SEtUP CARD CAM ALL RESEt REC VIEW PIXEL - Olympus Stylus 400 | Stylus 300 Digital Basic Manual (English, Français - Page 61
glage. Appuyez de nouveau sur pour quitter le menu et retourner en mode prise de vue. SEt CARD CAMERA SEt CARD CAMERA ESP/ ESP ESP/ DRIVE DIGItAL ZOOM OFF DRIVE Fr DIGItAL ZOOM OFF PANORAMA PANORAMA ON 2 IN 1 2 IN 1 L'encadré vert ou passe sur l'élément Appuyez sur ou sélectionn - Olympus Stylus 400 | Stylus 300 Digital Basic Manual (English, Français - Page 62
Menus Raccourcis Mode prise de vue Règle la luminosité de l'image. Règle la qualité et résolution. Vue fixe : SHQ, HQ, SQ1, SQ2 Vidéo : HQ, SQ (Balance des blancs) Règle la balance des blancs appropriée selon la source de lumière. Mode affichage Fr Affiche toutes les images enregistrées l'une - Olympus Stylus 400 | Stylus 300 Digital Basic Manual (English, Français - Page 63
Ces instructions sont uniquement destinées à une prise en main rapide. Vous trouverez un descriptif plus détaillé des fonctions dans le "Manuel de référence" sur le CD-ROM. Mode prise de vue SEt CARD CAMERA Onglet CAMERA Onglet CARD [CARTE] Onglet SETUP [CONFIG] ESP/ DRIVE DIGItAL ZOOM - Olympus Stylus 400 | Stylus 300 Digital Basic Manual (English, Français - Page 64
vidéo de votre téléviseur. Le type de signal vidéo TV varie en fonction de la région. SEt CARD EDIt PLAY Onglet PLAY [LECTURE] Onglet EDIT Fr Onglet CARD [CARTE] Onglet SETUP [CONFIG] Onglet PLAY [LECTURE] (Protection) (Rotation) (lmprimer) Protège les images d'une suppression accidentelle - Olympus Stylus 400 | Stylus 300 Digital Basic Manual (English, Français - Page 65
Onglet CARD [CARTE] CARD SETUP [CONFIG CARTE] Supprime toutes les données d'images stockées sur la carte ou formate la carte. Onglet SETUP [CONFIG] ALL RESET [TOUT REINIT] Dé - Olympus Stylus 400 | Stylus 300 Digital Basic Manual (English, Français - Page 66
PRISE DE VUES - INSTRUCTIONS DE BASE J MODES DE PRISE DE VUES L'appareil photo possède 7 modes de prise de vue que vous choisissez en fonction des conditions de prise - Olympus Stylus 400 | Stylus 300 Digital Basic Manual (English, Français - Page 67
LANDSCAPE [PAYSAGE] Permet de photographier des paysages et des scènes en extérieur. L'appareil photo se règle automatiquement des conditions de prise de vue optimales. NIGHT SCENE [SCEN NUIT] Permet de faire des photos le soir ou la nuit. L'appareil photo ralentit la vitesse d'obturation par - Olympus Stylus 400 | Stylus 300 Digital Basic Manual (English, Français - Page 68
façon que lorsque vous utilisez le viseur pour prendre la photo. • Il ne faut jamais ouvrir le couvercle du logement de carte, retirer la batterie ou déconnecter l'adaptateur secteur pendant que le voyant orange Remarque clignote. Vous risqueriez de détruire des images enregistrées et d'empêcher la - Olympus Stylus 400 | Stylus 300 Digital Basic Manual (English, Français - Page 69
2 Placez les repères de mise au point automatique autour du sujet sur lequel vous voulez effectuer la mise au point. • Lorsque vous prenez en photo un sujet sur lequel il est difficile d'effectuer la mise au point, visez un sujet placé à peu près à la même distance. Repères de mise au point - Olympus Stylus 400 | Stylus 300 Digital Basic Manual (English, Français - Page 70
optique pendant l'enregistrement d'une vidéo. Le zoom est bloqué Remarque en position grand angle. Pour utiliser le zoom, activez le zoom numérique (DIGITAL ZOOM sur ON). • En mode d'enregistrement vidéo, le flash est désactivé. • L'enregistrement est plus long pour les vidéo que pour les vues - Olympus Stylus 400 | Stylus 300 Digital Basic Manual (English, Français - Page 71
J UTILISATION DU FLASH 1 Ouvrez complètement le capot de protection d'objectif. • L'objectif se déploie et l'écran ACL s'allume. 2 Appuyez sur ( ) pour définir le mode de flash. • Le réglage actuel du flash est affiché. • A chaque fois que vous appuyez sur , le mode flash passe par les états - Olympus Stylus 400 | Stylus 300 Digital Basic Manual (English, Français - Page 72
2 Ouvrez complètement le capot de protection d'objectif. • L'objectif se déploie et l'écran ACL s'allume. 3 Appuyez sur ( ) pour activer le mode retardateur ( ) ou le mode télécommande ( ). • L'indication passe de . / OFF, et à chaque pression sur 4 Prenez la photo. • Lorsque vous utilisez - Olympus Stylus 400 | Stylus 300 Digital Basic Manual (English, Français - Page 73
SÉLECTION MODE D'ENREGISTREMENT Choisissez le mode d'enregistrement correspondant le mieux à vos besoins (impression, montage sur un ordinateur, publication sur site Web, etc.). Mode d'enregistrement Description Qualité Taille de fichier • Mode restituant un haut niveau de qualité. • Le nombre - Olympus Stylus 400 | Stylus 300 Digital Basic Manual (English, Français - Page 74
AFFICHAGE J AFFICHAGE DE VUES FIXES 1 Appuyez sur . • L'écran ACL s'allume et affiche la dernière photo prise. (Affichage d'une seule photo) 2 Utilisez la molette de défilement pour afficher d'autres photos. Affiche la 10ème photo en arrière. ( ) Affiche la photo précédente. ( ) Affiche la photo - Olympus Stylus 400 | Stylus 300 Digital Basic Manual (English, Français - Page 75
Affichage en gros plan Les photos affichées sur l'écran ACL peuvent être agrandies jusqu'à 4 fois leur taille originale. Cette fonction est utile lorsque vous voulez vérifier les détails d'une photo. 1 Utilisez les molette de défilement pour sélectionner la photo que vous voulez agrandir. • Vous ne - Olympus Stylus 400 | Stylus 300 Digital Basic Manual (English, Français - Page 76
• Appuyez de nouveau sur à la fin de la lecture pour afficher le menu MOVIE PLAYBACK. PLAYBACK : Relit la vidéo intégralement. FRAME BY FRAME : Vous permet de faire défiler la vidéo manuellement, une image à la fois. EXIT : Quitte le mode lecture de vidéos. Appuyez sur pour sélectionner - Olympus Stylus 400 | Stylus 300 Digital Basic Manual (English, Français - Page 77
appuyez sur . • La photo est effacée et le menu est fermé. Effacement de toutes les photos 1 Dans le menu principal, sélectionnez MODE MENU CARD CARD SETUP et appuyez sur . 2 Appuyez sur pour sélectionner puis appuyez sur . ALL ERASE 3 Appuyez sur pour sélectionner YES, puis appuyez sur - Olympus Stylus 400 | Stylus 300 Digital Basic Manual (English, Français - Page 78
recevoir des données. Avant d'utiliser des cartes d'une marque autre que Olympus ou des cartes qui ont été formatées sur un ordinateur, vous devez sélectionnez MODE MENU CARD CARD SETUP et appuyez sur . • Mode prise de vue L'écran FORMAT s'affiche. • Mode affichage L'écran CARD SETUP s'affiche. - Olympus Stylus 400 | Stylus 300 Digital Basic Manual (English, Français - Page 79
DPOF ou auprès d'un laboratoire photo qui prend en charge le format DPOF. Que signifie DPOF? DPOF est l'abréviation de l'anglais "Digital Print Order Format" (Format de commande de tirage numérique). Il s'agit d'un format utilisé pour enregistrer automatiquement les informations d'impression - Olympus Stylus 400 | Stylus 300 Digital Basic Manual (English, Français - Page 80
rence" sur le logiciel CD. Veuillez également consulter le "Guide d'installation de logiciel" livré avec le CD-ROM. OS 8.6 ou inférieur (sauf Mac OS 8.6 avec USB MASS Storage Support 1.3.5 installés en usine) • Le transfert de données n'est pas Internet Explorer, etc.); CAMEDIA Master; ou d'autres - Olympus Stylus 400 | Stylus 300 Digital Basic Manual (English, Français - Page 81
pouvez télécharger des images supporté avec Windows NT4.0 et les systèmes inférieurs. Adressez-vous au représentant Olympus le plus près de chez vous. Reportez-vous au "Manuel de référence" sur le CD-ROM pour plus d'informations. Pour la connexion à l'ordinateur, veuillez consulter le "Guide - Olympus Stylus 400 | Stylus 300 Digital Basic Manual (English, Français - Page 82
carte ne peut pas être formatée, vous ne pouvez pas l'utiliser. [ERR CARTE] Utilisez un autre type de carte ou Il y a un problème CARD ERROR avec la carte. insérez une nouvelle carte. [ECRIT PROTEGE] L'attribut Lecture seule a été fixé Il est interdit d'écrire avec un ordinateur. Vous devez - Olympus Stylus 400 | Stylus 300 Digital Basic Manual (English, Français - Page 83
Indication de l'écran ACL CARD COVER OPEN Cause possible [COUV CARTE OUV] Le couvercle du logement de la carte est ouvert. La date et l'heure n'ont pas été réglées. Solution Fermez le couvercle du logement de carte. Réglez la date et l'heure. Y/M/D Fr Fr 83 - Olympus Stylus 400 | Stylus 300 Digital Basic Manual (English, Français - Page 84
(conforme au système Design Rule for Camera File System (DCF)), Exif 2.2, Digital Print Order Format (DPOF), PRINT Image Matching carte de 16 Mo) Résolution 2.272 × 1.704 Mode d'enregistrement Stylus/µ[mju:] 400 DIGITAL Stylus/µ[mju:] 300 DIGITAL SHQ 5 HQ 16 - - Fr 2.048 × 1.536 SQ1 20 - Olympus Stylus 400 | Stylus 300 Digital Basic Manual (English, Français - Page 85
/µ[mju:] : Capteur CCD de 1/2,5" à 3.340.000 pixels (brut) 300 DIGITAL Stylus/µ[mju:] : Capteur CCD de 1/2,5" à 4.230.000 pixels (brut) 400 DIGITAL Objectif : Objectif Olympus 5,8 mm à 17,4 mm (équivalent à un objectif de 35 mm à 105 mm sur une appareil photo de 35 mm), F3,1 à F5,2 Système de - Olympus Stylus 400 | Stylus 300 Digital Basic Manual (English, Français - Page 86
Funktionen finden Sie im „Referenzhandbuch" auf der CD-ROM. De Dieses Einfache Anleitung enthält Hinweise zum Gebrauch der Digitalkamera Olympus Stylus 300/400 DIGITAL (µ [mju:] 300/400 DIGITAL). Falls nicht anders angegeben, gelten die jeweiligen Bedienhinweise in diesem Handbuch stets für beide - Olympus Stylus 400 | Stylus 300 Digital Basic Manual (English, Français - Page 87
Markenname Verantwortlicher Hersteller Adresse Telefonnummer : Stylus 300 DIGITAL, Stylus 400 DIGITAL RM-2 (Fernauslöser) : OLYMPUS : Olympus America Inc. : 2 Corporate Center Kamera unterstützt die DCF-Norm „Design Rule for Camera File System" der JEITA (Japan Electronics and Information - Olympus Stylus 400 | Stylus 300 Digital Basic Manual (English, Français - Page 88
ERSTE SCHRITTE J BESCHREIBUNG DER TEILE Objektivschutzschieber Schaltet die Kamera im Speichermodus ein und aus. Auslöser Blitz Selbstauslöser-/ FernauslöserLED De Kartenfach deckel Fernauslösersensor Objektiv Wird beim Öffnen des Objektivschutzschiebers automatisch ausgeschoben. VIDEO OUT - Olympus Stylus 400 | Stylus 300 Digital Basic Manual (English, Français - Page 89
Pfeiltasten ( ) Die Pfeiltasten können als Richtungs- und Funktionstasten verwendet werden. Die Markierungen , , und zeigen an, welche spezielle Taste jeweils auf den Pfeiltasten gedrückt werden muss. Speichermodus-Taste Taste für Nahaufnahmen Blitzmodus-Taste Selbstauslösermodus-Taste - Olympus Stylus 400 | Stylus 300 Digital Basic Manual (English, Français - Page 90
J LCD-MONITOR-ANZEIGEN Speichermodus 1 2 3 4 5 6 7 8 9 SHQ 10 Einzelbild 1 11 2 12 13 5 6 14 15 9 16 11 13 14 15 16 Movie Funktionen 1 Speichermodus 2 Batterieladezustand 3 Grüne Sucher-LED 4 Blitzbereitschaft/ De Verwackelungswarnanzeige/ Blitzladebetrieb 5 Nahaufnahmemodus 6 - Olympus Stylus 400 | Stylus 300 Digital Basic Manual (English, Français - Page 91
2 1 4 1 5 2048 1536 6 7 8 9 10 Einzelbild 3 4 5 6 7 8 9 10 Movie Funktionen 1 Batterieladezustand 2 Druckvorauswahl, Anzahl der Ausdrucke 3 Movie 4 Löschschutz 5 Speichermodus 6 Bildauflösung 7 Belichtungskorrektur 8 Weißabgleich 9 Datum und Zeit 10 Dateinummer Spielzeit/Gesamtspielzeit - Olympus Stylus 400 | Stylus 300 Digital Basic Manual (English, Français - Page 92
Speichersegmente Die Speichersegmente leuchten, wenn Sie ein Bild aufnehmen oder ein Movie aufzeichnen. Während die Speichersegmente leuchten, wird die Aufnahme auf der Karte gespeichert. Die Speichersegmente ändern sich wie nachfolgend gezeigt je nach Aufnahmestatus. Wenn die Speichersegmente - Olympus Stylus 400 | Stylus 300 Digital Basic Manual (English, Français - Page 93
jedoch nicht für Unterwasseraufnahmen verwendet werden. Beachten Sie bitte die folgenden Sicherheitsvorkehrungen, wenn Sie die Kamera benutzen. Olympus übernimmt keinerlei Verantwortung für Fehlfunktionen der Kamera, die auf eingedrungenes Wasser als Ergebnis von Fehlbedienungen durch den Anwender - Olympus Stylus 400 | Stylus 300 Digital Basic Manual (English, Français - Page 94
und achten Sie darauf, dass er sicher befestigt ist und sich nicht lösen kann. Trageriemenöse J AUFLADEN DES AKKUS Dieses Kamera verwendet einen Olympus Lithium-Ionen-Akku (LI-10B). Dieser Akku ist nur für diese Kamera bestimmt. Andere Akkus oder Batterien dürfen nicht verwendet werden. Wenn Sie - Olympus Stylus 400 | Stylus 300 Digital Basic Manual (English, Français - Page 95
J EINLEGEN DES AKKUS Wichtig • Prüfen Sie nach jedem Auswechseln des Akkus, ob die Einstellungen für Zeit und Datum noch korrekt sind. 1 Achten Sie stets darauf, dass: • Der LCD-Monitor abgeschaltet ist. • Der Objektivschutzschieber geschlossen ist. • Die rechts im Sucher angeordnete LED nicht - Olympus Stylus 400 | Stylus 300 Digital Basic Manual (English, Français - Page 96
J EINLEGEN EINER KARTE Die Bezeichnung „Karte" bezieht sich in diesem Handbuch auf die Fabrikate xD-Picture Card-Karte. Die Kamera verwendet die Karte, um darauf Bilder abzuspeichern. 1 Achten Sie stets darauf, dass: • Der LCD-Monitor abgeschaltet ist. • Der Objektivschutzschieber geschlossen ist. • - Olympus Stylus 400 | Stylus 300 Digital Basic Manual (English, Français - Page 97
6 Schließen Sie die Buchsenabdeckung. • Drücken Sie beim Schließen der Buchsenabdeckung wie in der Abbildung gezeigt auf die Markierung . Hinweis Schließen Sie niemals die Buchsenabdeckung, ohne zuvor den Kartenfachdeckel zu schließen. Entfernen einer Karte 1 Öffnen Sie die Buchsenabdeckung und - Olympus Stylus 400 | Stylus 300 Digital Basic Manual (English, Français - Page 98
J EIN- UND AUSSCHALTEN DER KAMERA Zum Aufnehmen Einschalten: Den Objektivschutzschieber öffnen. Die Kamera wird im Speichermodus eingeschaltet. Das Objektiv wird ausgeschoben, und das Motiv erscheint auf dem LCD-Monitor. Falls sich das Objektiv bei geöffnetem Objektivschutzschieber nicht ausschiebt - Olympus Stylus 400 | Stylus 300 Digital Basic Manual (English, Français - Page 99
Bei der Bildwiedergabe Einschalten: Bei geschlossenem Objektivschutzschieber drücken. Die Kamera wird im Wiedergabemodus eingeschaltet. Der LCD- Monitor schaltet sich ein und zeigt die zuletzt erstellte Aufnahme. Ausschalten: Drücken Sie . Der LCD-Monitor und die Kamera schalten sich ab. - Olympus Stylus 400 | Stylus 300 Digital Basic Manual (English, Français - Page 100
J EINSTELLEN VON DATUM UND ZEIT 1 Den Objektivschutzschieber vollständig öffnen. • Das Objektiv wird ausgeschoben, und der LCD-Monitor schaltet sich ein. 2 Drücken Sie . • Das Hauptmenü wird angezeigt. 3 Drücken Sie auf die Pfeiltaste und wähle Sie MODE MENU. 4 Drücken Sie und wählen Sie den - Olympus Stylus 400 | Stylus 300 Digital Basic Manual (English, Français - Page 101
die Menüanzeiger für jedes einzelne Menü an. Wählen Sie den gewünschten Menüanzeiger im linken Bildschirmbereich, indem Sie auf die Tasten drücken. SEt CARD CAMERA CANCEL + 0.0 SELECt GO Menüanzeiger ESP/ DRIVE DIGItAL ZOOM PANORAMA 2 IN 1 ESP OFF De 101 - Olympus Stylus 400 | Stylus 300 Digital Basic Manual (English, Français - Page 102
Sie , um einen Menüanzeiger auszuwählen und anschließend . Hauptmenü MODE MENU WB Menüanzeiger CAMERA SEt CARD CAMERA ESP/ DRIVE DIGItAL ZOOM PANORAMA 2 IN 1 ESP OFF Pfeiltasten ( De ) Menüanzeiger CARD CARD%SEtUP Drücken Sie , um zum Menü für die Menüanzeigerauswahl zurückzukehren. SEt - Olympus Stylus 400 | Stylus 300 Digital Basic Manual (English, Français - Page 103
bernehmen. Drücken Sie erneut, um das Menü zu schließen und zum Aufnahmestatus zurückzukehren. SEt CARD CAMERA SEt CARD CAMERA ESP/ ESP ESP/ DRIVE DRIVE DIGItAL ZOOM OFF DIGItAL ZOOM OFF PANORAMA 2 IN 1 PANORAMA ON 2 IN 1 De oder Der grüne Begrenzungsrahmen Um wieder eine bewegt - Olympus Stylus 400 | Stylus 300 Digital Basic Manual (English, Français - Page 104
Auswechselbare Menüfunktionen Speichermodus Zur LCD-Monitor-Helligkeitseinstellung. Zum Einstellen von Bildqualität und Bildauflösung. Einzelbild : SHQ, HQ, SQ1, SQ2 Movie-Aufnahme : HQ, SQ (Weißabgleich) Zur Wahl des passenden Weißabgleichs entsprechend der Lichtquelle. Wiedergabemodus Mit - Olympus Stylus 400 | Stylus 300 Digital Basic Manual (English, Français - Page 105
finden Sie im „Referenzhandbuch" auf der CD-ROM. Speichermodus SEt CARD CAMERA Menüanzeiger CAMERA [KAMERA] Menüanzeiger CARD [KARTE] Menüanzeiger SETUP [EINR] ESP/ DRIVE DIGItAL ZOOM PANORAMA 2 IN 1 ESP OFF Menüanzeiger CAMERA [KAMERA] De ESP/ Wählt die Messmethode zwischen ESP oder SPOT - Olympus Stylus 400 | Stylus 300 Digital Basic Manual (English, Français - Page 106
Videosignal hängt von der Region ab, in der Sie Ihren Fernseher gekauft haben. Wiedergabemodus De SEt CARD EDIt PLAY Menüanzeiger PLAY [W.GAB] Menüanzeiger EDIT [BEAR.] Menüanzeiger CARD [KARTE] Menüanzeiger SETUP [EINR] Menüanzeiger PLAY [W.GAB] (Löschschutz) Schützt Aufnahmen vor einem - Olympus Stylus 400 | Stylus 300 Digital Basic Manual (English, Français - Page 107
und speichert das veränderte Bild als neue Datei. Verringert die Dateigröße und speichert das veränderte Bild als neue Datei. Menüanzeiger CARD [KARTE] CARD SETUP Löschen Sie alle auf der Karte gespeicherten Daten [KARTE EINR.] oder formatieren Sie diese. Menüanzeiger SETUP [EINR] ALL RESET - Olympus Stylus 400 | Stylus 300 Digital Basic Manual (English, Français - Page 108
GRUNDSÄTZLICHE AUFNAHMEFUNKTIONEN J AUFNAHMEARTEN Je nach Aufnahmesituation und dem Effekt, den Sie erzielen möchten, stehen Ihnen bei dieser Kamera 7 verschiedene Aufnahmearten zur Verfügung. 1 Den Objektivschutzschieber vollständig öffnen. • Das Objektiv wird ausgeschoben, und der LCD- - Olympus Stylus 400 | Stylus 300 Digital Basic Manual (English, Français - Page 109
NIGHT SCENE [NACHTAUFNAHNE] Dieser Modus eignet sich zum Erstellen von Bildern am Abend oder bei Nacht. Dabei verwendet die Kamera eine niedrigere Verschlusszeit als sonst. Wenn Sie normalerweise eine Straße bei Nacht fotografieren, kann es sein, dass Sie aufgrund der fehlenden Helligkeit nur ein - Olympus Stylus 400 | Stylus 300 Digital Basic Manual (English, Français - Page 110
4 Drücken Sie den Auslöser aus der halb gedrückten Position vollständig nach unten. • Die Kamera erstellt die Aufnahme, wobei ein Piepton zu hören ist. • Wenn die grüne LED erlischt, können Sie die nächste Aufnahme erstellen. • Die orangefarbene LED blinkt, solange das Bild auf der Karte gespeichert - Olympus Stylus 400 | Stylus 300 Digital Basic Manual (English, Français - Page 111
3 Drücken Sie den Auslöser halb nach untern, bis die grüne Sucher-LED leuchtet. • Die Schärfe, die Belichtungsstärke und der Weißabgleich sind gespeichert. • Wenn die grüne LED blinkt, sind Schärfe und Belichtungsstärke nicht gespeichert. Lassen Sie den Auslöser los, richten Sie die Kamera noch - Olympus Stylus 400 | Stylus 300 Digital Basic Manual (English, Français - Page 112
Zoom wird dabei fest auf die Weitwinkelposition eingestellt. Wenn Sie den Zoom jedoch auch während der Aufnahme verwenden möchten, stellen Sie die Funktion „DIGITAL ZOOM" auf „ON". • Während der Movie-Aufnahme ist der Blitz nicht verfügbar. • Das Abspeichern von Bildern dauert hier länger als bei - Olympus Stylus 400 | Stylus 300 Digital Basic Manual (English, Français - Page 113
J BLITZPROGRAMMWAHL 1 Den Objektivschutzschieber vollständig öffnen. • Das Objektiv wird ausgeschoben, und der LCD-Monitor schaltet sich ein. 2 Drücken Sie ( ), um den Blitzmodus auszuwählen. • Die aktuell gewählte Blitzeinstellung wird angezeigt. • Jedes Mal, wenn Sie drücken, ändert sich der - Olympus Stylus 400 | Stylus 300 Digital Basic Manual (English, Français - Page 114
3 Drücken Sie ( ), um den Selbstauslösermodus ( ) oder den Fernauslösermodus ( ) einzustellen. • Die Einstellung wechselt immer dann zwischen / OFF, und , wenn Sie drücken. 4 Aufnahme tätigen. • Wenn Sie Aufnahmen unter Verwendung des Fernauslösers erstellen möchten, richten Sie diesen auf den - Olympus Stylus 400 | Stylus 300 Digital Basic Manual (English, Français - Page 115
AUFNAHMEMODUS AUSWÄHLEN Wählen Sie den Speichermodus, der für die spätere Verwendung Ihrer Aufnahmen (zum Ausdrucken, zur Bildbearbeitung mittels Personal Computer oder Webpage-Gestaltung usw.) am besten geeignet ist. Speichermodus Beschreibung Qualität Dateigröße SHQ • Ein Modus mit hoher - Olympus Stylus 400 | Stylus 300 Digital Basic Manual (English, Français - Page 116
WIEDERGABE J EINZELBILDWIEDERGABE 1 Drücken Sie . • Der LCD-Monitor schaltet sich ein und zeigt die zuletzt erstellte Aufnahme. (Wiedergabe eines Bildes) 2 Verwenden Sie die Pfeiltasten, wenn Sie andere Bilder wiedergeben möchten. Wiedergabesprung um 10 Bilder rückwärts. ( ) Wiedergabe des - Olympus Stylus 400 | Stylus 300 Digital Basic Manual (English, Français - Page 117
Wiedergabe mit Ausschnittsvergrößerung Die auf dem LCD-Monitor dargestellten Bilder lassen sich in Einzelschritten bis auf das 4fache ihrer Originalgröße vergrößern. Diese Funktion ist nützlich, wenn Sie bestimmte Details einer Aufnahme näher untersuchen möchten. 1 Verwenden Sie die Pfeiltasten für - Olympus Stylus 400 | Stylus 300 Digital Basic Manual (English, Français - Page 118
• Drücken Sie nach dem Ende der Wiedergabe erneut, um das MOVIE PLAYBACK Menü anzuzeigen. PLAYBACK: Erneute Wiedergabe der gesamten Movie-Aufnahme. FRAME BY FRAME : Bild-für-Bild-Wiedergabe der gewählten Movie- Aufnahme. EXIT : Beendet den Movie-Wiedergabemodus. Drücken Sie und wählen Sie - Olympus Stylus 400 | Stylus 300 Digital Basic Manual (English, Français - Page 119
Sie anschließend . • Das Bild wird gelöscht und das Menü geschlossen. De Löschen aller Bilder 1 WähIen Sie im Hauptmenü für den Wiedergabemodus MODE MENU CARD CARD SETUP und drücken Sie anschließend . 2 Drücken Sie und wählen Sie ALL ERASE. Drücken Sie anschließend . 3 Drücken Sie und - Olympus Stylus 400 | Stylus 300 Digital Basic Manual (English, Français - Page 120
auf einen Personal Computer herunter. 1 WähIen Sie im Hauptmenü MODE MENU CARD CARD SETUP und drücken Sie anschließend . • Speichermodus Das Menü FORMAT FORMAT angezeigt wird, drücken Sie und anschließend YES. Wenn das Menü CARD SETUP angezeigt wird, drücken Sie und wählen Sie FORMAT. Drücken Sie - Olympus Stylus 400 | Stylus 300 Digital Basic Manual (English, Français - Page 121
in einem DPOF-Fotolabor oder auf einem DPOF-kompatiblen Drucker ausgedruckt werden. Was ist DPOF? DPOF ist die Abkürzung für Digital Print Order Format. Das DPOF-Format wird verwendet, um die Druckinformationen von Kameras automatisch aufzuzeichnen. Durch das Speichern der Druckvorauswahldaten auf - Olympus Stylus 400 | Stylus 300 Digital Basic Manual (English, Français - Page 122
erforderlich: Grafiksoftware mit Unterstützung des JPEG-Formats (wie Paint Shop Pro oder Photoshop); Internet-Browser (wie Netscape Communicator oder Microsoft Internet Explorer); CAMEDIA Master-Software. Weitere Angaben zur Verwendung einer geeigneten Anwendungssoftware siehe jeweils die - Olympus Stylus 400 | Stylus 300 Digital Basic Manual (English, Français - Page 123
ssen Sie diese zunächst von Ihrem Computer herunterladen. Je nach verwendeter Software ist es möglich, dass Bilddateien auf der Karte zerstört werden Version 4.0 oder niedriger. Wenden Sie sich an Ihren nächstgelegenen Olympus-Repräsentanten. Wenn Sie weitere Einzelheiten benötigen, lesen Sie bitte - Olympus Stylus 400 | Stylus 300 Digital Basic Manual (English, Français - Page 124
ein. Lässt sich das Problem dadurch noch immer nicht beheben, müssen Sie die Karte formatieren. Lässt sich die Karte nicht formatieren, können Sie diese nicht benutzen. [KARTENFEHLER] Verwenden Sie eine andere Es liegt ein Kartenfehler Karte (neue Karte einlegen). CARD ERROR vor. [SCHREIBSCHUTZ - Olympus Stylus 400 | Stylus 300 Digital Basic Manual (English, Français - Page 125
LCD-Monitor-Anzeige Mögliche Ursache Abhilfemaßnahme [KARTENFACH OFFEN] Schließen Sie den Der Kartenfachdeckel ist Kartenfachdeckel. CARD COVER offen. OPEN Datum und Zeit sind nicht eingestellt. Stellen Sie Datum und Zeit ein. Y/M/D De De 125 - Olympus Stylus 400 | Stylus 300 Digital Basic Manual (English, Français - Page 126
Digital-Aufzeichnung, JPEG (in Übereinstimmung mit der Rule for Camera File System [DCF]), Exif 2.2, Digital verwendet wird) Bildauflösung 2.272 × 1.704 Speichermodus/Anzahl der Einzelaufnahmen Stylus/µ[mju:] Stylus/µ [mju:] 400 DIGITAL 300 DIGITAL SHQ 5 HQ 16 - - 2.048 × 1.536 SQ1 20 SHQ - Olympus Stylus 400 | Stylus 300 Digital Basic Manual (English, Français - Page 127
Bildwandler Stylus/µ [mju:] 300 DIGITAL : 1/2,5-Zoll-CCD-Bildwandler-Chip, 3.340.000 Pixel (brutto) Stylus/µ [mju:] 400 DIGITAL : 1/2,5-Zoll-CCD-Bildwandler-Chip, 4.230.000 Pixel (brutto) Objektiv : Olympus-Objektiv 5,8 mm - 17,4 mm, f 3,1 - f 5,2 (entspricht einem 35-mm - 105-mm-Objektiv an - Olympus Stylus 400 | Stylus 300 Digital Basic Manual (English, Français - Page 128
sobre las funciones aquí descritas, consulte el "Manual de consulta" en CD-ROM. Este manual de básico contiene instrucciones para el uso de la cámara Olympus Stylus 300/400 DIGITAL (µ [mju:] 300/400 DIGITAL). Salvo Es indicación, las explicaciones del manual son aplicables a ambos modelos. 128 Es - Olympus Stylus 400 | Stylus 300 Digital Basic Manual (English, Français - Page 129
del software incluida en el paquete del CD-ROM. Para clientes de Norte y Sudamérica Para los clientes de Estados Unidos Declaración de Conformidad Número de modelo : Stylus 300 DIGITAL, Stylus 400 DIGITAL RM-2 (Control remoto) Nombre comercial : OLYMPUS Entidad responsable : Olympus America - Olympus Stylus 400 | Stylus 300 Digital Basic Manual (English, Français - Page 130
PRIMEROS PASOS J NOMBRES DE LAS PARTES Cubreobjetivo La cámara se enciende y apaga en el modo de fotografía. Botón obturador Flash LED del disparador automático/del control remoto Es Tapa de - Olympus Stylus 400 | Stylus 300 Digital Basic Manual (English, Français - Page 131
Teclas de control Las teclas de control se utilizan como teclas de flecha y como botones de función. Las marcas , , y indican qué tecla de flecha debe presionar. Botón del modo de fotografía Botón macro Botón del modo de flash Botón del disparador automático Botón del zoom (W/T ) Monitor - Olympus Stylus 400 | Stylus 300 Digital Basic Manual (English, Français - Page 132
J INDICACIONES DEL MONITOR Modo de fotografía 1 1 2 11 2 11 3 4 5 12 13 5 13 6 6 7 8 9 SHQ 10 Imagen fija 14 15 9 16 14 15 16 Vídeo Opciones Indicaciones 1 Modo de fotografía , ,, , , , 2 Verificación de la batería , 3 Lámpara verde 4 Flash en estado de reposo (stand-by)/ - Olympus Stylus 400 | Stylus 300 Digital Basic Manual (English, Français - Page 133
Modo de reproducción Las pantallas con la visualización de información ajustadas en ON se muestran abajo. 2 1 4 1 5 2048 1536 6 7 8 9 10 Imagen fija 3 4 5 6 7 8 9 10 Vídeo Opciones Indicaciones 1 Verificación de la batería , 2 Reserva de impresión, número de ×10 impresiones 3 Video 4 - Olympus Stylus 400 | Stylus 300 Digital Basic Manual (English, Français - Page 134
para tomar la siguiente fotografía. Esperar Es Antes de Durante la fotografía (Iluminado) fotografiar • No se podrá fotografiar hasta que la parte iluminada desaparezca (El indicador por completo. está apagado) • La grabación de vídeo finaliza automáticamente al iluminarse por completo el - Olympus Stylus 400 | Stylus 300 Digital Basic Manual (English, Français - Page 135
agua en el interior de la misma debido a una manipulación incorrecta por parte del usuario. • No limpie la cámara con • No sumerja la cá de goma se desgasta o deteriora, póngase en contacto con su centro de servicio Olympus más cercano. (Deberá abonar el importe de las piezas de repuesto.) • - Olympus Stylus 400 | Stylus 300 Digital Basic Manual (English, Français - Page 136
que ha Enganche para correa quedado firmemente sujeta, sin riesgos de que se afloje. J CARGA DE LA BATERÍA Esta cámara utiliza una batería de ión litio Olympus (LI-10B). La batería es específica para esta cámara y no funciona con otras baterías. Cuando usted adquiere la cámara, la batería no est - Olympus Stylus 400 | Stylus 300 Digital Basic Manual (English, Français - Page 137
J INSTALACIÓN DE LA BATERÍA Importante • Asegúrese de verificar los ajustes de fecha y hora después de cambiar la batería. 1 Compruebe que: • El monitor esté apagado. • El cubreobjetivo esté cerrado. • La lámpara a la derecha del visor esté apagada. 2 Deslice la tapa del compartimento de la bater - Olympus Stylus 400 | Stylus 300 Digital Basic Manual (English, Français - Page 138
J INSERCIÓN DE LA TARJETA En este manual se emplea el término "tarjeta" para referirse a las tarjetas xDPicture Card. La cámara utiliza la tarjeta para grabar imágenes. 1 Compruebe que: • El monitor esté apagado. • El cubreobjetivo esté cerrado. • La lámpara a la derecha del visor - Olympus Stylus 400 | Stylus 300 Digital Basic Manual (English, Français - Page 139
6 Cierre la tapa del conector. • Presione la marca de la ilustración al cerrar la tapa del conector. Nota No cierre la tapa del conector sin haber cerrado antes la tapa de la tarjeta. Extraer la tarjeta 1 Abra la tapa del conector y la tapa de la tarjeta. 2 Empuje la tarjeta hasta el fondo para - Olympus Stylus 400 | Stylus 300 Digital Basic Manual (English, Français - Page 140
J ENCENDER/APAGAR LA CÁMARA Al realizar las tomas Encendido: Abra el cubreobjetivo. La cámara se enciende en el modo de fotografía. El objetivo se extiende y el sujeto aparece en el monitor. Si el objetivo no se extiende al abrir el cubreobjetivo, es probable que éste no se haya abierto - Olympus Stylus 400 | Stylus 300 Digital Basic Manual (English, Français - Page 141
Cuando se reproducen las imágenes Encendido: Presione con el cubreobjetivo cerrado. La cámara se enciende en el modo de reproducción. El monitor se enciende y se visualiza la última imagen fotografiada. Apagado: Presione . El monitor y la cámara se apagan. • Nunca abra la tapa de la tarjeta, - Olympus Stylus 400 | Stylus 300 Digital Basic Manual (English, Français - Page 142
J AJUSTE DE LA FECHA Y LA HORA 1 Abra completamente el cubreobjetivo. • El objetivo se extiende y el monitor se enciende. 2 Presione . • Se visualiza el menú superior. 3 Presione en las teclas de control para seleccionar MODE MENU. 4 Presione para seleccionar la pestaña SETUP, y luego - Olympus Stylus 400 | Stylus 300 Digital Basic Manual (English, Français - Page 143
en la parte inferior de la pantalla. • Clasifica los ajustes en pestañas. • Muestra las pestañas de cada menú. Seleccione la pestaña deseada a la izquierda de la pantalla presionando . Si presiona . para seleccionar SEt CARD CAMERA CANCEL + 0.0 SELECt GO Pestaña ESP/ DRIVE DIGItAL ZOOM - Olympus Stylus 400 | Stylus 300 Digital Basic Manual (English, Français - Page 144
. Presione . Menú superior 2 Presione para seleccionar una pestaña, y luego presione . Pestaña CAMERA SEt CARD CAMERA MODE MENU WB Teclas de control ( ) ESP/ DRIVE DIGItAL ZOOM PANORAMA 2 IN 1 ESP OFF Pestaña CARD CARD%SEtUP Presione para volver a la pantalla de selección de pestañas - Olympus Stylus 400 | Stylus 300 Digital Basic Manual (English, Français - Page 145
un ajuste. Presione para concluir el ajuste. Vuelva a presionar para salir del menú y volver al estado de disparo. SEt CARD CAMERA SEt CARD CAMERA ESP/ DRIVE DIGItAL ZOOM PANORAMA 2 IN 1 ESP OFF El marco verde se mueve a la opción seleccionada. o Para volver a seleccionar una opci - Olympus Stylus 400 | Stylus 300 Digital Basic Manual (English, Français - Page 146
Menús de acceso directo Modo de fotografía Ajusta el brillo de la imagen. Ajusta la calidad y resolución. Imagen fija : SHQ, HQ, SQ1, SQ2 Vídeo : HQ, SQ (Blalance de blancos) Ajusta al balance de blancos apropiado de acuerdo con la fuente de luz. Modo de reproducción Recorre todas las imágenes - Olympus Stylus 400 | Stylus 300 Digital Basic Manual (English, Français - Page 147
sobre las funciones aquí descritas, consulte el "Manual de consulta" en CD-ROM. Modo de fotografía SEt CARD CAMERA Pestaña CAMERA [CAMARA] Pestaña CARD [TARJETA] Pestaña SETUP [CONFIG.] ESP/ DRIVE DIGItAL ZOOM PANORAMA 2 IN 1 ESP OFF Pestaña CAMERA [CAMARA] ESP/ Selecciona el método de medici - Olympus Stylus 400 | Stylus 300 Digital Basic Manual (English, Français - Page 148
de señal de vídeo de los televisores varían según la zona. Modo de reproducción SEt CARD EDIt PLAY Pestaña PLAY [REPROD.] Es Pestaña EDIT [EDICION] Pestaña CARD [TARJETA] Pestaña SETUP [CONFIG] Pestaña PLAY [REPROD] (Protección) Protege las imágenes contra el borrado accidental. (Rotaci - Olympus Stylus 400 | Stylus 300 Digital Basic Manual (English, Français - Page 149
imagen en tono sepia y la guarda como una nueva fotografía. Reduce el tamaño del archivo y lo almacena como una nueva fotografía. Pestaña CARD [TARJETA] CARD SETUP [CONFIG. TARJ.] Borra todos los datos de imágenes almacenados en la tarjeta, o formatea la tarjeta. Pestaña SETUP [CONFIG.] ALL - Olympus Stylus 400 | Stylus 300 Digital Basic Manual (English, Français - Page 150
áticamente los ajustes para un balance de colores naturales. Otras funciones, como el modo de flash y la medición, pueden ser ajustadas de forma manual. PORTRAIT [RETRATO] Adecuada para tomar la foto de una persona (retrato). Se concede mayor importancia a la reproducción de la textura de la piel - Olympus Stylus 400 | Stylus 300 Digital Basic Manual (English, Français - Page 151
LANDSCAPE + PORTRAIT [PAIS. + RETR.] Adecuada para incluir en la fotografía el sujeto y el paisaje. La cámara se ajusta automáticamente a las condiciones óptimas de fotografía. LANDSCAPE [PAISAJE] Adecuada para fotografiar paisajes y otras escenas exteriores. La cámara se ajusta automáticamente a - Olympus Stylus 400 | Stylus 300 Digital Basic Manual (English, Français - Page 152
J FOTOGRAFÍA DE IMÁGENES FIJAS Las imágenes fijas se pueden fotografiar usando ya sea el visor o el monitor. Ambos métodos son sencillos ya que sólo tendrá que presionar el botón obturador. Fotografiar imágenes fijas usando el monitor 1 Abra completamente el cubreobjetivo. • Abra el cubreobjetivo - Olympus Stylus 400 | Stylus 300 Digital Basic Manual (English, Français - Page 153
J SI NO SE PUEDE OBTENER UN ENFOQUE CORRECTO (BLOQUEO DE ENFOQUE) Cuando el sujeto que desea enfocar no está en el centro del cuadro y no puede situar sobre él la marca de objetivo de enfoque automático (AF), podrá ajustar el enfoque de la cámara sobre otro punto que se encuentre aproximadamente a - Olympus Stylus 400 | Stylus 300 Digital Basic Manual (English, Français - Page 154
no puede cambiarse durante la grabación de vídeos. El zoom se ajusta a la posición de gran angular (W). Si Es Nota desea usar el zoom, ajuste "DIGITAL ZOOM" en "ON". • Durante la grabación de vídeos, el flash no se dispara. • Se tarda más en almacenar vídeos que imágenes fijas. • Los segundos - Olympus Stylus 400 | Stylus 300 Digital Basic Manual (English, Français - Page 155
Presione el botón del zoom hacia la T para el zoom de acercamiento. 3 Tome la foto. • Las imágenes tomadas con el zoom digital pueden aparecer granuladas. Nota J USO DEL FLASH 1 Abra completamente el cubreobjetivo. • El objetivo se extiende y el monitor se enciende. 2 Presione ( ) para ajustar - Olympus Stylus 400 | Stylus 300 Digital Basic Manual (English, Français - Page 156
J USO DEL DISPARADOR AUTOMÁTICO/CONTROL REMOTO Disparador automático : Esta función es útil para tomar fotografías si usted desea también aparecer en las mismas. Control remoto : Es posible fotografiar empleando el dispositivo de control remoto (de venta por separado en algunas zonas). Esta - Olympus Stylus 400 | Stylus 300 Digital Basic Manual (English, Français - Page 157
SELECCIONAR EL MODO DE GRABACIÓN Seleccione el modo de grabación más adecuado para su propósito (impresión, edición en un ordenador, edición de un sitio web, etc.). Modo de grabación SHQ Descripción • Un modo de alta calidad. • Se pueden guardar menos imágenes en una tarjeta. • Se tarda más en - Olympus Stylus 400 | Stylus 300 Digital Basic Manual (English, Français - Page 158
REPRODUCCIÓN J REPRODUCCIÓN DE IMÁGENES FIJAS 1 Presione . • El monitor se enciende y se visualiza la última imagen fotografiada. (Reproducción de un solo cuadro) 2 Utilice las teclas de control para reproducir otras imágenes. Se retroceden 10 cuadros. ( ) Se visualiza la imagen anterior. ( ) Se - Olympus Stylus 400 | Stylus 300 Digital Basic Manual (English, Français - Page 159
Reproducción de primeros planos Las imágenes visualizadas en el monitor se pueden ampliar en pasos hasta un máximo de 4 veces su tamaño original. Esta función es conveniente para verificar los detalles de la imagen capturada. 1 Utilice las teclas de control para seleccionar la imagen fija que desea - Olympus Stylus 400 | Stylus 300 Digital Basic Manual (English, Français - Page 160
se muestre el menú MOVIE PLAYBACK. PLAYBACK : Se reproduce otra vez el vídeo entero. FRAME BY FRAME: Reproduce el vídeo de forma manual, cuadro por cuadro. EXIT : Sale del modo de reproducción de vídeo. Presione para seleccionar PLAYBACK, FRAME BY FRAME o EXIT, y luego presione . Cuando - Olympus Stylus 400 | Stylus 300 Digital Basic Manual (English, Français - Page 161
presione Es . • La imagen se borra y el menú se cierra. Borrar todos los cuadros 1 En el menú superior, seleccione MODE MENU CARD CARD SETUP y presione . 2 Presione presione para seleccionar . ALL ERASE y luego 3 Presione para seleccionar YES, y luego presione . • Todas las imágenes se - Olympus Stylus 400 | Stylus 300 Digital Basic Manual (English, Français - Page 162
J FORMATEO (CARD SETUP) Esta función le permite formatear la tarjeta. Al formatearlas, las tarjetas quedan preparadas para recibir los datos. Antes de utilizar tarjetas que no sean de Olympus o que hayan sido formateadas en un ordenador, deberá formatearlas con esta cámara. • Todos los datos - Olympus Stylus 400 | Stylus 300 Digital Basic Manual (English, Français - Page 163
DPOF o en un establecimiento fotográfico DPOF. ¿Qué es DPOF? DPOF son las siglas de Digital Print Order Format. DPOF es el formato utilizado para registrar información sobre impresión automática desde las tarjeta. Es Para mayores detalles, consulte con el "Manual de consulta" del CD-ROM. Es 163 - Olympus Stylus 400 | Stylus 300 Digital Basic Manual (English, Français - Page 164
la tabla, consulte con el "Manual de consulta" del software del CD. Consulte también la "Guía de instalación del software" incluida en el paquete del CD (Netscape Communicator, Microsoft Internet Explorer, etc.); software CAMEDIA Master; u otro software. Para los detalles sobre el uso de aplicaciones - Olympus Stylus 400 | Stylus 300 Digital Basic Manual (English, Français - Page 165
PC opcional. *No soportado por Windows NT4.0 ni menor. Consulte con el representante Olympus más cercano. Para mayores detalles, consulte con el "Manual de consulta" del CD-ROM. Para la conexión al ordenador, consulte la "Guía de instalación del software" incluida en el paquete del CD-ROM. Es 165 - Olympus Stylus 400 | Stylus 300 Digital Basic Manual (English, Français - Page 166
Utilice una tarjeta diferente. Inserte Hay un problema con una tarjeta nueva. CARD ERROR la tarjeta. [PROT. ESCR] No se puede escribir WRITE- fotografía seleccionada y no puede ser mostrada. Para verla, utilice el software de procesamiento de imágenes en un ordenador. Si aún no consigue - Olympus Stylus 400 | Stylus 300 Digital Basic Manual (English, Français - Page 167
Indicaciones del Causas posibles monitor La fecha y la hora no están ajustadas. Acciones correctivas Ajuste la fecha y la hora. Y/M/D Es Es 167 - Olympus Stylus 400 | Stylus 300 Digital Basic Manual (English, Français - Page 168
Vídeo : Soporta QuickTime Motion JPEG Memoria : xD-Picture Card (16 - 256MB) Núm. de imágenes : almacenables (cuando se utiliza una tarjeta de 16 MB) Resolución 2272 × 1704 Modo de grabación Stylus/µ[mju:] Stylus/µ[mju:] 400 DIGITAL 300 DIGITAL SHQ 5 HQ 16 - - 2048 × 1536 SQ1 20 SHQ - Olympus Stylus 400 | Stylus 300 Digital Basic Manual (English, Français - Page 169
300 DIGITAL sólido, de 1/2,5", 3.340.000 pixels (total) Stylus/µ[mju:] : Elemento captador de imágenes CCD de estado 400 DIGITAL sólido, de 1/2,5", 4.230.000 pixels (total) Objetivo : Objetivo Olympus SUJETAS A CAMBIOS SIN PREVIO AVISO NI OBLIGACIÓN ALGUNA POR PARTE DEL FABRICANTE. Es 169 - Olympus Stylus 400 | Stylus 300 Digital Basic Manual (English, Français - Page 170
MEMO 170 - Olympus Stylus 400 | Stylus 300 Digital Basic Manual (English, Français - Page 171
MEMO 171 - Olympus Stylus 400 | Stylus 300 Digital Basic Manual (English, Français - Page 172
: Tel. 1-888-553-4448 (Toll-free) Our phone customer support is available from 8 am to 10 pm (Monday to Friday) ET E-Mail: [email protected] Olympus software updates can be obtained at: http://olympus.com/digital/ OLYMPUS OPTICAL CO. (EUROPA) GMBH. Premises/Goods delivery: Wendenstrasse 14-18
-
 1
1 -
 2
2 -
 3
3 -
 4
4 -
 5
5 -
 6
6 -
 7
7 -
8
-
9
-
10
-
11
-
12
-
13
-
14
-
15
-
16
-
17
-
18
-
19
-
20
-
21
-
22
-
23
-
24
-
25
-
26
-
27
-
28
-
29
-
30
-
31
-
32
-
33
-
34
-
35
-
36
-
37
-
38
-
39
-
40
-
41
-
42
-
43
-
44
-
45
-
46
-
47
-
48
-
49
-
50
-
51
-
52
-
53
-
54
-
55
-
56
-
57
-
58
-
59
-
60
-
61
-
62
-
63
-
64
-
65
-
66
-
67
-
68
-
69
-
70
-
71
-
72
-
73
-
74
-
75
-
76
-
77
-
78
-
79
-
80
-
81
-
82
-
83
-
84
-
85
-
86
-
87
-
88
-
89
-
90
-
91
-
92
-
93
-
94
-
95
-
96
-
97
-
98
-
99
-
100
-
101
-
102
-
103
-
104
-
105
-
106
-
107
-
108
-
109
-
110
-
111
-
112
-
113
-
114
-
115
-
116
-
117
-
118
-
119
-
120
-
121
-
122
-
123
-
124
-
125
-
126
-
127
-
128
-
129
-
130
-
131
-
132
-
133
-
134
-
135
-
136
-
137
-
138
-
139
-
140
-
141
-
142
-
143
-
144
-
145
-
146
-
147
-
148
-
149
-
150
-
151
-
152
-
153
-
154
-
155
-
156
-
157
-
158
-
159
-
160
-
161
-
162
-
163
-
164
-
165
-
166
-
167
-
168
-
169
-
170
-
171
-
172
 |
 |

DIGITAL CAMERA
APPAREIL PHOTO NUM
ÉRIQUE
DIGITALKAMERA
CÁMERA DIGITAL
BASIC MANUAL
MANUEL DE BASE
EINFACHE ANLEITUNG
MANUAL BÁSICO
ENGLISH
FRANÇAIS
DEUTSCH
ESPAÑOL