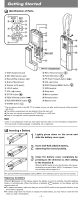
Olympus WS 110 WS-210S Instruction Manual (English) - Page 5
Recording - voice recorder
 |
UPC - 050332400658
View all Olympus WS 110 manuals
Add to My Manuals
Save this manual to your list of manuals |
Page 5 highlights
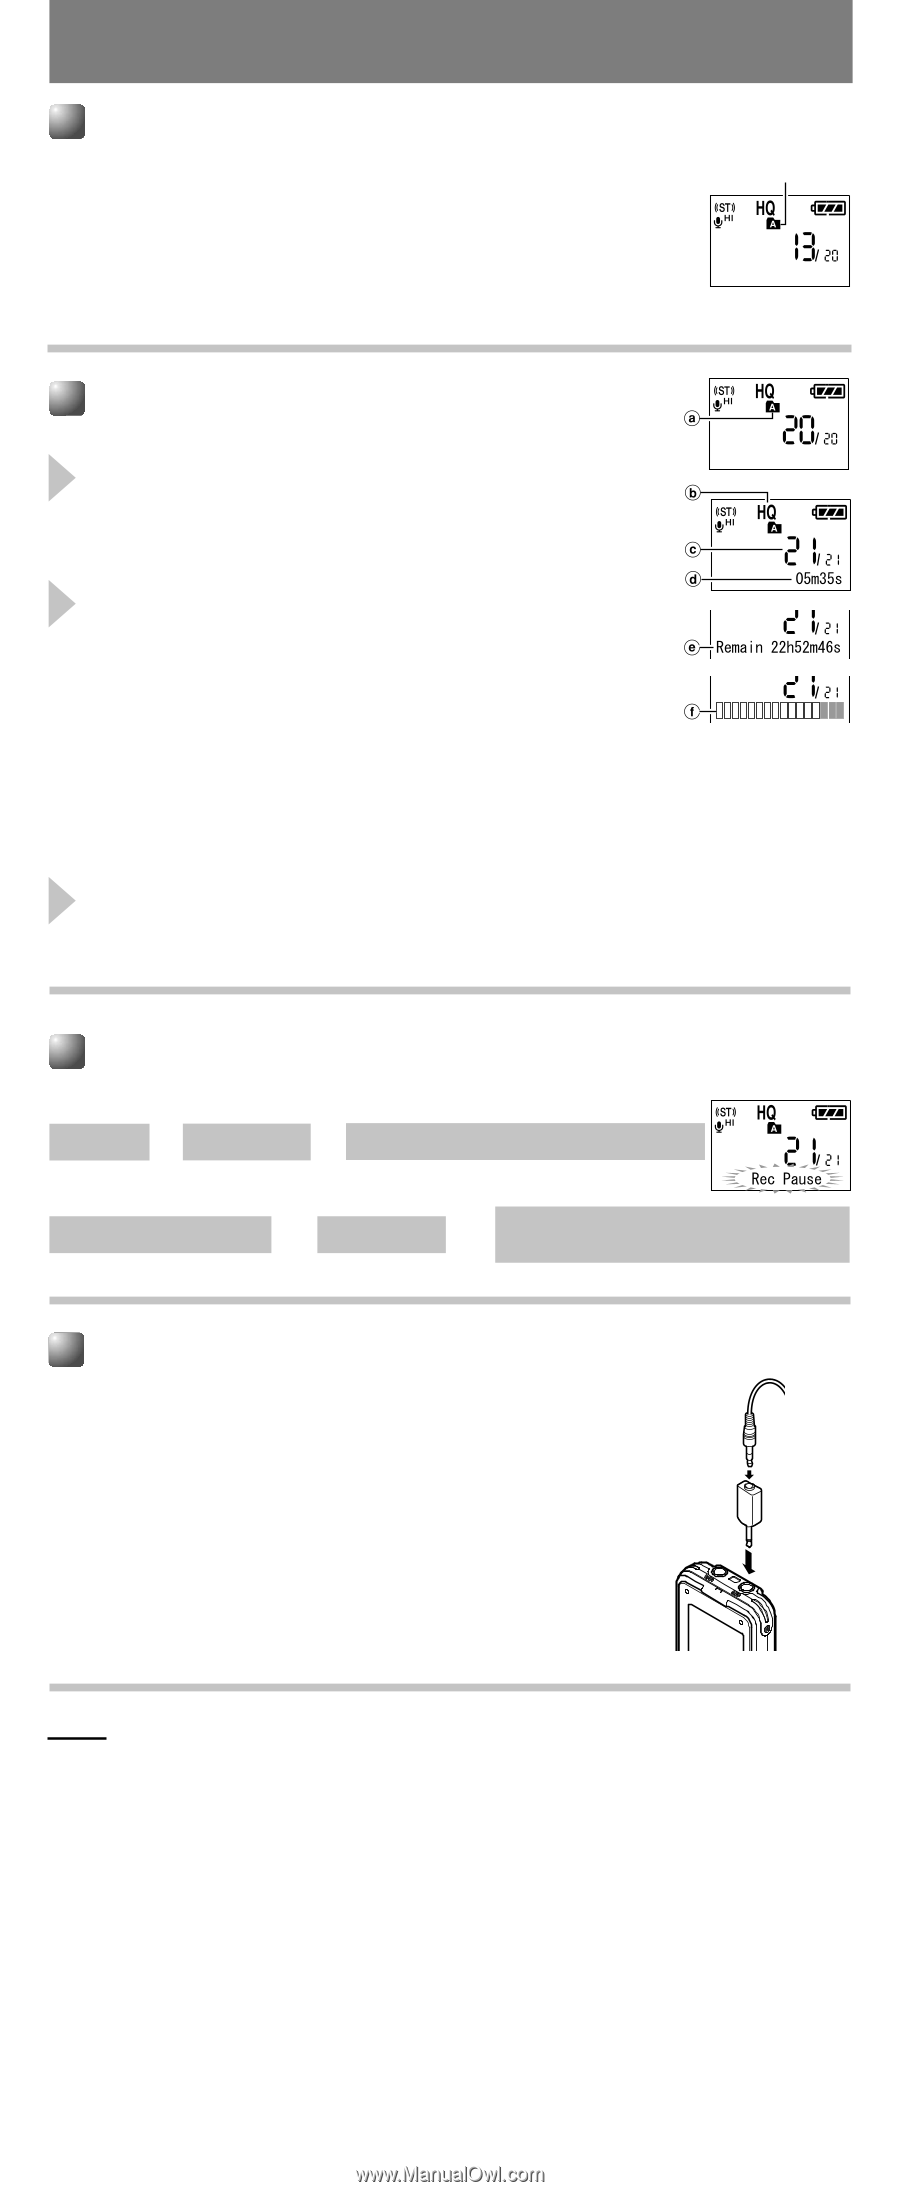
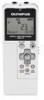
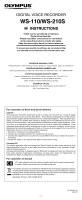
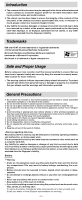
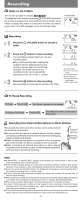
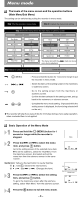
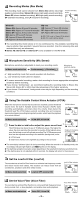
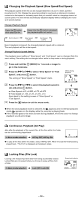
Recording Notes on the Folders The recorder provides five folders, ABCDE. To change the folder selection, press the 2 (FOLDER) button while the recorder is stopped. Each recorded file is stored in a folder. Using folders to classify files makes it convenient to find files you want to access later. Up to 200 messages can be recorded per folder. Current folder Recording 1 Press the 2 (FOLDER) button to choose a folder. 2 Press the 4 button to start recording. The record/play indicator light turns red, and recording starts. sIf you start recording after inserting the earphone into the earphone jack on the recorder, you can hear the sound being recorded. The sound volume on the recording monitor can be adjusted by pressing the VOL (+) or VOL (-) button. 3 Press the 5 button to stop recording. New recordings are saved as the last file in the folder. a Current folder b Current recording mode c Current file number d Recording time e Remaining recording time (Remain) f Record level meter To Pause Recording To Pause ➜ Press the 4. ➜ "Rec Pause" appears on the display. To Resume Recording ➜ Press the 4. ➜ Recording will resume at the point of interruption. Recording from External Microphone or Other Devices The external microphone and other devices can be connected and the sound can be recorded. sTo connect the recorder to an external device, use the optional connecting cord KA333, and the stereo/monaural converting plug adapter supplied with KA333. sWhen the external microphone is connected to the microphone jack of the recorder, the built-in microphone will not operate. sWhen connecting an external microphone or other external equipment to the microphone jack, choose adequate equipment, such as a mono microphone (optional). To audio input terminal of other devices Converting plug adapter of KA333 Notes s If "Folder FULL" or "Memory FULL" appears on the display, you cannot record. In such a case, erase unnecessary files or download to PC. s If the recorder is placed directly on a table when recording a meeting, it tends to pick up table vibrations. Put a notebook or other item between the table and the recorder for clearer recording. s Even if you press the 2 (DISP.) button, the display will not change to current recording time if the remaining recording time is 1 minute or less. s A beep will sound when remaining recording time reaches 60 seconds, 30 seconds, and 10 seconds while recording. s When remaining recording time is less than 60 seconds, the record/play indicator light starts flashing in red. When the recording time is decreasing to 30 or 10 seconds, the light flashes faster. s The recorder will enter Stop mode if it has been left paused for 60 minutes or longer. s In case of difficult acoustic conditions or low speaker's voice, recording in Stereo XQ, Stereo HQ, Stereo SP or HQ is recommended. Also, usage of an external microphone (sold separately) could improve the quality of recordings. s The input level cannot be adjusted on this recorder. When you connect the recorder to an external device, execute a test recording and adjust the output level of the external device. - 5 -
-
 1
1 -
 2
2 -
 3
3 -
 4
4 -
 5
5 -
 6
6 -
 7
7 -
 8
8 -
 9
9 -
 10
10 -
 11
11 -
12
-
13
-
14
 |
 |