Olympus WS 110 WS-210S Instruction Manual (English) - Page 7
Erase - review
 |
UPC - 050332400658
View all Olympus WS 110 manuals
Add to My Manuals
Save this manual to your list of manuals |
Page 7 highlights
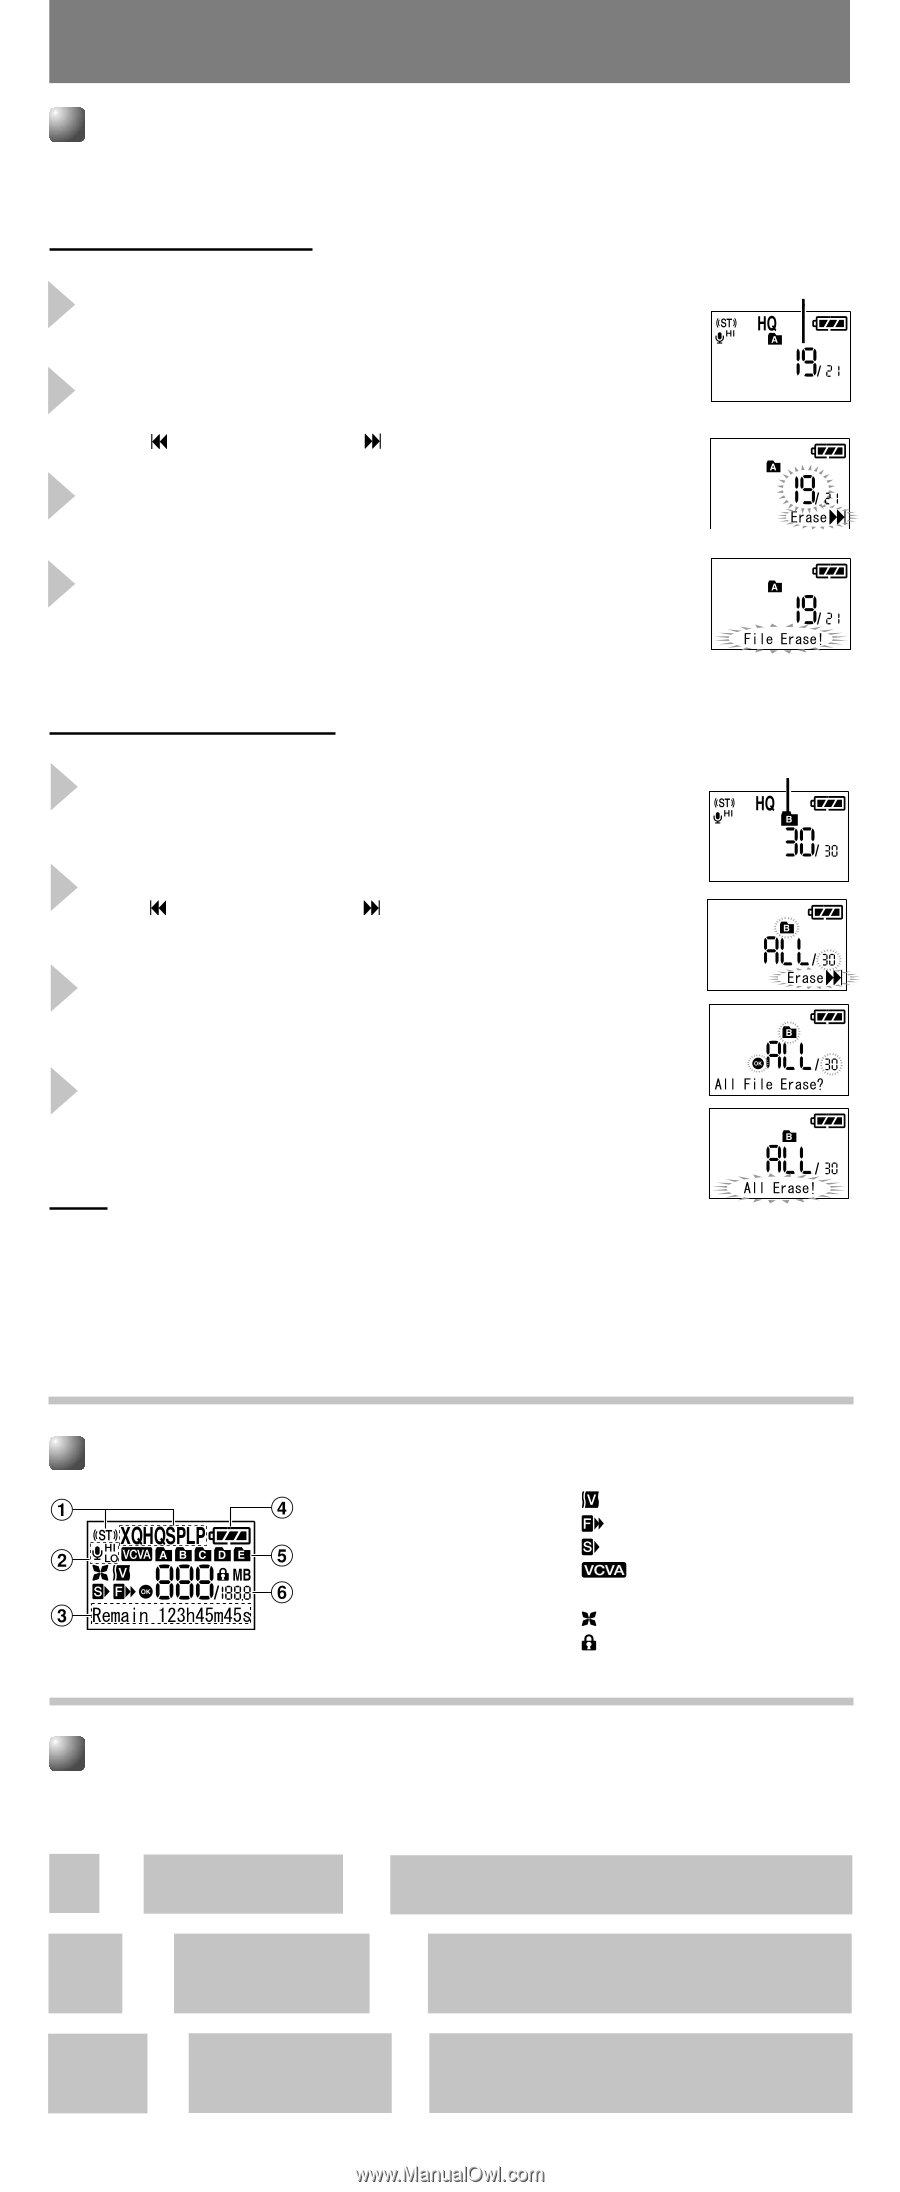
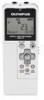
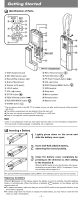
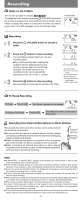
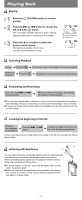
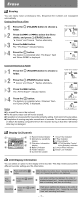
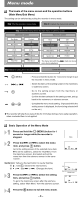
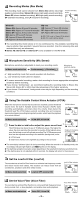
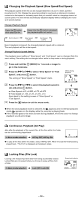
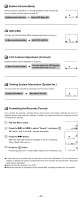
Erase Erasing You can easily erase unnecessary files. Sequential file numbers are reassigned automatically. Erasing One File at a Time 1 Press the 2 (FOLDER) button to choose a folder. 2 Press the 9 or 0 to select the file to delete, and press 1 (ERASE) button. " Cancel" and "Erase " flashes alternately. 3 Press the 9 button. The "1File Erase?" indicator flashes. File to be erased 4 Press the t button. The deletion is completed when "File Erase!" flash and "Erase DONE" is displayed. Erase All Files from a Folder 1 Press the 2 (FOLDER) button to choose a folder. 2 Press the 1 (ERASE) button twice. " Cancel" and "Erase " flashes alternately. 3 Press the 9 button. The "All File Erase?" indicator flashes. Folder to be erased 4 Press the t button. The deletion is completed when "All Erase!" flash and "Erase DONE" is displayed. Notes sAn erased file cannot be restored. sThe file set to erase lock will not be erased. sIf operation is not executed for 8 seconds during the setting, it will return to the stop status. sCompletion of erasing may take several tens of seconds. Do not remove the battery or detach the battery compartment from the recorder during in that time. Otherwise data may be damaged. Display (LCD panel) 1 Record mode indicator 2 Microphone sensitivity display 3 Character information display 4 Battery indicator 5 Folder indicator 6 Current file number Voice Filter indicator F.Play indicator S.Play indicator VCVA(Variable Control Voice Actuator) indicator LowCut Filter indicator Erase Lock indicator LCD Display Information You can select an option for the display of the recorder. This help review and confirm different recorder settings and file information. Stop ➜ Press and hold the 5 button. ➜ While holding the button down, "remaining recording time" and "remaining memory" are displayed. Stop Playing ➜ Press the 2 (DISP.) button. ➜ Each press switches the display in the order of "playback elapsed time", "remaining playback time", "date of recording" and "time at recording". Recording ➜ Press the 2 (DISP.) button. ➜ Each press switches the display in the order of "recording elapsed time", "remaining recording time" and "recording level meter". - 7-
-
 1
1 -
 2
2 -
 3
3 -
 4
4 -
 5
5 -
 6
6 -
 7
7 -
 8
8 -
 9
9 -
 10
10 -
 11
11 -
 12
12 -
13
-
14
 |
 |