Olympus WS-500M WS-500M Detailed Instructions (English)
Olympus WS-500M Manual
 |
View all Olympus WS-500M manuals
Add to My Manuals
Save this manual to your list of manuals |
Olympus WS-500M manual content summary:
- Olympus WS-500M | WS-500M Detailed Instructions (English) - Page 1
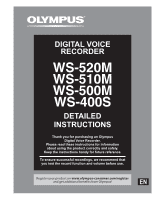
DIGITAL VOICE RECORDER DETAILED INSTRUCTIONS Thank you for purchasing an Olympus Digital Voice Recorder. Please read these instructions for information about using the product correctly and safely. Keep the instructions handy for future reference. To ensure successful recordings, we recommend that - Olympus WS-500M | WS-500M Detailed Instructions (English) - Page 2
is found, please contact our Customer Support Center. • Any liability for passive damages or damage of any kind occurred due to data loss incurred by a defect of the product, repair performed by the third party other than Olympus or an Olympus authorized service station, or any other reason is - Olympus WS-500M | WS-500M Detailed Instructions (English) - Page 3
from CD 54 5 About the folders for voice recordings..........18 Transferring music file to the recorder......... 55 About the folder for music playback begin segment repeat playback ...... 32 Troubleshooting 66 Technical assistance and support 68 Accessories (optional 68 Specifications 69 Erasing - Olympus WS-500M | WS-500M Detailed Instructions (English) - Page 4
your new recorder, read this manual carefully to ensure that you know how to operate it safely and correctly. Keep this manual in an by the third party other than Olympus or an Olympus authorized service station, or any other reasons is excluded from the Olympus's liability. Batterries f Danger: - Olympus WS-500M | WS-500M Detailed Instructions (English) - Page 5
, smoke, or a burning odor: 1 remove the batteries immediately while being careful not to burn yourself, and; 2 call your dealer or local Olympus representative for service. • Do not expose the batteries to water. Do not allow water to contact the terminals. • Do not remove or damage the batteries - Olympus WS-500M | WS-500M Detailed Instructions (English) - Page 6
27, P.53, P.60). * For WS-520M, WS-510M, WS-500M only. s Supports the MP3 format and linear PCM format, which is capable of recording sound quality equivalent to CD-level (For WS-520M only) (☞ P.36, P.38). s It has a built-in Variable Control Voice Actuator (VCVA) function (☞ P. 36, P. 39 - Olympus WS-500M | WS-500M Detailed Instructions (English) - Page 7
(Record) button @ 9 button # MENU button $ - button % INDEX/ERASE button ^ OK ` button & 0 button * STOP (4) button ( Battery cover ) HOLD switch - Mode (VOICE/MUSIC) switch*1 MIC SENSE CONF/DICT switch*2 = USB connector slide lever q USB connector *1 For WS-520M, WS-510M, WS-500M only. *2 For WS - Olympus WS-500M | WS-500M Detailed Instructions (English) - Page 8
of parts Display (LCD panel) Folder list display " For WS-520M/WS-510M/ WS-500M: 1 When [VOICE] mode is selected: 1 2 When [MUSIC] mode is selected: 3 4 Identification of parts 1 [VOICE] mode indicator Record/ Playback status indicator Battery indicator 2 Folder name 3 [MUSIC] mode - Olympus WS-500M | WS-500M Detailed Instructions (English) - Page 9
indicator 4 File name File display " For WS-520M/WS-510M/ WS-500M: When [VOICE] mode is selected: 1 2 6 3 7 8 4 5 9 0 ! @ # $ " For WS-400S: % ^ 1 & Identification of parts 1 2 6 3 7 8 4 5 9 1 File name Record/ Playback status indicator Battery indicator 2 Folder indicator - Olympus WS-500M | WS-500M Detailed Instructions (English) - Page 10
Insert size-AAA alkaline battery, observing the correct = and - polarities. Identification of parts/Power supply " For WS-520M/WS-510M/ WS-500M: • When charging the recorder, be sure to use the supplied specified Ni-MH rechargeable (BR401) batteries. • The supplied rechargeable batteries are - Olympus WS-500M | WS-500M Detailed Instructions (English) - Page 11
batteries run out, you will loose your currently recorded recorder for an extended period of time. • When playing a voice/music file, the recorder recorder shuts down. Notes • Manganese batteries may not be used in this recorder. • When changing batteries, AAA alkaline batteries or Olympus - Olympus WS-500M | WS-500M Detailed Instructions (English) - Page 12
Charging by connecting to a computer via USB " For WS-520M/WS-510M/ WS-500M: 1 You can charge the batteries by connecting to a PC's USB port. When charging, be sure to correctly place the rechargeable batteries (supplied) into the recorder (☞ P.10). 3 While pressing the STOP (4) button, connect to - Olympus WS-500M | WS-500M Detailed Instructions (English) - Page 13
by taping the contacts) before disposing. For customers in Germany: Olympus has a contract with the GRS (Joint Battery Disposal Association) in Germany to ensure environmentally friendly disposal. Turning on/off the power When the recorder is not being used, turn the power off to reduce battery - Olympus WS-500M | WS-500M Detailed Instructions (English) - Page 14
the arrow. 1 If you bring the recorder is set to HOLD mode, the running conditions will be preserved, and all buttons will be disabled. This feature is useful when the recorder has to be carried in a bag or pocket. Set the recorder to HOLD mode While the recorder is during stop mode, slide the HOLD - Olympus WS-500M | WS-500M Detailed Instructions (English) - Page 15
the time and date beforehand, the information when the file is recorded is automatically stored for each file. Setting the time and date beforehand enables easier file management. When you use the recorder for the first time after purchasing it, or when the batteries - Olympus WS-500M | WS-500M Detailed Instructions (English) - Page 16
9 button to move the cursor to the item to set. • [Device Menu] will appear on the display. +− button 9 button OK `button MENU button 1 While the recorder is during stop mode, press the MENU button. • The menu will appear on the display (☞ P.36). 4 Press the OK ` or 9 button. • [Time & Date] will - Olympus WS-500M | WS-500M Detailed Instructions (English) - Page 17
] mode and [MUSIC] mode " For WS-520M/WS-510M/ [MUSIC] mode: WS-500M: Slide the mode switch to [MUSIC] This device can be used as a voice recorder position. or as a music player. For recording and playback voice recordings, set the mode switch to [VOICE]. For listening to music, set the - Olympus WS-500M | WS-500M Detailed Instructions (English) - Page 18
Recorder. 1 2 3 2 File number: A serial number automatically assigned by a Digital Voice Recorder. 3 Extension: These are the file name extensions for the recording format when recording with this device. • Linear PCM format* .WAV • MP3 format* .MP3 EN • WMA format .WMA 18 * For WS - Olympus WS-500M | WS-500M Detailed Instructions (English) - Page 19
Notes on the folders Notes on the folders " For WS-520M/WS-510M/ WS-500M: About the folder for music playback When transferring music files to the device using Windows Media Player, a folder is automatically created within the music playback - Olympus WS-500M | WS-500M Detailed Instructions (English) - Page 20
the folders for music playbacks: " For WS-520M/WS-510M/WS-500M: 1 Folder list display Folder list display (First layer) Folder list display (Second layer) File list display Selecting the folders and files Operation of the folders for voice recordings: Folder list display File list display - Olympus WS-500M | WS-500M Detailed Instructions (English) - Page 21
business information. STOP (4) button REC (s) button " For WS-520M/WS-510M/ WS-500M: • If the REC (s) button is pressed while the mode switch is set to [MUSIC], [Music Mode] will flash on the display. Set the mode switch to [VOICE] before recording (☞ P.17). 2 Press the REC (s) button to start - Olympus WS-500M | WS-500M Detailed Instructions (English) - Page 22
− button. Connect the earphone to the EAR jack on the recorder. Recording • [5] will appear on the display. • The recorder will time out after 60 minutes when left in "Rec Pause". Resume Recording: Press the REC (s) button again. • Recording will resume at the point of interruption. To EAR jack - Olympus WS-500M | WS-500M Detailed Instructions (English) - Page 23
recording needs. volume too high. Listening at very high volume may lead to hearing loss. " For WS-520M/WS-510M/ • Do not place earphones near a WS-500M would like to clearly record a speaker's voice, set the MIC SENSE CONF/DICT switch to [DICT] and hold the recorder's built-in stereo - Olympus WS-500M | WS-500M Detailed Instructions (English) - Page 24
so that you can make high quality stereo recordings immediately after purchasing it. The various functions relating to recording can be configured in detail to suit the recording conditions. Recommended settings Recording condition Recording Mode (☞ P.36, P.38) 2 Conferences with large crowds - Olympus WS-500M | WS-500M Detailed Instructions (English) - Page 25
can be plugged into your ear while phoning. The voice or conversation over the phone can be clearly recorded. 2 Notes • The built-in microphone will become inoperable when an external microphone is plugged into the recorder's MIC jack. • Microphones supported by plug-in power can also be used - Olympus WS-500M | WS-500M Detailed Instructions (English) - Page 26
to other devices when connected to the audio input terminal (microphone jack) of other devices and the EAR jack of this recorder, with the connecting cord KA333 (optional) for dubbing. 2 To MIC jack To audio output terminal of other devices To EAR jack To audio input terminal - Olympus WS-500M | WS-500M Detailed Instructions (English) - Page 27
the display. a b c 3 d e Playback " For WS-520M/WS-510M/ WS-500M: • When playing back files transferred from a PC, set the mode switch according to the folder type (☞ P.17). • When playing back files recorded on the recorder, set the mode switch to [VOICE] (☞ P.17). 1 Select the folder which - Olympus WS-500M | WS-500M Detailed Instructions (English) - Page 28
reaches the end of the file. Continue pressing the 9 button to proceed with the cue from the beginning of the next file. Rewinding While the recorder is during stop mode in the file display, press and hold the 0 button. EN 28 • [4] will appear on the display. • If you release the 0 button - Olympus WS-500M | WS-500M Detailed Instructions (English) - Page 29
twice. • The recorder skips to the beginning of the previous file. Settings relating to playback " For WS-520M/WS-510M/ WS-500M: Notes • When during playback, do not raise the volume too *1 Can be operated only in [VOICE] mode. much. It may cause hearing impairment *2 Can be operated only in - Olympus WS-500M | WS-500M Detailed Instructions (English) - Page 30
while in normal playback mode etc. The recorder has a Voice Filter Function to cut low 3 [Voice Filter] (☞ P.36, P.40) and * For WS-520M, WS-510M, WS-500M only. • Variable bitrate MP3 files (in which conversion bitrates can vary) may not play properly. • For WAV files, this recorder can only - Olympus WS-500M | WS-500M Detailed Instructions (English) - Page 31
in fast forward and fast rewind and when cuing a file. Index marks cannot be placed on MP3 files or files created on machines other than Olympus IC recorders, but temp marks can be placed instead to temporarily remember desired locations. Clearing an index mark or a temp mark: 1 Locate the index or - Olympus WS-500M | WS-500M Detailed Instructions (English) - Page 32
Playback • Up to 16 index and temp marks can be set in a file. If you try to place more than 16 index or temp marks, [Index Full] message will appear for index marks, and [Temp Mark Full] for temp marks. • Index or temp marks cannot be set or erased in a locked file (☞ P.36, P.38). How to begin - Olympus WS-500M | WS-500M Detailed Instructions (English) - Page 33
and repeat playback will start. 5 Press the REC (s) button again at the position where you want to end segment repeat playback. • The recorder repeatedly plays back the segment until the segment repeat playback is cancelled. Cancel the segment repeat playback function Pressing any of the following - Olympus WS-500M | WS-500M Detailed Instructions (English) - Page 34
press the + or − button to select the file you want to erase. • In the File display, press the 9 or 0 button to select a file. 3 While the recorder is during stop mode, press the INDEX/ERASE button. 7 Press the OK ` button. • The display changes to [Erase!] and erasing will start. • [Erase Done] is - Olympus WS-500M | WS-500M Detailed Instructions (English) - Page 35
that the batteries will not run out while processing. • For WS-520M, WS-510M, WS-500M only: You can delete other than [Music] folders when the recorder is set to [MUSIC] mode. However, you cannot delete any folders when the recorder is set to [VOICE] mode. • For WS-400S only: You cannot delete - Olympus WS-500M | WS-500M Detailed Instructions (English) - Page 36
to set. +− button 9 0 button OK ` button MENU button 4 1 While the recorder is during stop mode, press the MENU button. • The menu will appear on the you want to set. Menu setting method • Menu items can be set during a recording or playback (☞ P.37). 2 Press the + or − button to move to the - Olympus WS-500M | WS-500M Detailed Instructions (English) - Page 37
recording or playback, the menu settings will be cancelled if 8 seconds elapse with no buttons being pressed. Skip Space Backlight LED *1 For WS-520M, WS-510M, WS-500M only (Set to [VOICE] mode). *2 For WS-400S. For WS-520M, WS-510M, WS-500M (Set to [VOICE] mode). *3 For WS-520M, WS-510M, WS-500M - Olympus WS-500M | WS-500M Detailed Instructions (English) - Page 38
in advance before 38 operating the menu. " For WS-520M/WS-510M/ WS-500M: • When performing operations on [Rec Menu] screen, set the mode switch to [VOICE] (☞ P.17). Mic Sense Microphone sensitivity is adjustable to meet recording needs. " For WS-400S: • Use the switch to set the microphone - Olympus WS-500M | WS-500M Detailed Instructions (English) - Page 39
[WMA]: [ST XQ], [ST HQ], [ST SP], [HQ], [SP], [LP] * For WS-520M only. • To record a meeting and lecture clearly, set other than [LP] in [Rec Mode]. • When the external monaural level, the built-in Variable Control Voice Actuator (VCVA) starts recording automatically, and stops when the volume - Olympus WS-500M | WS-500M Detailed Instructions (English) - Page 40
To ensure successful recordings, prior testing and adjustment of the start/stop actuation level is recommended. - Play Menu 4 " For WS-520M/WS-510M/ WS-500M: • When operating [Play Menu] screen, different settings items are displayed depending on the position of the mode switch. When [VOICE] mode is - Olympus WS-500M | WS-500M Detailed Instructions (English) - Page 41
repeat the procedure from step 2. Play Mode You can select the playback mode that fits your preference. 4 Menu setting method " For WS-520M/WS-510M/ WS-500M: Set to [MUSIC] mode. Select the desired playback range: 1 Select [Play Area]. 2 Select [File], [Folder] or [All]. [File]: Selects the - Olympus WS-500M | WS-500M Detailed Instructions (English) - Page 42
WS-520M/WS-510M/ WS-500M: Set to [VOICE] mode. " For WS-400S: [File]: Stop after playing back the current file. 4 [Folder]: Play files continuously in the current folder until the last file and stop. • In [File] mode, when the recorder automatically adjusted digitally without changing the voice so it - Olympus WS-500M | WS-500M Detailed Instructions (English) - Page 43
• The slow playback or fast playback is available even if either [Voice Filter] or [Equalizer] is set (☞ P.40, P.41). • The [On]: LED light will be set. [Off]: LED light will be cancelled. Beep The recorder beeps to alert you to button operations or warn you of errors. System sounds may be - Olympus WS-500M | WS-500M Detailed Instructions (English) - Page 44
06] [On] [On] [English] *1 For WS-520M, WS-510M, WS-500M only (Set to [VOICE] mode). *2 For WS-400S. For WS-520M, WS-510M, WS-500M (Set to [VOICE] mode). *3 For WS-520M, WS-510M, WS-500M only (Set to [MUSIC] mode). Format Refer to "Formatting the Recorder [Format]" (☞ P.46). System Info. You can - Olympus WS-500M | WS-500M Detailed Instructions (English) - Page 45
+− button 9 0 button OK ` button MENU button 1 Select the folder for which you would like to rearrange the song order (☞ P.18 to P.20). 2 While the recorder is during stop mode, press the MENU button. • The menu will appear on the display (☞ P.36). 3 Press the OK ` or 9 button to move the cursor - Olympus WS-500M | WS-500M Detailed Instructions (English) - Page 46
defaults except date and time settings. Transfer any important files to a computer before formatting the recorder. 6 Press the + button to select [Start]. +− button 9 0 button OK ` button MENU button 4 1 While the recorder is during stop mode, press the MENU button. • The menu will appear on the - Olympus WS-500M | WS-500M Detailed Instructions (English) - Page 47
in order to ensure that the batteries will not run out while processing. • Never format the recorder from a PC. • Once the recorder is formatted, the music files with DRM may not be transferred to the recorder again. • When the recorder is formatted, all the saved data, including locked files - Olympus WS-500M | WS-500M Detailed Instructions (English) - Page 48
using Windows Windows Media Player or iTunes (☞ P.53, P.60). • The recorder is compatible with WMA, MP3* and WAV* language content. * For WS-520M, WS-510M, WS-500M only. • In addition to its uses as an IC recorder and a music player, this recorder can also be used as external memory for a computer - Olympus WS-500M | WS-500M Detailed Instructions (English) - Page 49
the Copyright Act, any voice/music the recorder or uploading a file to the files and music CDs downloaded from the recorder, do not remove the the instructions in [Format] screen of the from music distribution services. To transfer recorder (☞ P.46). a WMA file with DRM to the recorder, you - Olympus WS-500M | WS-500M Detailed Instructions (English) - Page 50
product name on the desktop. 5 3 Connect to the PC's USB port or to a USB hub. • [Remote] is appeared on recorder if the USB cable is connected. Notes • Refer to the user's manual for your PC regarding the USB port on your PC. • Be sure to push the cable connector all the way - Olympus WS-500M | WS-500M Detailed Instructions (English) - Page 51
depending on the PC being used. 2 When the safe to remove hardware window appears, click [OK]. 3 Disconnect the recorder from the 5 PC. • NEVER disconnect the USB while the recording indicator light is flashing. If you do, the data will be destroyed. Macintosh Connecting to your PC 1 Move the - Olympus WS-500M | WS-500M Detailed Instructions (English) - Page 52
files to your PC The 5 voice folders of this recorder are appeared as [DSS_FLDA], [DSS_FLDB], [DSS_FLDC], [DSS_FLDD] and [DSS_FLDE], and the recorded voice files are saved in these folders. Windows 1 Connecting the recorder to your PC (☞ P.50). Notes • While transmitting data, [Busy] is appeared - Olympus WS-500M | WS-500M Detailed Instructions (English) - Page 53
that have been imported to your computer from music CDs and acquired over the Internet can be transferred to and played back with this recorder. It supports WAV, MP3, and WMA format music files. By using Windows Media Player, music files from music CDs can be converted (ripped) (☞ P.54) and music - Olympus WS-500M | WS-500M Detailed Instructions (English) - Page 54
Using Windows Media Player Copying music from CD 1 Insert CD into the CD-ROM drive, and start Windows Media Player. 2 From the Features taskbar, click [Rip] menu. • After clicking [Rip] menu, click [View Album Info] for Windows Media Player 10 as necessary. • If Internet connectivity is available, - Olympus WS-500M | WS-500M Detailed Instructions (English) - Page 55
. For how to copy the music files from the CD to your PC, see "Copying music from CD" (☞ P.54). Windows Media Player 11 1 Connect the recorder to a PC, and start Windows Media Player. 2 From the Features taskbar, click [Sync]. 3 Click [Sync] menu again to select [DVR] { [Advanced Options] { [Set Up - Olympus WS-500M | WS-500M Detailed Instructions (English) - Page 56
. 2 From the Features taskbar, click [Sync]. 3 From the pull down menu on the left side window, select the play list to be transferred to the recorder, and put the check marks on the music file that you want to transfer. • The order of music pieces can be changed by Drag & Drop - Olympus WS-500M | WS-500M Detailed Instructions (English) - Page 57
files with DRM purchased online music distribution service to a portable device such as this recorder may be restricted. • To transfer the files by using Windows Media Player 9, check the Olympus website. • If the music files are transferred to the recorder until it reaches to the maximum memory - Olympus WS-500M | WS-500M Detailed Instructions (English) - Page 58
them to CD. For how to copy the voice files from the recorder to your PC, see "Transfer the voice files to your PC" (☞ P.52). Windows [Burn] menu. 3 Select the desired category from [Library] on the left, and select voice files or albums to copy to 5 the CD-R/RW, and Drag & Drop them in [Burn - Olympus WS-500M | WS-500M Detailed Instructions (English) - Page 59
Drag & Drop files. 3 Put a check mark on the voice files that you want to copy. 4 Select format of CD recorded. 5 Click [Start Burn]. Using Windows Media Player Notes • Copying the music files with DRM purchased online music distribution service to a portable EN device such as this recorder - Olympus WS-500M | WS-500M Detailed Instructions (English) - Page 60
Using iTunes Window names 1 2 3 Using iTunes 5 4567 1 Features taskbar 2 Rewind button/ Playback, Pause button/ Fast Forward button 3 Volume slide 4 Playlist addition button EN 60 8 90 5 Shuffle button 6 Repeat button 7 Display change button 8 Disc create button 9 Browse button 0 Disc eject - Olympus WS-500M | WS-500M Detailed Instructions (English) - Page 61
3 Click [Advanced] tag. 4 Click [Importing] to set the file format and bit rate for copying music files to your PC, and click [OK]. • This recorder supports MP3 and WAV format music files (☞ P.30). [Import Using]: Set the file format for copying music file from a CD. [Setting]: Set the bit rate for - Olympus WS-500M | WS-500M Detailed Instructions (English) - Page 62
be changed by Drag & Drop of the music file in the play list displayed. 5 3 Double-click the corresponding drive with the recorder, and open [Music] folder. • When you connect the recorder to a Mac OS, it will be recognized by the drive name of the product name on the desktop. • Copy to [Music - Olympus WS-500M | WS-500M Detailed Instructions (English) - Page 63
to your PC and copy them to CD. For how to copy the voice files from the recorder to your PC, see "Transfer the voice files to your PC" (☞ P.52). 1 Insert the CD-R/RW into the CDR/RW drive, and start iTunes. 2 2 Click [iTunes] { [Preferences]. 3 Click [Advanced] tag. 4 Click [Burning] - Olympus WS-500M | WS-500M Detailed Instructions (English) - Page 64
5 will be recognized by the drive name of the product name. 4 Copy the data. 5 Disconnect the recorder from the PC (☞ P.51). Macintosh 1 Connecting the recorder to your PC (☞ P.50). • When you connect the recorder to a Mac OS, it will be recognized by the drive name of the product name on the - Olympus WS-500M | WS-500M Detailed Instructions (English) - Page 65
For WS-520M, WS-510M, WS-500M only: [Music Mode] [MUSIC] mode is active. The mode switch is set to [MUSIC] position. Set the mode switch to [VOICE] malfunction, so go to the store where you purchased the recorder or an Olympus service station for repair (☞ P.68). [Licence Mismatch] Illegally - Olympus WS-500M | WS-500M Detailed Instructions (English) - Page 66
13). Battery power is getting low. Replace with new batteries (☞ P.10). Won't start Unable to record No playback tone 6 heard Recording level too low Voice files are not recorded in stereo Cannot find the recorded Voice File Noise heard during playback EN 66 The power is off. Turn the power on - Olympus WS-500M | WS-500M Detailed Instructions (English) - Page 67
from the microphone further, do not point the microphone at the earphones, lower the volume on the recording monitor, and so on. The maximum number of marks has been reached. Erase unnecessary marks (☞ Unlock the file or cancel the read-only setting of the file on the PC. Troubleshooting EN 67 - Olympus WS-500M | WS-500M Detailed Instructions (English) - Page 68
support for Olympus recorders and software only. s Technical Hotline Number in the U.S. and Canada 1-888-553-4448 s User Support E-mail address in the U.S. and Canada distec@olympus your ear while phoning. The voice or conversation over the phone can be clearly recorded. s Ni-MH rechargeable battery - Olympus WS-500M | WS-500M Detailed Instructions (English) - Page 69
working output: 60 mW (8 Ω speaker) 4 Maximum headphone output: ≤_ 150 mV (according to EN 50332-2) 4 Recording medium: Built-in NAND FLASH memory WS-520M: 8 GB/WS-510M: 4 GB/ WS-500M: 2 GB/WS-400S: 1 GB 4 Speaker: Built-in ø 16 mm round dynamic speaker 4 MIC jack: ø 3.5 mm mini-jack - Olympus WS-500M | WS-500M Detailed Instructions (English) - Page 70
Specifications Guide to recording times 4 WS-520M (Built-in flash memory 8 GB): PCM format . 278 h. [HQ] mode: approx. 278 h. [SP] mode: approx. 547 h. [LP] mode: approx. 1.088 h. 4 WS-500M (Built-in flash memory 2 GB): WMA format [ST XQ] mode: approx. 34 h. [ST HQ] mode: approx. 69 h. - Olympus WS-500M | WS-500M Detailed Instructions (English) - Page 71
guides. During recording mode Recording mode Built-in stereo microphone *1 *2 WS-520M: 2,000 songs WS-510M: 1,000 songs WS-500M: 500 songs WS-400S Model Number: WS-520M/WS-510M/WS-500M/ WS-400S Trade Name: DIGITAL VOICE RECORDER Responsible Party: OLYMPUS IMAGING AMERICA INC. Address: - Olympus WS-500M | WS-500M Detailed Instructions (English) - Page 72
Shinjuku Monolith, 3-1 Nishi-Shinjuku 2-chome, Shinjyuku-ku, Tokyo 163-0914, Japan. Tel. +81 (0)3-3340-2111 http://www.olympus.com 3500 Corporate Parkway, P.O. Box 610, Center Valley, PA 18034-0610, U.S.A. Tel. 1-888-553-4448 http://www.olympusamerica.com EN-BD2380-04 AP0911
-
 1
1 -
 2
2 -
 3
3 -
 4
4 -
 5
5 -
 6
6 -
 7
7 -
8
-
9
-
10
-
11
-
12
-
13
-
14
-
15
-
16
-
17
-
18
-
19
-
20
-
21
-
22
-
23
-
24
-
25
-
26
-
27
-
28
-
29
-
30
-
31
-
32
-
33
-
34
-
35
-
36
-
37
-
38
-
39
-
40
-
41
-
42
-
43
-
44
-
45
-
46
-
47
-
48
-
49
-
50
-
51
-
52
-
53
-
54
-
55
-
56
-
57
-
58
-
59
-
60
-
61
-
62
-
63
-
64
-
65
-
66
-
67
-
68
-
69
-
70
-
71
-
72
 |
 |
DETAILED
INSTRUCTIONS
DIGITAL VOICE
RECORDER
Thank you for purchasing an Olympus
Digital Voice Recorder.
Please read these instructions for information
about using the product correctly and safely.
Keep the instructions handy for future reference.
To ensure successful recordings, we recommend that
you test the record function and volume before use.
EN
Register your product on
www.olympus-consumer.com/register
and get additional benefits from Olympus!