Olympus WS-801 WS-801 Detailed Instructions (English) - Page 79
Connecting to your PC - user manual
 |
View all Olympus WS-801 manuals
Add to My Manuals
Save this manual to your list of manuals |
Page 79 highlights
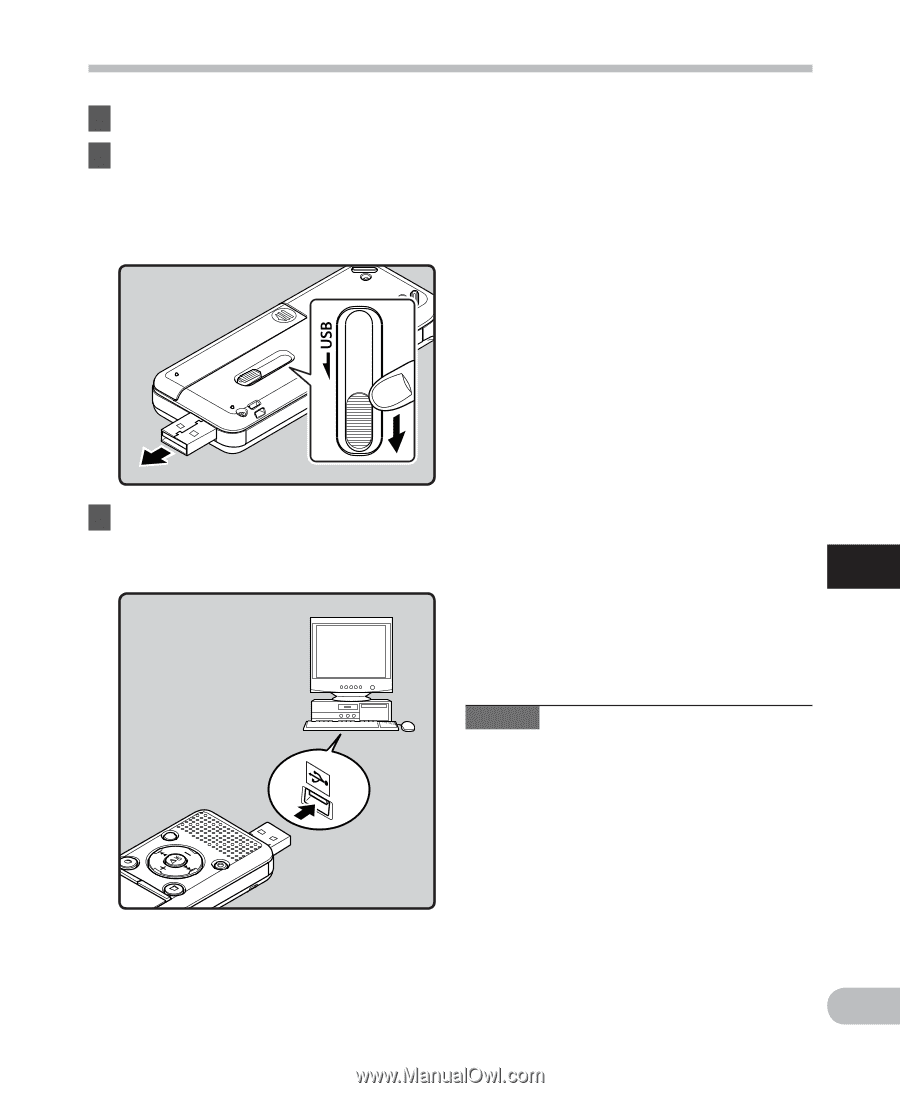
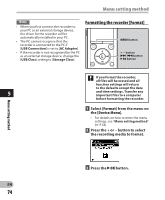
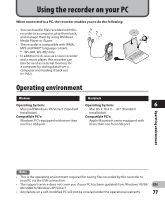
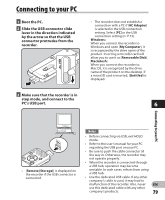
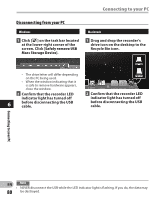
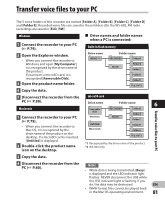
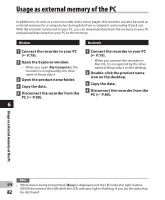
Connecting to your PC 1 Boot the PC. 2 Slide the USB connector slide lever in the direction indicated by the arrow so that the USB connector protrudes from the recorder. • The recorder does not establish a connection with a PC if [AC Adapter] is selected in the USB connection setting. Select [PC] in the USB connection setting (☞ P.73). Windows: When you connect the recorder to Windows and open [My Computer], it is recognized by the drive name of the product. Inserting a microSD card will allow you to use it as [Removable Disk]. Macintosh: When you connect the recorder to Mac OS, it is recognized by the drive name of the product on the desktop. If a microSD card is inserted, [Untitled] is displayed. 3 Make sure that the recorder is in stop mode, and connect to the PC's USB port. 6 Connecting to your PC • [Remote (Storage)] is displayed on the recorder if the USB connector is connected. Notes • Before connecting via USB, exit HOLD mode. • Refer to the user's manual for your PC regarding the USB port on your PC. • Be sure to push the cable connector all the way in. Otherwise, the recorder may not operate properly. • When the recorder is connected through a USB hub, operation may become unstable. In such cases, refrain from using a USB hub. • Use the dedicated USB cable. If any other company's cable is used, it may lead to malfunction of the recorder. Also, never EN use this dedicated cable with any other company's products. 79
-
 1
1 -
2
-
3
-
4
-
5
-
6
-
7
-
8
-
9
-
10
-
11
-
12
-
13
-
14
-
15
-
16
-
17
-
18
-
19
-
20
-
21
-
22
-
23
-
24
-
25
-
26
-
27
-
28
-
29
-
30
-
31
-
32
-
33
-
34
-
35
-
36
-
37
-
38
-
39
-
40
-
41
-
42
-
43
-
44
-
45
-
46
-
47
-
48
-
49
-
50
-
51
-
52
-
53
-
54
-
55
-
56
-
57
-
58
-
59
-
60
-
61
-
62
-
63
-
64
-
65
-
66
-
67
-
68
-
69
-
70
-
71
-
72
-
73
-
 74
74 -
 75
75 -
 76
76 -
 77
77 -
 78
78 -
 79
79 -
 80
80 -
 81
81 -
 82
82 -
 83
83 -
 84
84 -
85
-
86
-
87
-
88
-
89
-
90
-
91
-
92
-
93
-
94
-
95
 |
 |