Onkyo HT-S6300 Owner Manual - Page 14
Connections, Connecting the AV Receiver - speaker stands
 |
View all Onkyo HT-S6300 manuals
Add to My Manuals
Save this manual to your list of manuals |
Page 14 highlights
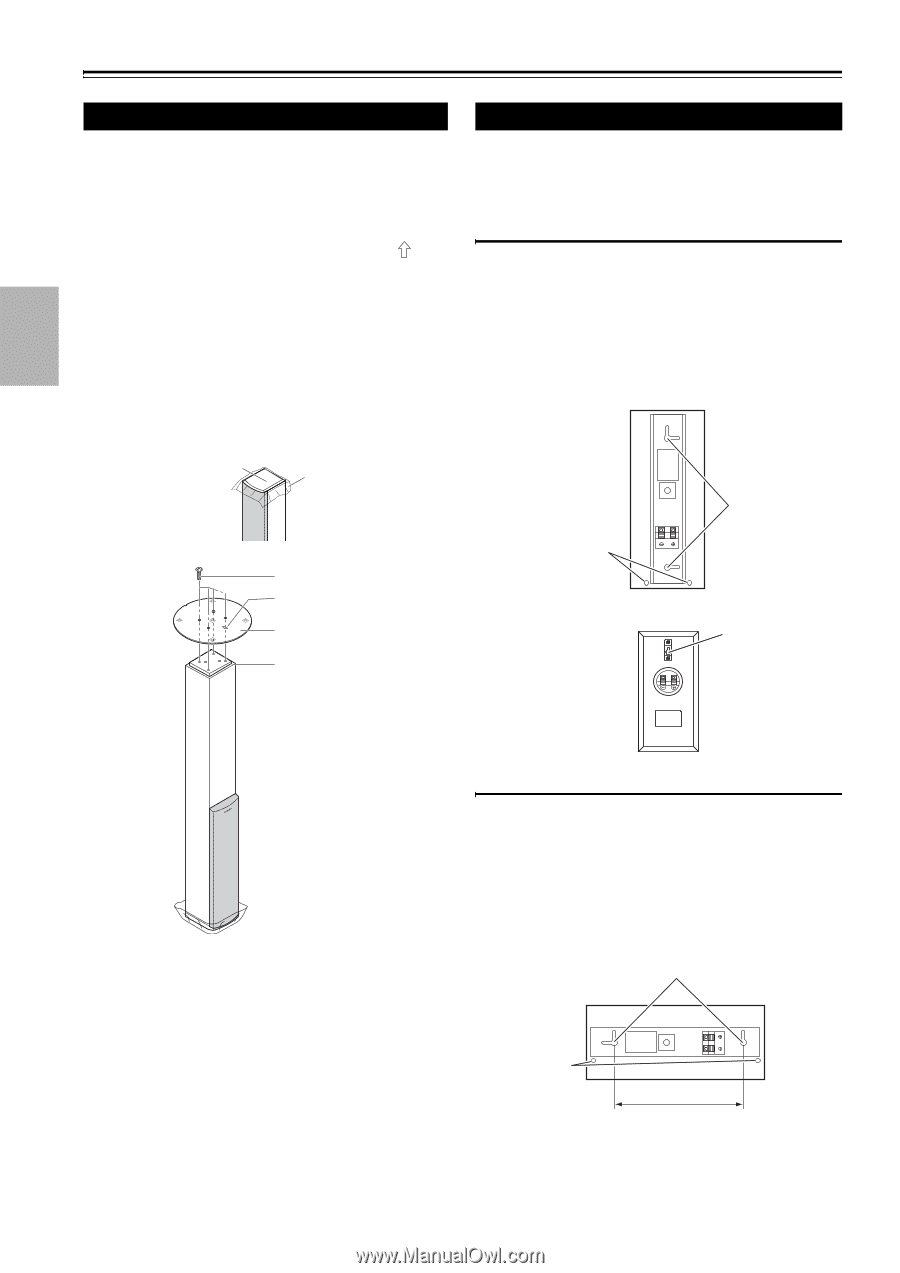
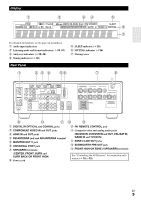
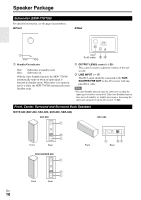
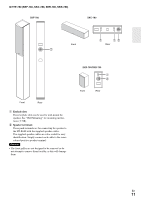
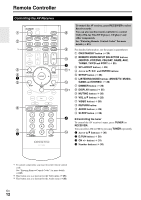
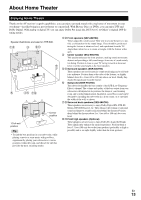
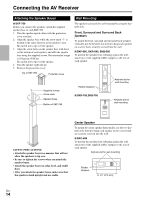
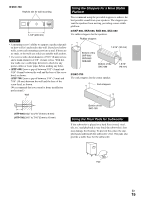
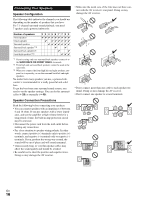
Connections Connecting the AV Receiver Attaching the Speaker Bases ■ SKF-780 Before you connect the speakers, attach the supplied speaker base to each SKF-780. 1. Turn the speaker upside down with the protection cover attached. 2. Align the speaker base while the arrow mark is headed in the same direction as the speaker's face. Be careful not to tip over the speaker. 3. Align the screw holes on the speaker base with those on the bottom of each speaker, and affix the speaker base using the supplied screws. Recommended torque is 10 kgf·cm (9 lbf·in). Be careful not to tip over the speaker. 4. Turn the speaker right side up. 5. Remove the protection cover. Top of SKF-780 Protection cover Supplied screws Arrow mark Speaker base Bottom of SKF-780 Wall Mounting The speakers can easily be wall mounted by using the keyhole slots. Front, Surround and Surround Back Speakers To mount the front, surround and surround back speakers vertically, use the keyhole slot shown to hang each speaker on a screw that's securely screwed into the wall. ■ SKF-680, SKR-680, SKB-680 To prevent the speaker from vibrating against the wall, attach two of the supplied rubber stoppers to the rear of each speaker. Rubber stoppers ■ SKR-780,SKB-780 Keyhole slot for wall mounting Keyhole slot for wall mounting SAFETY PRECAUTIONS: • Attach the speaker bases in a manner that will not allow the speakers to tip over. • Be sure to tighten the screws when you attach the speaker bases. • Attach the speaker bases on a flat, level, and stable floor. • After you attach the speaker bases, make sure that the speakers stand upright and are stable. Center Speaker To mount the center speaker horizontally, use the two keyhole slots shown to hang each speaker on two screws that are securely screwed into the wall. ■ SKC-680 To prevent the speaker from vibrating against the wall, attach two of the supplied rubber stoppers to the rear of each speaker. Keyhole slot for wall mounting Rubber stoppers 8-1/4" (210 mm) En 14
-
 1
1 -
2
-
3
-
4
-
5
-
6
-
7
-
8
-
 9
9 -
 10
10 -
 11
11 -
 12
12 -
 13
13 -
 14
14 -
 15
15 -
 16
16 -
 17
17 -
 18
18 -
 19
19 -
20
-
21
-
22
-
23
-
24
-
25
-
26
-
27
-
28
-
29
-
30
-
31
-
32
-
33
-
34
-
35
-
36
-
37
-
38
-
39
-
40
-
41
-
42
-
43
-
44
-
45
-
46
-
47
-
48
-
49
-
50
-
51
-
52
-
53
-
54
-
55
-
56
-
57
-
58
-
59
-
60
-
61
-
62
-
63
-
64
-
65
-
66
-
67
-
68
-
69
-
70
-
71
-
72
-
73
-
74
-
75
-
76
 |
 |