Onkyo TX-8511 Owner Manual
Onkyo TX-8511 Manual
 |
View all Onkyo TX-8511 manuals
Add to My Manuals
Save this manual to your list of manuals |
Onkyo TX-8511 manual content summary:
- Onkyo TX-8511 | Owner Manual - Page 1
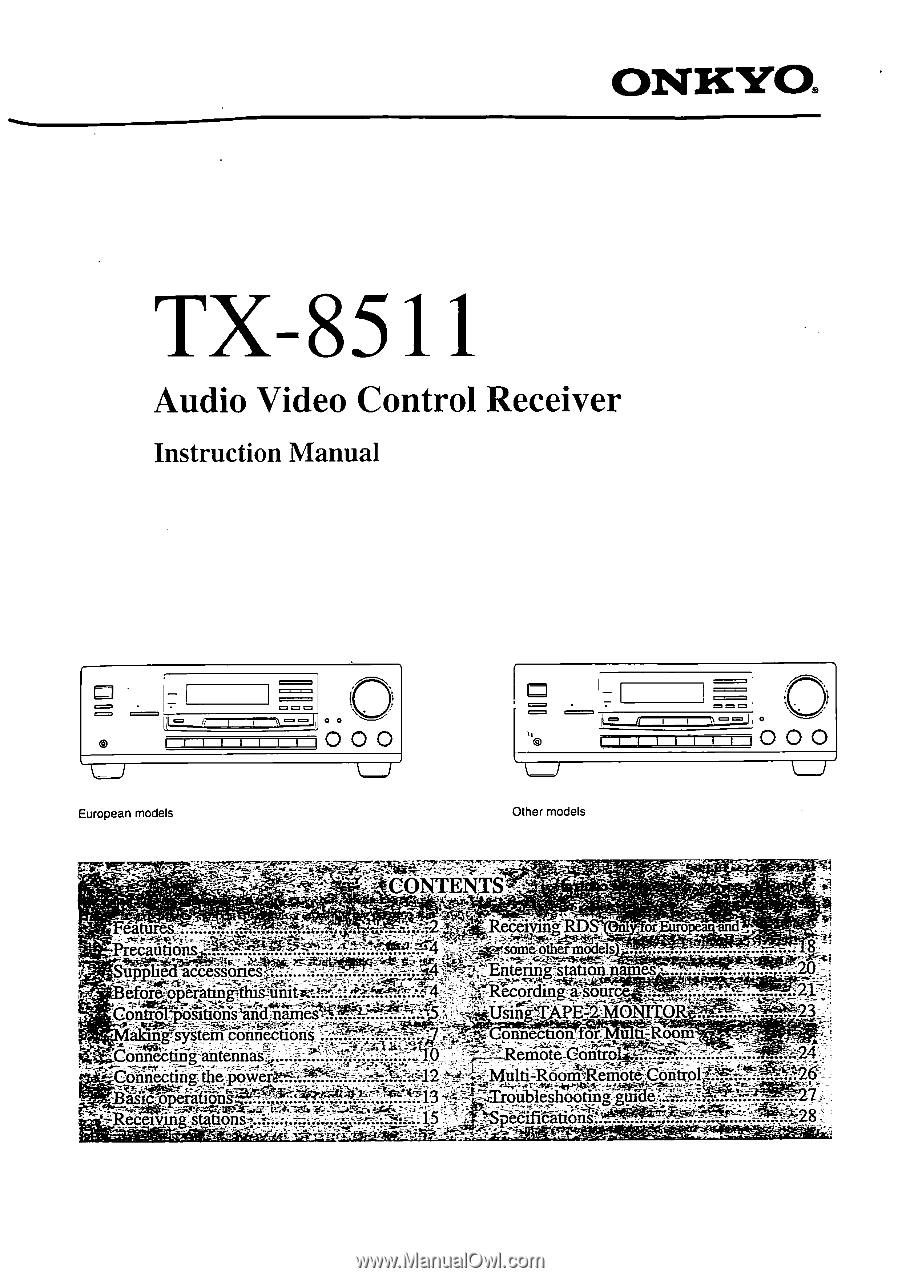
ONKYO. TX-8511 Audio Video Control Receiver Instruction Manual ===1 o= = o 6 I 0 0 OO O = = =- OOO European models Other models I-:.' - - t 54 z:. - , 7 ..= roubleshooting - guide; .1 - 'P ki. ''1 I7s.-.!' --' ''. EaliOhe:441-011 - Onkyo TX-8511 | Owner Manual - Page 2
Me Onkyo TX-8511 Audio Video Control Rlteiier. Please read this manual thoroughlSriletore making connections and operating the unit. Following the instructions in this manual will enable you to obtain optimum performance and listening enjoyment from your new Receiver. Please retain this manual for - Onkyo TX-8511 | Owner Manual - Page 3
that described in the operating instructions. All other servicing should be referred to qualified service personnel. 19. Outdoor Antenna Grounding - If an outside antenna is connected to the receiver. be sure the antenna system is erounded so as to provide some protection against voltage surges and - Onkyo TX-8511 | Owner Manual - Page 4
for other than personal use is illegal without permission of the copyright holder. 3. AC Fuse The fuse is located inside the chassis and is not user-serviceable. If power does not come on, contact your Onkyo authorized service station. 4. Care From time to time you should wipe the front and rear - Onkyo TX-8511 | Owner Manual - Page 5
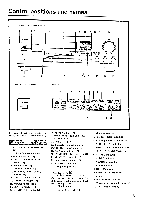
Is PIO u CO i Ttit!) ) 4.1•04.400 TX 5,, 22 21 USA and Canadian model 20 19 18 17 16 15 Display a d e f ah i k I -APRRR STEREO MODE ''•MOOE [ULM MU WIN I . SPEAKERS A B AUDIO MUTE FM MUTE I. TUNED 4 MEMORY -2 MO R VIDEO OE ON OFF STEREO ...-GrE m"i2tf1r\1iu-i1l-\t"r?.m\t/I\tp\i. 11 - Onkyo TX-8511 | Owner Manual - Page 6
4se VOLUME C] ONKYO REMOTE CONTROLLER RC-MS 6. SLEEP 7. MUTING 8. VOLUME Insert the batteries into the remote control according to the illustration. O O (-3O Remote control sensor STAND-BY indicator 30' 30* TX-8511 approx. 5 m (16 feet) 6 RernOte'COntrol' ' 1. POWER button [12] 2. INI - Onkyo TX-8511 | Owner Manual - Page 7
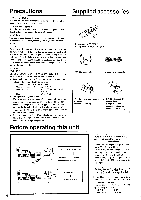
with the fTTg'.: mark. NOTE: • To enable proper remote control operation, both the RI cables and the audio cables must be connected to the units. • This unit's remote control cannot be used to control Onkyo turntables. • An R I remote control cable equipped with 1/8" (3.5 mm) mini jacks is included - Onkyo TX-8511 | Owner Manual - Page 8
Capacity is total 120 watts AC outlet connections The power to components connected to the SWITCHED outlets is turned on and off using the POWER switch (or the SYSTEM switch on models other than USA and Canadian models) on the front panel and remote control. NOTE: • The shape, number and total - Onkyo TX-8511 | Owner Manual - Page 9
_I L A or 13 speaker 8 ohms or above/speaker M _J L • Do not plug in the power cord during speaker system connection and operation of the SPEAKER IMPEDANCE SELECTOR. Other models: • The load impedance of each speaker system connected to this unit must be at least 4 ohms. (If using only A or only - Onkyo TX-8511 | Owner Manual - Page 10
coaxial cable as shown in the illustration. Connect the coaxial cable to the 75/300 ohm antenna adaptor. C) Insert the end of the cable. (i) Use pliers to pinch it and keep it in place. 4. Re-Install the cover. Directional linkage type splitter To TX-8511 To TV (or VCR) DIrectional linkage Do - Onkyo TX-8511 | Owner Manual - Page 11
use only. Position it where the clearest sound is received. Put it as far as possible away from this, unit, the TV, speaker cables and power cords. If clear signals cannot be received using only the enclosed T-shaped FM antenna or AM loop antenna, connect an outdoor FM or outdoor AM antenna as - Onkyo TX-8511 | Owner Manual - Page 12
display. If this switch is pressed again, the unit returns to the stand-by status. The POWER button on the remote control is used in the same way as the POWER switch on the TX-851 I. SYSTEM switch rI 1 000 STAND-BY indicator Models other than U.S. and Canadian models: After plugging the TX-8511 - Onkyo TX-8511 | Owner Manual - Page 13
OFF, no sound will come from the speakers. 3. Start playing the selected input source. Follow the operating instructions for that unit. If FM or AM is selected, refer to "Receiving stations". 4. Adjust the level. Turn the VOLUME knob clockwise or press the UP button on the remote control to increase - Onkyo TX-8511 | Owner Manual - Page 14
ertipor gt Press the MUTING button on the remote control. This button temporarily switches off the sound from the speakers or headphones. The AUDIO MUTE indicator will flash. The muting function will be cancelled if you: • press the MUTING button again, or • turn the power off then on. The sleep - Onkyo TX-8511 | Owner Manual - Page 15
IL LIU"' Please make sure that the T-2 MONITOR and AUDIO MUTE indicators are not lit. Tuhing the radio (Manual When the frequency is not known (Man- ual tuning) 1. I'ress the FM or AM button. 2. Use the -4 DOWN TUNING UP IP- buttons to change the frequency. UP the frequency increases. DOWN - Onkyo TX-8511 | Owner Manual - Page 16
the station you want to listen to. APR RF STEREO MODE MODE EMI Min WEE VIM This unit is equipped with an APR system to help tune in FM stations. When receiving an FM station using manual or direct tuning, RF MODE LOCAUDX and STEREO MODE AUTO/MONO settings are made automatically, according to the - Onkyo TX-8511 | Owner Manual - Page 17
button on the remote control. Main unit 1. Press the GROUP button to select the desired group. 2. Input the memory number you wish to receive by using the number buttons. or Press the SCAN button the FM MUTE/MODE button while holding down the MEMORY button. -" will be shown on the display. • Once the - Onkyo TX-8511 | Owner Manual - Page 18
of the TX-8511 may not be exactly the same as the ones broadcast by the radio station. If strange characters appear in the display, it is because characters are being received that cannot be correctly displayed by the TX-851I. They do not indicate a malfunction of the unit. PS: Program Service Name - Onkyo TX-8511 | Owner Manual - Page 19
a station.which.broadcasts yourl?,, (avorite category (PTY -*- I. Press the PTY/"FP button, and the program type of the currently selected station will be shown on the display (for example, "SPORT"). If the station you are receiving is not broadcasting RDS, "NOT RDS" (this is not an RDS station - Onkyo TX-8511 | Owner Manual - Page 20
stored in preset number 2CH of group B and will be given the name "ONKYO". I.Select the desired station. (Refer to Selecting preset stations on page 17.) 2.Press the CHARACTER button on the front panel. The frequency in the display goes off and the cursor ( _ ) flashes. 3.Continue pressing the SMNO - Onkyo TX-8511 | Owner Manual - Page 21
..'' 41' hifi: • I .: . •• ' ,.. ' ••._.., TX-8511 Recording I 1 Tape deck (TAPE-1, TAPE-2) I Playback Turntable CD player VCR, VDP o • L=7 ==I O L=___II 1 Li 2 •v_.=_.= ° 00 O Li 2 TAPE. • -Recording-an audio,•Tsit•oUrCe-;'.. Please read the instruction manuals concerning the - Onkyo TX-8511 | Owner Manual - Page 22
the VIDEO-I/VD') button. 4. Select the audio program source (TAPE-1, FM, AM, PHONO, CD). 5. Begin playback of the video connected to the VIDEO-I and also start the sound source, then start recording on the VIDEO-2 VCR. Refer to the video disc player, video camcorder or VCR instruction manuals for - Onkyo TX-8511 | Owner Manual - Page 23
rear panel of the TX-8511. 2. IF a second tape deck is used, connect it to the tape deck connectors on the graphic equalizer. 3. Press the TAPE-2 button on the remote control or the TAPE-2 MONITOR button on the main unit. The T-2 MONITOR indicator on the main unit's display lights up. 4. Follow the - Onkyo TX-8511 | Owner Manual - Page 24
Speaker A (Main room) \ 7-\ \ TX-8511 7 , Speaker A (Main room) 3. Connecting block - \.- \ Power supply Remote -control 4. Remote Sensor\ 2. Speaker B (Sub room) 7Thr 2. Speaker B (Sub room) 1. Set up the components (a) displaying Onkyo's RI jack. Connect the sub room speaker cables to the - Onkyo TX-8511 | Owner Manual - Page 25
displaying Onkyo's R I jack. 2. Connect the sub room speaker cables to the speaker B terminal on the TX-8511. (0)) 3. Install Remote Sensor Ilk -10 in the sub-room. then connect it to the TX-851I. (C)) B. Connecting components not equippped with Onkyo R I jacks 3. Remote Emitter HE-50(AC) Power - Onkyo TX-8511 | Owner Manual - Page 26
source and start operating it. 5. Use the VOLUME • or • button to adjust the volume to the desired level. II. the remote control is used from the sub-room, but the compo- nents cannot be controlled, check the following: • Use the controls On the TX-8511 in the main room to check whether it is - Onkyo TX-8511 | Owner Manual - Page 27
Troubleshooting guide If a problem occurs, while you are using the remote control, first operate the unit using, the front panel controls to confirm that it is not due to a malfunction (or expired batteries) of the remote control. Trouble No power Power but no sound Cause • Power cord is - Onkyo TX-8511 | Owner Manual - Page 28
120 V switchable, 50/60 Hz Power Consumption: U.S. and Canadian models: 2.8 A Other models: 220 W Dimensions (%V x H x D): W'ei!ht: 435 x 150 x 322 mm 17-1/8"x 5-7/8" x 12-11/16" 8.9 kg. 19.6 lbs REMOTE CONTROL RC-329S Transmitter: Infrared Signal range: Power supply: Approx. 5 meters. 16
-
 1
1 -
 2
2 -
 3
3 -
 4
4 -
 5
5 -
 6
6 -
 7
7 -
8
-
9
-
10
-
11
-
12
-
13
-
14
-
15
-
16
-
17
-
18
-
19
-
20
-
21
-
22
-
23
-
24
-
25
-
26
-
27
-
28
 |
 |
ONKYO.
TX
-8511
Audio
Video
Control
Receiver
Instruction
Manual
o
===1
o = =
6
I
0 0
O
O
O
European
models
======
======
= =
=-
OOO
Other
models
F
tures..-...-=
-
.1?::-
,...
Preeaunp
ns
-
.,
„,
---,
Srilpp&ar.4
-
psso
F
'
-.
-
tige
lej
-,,,*
,
-
9igo'Ffs-,;,;..-..,-.
4.--
....
,
44_,----,:;.,,,:s
,
.-
k4r-4
LP-foreoperatnagAhisr-•lintil
,::?..:
,...
-;
--
4
91.4%46?
..,..,..v...
,444.--*Zi...kri
c
o,„,
-
."_
U0141)0SitiOnS'anovnaites
21--4-
CONTENT
n
connecton4
-
-
onnectinanntenn
-
as.
..
!
'63inlctifg
the
,i
)
b
w
ast
:gperations—
"
enew
gstAtions,..;---
•
-
ReceivingRD
some
-oilier
model
• •
of,Euro
-...te101,al
ta
names
:;
Recording
a
soars
04
-
GT7
Y~iC
T
2
.
APEallt0
2
pppec4onf:gr
;
:,._
pn-:gropjzt
2•ReiiiofeCCiiriail
'
-''-'"-
---
-
-
--
-
-...
i
,
.....
„,
,,,
.
.....
",.-.,"
.
*!
'":'''''''''''
ulti4Z6onTileinite-'.;Cintifrolk
-
,..: ..,,,„
....
:f
I
-
:.'
-
-
t
roubleshooting
-
guide;
"
.1
-
'P
k
i. '1
''''
......
Is.
7
..=
,-:.---.-=-
--
;
5
4
...-...,
=
..z:.
-
,
''
'
::,
-
.7.-!'
--' ''.
EaliOhe:441-011
-24.4t-,`--
7''';',10-C428