Onkyo TX-DS575x Owner Manual - Page 29
Recording a source - - av receiver - 5 1 channel
 |
View all Onkyo TX-DS575x manuals
Add to My Manuals
Save this manual to your list of manuals |
Page 29 highlights
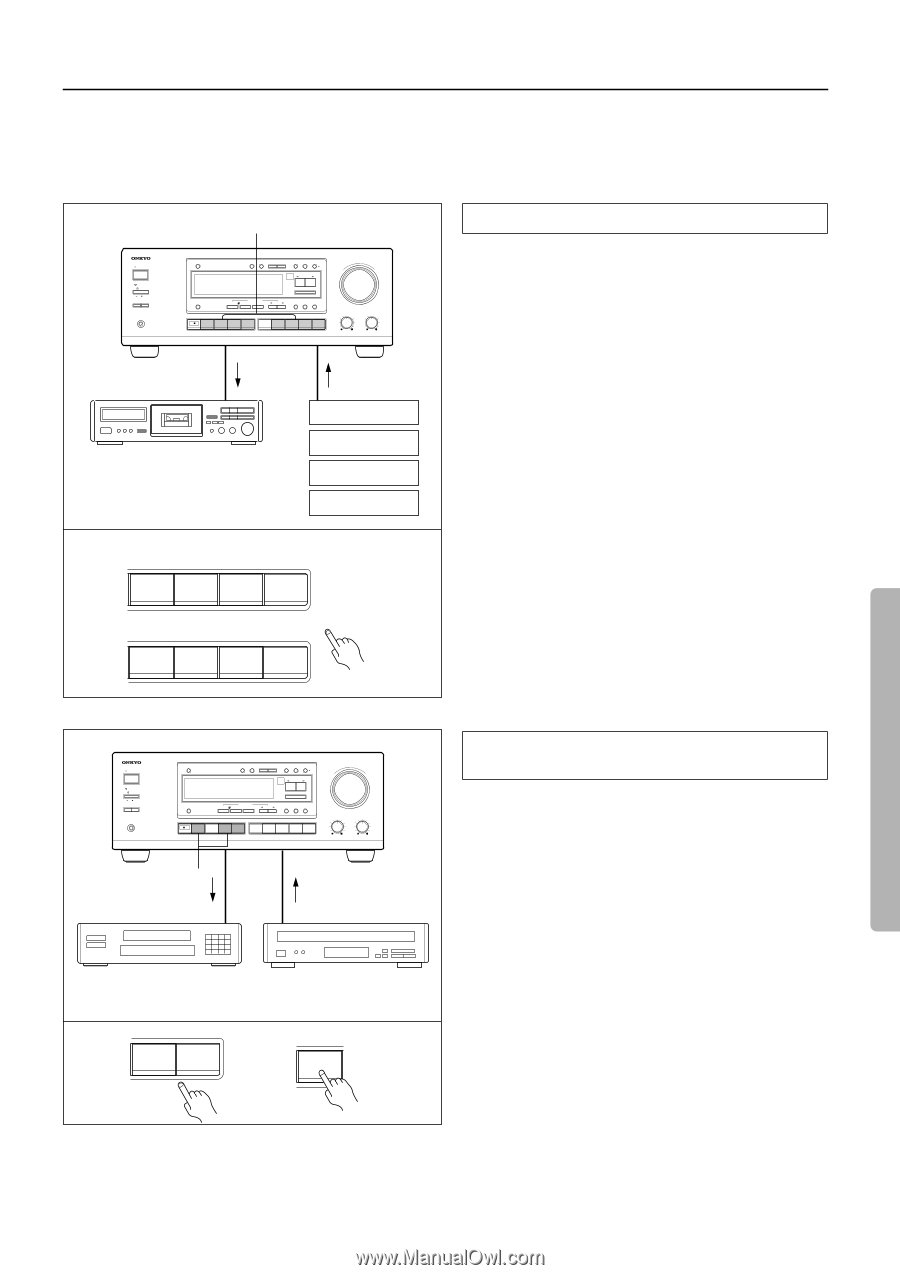
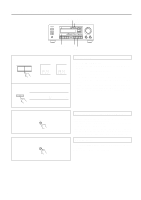
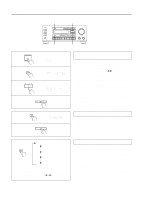
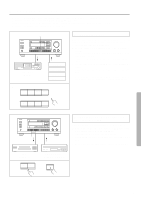
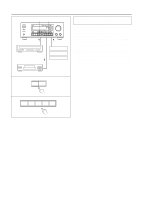
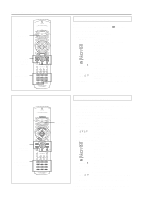
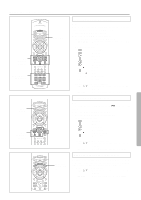
UP UP Recording a source • You can record analog Audio, but not digital audio. Make sure that you have made a correct analog connection. • You cannot record the source connected to MULTI CHANNEL INPUT jack. • If you select another device as the input source during recording, the input signal from that device will be recorded. • You cannot record audio source along with the surround effects. 1 STANDBY/ON STANDBY POWER ON OFF A SPEAKERS B PHONES 2 PTY/TP DISPLAY FM MUTE / MEMORY MODE DOWN TUNING UP DIGITAL/ ANALOG SP/ SYS SETUP CH LEVEL MODE PRESET/ MODE ADJ DOW N UP STEREO LISTENING MODE /DTS SURROUND 5 CH STEREO ENTER / SCAN DSP LATE NIGHT/ FRONT EFFECT Re-EQ LFE LEVEL CONTROL MULTI CH INPUT DVD VIDEO 1 VIDEO 2 VIDEO 3 TAPE FM AM PHONO C D DOWN MASTER VOLUME BASS TREBLE AV RECEIVER TX-DS575X 1·3 Tape deck (TAPE) 3 Turntable CD player VCR, VDP DVD 2 DVD VIDEO 1 VIDEO 2 VIDEO 3 Recording an audio source Make all connections between the tape deck and the receiver as shown in the "Audio equipment connections" diagram (page 6). 1. Insert a blank tape into the tape deck. 2. Press the input selector button for the source you want to record. • If you select DVD, VIDEO 1, VIDEO 2 or VIDEO 3, only the audio will be recorded. • If you select FM or AM, set the tuner to the station you want to record. 3. Set the tape deck in recording mode. Start playing the source. Set the proper recording level using the controls on the tape deck. • Please read the corresponding instruction manuals for more information on how to operate the corresponding equipment. FM AM PHONO C D 1 STANDBY/ON STANDBY POWER ON OFF A SPEAKERS B PHONES 1·3 PTY/TP DISPLAY FM MUTE / MEMORY MODE DOWN TUNING UP DIGITAL/ ANALOG SP/ SYS SETUP CH LEVEL MODE PRESET/ MODE ADJ DOW N UP STEREO LISTENING MODE /DTS SURROUND 5 CH STEREO ENTER / SCAN DSP LATE NIGHT/ FRONT EFFECT Re-EQ LFE LEVEL CONTROL MULTI CH INPUT DVD VIDEO 1 VIDEO 2 VIDEO 3 TAPE FM AM PHONO C D DOWN MASTER VOLUME BASS TREBLE AV RECEIVER TX-DS575X 2 1·3 Recording data from a video disc player (or a video camcorder) to VCR Video disc programs can be recorded onto a VCR (VIDEO 1). 1. Load a disc in the video disc player or DVD player, and insert a blank tape in the VCR (VIDEO 1). 2. Press the VIDEO 2, VIDEO 3 or DVD button. 3. Start playing the video disc player and recording on the VCR. • Refer to the Video equipment connections section on the page 7. VCR (VIDEO 1) 2 VIDEO 2 VIDEO 3 VDP, DVD player (VIDEO 2, VIDEO 3) DVD or 29
-
 1
1 -
2
-
3
-
4
-
5
-
6
-
7
-
8
-
9
-
10
-
11
-
12
-
13
-
14
-
15
-
16
-
17
-
18
-
19
-
20
-
21
-
22
-
23
-
 24
24 -
 25
25 -
 26
26 -
 27
27 -
 28
28 -
 29
29 -
 30
30 -
 31
31 -
 32
32 -
 33
33 -
 34
34 -
35
-
36
-
37
-
38
-
39
-
40
-
41
-
42
-
43
-
44
 |
 |