Onkyo TX-SR700 Owner Manual
Onkyo TX-SR700 Manual
 |
View all Onkyo TX-SR700 manuals
Add to My Manuals
Save this manual to your list of manuals |
Onkyo TX-SR700 manual content summary:
- Onkyo TX-SR700 | Owner Manual - Page 1
AV Receiver TX-SR700/700E TX-SR600/600E Instruction Manual Before using 2 Facilities and connections 8 Setup and operation 36 Thank you for purchasing the Onkyo AV Receiver. Please read this manual thoroughly before making connections and plugging in the unit. Following the instructions in - Onkyo TX-SR700 | Owner Manual - Page 2
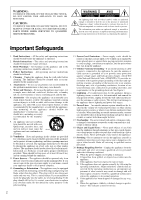
intended to alert the user to the presence of important operating and maintenance (servicing) instructions in the literature accompanying the appliance. Important Safeguards 1. Read Instructions - All the safety and operating instructions should be read before the appliance is operated. 2. Retain - Onkyo TX-SR700 | Owner Manual - Page 3
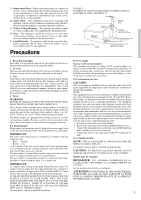
SYSTEM (NEC ART 250, PART H) 1. Recording Copyright Recording of copyrighted material for other than personal use is illegal without permission of the copyright holder. 2. AC Fuse The fuse is located inside the chassis and is not user-serviceable. If power does not come on, contact your Onkyo - Onkyo TX-SR700 | Owner Manual - Page 4
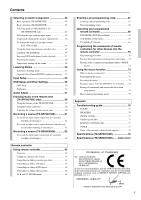
Operating components not reached by the remote controller signals (IR IN) (TX-SR700/ 700E only 22 If the remote controller signal does not reach the TXSR700 terminals 23 AC OUTLETS 29 REMOTE CONTROL 29 Connections (TX-SR600/600E 24 Connecting your audio components 24 Connecting your video - Onkyo TX-SR700 | Owner Manual - Page 5
Appendix Troubleshooting guide 76 SR700/700E 79 Specifications (TX-SR600/600E) ....... back cover Declaration of Conformity We, ONKYO EUROPE ELECTRONICS GmbH INDUSTRIESTRASSE 20 82110 GERMERING, GERMANY declare in own responsibility, that the ONKYO product described in this instruction manual - Onkyo TX-SR700 | Owner Manual - Page 6
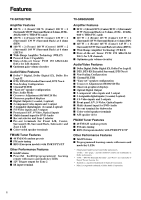
Features TX-SR700/700E Amplifier Features I 100 W × 2 (Front)/ 100 W ( -key LEDs I 12V Trigger output for Zone 2 I IR input terminal TX-SR600/600E Amplifier Features I 80 W × 2 (Front)/ 80 W (Center)/ ," and "Neo:6" are trademarks of Digital Theater Systems, Inc. • Xantech is a registered trademark - Onkyo TX-SR700 | Owner Manual - Page 7
purchased. AM loop antenna × 1 RC-482M Remote controller × 1 TX-SR700/700E: RC-482M TX-SR600/600E: RC-480M Batteries (AA, R6 or UM-3) × 2 Front SURROUND CENTER L ZONE 2 L SURROUND BACK SPEAKER PRE OUT R R AV RECEIVER 120 V MODEL NO. TX-SR700E SURROUND BACK SWITCHED TOTAL 100W MAX. 120 - Onkyo TX-SR700 | Owner Manual - Page 8
Front panel facilities Here is an explanation of the controls and displays on the front panel of the TX-SR700E/600E. Front panel 8 - Onkyo TX-SR700 | Owner Manual - Page 9
receiver plugged in for US models), the TX-SR700/700E/600/600E turns on and the display lights up. If pressed again, the TX-SR700 button to tune into the Radio Data System (RDS) for FM broadcasting. RDS was dial [44, 45] TX-SR600/600E: Use to control the volume. TX-SR700/700E: Use to control the - Onkyo TX-SR700 | Owner Manual - Page 10
SR700/700E only), and CD) [44, 45, 53] TX-SR600/600E: These buttons are used to select the input source. TX-SR700 (TX-SR700/700E only SR700/700E only) [60, 61] The REC OUT and ZONE 2 buttons allow you to use the TX-SR700 TX-SR700/ SR600/600E only) [45] Press these buttons to turn on and off speakers - Onkyo TX-SR700 | Owner Manual - Page 11
RDS station is received. MEMORY indicator SR700/700E only) Lights when using the remote zone (Zone 2). REC OUT indicator (TX-SR700/700E only) Lights when recording the input source from one component to another (Rec Out). SPEAKERS A/B indicators (TX-SR600/600E only) Indicates which speaker system - Onkyo TX-SR700 | Owner Manual - Page 12
[47] Press to set the sleep function. The SLEEP button enables you to set the TX-SR700/700E/600/ 600E to turn off automatically after a specified time period. MACRO 1, 2 button [73 buttons [63-66] Press to operate other Onkyo components connected to the TXSR700/700E/600/600E using the terminals. - Onkyo TX-SR700 | Owner Manual - Page 13
mode, SP A, SP B, CINE FLTR, DISPLAY, DIMMER buttons 1 to 9, +10, --/---, 0: For entering the number of a track. [64-66] PURE A: TX-SR600/600E: Not used with the TX-SR600/600E. TX-SR700/700E: Press to select the Pure Audio mode. [51] DIRECT, STEREO, SURR, ALL ST, DSP: You can select a listening mode - Onkyo TX-SR700 | Owner Manual - Page 14
Connections • Be sure to always refer to the instructions that came with the component that you are connecting. • Do not plug in the power cord until all connections have been properly made. • For input - Onkyo TX-SR700 | Owner Manual - Page 15
TX-SR700/700E ZONE 2 L SURROUND BACK SPEAKER PRE OUT R R AV RECEIVER MODEL NO. TX-SR700E SURROUND BACK AC OUTLETS AC 230-240V ] terminals [23] When using the ZONE 2 SPEAKERS terminals [23] TX-SR600/600E Connecting your audio components [24] REMOTE Connecting antennas [34] CONTROL - Onkyo TX-SR700 | Owner Manual - Page 16
is an example of how you can connect your audio components to the TX-SR700/700E. Refer to the diagram above for the following connection examples. AUDIO jacks of the compact disc player to the CD audio jacks of the TX-SR700/700E. Make sure that you properly connect the left channel to the L jack - Onkyo TX-SR700 | Owner Manual - Page 17
Digital audio output (coaxial) Connecting your video components Below is an example of how you can connect your video components to the TX-SR700/700E. Refer to the diagram above for the following connection examples. COMPONENT VIDEO INPUT/OUTPUT For DVD players or other devices that have component - Onkyo TX-SR700 | Owner Manual - Page 18
(composite) of the DVD player to the DVD VIDEO IN jack of the TX-SR700/ 700E. Or if the DVD player has an S video output jack, connect it FRONT L/ R, SURR L/R, CENTER, and SUBWOOFER (5.1-channel input) jacks of the TX-SR700/700E to the 5.1-channel output jacks of the DVD player. Make sure that you - Onkyo TX-SR700 | Owner Manual - Page 19
sure that you properly connect the left channels to the L jacks and the right channels to the R jacks. With the initial settings of the TX-SR700/700E, nothing is allocated as the digital input source for VIDEO 1 (----). If you connect the digital audio output, be sure to make the appropriate changes - Onkyo TX-SR700 | Owner Manual - Page 20
using an S video cable. Or if the device has component video inputs, connect them to the bank of COMPONENT VIDEO OUTPUT jacks on the TX-SR700/700E. Note: Note that the Setup Menu will only be displayed on the monitor connected to MONITOR OUT and not those connected to the COMPONENT - Onkyo TX-SR700 | Owner Manual - Page 21
optical digital output, connect it to the VIDEO 4 DIGITAL jack of the TX-SR700/700E. The VIDEO 4 digital input is fixed to the OPTICAL input on the SURROUND CENTER L ZONE 2 L SURROUND BACK SPEAKER PRE OUT R R AV RECEIVER MODEL NO. TX-SR700E SURROUND BACK AC OUTLETS AC 230-240V 50 Hz SWITCHED - Onkyo TX-SR700 | Owner Manual - Page 22
of those given below: • Onkyo's Multi-Room System kit (IR Remote Controller Extension System) • Multiroom A/V distribution and control system such as those from Niles® and Xantech® If the remote controller signal does not reach the TX-SR700/700E remote sensor If the TX-SR700/700E is located inside - Onkyo TX-SR700 | Owner Manual - Page 23
the TX-SR700/700E from the remote zone (Zone 2) with the remote controller even though the remote zone is physically separated. The diagram below shows how to make the proper connections for the remote zone. When using the ZONE 2 SPEAKERS terminals If you are using a 5.1-channel speaker system in - Onkyo TX-SR700 | Owner Manual - Page 24
an example of how you can connect your audio components to the TX-SR600/600E. Refer to the diagram above for the following connection examples. AUDIO jacks of the compact disc player to the CD audio jacks of the TX-SR600/600E. Make sure that you properly connect the left channel to the L jack - Onkyo TX-SR700 | Owner Manual - Page 25
Digital audio output (coaxial) Connecting your video components Below is an example of how you can connect your video components to the TX-SR600/600E. Refer to the diagram above for the following connection examples. COMPONENT VIDEO INPUT/OUTPUT For DVD players or other devices that have component - Onkyo TX-SR700 | Owner Manual - Page 26
(composite) of the DVD player to the DVD VIDEO IN jack of the TX-SR600/ 600E. Or if the DVD player has an S video output jack, connect it FRONT L/ R, SURR L/R, CENTER, and SUBWOOFER (5.1-channel input) jacks of the TX-SR600/600E to the 5.1-channel output jacks of the DVD player. Make sure that you - Onkyo TX-SR700 | Owner Manual - Page 27
sure that you properly connect the left channels to the L jacks and the right channels to the R jacks. With the initial settings of the TX-SR600/600E, nothing is allocated as the digital input source for VIDEO 1 (----). If you connect the digital audio output, be sure to make the appropriate changes - Onkyo TX-SR700 | Owner Manual - Page 28
connect them to the bank of COMPONENT VIDEO OUTPUT jacks on the TX-SR600/600E. Note: Note that the Setup Menu will only be displayed on an optical digital output, connect it to the VIDEO 4 DIGITAL jack of the TX-SR600/600E. The VIDEO 4 digital input is fixed to the OPTICAL input on the front panel - Onkyo TX-SR700 | Owner Manual - Page 29
other Onkyo components equipped with the same terminal. When a component is connected to the terminal, it can be operated by the remote controller supplied with the TX-SR700/ 700E/600/600E. In addition, when you connect a component to the terminal, you can also perform the system operations - Onkyo TX-SR700 | Owner Manual - Page 30
space for your listening pleasure. Be sure to refer to the instruction manuals that came with the speakers during placement and connection. Furthermore, position Using the speaker labels The positive speaker terminals on the TX-SR700/700E/600/600E are color coded for easy identification. Attach the - Onkyo TX-SR700 | Owner Manual - Page 31
the layout of your speaker system, it is now necessary to connect the speakers correctly to your TX-SR700/ 700E/600/600E. Caution: the speaker terminal cap. 5/8" (15mm) Connecting to the SPEAKERS B terminals (TX-SR600/600E only) If you require an additional set of front speakers (left and right - Onkyo TX-SR700 | Owner Manual - Page 32
Connecting speakers TX-SR700/700E Front right speaker ZONE 2 L SURROUND BACK SPEAKER PRE OUT R R AV RECEIVER MODEL NO. TX-SR700E SURROUND BACK AC OUTLETS AC 230-240V right speaker Surround back speaker Surround left speaker TX-SR600/600E Front right A speaker Center speaker Front left - Onkyo TX-SR700 | Owner Manual - Page 33
indicator will turn off. If you press the STANDBY/ON button again, the receiver returns to standby state. Turn off Diagram for RC-482M Turning on the and Canadian models) The TX-SR700/600 does not require memory preservation batteries. A built-in memory backup system preserves the contents of memory - Onkyo TX-SR700 | Owner Manual - Page 34
, extend the antenna and adjust its orientation until the clearest signal is received. Fix it with push pins or similar items in the position that in the direction and position where you receive the clearest sound. Put it as far away as possible from the TX-SR700/700E/600/600E, televisions, speaker - Onkyo TX-SR700 | Owner Manual - Page 35
FM/TV (or VCR) antenna, use a directional linkage type splitter. To receiver To TV (or VCR) ANTENNA R FM AM PH 75 Connecting the antenna OUT IN O OPTICAL 2 1 OPTICAL Note: If you are using the TX-SR700/700E/600/600E worldwide model in a region where AM frequencies are delineated by - Onkyo TX-SR700 | Owner Manual - Page 36
700E/600/ 600E for optimum performance. Speaker Configuration 1. Display the main menu. 2. Use the and cursor buttons to select "1. Speaker Config." TX-SR700/700E/600/600E Remote controller Displaying the Main Menu 1. Display the main menu. Press the MENU button on the front panel or SETUP button - Onkyo TX-SR700 | Owner Manual - Page 37
is connected. No: Select when a subwoofer is not connected. TX-SR700/700E/600/600E Remote controller 9. Use the and cursor buttons to select Bass Management This setting allows you to set the crossover frequency for your speaker system. This setting is valid when "Subwoofer" is set to "Yes," or - Onkyo TX-SR700 | Owner Manual - Page 38
Configuring the speakers Setting the speaker distance from your normal listening position Each speaker can be set between 1 and 30 feet (0.3 and 9 meters) in 1-foot (0.3 meter) increments. Select the setting closest to the actual distance from the speaker to your normal listening position. Note: - Onkyo TX-SR700 | Owner Manual - Page 39
from the front left speaker. (3) Press the cursor button again. The TX-SR700/700E/600/600E will now emit the pink noise from the front right speaker the volume level of this noise and then press the CH SEL button. The TX-SR700/700E/600/600E will now emit the pink noise from the center speaker. (2) - Onkyo TX-SR700 | Owner Manual - Page 40
The TX-SR700/700E/600/600E provides a number of listening modes perfect for listening to the radio and getting the most out of your audio system. Also release the button and a station is received in stereo, the scanning stops. • The European model allows you to receive RDS broadcasts. See page 42 for - Onkyo TX-SR700 | Owner Manual - Page 41
. 3. Press the CH button and select the number of the desired preset station. Erasing a preset radio station This can only be performed at the TX-SR700/700E/600/600E. 1. Press the TUNER button and press the PRESET / buttons to select the preset radio station that you want to erase (see above - Onkyo TX-SR700 | Owner Manual - Page 42
is RDS? RDS stands for Radio Data System and is a type of FM broadcasting. provides you with various services so that you can on the display if the TX-SR700E/600E receives characters that cannot be displayed correctly. This usually from past or present sales charts (e.g., Top 40). Rock music - Onkyo TX-SR700 | Owner Manual - Page 43
RT information. When the information is received, the characters will scroll across the front display. • If "No Text Data" appears on the display, RT information is not available. • The display shows the frequency for 3 seconds and returns to program service name. Performing a PTY scan 1. Press the - Onkyo TX-SR700 | Owner Manual - Page 44
player with a 5.1-channel input port is connected to the TX-SR700/700E. 2. Start playing the selected input source. Follow the operating instructions for the source device. 3. Adjust the volume to an appropriate level. TX-SR700/700E Remote controller Adjusting the main volume adjusts the volume - Onkyo TX-SR700 | Owner Manual - Page 45
47) when a DVD player with a 5.1-channel input port is connected to the TX-SR600/600E. 2. Make sure that the SPEAKERS A indicator ( ) is lit on the display .) 3. Start playing the selected input source. Follow the operating instructions for the source device. 4. Adjust the volume to an appropriate - Onkyo TX-SR700 | Owner Manual - Page 46
is pressed. By changing the display, when an Onkyo MD recorder is -connected, the system functions will become enabled. Changing the display: Press that the calibration settings will return to the original settings when the TX-SR700/700E/600/600E is put in standby. Using the remote controller: 1. - Onkyo TX-SR700 | Owner Manual - Page 47
panel (or AUDIO SEL button on the remote controller). TX-SR700/700E/600/600E Remote controller (TX-SR700/700E only) If you are using the remote zone (Zone , you can only use the Direct, Stereo, and Pure Audio (TX-SR700/700E only) listening modes. If you have selected multichannel audio, you will - Onkyo TX-SR700 | Owner Manual - Page 48
control: 1. Press the SURROUND button (or SURR button on the remote controller). TX-SR700/700E/600/600E Remote controller "Tone On" appears on the display and the tone headphones will be switched off by the receiver's audio muting circuit. Press the MUTING button again to turn the sound - Onkyo TX-SR700 | Owner Manual - Page 49
comes from digital satellite broadcasts that support Dolby Digital. * 5.1-channel Digital Format used to play DTS sources. DTS (Digital Theater System) is compressed digital data with a maximum and not output to the subwoofer. Pure Audio (TX-SR700/700E only) Same as the direct mode except that - Onkyo TX-SR700 | Owner Manual - Page 50
Listening Modes Orchestra This mode is appropriate for classical and opera music. The center channel is cut and the surround channels are emphasized to widen the stereo image. It will simulate the natural reverberation that is created in large halls. Unplugged This mode is suitable for acoustical - Onkyo TX-SR700 | Owner Manual - Page 51
before preceding to the step below. Press one of the listening mode buttons to select the listening mode. TX-SR700/700E/ 600/600E Remote controller PURE AUDIO (PURE A) (TX-SR700/700E only): Changes the listening mode for the signal type that is currently being input from the selected input source - Onkyo TX-SR700 | Owner Manual - Page 52
Listening Modes ALL ST (remote controller only): Changes the listening mode for the signal type that is currently being input from the selected input source to the All Ch Stereo listening mode. If pressed, the corresponding setting in the "Input Setup" menu for the selected input source is also - Onkyo TX-SR700 | Owner Manual - Page 53
signals input from the various input sources that you use with the TX-SR700/700E/600/600E. The settings made in this menu are valid for the controller to exit the Setup menu. a. Digital Input This setting tells the TX-SR700/700E/600/600E which input source button on the front panel is connected with - Onkyo TX-SR700 | Owner Manual - Page 54
and LD players even when you connect the player to the TX-SR700/700E/600/600E digitally. This is because the digital signal has been and TAPE OUT output analog audio signals. Do not record from CDs or LDs that support DTS using these outputs. If you do, the DTSencoded signal will be recorded as - Onkyo TX-SR700 | Owner Manual - Page 55
o DVD (96k/24bit) o o o Dolby Digital (Multichannel) DVD o o o Digital Format DTS (Multichannel) DVD DTS-CD 2ch source DVD Digital satellite o o o *2 o o o *1 TX-SR700/700E only *2 This mode is not available for DTS sources. Note: You may not be able to select all the listening modes shown - Onkyo TX-SR700 | Owner Manual - Page 56
using the remote control sensor for operation with the remote controller in the remote zone (Zone 2). c. AM Frequency Step (TX-SR700/700E)/ b. AM Frequency Step (TX-SR600/600E) This setting only appears on the worldwide model. It determines the increment amount or decrement amount when adjusting the - Onkyo TX-SR700 | Owner Manual - Page 57
Off Off, Low, High 0, 1, 2, 3, 4, 5 On, Off 0, 1, 2, 3, 4, 5, 6 0, 1, 2, 3, 4, 5, 6, 7 Off, Middle, High Off, Middle, High Initial value 0 0 On Off 3 Off 3 3 Middle Middle * TX-SR700/700E only Bass, Treble Separately adjust the bass and treble settings in 2-decibel increments. The Bass and Treble - Onkyo TX-SR700 | Owner Manual - Page 58
three speakers (center, front left and right) in various level combinations. For home use, applying some width to the center signal will improve the level balance mode is Dolby Pro Logic II Music. Front Effect (TX-SR700/700E only) Some live recordings contain acoustic reverberation. When you play - Onkyo TX-SR700 | Owner Manual - Page 59
Audio Adjust Settings possible for each listening mode Setting Tone Control (Bass, Treble Subwoofer (Analog/ PCM only) Listening mode Direct Pure Audio Stereo G G Dolby Pro Logic II G G Dolby Digital G Dolby Digital EX G DTS Neo:6 G G DTS G DTS-ES Discrete G DTS-ES Matrix G - Onkyo TX-SR700 | Owner Manual - Page 60
• When you are using the remote zone (Zone 2), operation will not work. system • In the remote zone, you can only play the source in the 2-channel ZONE 2 button on the remote controller, the STANDBY indicator on the TX-SR700/700E flashes for five seconds. During this time, you will not be able - Onkyo TX-SR700 | Owner Manual - Page 61
Recording a source (TX-SR700/700E) REC OUT Input source buttons Notes: • You cannot record the There are some restrictions on recording digital signals. When making digital recordings, consult the instruction manual that came with your digital recording equipment (e.g., MD recorder or DAT deck) to - Onkyo TX-SR700 | Owner Manual - Page 62
Recording a source (TX-SR600/600E) Input source buttons Notes: • You cannot record the surround are some restrictions on recording digital signals. When making digital recordings, consult the instruction manual that came with your digital recording equipment (e.g., MD recorder or DAT deck) to - Onkyo TX-SR700 | Owner Manual - Page 63
that can not only operate the TX-SR700/700E/600/600E, but also all the other components of your home theater as well. To operate any component operation buttons Controlling an Onkyo cassette tape deck The connector of the Onkyo cassette tape deck must be connected to the TX-SR700/700E/600/600E (see - Onkyo TX-SR700 | Owner Manual - Page 64
Using remote controller ON CD MODE DISC STANDBY VOL MUTING CD operation buttons Numeric keys Controlling an Onkyo CD player The connector of the Onkyo compact disc player must be connected to the TX-SR700/700E/600/600E (see page 29). 1. Press the CD MODE button. The CD MODE button lights green. - Onkyo TX-SR700 | Owner Manual - Page 65
SEL ANGLE STANDBY DVD MODE SETUP VOL MENU MUTING SUBTITLE DVD operation buttons Numeric keys SEARCH Controlling an Onkyo DVD player The connector of the Onkyo DVD player must be connected to the TX-SR700/700E/600/600E (see page 29). 1. Press the DVD MODE button. The DVD MODE button lights green - Onkyo TX-SR700 | Owner Manual - Page 66
Using remote controller ON STANDBY MD MODE VOL MUTING MD operation buttons Numeric keys ENTER Controlling an Onkyo MD recorder The conneÇóctor of the Onkyo MD recorder must be connected to the TX-SR700/700E/600/600E (see page 29). 1. Press the MD MODE button. The MD MODE button lights green. - Onkyo TX-SR700 | Owner Manual - Page 67
return to step 3. 5. Press the button that you programmed and check if the system operates correctly. • If the component does not operate properly, return to step No. 600: This code is for Onkyo DVD players that have an terminal that you are connecting to the TX-SR700/700E/600/600E with an cable. - Onkyo TX-SR700 | Owner Manual - Page 68
you reach a code that works (i.e. if the first code does not work, then try the next). DVD BRAND DENON HITACHI JVC KENWOOD MAGNAVOX MARANTZ MITSUBISHI ONKYO PANASONIC PIONEER PROSCAN RCA SONY TOSHIBA YAMAHA ZENITH SETTING No. 602, 609 603 604 605 606, 613 607 608, 613 600, 601, 613 609 610 - Onkyo TX-SR700 | Owner Manual - Page 69
: Rewind : Fast Forward : Pause 0, 1 to 9, +10: Numeric keys You may also use the following buttons: VOL : Adjusts volume at TX-SR700/700E/600/600E MUTING: Activates muting function at TX-SR700/700E/600/ 600E TV MODE TV CH TV/VCR VOL MUTING TV MODE (TV Mode) 1. Press the TV MODE button. The - Onkyo TX-SR700 | Owner Manual - Page 70
Programming the commands of remote controllers for other devices into the remote controller INMPULUTTI-CH MOSDUER CD SLEEP POWER VIDEO-2 DVGTDRAOPUEPINPTUUTTNSUEPENRLREEERCSPTEDITHOMORNMEOR 2 to 6 inches (5 to 15 cm ) SEND/LEARN indicator MODE buttons DVD VIDEO-1 CD TOTNEEST VOLUME DISC - Onkyo TX-SR700 | Owner Manual - Page 71
for other remote controllers. If you wish to restore the Onkyo preset codes after you program new codes, you must first be aware that some remote controllers use systems that are quite different from the remote refer to the instruction manual that came with that product for instructions on how to - Onkyo TX-SR700 | Owner Manual - Page 72
Programming the commands of remote controllers for other devices into the remote controller MACRO 1 SEND/LEARN indicator MACRO 2 MODE buttons ENTER Erasing the programmed command from one button You can only erase memorized commands and not preset ones. 1. Press and hold down the MODE button for - Onkyo TX-SR700 | Owner Manual - Page 73
a macro. For example, to play a compact disc player connected to the TX-SR700/700E/600/ 600E normally, you must perform the following steps: 1. Press the sure that it has been programmed properly. Point the remote controller at the TX-SR700/700E/600/ 600E and press the MACRO 1 (or 2) button. It may - Onkyo TX-SR700 | Owner Manual - Page 74
Using the macro function MACRO 1 SEND/LEARN indicator MACRO 2 MODE buttons ENTER Erasing a macro from the MACRO 1 (or 2) button 1. Press and hold down any one of the six MODE buttons, press the MACRO 1 (or 2) button, and then release both buttons. When you press the MODE button, it lights green - Onkyo TX-SR700 | Owner Manual - Page 75
Using the macro function Macro mode programming memo: MACRO MACRO 1 Operation 1 Operation 2 Operation 3 Operation 4 Operation 5 Operation 6 Operation 7 Operation 8 Operation 9 Operation 10 Operation 11 Operation 12 Operation 13 Operation 14 Operation 15 Operation 16 MACRO 2 75 - Onkyo TX-SR700 | Owner Manual - Page 76
Troubleshooting guide If a problem occurs while you are using the remote controller, first try to operate the controls on the front panel of the TX-SR700/ the power (see page 33). • Internal fuse is blown. © Contact your Onkyo Service Center. Power turns on but no sound. • "Muting" is displayed. © - Onkyo TX-SR700 | Owner Manual - Page 77
Troubleshooting guide (or monitor) is not set to receive the output signals from the receiver. © Set the TV (or monitor) to the receiver input. • Video cable is not 600E (see page 7). • Remote controller is too far from the TX-SR700/700E/600/ 600E. © Operate the remote controller within 16 feet (5 - Onkyo TX-SR700 | Owner Manual - Page 78
Troubleshooting guide If one of the messages shown below appears "Not available with . Also refer to the respective instruction manuals of the CD player, DVD player, video cassette recorder, TV monitor, etc., that compose your entertainment system. The TX-SR700/700E/600/600E contains an internal - Onkyo TX-SR700 | Owner Manual - Page 79
Specifications (TX-SR700/700E) AMPLIFIER SECTION Continuous average power output (FTC) All channels: 100 W per channel min. RMS at 8 Ω, 2 channels driven from 20 Hz to 20 kHz with - Onkyo TX-SR700 | Owner Manual - Page 80
TX-SR600/ 2) Specifications and features are subject to change without notice. SN 29343298 Sales & Product Planning Div. : 2-1, Nisshin-cho, Neyagawa-shi, OSAKA ONKYO EUROPE ELECTRONICS GmbH Industriestrasse 20, 82110 Germering, GERMANY Tel: 089-849-320 Fax: 089-849-3265 E-mail: [email protected] ONKYO
-
 1
1 -
 2
2 -
 3
3 -
 4
4 -
 5
5 -
 6
6 -
 7
7 -
8
-
9
-
10
-
11
-
12
-
13
-
14
-
15
-
16
-
17
-
18
-
19
-
20
-
21
-
22
-
23
-
24
-
25
-
26
-
27
-
28
-
29
-
30
-
31
-
32
-
33
-
34
-
35
-
36
-
37
-
38
-
39
-
40
-
41
-
42
-
43
-
44
-
45
-
46
-
47
-
48
-
49
-
50
-
51
-
52
-
53
-
54
-
55
-
56
-
57
-
58
-
59
-
60
-
61
-
62
-
63
-
64
-
65
-
66
-
67
-
68
-
69
-
70
-
71
-
72
-
73
-
74
-
75
-
76
-
77
-
78
-
79
-
80
 |
 |

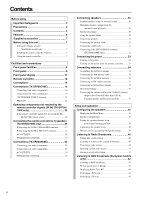
Contents
Thank you for purchasing the Onkyo AV Receiver.
Please read this manual thoroughly before making
connections and plugging in the unit. Following the
instructions in this manual will enable you to obtain
optimum performance and listening enjoyment from
your new AV Receiver. Please retain this manual for
future reference.
TX-SR700/700E
TX-SR600/600E
Appendix
76
Remote controller
63
Setup and operation
36
Before using
2
AV Receiver
Instruction Manual
Facilities and connections
8