Onkyo TX SR875 Owner Manual
Onkyo TX SR875 - AV Receiver Manual
 |
UPC - 751398007668
View all Onkyo TX SR875 manuals
Add to My Manuals
Save this manual to your list of manuals |
Onkyo TX SR875 manual content summary:
- Onkyo TX SR875 | Owner Manual - Page 1
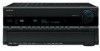
QSJM 1. AV Receiver TX-SR805 TX-SR875 Instruction Manual Contents Introduction 2 Connection 20 Turning On & First Time Setup..... 44 Basic Operation Playing your AV components ....... 62 Listening to the Radio 63 Thank you for purchasing an Onkyo AV Receiver. Please read this manual thoroughly - Onkyo TX SR875 | Owner Manual - Page 2
the presence of important operating and maintenance (servicing) instructions in the literature accompanying the appliance. Important Safety Instructions 1. Read these instructions. 2. Keep these instructions. 3. Heed all warnings. 4. Follow all instructions. 5. Do not use this apparatus near - Onkyo TX SR875 | Owner Manual - Page 3
gets inside this unit, have it checked by your Onkyo dealer. 6. Handling Notes • If you need to used in accordance with the instructions, may cause harmful interference to Reorient or relocate the receiving antenna. • Increase the separation between the equipment and receiver. • Connect the equipment - Onkyo TX SR875 | Owner Manual - Page 4
qualified service personnel. IMPORTANT The wires in the mains lead are coloured in accordance with the following code: Blue: the terminal which is marked with the letter N or coloured black. The wire which is coloured brown must be connected to the ONKYO product described in this instruction manual is - Onkyo TX SR875 | Owner Manual - Page 5
only).......42 Connecting Onkyo Components 43 Connecting the Power Cord 43 Turning On the AV Receiver 44 Turning On and Standby 44 First Time Setup 45 Speaker Settings 45 HDMI Monitor Setup 46 HDMI Input Setup 48 Component Video Input Setup 50 Changing the Input Display 51 Digital Input - Onkyo TX SR875 | Owner Manual - Page 6
remote controller for use with other AV components, with Learning and Macro functions TX-SR875 Only • 140 watts minimum continuous power per channel, 8 ohm loads, 2 channels driven from 20 Hz to 20 kHz, with a maximum total harmonic distortion of 0.05% (FTC) • Zone 2 composite video output • 4 HDMI - Onkyo TX SR875 | Owner Manual - Page 7
. Supplied Accessories Make sure you have the following accessories: Remote controller and three batteries (AA/R6) Speaker setup microphone Indoor FM antenna AM loop antenna THX Ultra2 Before any home theater component can be THX Ultra2 certified, it must pass a rigorous series of quality - Onkyo TX SR875 | Owner Manual - Page 8
use three speaker systems with this AV receiver-a surround-sound speaker system (up to 7.1 channels) in your main listening room, THX (pages 71-78). *While Powered Zone 2 is being used, playback is reduced to 5.1-channels (see page 101). Zone 2: In your Zone 2 room, you can enjoy 2-channel stereo - Onkyo TX SR875 | Owner Manual - Page 9
Receives control signals from the remote controller. G Display See "Display" on page 11. H DISPLAY button (69) Displays various information about the currently selected input source. I MASTER VOLUME control (62) Sets the volume of the AV receiver input: analog, digital, HDMI, or multichannel. L - Onkyo TX SR875 | Owner Manual - Page 10
Know the AV Receiver-Continued North American model M N OP Q RS TUV W X Y PHONES ZONE 2 OFF LEVEL TONE HDMI OUT STEREO THX TUNING used with the onscreen setup menus. Y RETURN button Selects the previously displayed onscreen setup menu. Z SETUP MIC (55) The automatic speaker setup microphone - Onkyo TX SR875 | Owner Manual - Page 11
which audio channels are included in the current input signal. - FL: Front left - C: Center - FR: Front right - SL: Surround left - LFE: Subwoofer (Low Frequency Effects) - SR: Surround right - SBL: Surround back left - SB: Surround back - SBR: Surround back right 2 BTL indicator (45) (TX-SR875 only - Onkyo TX SR875 | Owner Manual - Page 12
to Know the AV Receiver-Continued Rear Panel 7 8 North American model only K TX-SR875 only 12 3 4 56 9 J LMN O RS232 IN 4 IN 3 COMPONENT VIDEO ASSIGNABLE IN 3 IN 2 IN 1(DVD) MONITOR OUT Y REMOTE CB/PB CONTROL DIGITAL ASSIGNABLE COAXIAL IN 1 (DVD) CR/PR HDMI ASSIGNABLE IN 2 IN - Onkyo TX SR875 | Owner Manual - Page 13
" and "Bridging the Front Speakers (TX-SR875 only)" on page 24. The TX-SR805 does not support bridging. a MULTI CH input: FRONT L/R, CENTER, SUB- WOOFER, SURR L/R, and SURR BACK L/R This analog multichannel input is for connecting a component with a 5.1/7.1-channel analog audio output, such as a DVD - Onkyo TX SR875 | Owner Manual - Page 14
the small hollow and slide open the cover. Using the Remote Controller When using the remote controller, point it toward the AV receiver's remote control sensor, as shown below. Remote control sensor STANDBY indicator AV receiver 2 Insert the three supplied batteries (AA/R6) in accordance with - Onkyo TX SR875 | Owner Manual - Page 15
modes: see page 110 Note: Some of the remote controller functions described in this manual may not work as expected with other components. RECEIVER/TAPE Mode RECEIVER/TAPE mode is used to control the AV receiver. It can also be used to control an Onkyo cassette recorder connected via . To set the - Onkyo TX SR875 | Owner Manual - Page 16
P VOL [ ]/[ ] button (62) Adjusts the volume of the AV receiver regardless of the currently selected remote controller mode. Q RETURN button Returns to the previous display when changing settings. R MUTING button (68) Mutes or unmutes the AV receiver. S Re-EQ button (81) Turns the Re-EQ function on - Onkyo TX SR875 | Owner Manual - Page 17
REMOTE MODE VCR CD CDR/MD ZONE2 TV DIMMER + CH DISC ALBUM - PREV CH DISPLAY CABLE SAT TOP MENU DOCK MENU RECEIVER TAPE/AMP SLEEP ENTER VOL GUIDE random playback function. Q PLAY MODE button Selects play modes on components with selectable play modes. R SUBTITLE button Selects subtitles. S - Onkyo TX SR875 | Owner Manual - Page 18
+10 0 CLEAR --/--- 10 11 12 INPUT SELECTOR MACRO 1 2 3 ZONE3 DVD REMOTE MODE VCR CD CDR/MD ZONE2 TV DIMMER + CH DISC ALBUM - PREV CH DISPLAY CABLE SAT TOP MENU DOCK RECEIVER TAPE/AMP SLEEP MENU ENTER VOL GUIDE SETUP EXIT RETURN MUTING K CD CDR/MD L REC PLAYLIST RANDOM - Onkyo TX SR875 | Owner Manual - Page 19
iPod in an Onkyo RI Dock that's connected via . When Using an RI Dock: • Connect the RI Dock to the TAPE IN or GAME/TV IN L/R jacks. • Set the RI Dock's RI MODE switch to HDD. • Set the AV receiver's Input Display to DOCK (see page 51). • See to the RI Dock's instruction manual for more - Onkyo TX SR875 | Owner Manual - Page 20
the AV receiver's superb capabilities, you can enjoy surround sound with a real sense of movement in your own home-just like being in a movie theater or concert hall. You can enjoy DVDs featuring Dolby Digital or DTS. With analog or digital TV, you can enjoy Dolby Pro Logic IIx, DTS Neo:6, or Onkyo - Onkyo TX SR875 | Owner Manual - Page 21
Labels The AV receiver's positive (+) speaker terminals are color-coded for ease of identification. (The negative (-) speaker terminals are all black.) Speaker terminal Front left, Zone 2 left Front right, Zone 2 right Center Surround left Surround right Surround back left Surround back right - Onkyo TX SR875 | Owner Manual - Page 22
're using only one surround back speaker, connect it to the SURR BACK L terminals. Front right speaker Center speaker Front left speaker RS232 HDMI ASSIGNABLE IN 4 IN 3 IN 2 IN 1 OUT COMPONENT VIDEO ASSIGNABLE IN 3 IN 2 IN 1(DVD) MONITOR OUT Y REMOTE CB/PB CONTROL DIGITAL ASSIGNABLE - Onkyo TX SR875 | Owner Manual - Page 23
. And connect the AV receiver's SURR BACK L negative (-) terminal to the left speaker's negative (-) woofer (low) terminal. RS232 IN 3 COMPONENT VIDEO ASSIGNABLE IN 3 IN 2 IN 1(DVD) MONITOR OUT Y REMOTE CB/PB CONTROL DIGITAL ASSIGNABLE COAXIAL IN 1 (DVD) CR/PR HDMI ASSIGNABLE IN 2 IN - Onkyo TX SR875 | Owner Manual - Page 24
the Front Speakers (TX-SR875 only) The FRONT L/R and SURR BACK L/R terminal posts can be used with front speakers and surround back speakers respectively, or bridged together to provide almost double the output power for the front speakers. • When bridging is used, the AV receiver is able to drive - Onkyo TX SR875 | Owner Manual - Page 25
need to tune into an AM radio station and adjust the position of the AM antenna to achieve the best possible reception. Keep the antenna as far away as possible from your AV receiver, TV, speaker cables, and power cords. If you cannot achieve good reception with the supplied indoor AM loop antenna - Onkyo TX SR875 | Owner Manual - Page 26
TV reception, as this can cause interference problems. If circumstances demand it, use a TV/FM antenna splitter, as shown. Outdoor AM antennas work best when installed horizontally outside, but good to prevent electrical shock hazards. TV/FM antenna splitter To AV receiver To TV (or VCR) 26 - Onkyo TX SR875 | Owner Manual - Page 27
! Video HDMI Component video cable Cable Y PB PR S-Video cable Composite video cable Jack HDMI Y Y PB CB/PB PR CR/PR S V Description HDMI connections can carry uncompressed standard- or high-definition digital video and audio and offer the best picture and sound quality. Component video - Onkyo TX SR875 | Owner Manual - Page 28
the best picture quality. The AV receiver can upconvert and downconvert between video formats, depending on the HDMI Monitor setting, which generally determines whether video signals are upconverted for the component video output or the HDMI output. For optimal video performance, THX recommends - Onkyo TX SR875 | Owner Manual - Page 29
(see page 46). Video Signal Flow Chart DVD player, etc. Composite AV receiver Composite TV, projector, etc. S-Video Component IN MONITOR OUT S-Video Component HDMI HDMI Video Signal Flow and the Resolution Setting On the TX-SR875, when the HDMI Monitor setting is set to No (see page 46), if the - Onkyo TX SR875 | Owner Manual - Page 30
well, use a and b , or a and c .) Connection A B C a b c AV receiver COMPONENT VIDEO MONITOR OUT MONITOR OUT S MONITOR OUT V GAME/TV IN L/R DIGITAL COAXIAL IN 2 DIGITAL OPTICAL quality Best Better Standard b c A RS232 COMPONENT VIDEO ASSIGNABLE IN 3 IN 2 IN 1(DVD) MONITOR OUT Y REMOTE CB/ - Onkyo TX SR875 | Owner Manual - Page 31
main left and right outputs for connection a . Connection A B C a b c AV receiver COMPONENT VIDEO IN 1 DVD IN S DVD IN V DVD IN L/R DIGITAL COAXIAL IN 1 Picture quality Best Better Standard b c A RS232 COMPONENT VIDEO ASSIGNABLE IN 3 IN 2 IN 1(DVD) MONITOR OUT Y REMOTE CB/PB CONTROL - Onkyo TX SR875 | Owner Manual - Page 32
Connecting Your Components-Continued Hooking Up the Multichannel Input If your DVD player supports multichannel audio formats such as DVD-Audio and SACD, and it has a multichannel analog audio output, you can connect it to the AV receiver's multichannel input. Use a multichannel analog audio cable, - Onkyo TX SR875 | Owner Manual - Page 33
3 as well, use a and b , or a and c .) Connection A B C a b c AV receiver COMPONENT VIDEO IN 2 VCR/DVR IN S VCR/DVR IN V VCR/DVR IN L/R DIGITAL COAXIAL IN 2 DIGITAL OPTICAL Picture quality Best Better Standard b c A COMPONENT VIDEO ASSIGNABLE IN 3 IN 2 IN 1(DVD) MONITOR OUT Y REMOTE CB/PB - Onkyo TX SR875 | Owner Manual - Page 34
directly from your TV or another video source without going through the AV receiver, connect the audio and video outputs from your TV or other video component directly to the recording VCR/DVR's audio and video inputs. See the manuals supplied with your TV or VCR/DVR for details. • Video signals - Onkyo TX SR875 | Owner Manual - Page 35
3 as well, use a and b , or a and c .) Connection A B C a b c AV receiver COMPONENT VIDEO 3 IN CBL/SAT IN S CBL/SAT IN V CBL/SAT IN L/R DIGITAL COAXIAL IN 3 DIGITAL Picture quality Best Better Standard b c A RS232 COMPONENT VIDEO ASSIGNABLE IN 3 IN 2 IN 1(DVD) MONITOR OUT Y REMOTE CB/PB - Onkyo TX SR875 | Owner Manual - Page 36
Digital Content Protection), so only HDCP-compatible components will display a picture. The AV receiver's HDMI interface is based on the following standard: High-Definition Multimedia Interface Specification Informational Version 1.3a Supported Audio Formats • 2-channel linear PCM (32-192 kHz, 16/20 - Onkyo TX SR875 | Owner Manual - Page 37
speakers producing sound, change the settings, change your TV's settings, or turn down the AV receiver's volume. HDMI OUT HDMI IN TV DVD player HDMI IN 1 HDMI RS232 HDMI ASSIGNABLE IN 4 IN 3 IN 2 IN 1 OUT COMPONENT VIDEO ASSIGNABLE IN 3 IN 2 IN 1(DVD) MONITOR OUT Y REMOTE CB/PB - Onkyo TX SR875 | Owner Manual - Page 38
2 or Zone 3 as well, use a and b .) Connection A B C a b AV receiver COMPONENT VIDEO IN 3 GAME/TV IN S GAME/TV IN V GAME/TV IN L/R DIGITAL OPTICAL IN 1 Picture quality Best Better Standard b A RS232 COMPONENT VIDEO ASSIGNABLE IN 3 IN 2 IN 1(DVD) MONITOR OUT Y REMOTE CB/PB - Onkyo TX SR875 | Owner Manual - Page 39
VCR/DVR CBL/SAT GAME/TV AUX 1 AUX 2 TAPE TUNER LEVEL TONE HDMI OUT STEREO THX TUNING DIMMER MEMORY MODE SETUP DIGITAL INPUT LISTENING MODE CLEAR TUNING PRESET TUNING RETURN ENTER CD PHONO SETUP MIC DISPLAY AUX 2 INPUT PUSH TO OPEN S VIDEO VIDEO L AUDIO R DIGITAL INPUT S VIDEO - Onkyo TX SR875 | Owner Manual - Page 40
AV receiver's PHONO IN L/R jacks. • You can also use a phono equalizer to connect a turntable with an MC-type cartridge. See your phono equalizer's manual for details. 40 RS232 HDMI ASSIGNABLE IN 4 IN 3 IN 2 IN 1 OUT COMPONENT VIDEO ASSIGNABLE IN 3 IN 2 IN 1(DVD) MONITOR OUT Y REMOTE - Onkyo TX SR875 | Owner Manual - Page 41
subwoofer, connect it to the AV receiver's PRE OUT SUBWOOFER jack. 1. Subwoofer 2. Front left speaker 3. Center speaker 4. Front right speaker 5. Surround left speaker 6. Surround right speaker 7. Surround back left speaker 8. Surround back right speaker COMPONENT VIDEO ASSIGNABLE IN 3 IN 2 IN - Onkyo TX SR875 | Owner Manual - Page 42
iPod Doesn't Support Video: Connect your RI Dock's audio output jacks to the AV receiver's GAME/TV IN L/R jacks. (Onkyo DS-A2 hookup shown below.) IN L R GAME/TV RS232 HDMI ASSIGNABLE IN 4 IN 3 IN 2 IN 1 COMPONENT VIDEO ASSIGNABLE IN 3 IN 2 IN 1(DVD) MONITOR OUT Y REMOTE CB/PB CONTROL - Onkyo TX SR875 | Owner Manual - Page 43
select Multich to hear all channels (see page 70), as the Direct Change function selects the DVD IN L/R jacks. Remote Control You can use the AV receiver's remote controller to control your other -capable Onkyo components. You must enter the appropriate remote control code first (see page 109). And - Onkyo TX SR875 | Owner Manual - Page 44
MODE button, followed by the [ON] button. The AV receiver comes on, the display lights up, and the STANDBY indicator goes off. Pressing the remote controller's [ON] button again will turn on any components connected via . To turn the AV receiver off, press the [STANDBY/ON] button, or press the - Onkyo TX SR875 | Owner Manual - Page 45
menu appears. Notes: • This procedure can also be performed on the AV receiver by using its [SETUP], [ENTER], and arrow buttons. • The design of the TX-SR805 and TX-SR875 onscreen setup menus is slightly different. The TX-SR805 onscreen setup menus are used throughout this instruction manual. 45 - Onkyo TX SR875 | Owner Manual - Page 46
and output by the HDMI OUT. On the TX-SR875, you can specify the output resolution for the HDMI OUT and COMPONENT VIDEO OUT and have the AV receiver upconvert the picture resolution as necessary to match the resolution supported by your TV. 1 RECEIVER Press the [RECEIVER] button, followed by the - Onkyo TX SR875 | Owner Manual - Page 47
resolution and with no conversion. Auto: Select this to have the AV receiver automatically convert video at resolutions not supported by your TV. 480p: Select this for 480p output and video conversion as necessary. (Not available when the HDMI Monitor setting is set to No.) 720p: Select this for - Onkyo TX SR875 | Owner Manual - Page 48
- PREV CH DISPLAY CABLE SAT TOP MENU DOCK MENU RECEIVER TAPE/AMP SLEEP ENTER VOL GUIDE SETUP EXIT RETURN MUTING 1 2-4 REC PLAYLIST RANDOM STEREO LISTENING MODE SURR REPEAT AUDIO SUBTITLE PLAY MODE PURE A DIRECT THX ALL ST If you connect a video component to an HDMI IN, you must - Onkyo TX SR875 | Owner Manual - Page 49
Time Setup-Continued • When an HDMI IN is assigned to an input selector as explained here, the digital audio input for that input selector is automatically set to the same HDMI IN. See "Digital Input Setup" on page 52. • This procedure can also be performed on the AV receiver by using its [SETUP - Onkyo TX SR875 | Owner Manual - Page 50
CLEAR --/--- 10 11 12 INPUT SELECTOR MACRO 1 2 3 ZONE3 DVD REMOTE MODE VCR CD CDR/MD ZONE2 TV DIMMER + CH DISC ALBUM - PREV CH DISPLAY CABLE SAT TOP MENU DOCK MENU RECEIVER TAPE/AMP SLEEP ENTER VOL GUIDE SETUP EXIT RETURN MUTING 1 2-4 REC PLAYLIST RANDOM STEREO LISTENING - Onkyo TX SR875 | Owner Manual - Page 51
for the COMPONENT VIDEO OUT, the HDMI Monitor setting must be set to No (see page 46). See page 28 for more information on video signal flow and upconversion. • This procedure can also be performed on the AV receiver by using its [SETUP], [ENTER], and arrow buttons. Changing the Input Display If you - Onkyo TX SR875 | Owner Manual - Page 52
DISC ALBUM - PREV CH DISPLAY CABLE SAT TOP MENU DOCK RECEIVER TAPE/AMP SLEEP MENU ENTER VOL GUIDE SETUP EXIT RETURN MUTING 1 2-4 REC PLAYLIST RANDOM STEREO LISTENING MODE SURR REPEAT AUDIO SUBTITLE PLAY MODE PURE A DIRECT THX ALL ST If you connect a component to a digital audio - Onkyo TX SR875 | Owner Manual - Page 53
AV receiver by using its [SETUP], [ENTER], and arrow buttons. 1 STANDBY/ON STANDBY READY ZONE 2 ZONE 3 MASTER VOLUME PURE AUDIO AUDIO SEL DVD VCR/DVR CBL/SAT GAME/TV AUX 1 AUX 2 TAPE TUNER PHONES POWER ZONE 2 OFF LEVEL TONE HDMI OUT STEREO THX assignment is displayed. 3 DIGITAL - Onkyo TX SR875 | Owner Manual - Page 54
- PREV CH DISPLAY CABLE SAT TOP MENU DOCK MENU RECEIVER TAPE/AMP SLEEP ENTER VOL GUIDE SETUP EXIT RETURN MUTING 1 2-4 REC PLAYLIST RANDOM STEREO LISTENING MODE SURR REPEAT AUDIO SUBTITLE PLAY MODE PURE A DIRECT THX ALL ST If you connect a component to the AV receiver's analog - Onkyo TX SR875 | Owner Manual - Page 55
the one that best matches yours, ). • If the AV receiver is muted, it OFF LEVEL TONE HDMI OUT STEREO THX TUNING RT/PTY REMOTE MODE VCR CD CDR/MD ZONE2 TV DIMMER CABLE SAT DOCK RECEIVER TAPE/AMP SLEEP TOP MENU MENU , + CH DISC ALBUM - PREV CH ENTER GUIDE SETUP EXIT RETURN VOL DISPLAY - Onkyo TX SR875 | Owner Manual - Page 56
On the TV, select the input to which the AV receiver is connected. 2 SETUP MIC Place the setup microphone at movie. • Positioning the microphone close to where your ears would normally be will provide the best results. You can set the height of the microphone by using a tripod or level table. - Onkyo TX SR875 | Owner Manual - Page 57
Please unplug microphone. 9 ENTER ENTER Calculating... When the calculations are complete, the following screen appears. Auto Speaker Setup Save Review SP Config Review SP Distance Review SP Level Cancel AUDYSSEY Use the Up and Down [ ]/[ ] buttons to select an option, and then press [ENTER - Onkyo TX SR875 | Owner Manual - Page 58
the left surround back speaker hasn't. Auto Speaker Setup AUDYSSEY -----Speaker Detect Error----- FL : Error SL : Yes SBL : Yes C : Yes FR : Yes SR : Yes SBR : Yes SW : Yes Retry Cancel There is a problem with a speaker. The speaker may be broken or the subwoofer may be emitting sound that is - Onkyo TX SR875 | Owner Manual - Page 59
speaker setup, you'll need to manually select 80 Hz (THX) for each THX-certified speaker (see page 86). • Because of the complexities of low-frequency sounds and the way they interact with a room, THX recommends setting the subwoofer level and distance manually. Using a Powered Subwoofer If you're - Onkyo TX SR875 | Owner Manual - Page 60
CLEAR --/--- 10 11 12 INPUT SELECTOR MACRO 1 2 3 ZONE3 DVD REMOTE MODE VCR CD CDR/MD ZONE2 TV DIMMER + CH DISC ALBUM - PREV CH DISPLAY CABLE SAT TOP MENU DOCK MENU RECEIVER TAPE/AMP SLEEP ENTER VOL GUIDE SETUP EXIT RETURN MUTING 1 2-4 REC PLAYLIST RANDOM STEREO LISTENING - Onkyo TX SR875 | Owner Manual - Page 61
REMOTE MODE VCR CD CDR/MD ZONE2 TV DIMMER + CH DISC ALBUM - PREV CH DISPLAY CABLE SAT TOP MENU DOCK MENU RECEIVER TAPE/AMP SLEEP ENTER VOL GUIDE . Setup closes. Note: • This procedure can also be performed on the AV receiver by using its [SETUP], [ENTER], and arrow buttons. 2 ENTER Use - Onkyo TX SR875 | Owner Manual - Page 62
DIMMER + CH DISC ALBUM - PREV CH DISPLAY CABLE SAT TOP MENU DOCK RECEIVER TAPE/AMP SLEEP MENU ENTER VOL GUIDE SETUP EXIT RETURN MUTING 1 3 1 AV receiver DVD VCR/DVR CBL/SAT GAME/TV AUX 1 AUX 2 Remote controller RECEIVER Use the AV receiver's input selector buttons to select an input - Onkyo TX SR875 | Owner Manual - Page 63
1 AUX 2 TAPE TUNER PHONES POWER ZONE 2 OFF LEVEL TONE HDMI OUT STEREO THX TUNING RT/PTY/TP MEMORY MODE SETUP ON OFF ZONE 3 DIGITAL MODE Press the [TUNING MODE] button so that the AUTO indicator appears on the display. 2 TUNING TUNING Press the TUNING Up or Down [ ]/[ ] button. - Onkyo TX SR875 | Owner Manual - Page 64
(FM), 4 5 6 TAPE TUNER CD press 8, 7, 5. 7 8 9 PHONO +10 0 Note: While the [RECEIVER] button is flash- ing, you cannot select another input source with the remote controller. Displaying AM/FM Radio Information DISPLAY STANDBY/ON STANDBY READY ZONE 2 ZONE 3 PURE AUDIO AUDIO SEL DVD - Onkyo TX SR875 | Owner Manual - Page 65
type (e.g., news, sport, rock, etc.). The AV receiver supports four types of RDS information: PS (Program Service) When tuned to an RDS station that's broadcasting PS information, the station's name will be displayed. Pressing the [DISPLAY] button will display the frequency for 3 seconds. RT (Radio - Onkyo TX SR875 | Owner Manual - Page 66
displayed. RT/PTY/TP Press the [RT/PTY/TP] button once. The RT information scrolls across the display. Notes: • The message "Waiting" may appear while the AV receiver AUX 2 TAPE TUNER PHONES POWER ZONE 2 OFF LEVEL TONE HDMI OUT STEREO THX TUNING RT/PTY/TP MEMORY MODE SETUP ON OFF ZONE 3 - Onkyo TX SR875 | Owner Manual - Page 67
TAPE TUNER PHONES POWER ZONE 2 OFF LEVEL TONE HDMI OUT STEREO THX TUNING RT/PTY/TP MEMORY MODE SETUP ON OFF DISPLAY CABLE SAT TOP MENU DOCK MENU RECEIVER TAPE/AMP SLEEP ENTER VOL GUIDE SETUP EXIT RETURN MUTING To select a preset, use the PRE- PRESET SET [ ]/[ ] buttons or the remote - Onkyo TX SR875 | Owner Manual - Page 68
CH DISPLAY ENTER GUIDE SETUP EXIT RETURN VOL MUTING MUTING Adjusting Speaker Levels You can adjust the volume of each speaker while listening to an input source. These temporary adjustments are cancelled when the AV receiver is set to Standby. CH SEL LEVEL LEVEL Use the remote controller - Onkyo TX SR875 | Owner Manual - Page 69
various information about the current input source as follows. Remote controller DISPLAY Press the [DISPLAY] button repeatedly to cycle through the available information. AV receiver DISPLAY The following information can typically be displayed: Input source Listening mode Signal format* Sampling - Onkyo TX SR875 | Owner Manual - Page 70
OFF LEVEL TONE HDMI OUT STEREO THX TUNING RT/PTY/TP MEMORY MODE SETUP ON OFF ZONE 3 DIGITAL INPUT LISTENING MODE CLEAR TUNING PRESET TUNING RETURN ENTER CD PHONO SETUP MIC DISPLAY AUX 2 INPUT PUSH TO OPEN S VIDEO VIDEO L AUDIO R DIGITAL Normally, the AV receiver detects the format - Onkyo TX SR875 | Owner Manual - Page 71
is selected, the AV receiver's display is turned off and only the HDMI OUT outputs video signals. ■ [DIRECT] button This button selects the Direct listening mode. ■ [THX] button This button selects the THX listening modes. ■ [ALL ST] button This button selects the All Channel Stereo listening mode - Onkyo TX SR875 | Owner Manual - Page 72
:6 THX*3 [THX] Dolby PLII THX Games Mode Neo:6 THX Games Mode THX Surround EX THX Ultra2 Cinema THX Music Mode THX Games Mode LISTENING MODE*4 [ ]/[ ] Onkyo Original DSP Mono Mono Movie Orchestra Unplugged *3 Studio-Mix TV Logic All Ch Stereo Full Mono T-D PCM Multi 32-96 176.4/ channel - Onkyo TX SR875 | Owner Manual - Page 73
Neo:6 Neo:6 Cinema Neo:6 Music Neural THX 5.1 Neural THX 7.1 THX Cinema*4 Dolby PLII/ Dolby PLIIx THX Neo:6 THX Dolby PLII THX Games Mode [THX] Neo:6 THX Games Mode THX Surround EX THX Ultra2 Cinema THX Music Mode THX Games Mode LISTENING MODE [ ]/[ ] Onkyo Original DSP Mono Mono Movie - Onkyo TX SR875 | Owner Manual - Page 74
✔ Dolby PLII/ Dolby PLIIx THX ✔ ✔ Neo:6 THX ✔ ✔ Dolby PLII THX Games Mode ✔ [THX] Neo:6 THX Games Mode ✔ ✔ ✔ ✔ ✔ ✔ ✔ ✔ ✔ THX Surround EX ✔ ✔ THX Ultra2 Cinema ✔ ✔ THX Music Mode ✔ ✔ THX Games Mode ✔ ✔ LISTENING MODE*5 [ ]/[ ] Onkyo Original DSP Mono ✔ ✔ ✔ ✔ Mono - Onkyo TX SR875 | Owner Manual - Page 75
THX 5.1 ✔ Neural THX 7.1 ✔ ✔ THX Cinema*2 Dolby PLII/ Dolby PLIIx THX Neo:6 THX ✔ ✔ ✔ ✔ ✔ ✔ Dolby PLII THX Games [THX] Mode ✔ Neo:6 THX Games Mode ✔ THX Surround EX ✔ THX Ultra2 Cinema ✔ THX Music Mode ✔ THX Games Mode ✔ Mono ✔*3 ✔*3 ✔*3 ✔*3 LISTENING MODE [ ]/[ ] Onkyo - Onkyo TX SR875 | Owner Manual - Page 76
AV receiver's listening modes can transform your listening room into a movie theater or concert hall, with high fidelity and stunning surround sound. Pure Audio In this mode, the display DVD). DTS The DTS digital surround-sound format supports up to 5.1 discrete channels and uses less compression for - Onkyo TX SR875 | Owner Manual - Page 77
signal resolution. The AV receiver supports 7.1-channel sources up to 96 kHz and 5.1-channel sources up to 192 kHz. Neural THX 5.1/7.1 Neural-THX Surround employs psychoacoustic frequency domain processing, which allows delivery of a more detailed sound stage, with superior channel separation and - Onkyo TX SR875 | Owner Manual - Page 78
mono sources. The center speaker outputs the sound as it is, while reverb is applied to the sound output by the other speakers, giving presence to even mono material. Orchestra Suitable for classical or operatic music, this mode emphasizes the surround channels in order to widen the stereo image - Onkyo TX SR875 | Owner Manual - Page 79
Notes: • The surround sound and DSP listening AV receiver's MASTER VOLUME control has no effect on recording. 2 On your recorder, start record- ing. 3 On the source component HDMI ASSIGNABLE IN 4 IN 3 IN 2 IN 1 OUT COMPONENT VIDEO ASSIGNABLE IN 3 IN 2 IN 1(DVD) MONITOR OUT Y REMOTE - Onkyo TX SR875 | Owner Manual - Page 80
connected TV and provide a convenient way to change the AV receiver's various settings. Settings are organized into eight categories The design of the TX-SR805 and TX-SR875 onscreen setup menus is slightly different. The TX-SR805 onscreen setup menus are used throughout this instruction manual. 80 - Onkyo TX SR875 | Owner Manual - Page 81
Neo:6 Cinema, DTS 96/24, THX Cinema, THX Surround EX, THX Ultra2 Cinema, and Multichannel. RECEIVER Re-EQ Press the [RECEIVER] REMOTE MODE button, followed by the [ the material that you are playing and the intention of the original sound designer, and with some material there will be little or no - Onkyo TX SR875 | Owner Manual - Page 82
LEVEL TONE HDMI OUT STEREO THX TUNING RT/PTY/TP MEMORY MODE SETUP ON OFF ZONE 3 DIGITAL INPUT LISTENING MODE CLEAR TUNING PRESET TUNING RETURN ENTER CD PHONO SETUP MIC DISPLAY AUX 2 INPUT PUSH TO OPEN S VIDEO VIDEO L AUDIO R DIGITAL 1 TONE 2 Press the AV receiver's [TONE] button - Onkyo TX SR875 | Owner Manual - Page 83
0 to 7. The default value is 3. Neo:6 Music ■ Center Image This setting is unavailable if no surround speakers are connected. The DTS Neo:6 Music listening mode creates 6-channel surround sound from 2-channel stereo sources. With this setting, you can specify by how much the front left and right - Onkyo TX SR875 | Owner Manual - Page 84
you turn on the AV receiver. ENTER SETUP INPUT SELECTOR MACRO 1 2 3 DVD REMOTE MODE VCR CD CDR/MD ZONE3 ZONE2 TV DIMMER + CH DISC ALBUM - PREV CH DISPLAY CABLE SAT TOP MENU DOCK MENU RECEIVER TAPE/AMP SLEEP ENTER VOL GUIDE SETUP EXIT RETURN MUTING RECEIVER REC PLAYLIST RANDOM - Onkyo TX SR875 | Owner Manual - Page 85
press [ENTER]. The audio formats supported by that input selector appear. 5 SETUP 192/176.4k: Specifies the Specifies the default listening mode for 2-channel (2/0) stereo sources in a digital format HDMI). Note: • This procedure can also be performed on the AV receiver by using its [SETUP], - Onkyo TX SR875 | Owner Manual - Page 86
. Sounds below the crossover frequency will then be output by the subwoofer instead of the speaker. Refer to your speakers' manuals to determine the optimum crossover frequencies. If you're using THX-certified speakers, specify 80 Hz (THX) for all speakers. 1 RECEIVER Press the [RECEIVER] REMOTE - Onkyo TX SR875 | Owner Manual - Page 87
ENTER Use the Up and Down [ ]/[ ] buttons to select "Surr Back," and then use the Left and Right [ ]/[ ] buttons to select a crossover frequency. If no surround back speakers are connected, select None. Notes: • Cannot be set if Speaker Type is set to Bi-Amp or BTL (page 45 - Onkyo TX SR875 | Owner Manual - Page 88
to select: Off (THX): The subwoofer only outputs the LFE channel. On: In addition to LFE channel sounds, the subwoofer outputs front left and right channel bass sounds. 12 SETUP Press the [SETUP] button. Setup closes. Note: • This procedure can also be performed on the AV receiver by using its - Onkyo TX SR875 | Owner Manual - Page 89
listening position. 1 RECEIVER Press the [RECEIVER] REMOTE MODE button, followed 4.Level Calibration 5.Equalizer Settings 6.THX Audio Setup 3 ENTER ENTER Use is set to BTL (page 45), or Surround is set to None in the Speaker Confi AV receiver by using its [SETUP], [ENTER], and arrow buttons. 89 - Onkyo TX SR875 | Owner Manual - Page 90
THX, which is 0 dB (absolute volume setting 82). If you normally listen at volume settings below this, be careful because the test tone will be much louder. 1 RECEIVER Press the [RECEIVER] REMOTE is the same. If you're using a handheld sound level meter, adjust the level of each speaker so that - Onkyo TX SR875 | Owner Manual - Page 91
1 RECEIVER Press the [RECEIVER] REMOTE MODE 6.THX Audio Channel 63Hz 160Hz 400Hz 1000Hz 2500Hz 6300Hz 16000Hz Manual Channel," and then use the Left and Right [ ]/[ ] buttons to select the speaker. You can select: Front, Center, Surround sounds; high frequencies, such as 6300 Hz, affect treble - Onkyo TX SR875 | Owner Manual - Page 92
Subwoofer setting to Yes. You can then apply THX's Boundary Gain Compensation (BGC) to compensate the perceived exaggeration of low frequencies for listeners sitting very close to a room boundary (i.e., wall). 1 RECEIVER Press the [RECEIVER] REMOTE MODE button, followed by the [SETUP] button. The - Onkyo TX SR875 | Owner Manual - Page 93
. Note: • This setting is only available if THX Subwoofer is set to Yes (step 5). 7 SETUP Press currently selected input selector is displayed in a box. 4.Source can also be performed on the AV receiver by using its [SETUP], selector. 1 RECEIVER Press the [RECEIVER] REMOTE MODE button, and - Onkyo TX SR875 | Owner Manual - Page 94
Lip Sync is enabled (see page 99), and your TV or display supports HDMI Lip Sync, the displayed delay time will be the A/V Sync delay time. The HDMI Lip Sync delay time is displayed underneath in parentheses. Note: • A/V Sync cannot be set when the Pure Audio listening mode is selected, or when the - Onkyo TX SR875 | Owner Manual - Page 95
arrow buttons to display the following screen, performed on the AV receiver by using its Guide for more information. SIRIUS Parental Lock This item is for use with SIRIUS Satellite Radio. It's not available if Satellite Radio is set to None or XM (see page 99). See the separate Satellite Radio Guide - Onkyo TX SR875 | Owner Manual - Page 96
10 11 12 INPUT SELECTOR MACRO 1 2 3 DVD REMOTE MODE VCR CD CDR/MD ZONE3 ZONE2 TV DIMMER + CH DISC ALBUM - PREV CH DISPLAY CABLE SAT TOP MENU DOCK RECEIVER TAPE/AMP SLEEP MENU ENTER VOL GUIDE SETUP EXIT RETURN MUTING RECEIVER REC PLAYLIST RANDOM 4 ENTER Use the Up and Down - Onkyo TX SR875 | Owner Manual - Page 97
immediately after an AV receiver function is used. On: Displayed (default). Off: Not displayed. Even if On is selected, operation details are not output if the input source is connected to a COMPONENT VIDEO IN or HDMI IN. For optimal video performance, THX recommends that Immediate Display be turned - Onkyo TX SR875 | Owner Manual - Page 98
by using its [SETUP], [ENTER], and arrow buttons. Remote Control ■ Remote ID When several Onkyo components are used in the same room, their remote ID codes may overlap. To differentiate the AV receiver from the other components, you can change its remote ID from 1, the default, to 2 or 3. Note: • If - Onkyo TX SR875 | Owner Manual - Page 99
to audio from an HDMI component through your TV's speakers. Normally, it should be set to Off. Off: HDMI audio is not output (default). On: HDMI audio is output. Notes: • If On is selected and the signal can be output by the TV, the AV receiver will output no sound through its speakers. • When - Onkyo TX SR875 | Owner Manual - Page 100
power control only works with HDMI-compatible components that support it and may not work properly with some components due to their settings or compatibility. • When set to Enable, the AV receiver consumes more power. • When set to Enable, the AV receiver enters Ready mode when set to Standby, and - Onkyo TX SR875 | Owner Manual - Page 101
Zone 2 Speakers Directly to the AV receiver This setup allows 5.1-channel playback in your main room and 2-channel stereo playback in Zone 2, volume on the AV receiver (see page 104). Notes: • With this setup, the Zone 2 volume is controlled by the AV receiver. • On the TX-SR875, Powered Zone 2 - Onkyo TX SR875 | Owner Manual - Page 102
2 and Zone 3-Continued Zone 2 Video Output (TX-SR875 only) The TX-SR875 features a composite video output for connection to a TV in Zone 2, so you can enjoy both audio and video in that zone. Hookup • Use a composite video cable to connect the AV receiver's ZONE 2 OUT V jack to a composite video - Onkyo TX SR875 | Owner Manual - Page 103
Act is selected and Zone 2 turned off, the surround back speakers output sound as normal. • On the TX-SR875, Powered Zone 2 cannot be used if the Speaker Type is set to Bi-Amp or BTL (page 45). • This procedure can also be performed on the AV receiver by using its [SETUP], [ENTER], and arrow buttons - Onkyo TX SR875 | Owner Manual - Page 104
and tone on the AV receiver. 1 RECEIVER Press the [RECEIVER] REMOTE MODE button, followed 2 OFF LEVEL TONE HDMI OUT STEREO THX TUNING RT/PTY/TP REMOTE MODE VCR CD CDR/MD ZONE2 TV DIMMER + CH DISC ALBUM - PREV CH DISPLAY CABLE SAT TOP MENU DOCK MENU RECEIVER TAPE/AMP SLEEP ENTER VOL GUIDE - Onkyo TX SR875 | Owner Manual - Page 105
display. ZONE 3 2 Remote controller On the remote controller, use the INPUT SELECTOR buttons. DVD VCR/DVR CBL/SAT 1 2 3 GAME/TV AUX1 AUX2 On the AV receiver are not output. If no sound is heard when an input surround back speakers (6.1/7.1), such as Dolby Digital EX, DTS-ES, and THX Ultra2 - Onkyo TX SR875 | Owner Manual - Page 106
Zone 3-Continued Adjusting the Volume of Zones Remote controller ZONE3 ZONE2 On the remote controller, press the [ZONE 2] or [ZONE 3] REMOTE MODE button, and then use the [LEVEL-] and [LEVEL+] buttons. LEVEL LEVEL AV receiver On the AV receiver, press the [ZONE 2] or [ZONE 3] button, press - Onkyo TX SR875 | Owner Manual - Page 107
IR OUT jack and placed in front of the other component's remote control sensor. Infrared signals received at the AV receiver's IR IN jack are fed through to the other component via the IR emitter. Signals picked up by the AV receiver's remote control sensor are not output. IR IN IR OUT Connecting - Onkyo TX SR875 | Owner Manual - Page 108
controller at the component, and check the operation. If the remote controller doesn't work as expected, and several remote codes are listed, try each one in turn and use the one that works best. Notes: • Remote control codes cannot be entered for the [RECEIVER] and [DOCK] REMOTE MODE buttons - Onkyo TX SR875 | Owner Manual - Page 109
recorder with See the previous page for how to enter remote control codes. 3 Press the REMOTE MODE button, point the remote controller at the AV receiver, and operate the component. If you want to control an Onkyo component by pointing the remote controller directly at it, or you want to control an - Onkyo TX SR875 | Owner Manual - Page 110
remote controller mode with the REMOTE MODE buttons first.) With some components, receiver to On or Standby. B Number buttons Enter numbers. C [CLEAR] Cancels functions. D [CH +/-] Selects satellite/cable channels. E [PREV CH] Selects the previous channel. F [GUIDE] Displays the program guide - Onkyo TX SR875 | Owner Manual - Page 111
TV DIMMER + CH DISC ALBUM - PREV CH DISPLAY CABLE SAT TOP MENU DOCK MENU RECEIVER TAPE/AMP SLEEP ENTER VOL GUIDE SETUP EXIT RETURN MUTING Remote indicator 1 REMOTE MODE DVD VCR CD TV CDR/MD CABLE SAT RECEIVER TAPE/AMP DOCK While holding down the REMOTE MODE button for the mode in - Onkyo TX SR875 | Owner Manual - Page 112
. Example: To play a CD you typically need to perform the following actions: 1. Press the [RECEIVER] REMOTE MODE button to select the Receiver remote controller mode. 2. Press the [ON] button to turn on the AV receiver. 3. Press the [CD] INPUT SELECTOR button to select the CD input source. 4. Press - Onkyo TX SR875 | Owner Manual - Page 113
Troubleshooting If you have any trouble using the AV receiver, look for a solution in this section. If you can't resolve the issue yourself, contact your Onkyo dealer. If you can't resolve the issue yourself, try resetting the AV receiver before contacting your Onkyo dealer. To reset the AV receiver - Onkyo TX SR875 | Owner Manual - Page 114
LFE channel, the subwoofer produces no sound. • Check the Speaker Configuration (page 86). The Zone 2/3 speakers produce no sound • The Zone 2/3 speakers only output sources that are connected to an analog input. Check to see if the source component is connected to an analog input. • On the TX-SR875 - Onkyo TX SR875 | Owner Manual - Page 115
as expected, and some may not work at all. • To control an Onkyo component that's connected via , point the remote controller at the AV receiver. Be sure to enter the appropriate remote control code first (page 109). • To control an Onkyo component that's not connected via , or another manufacturer - Onkyo TX SR875 | Owner Manual - Page 116
Troubleshooting-Continued The AV receiver contains a microcomputer for signal processing and control functions. from the wall outlet, wait at least 5 seconds, and then plug it back in again. Onkyo is not responsible for damages (such as CD rental fees) due to unsuccessful recordings caused by this - Onkyo TX SR875 | Owner Manual - Page 117
kHz, 1 ch driven (IEC) TX-SR875: North American: 140 watts minimum continuous power per channel, 8 ohm loads, 2 channels driven from 20 Hz to 20 18-1/16" 23.1 kg 50.9 lbs. 23.3 kg 51.4 lbs. ■ Video Input HDMI TX-SR805: TX-SR875: Component Composite S-Video IN 1, IN 2, IN 3 IN 1, IN 2, IN 3, IN 4 - Onkyo TX SR875 | Owner Manual - Page 118
Specifications-Continued ■ Audio Outputs Digital Output OPTICAL (OUT) Analog Outputs TAPE, VCR/DVR, PRE OUT (FRONT, CENTER, SUBWOOFER, SURR, SURR BACK, ZONE 2, ZONE 3) Multichannel Pre Outputs 7 Subwoofer Pre Outputs 1 Speaker Outputs ZONE2 R, SURR BACK R, FRONT R, SURR R, CENTER, SURR - Onkyo TX SR875 | Owner Manual - Page 119
Memo - Onkyo TX SR875 | Owner Manual - Page 120
Sales & Product Planning Div. : 2-1, Nisshin-cho, Neyagawa-shi, OSAKA 572-8540, JAPAN Tel: 072-831-8023 Fax: 072-831-8124 ONKYO U.S.A. CORPORATION 18 Park Way, Upper Saddle River, N.J. 07458, U.S.A. Tel: 201-785-2600 Fax: 201-785-2650 http://www.us.onkyo.com/ ONKYO .onkyo.com/ ONKYO EUROPE UK Office
-
 1
1 -
 2
2 -
 3
3 -
 4
4 -
 5
5 -
 6
6 -
 7
7 -
8
-
9
-
10
-
11
-
12
-
13
-
14
-
15
-
16
-
17
-
18
-
19
-
20
-
21
-
22
-
23
-
24
-
25
-
26
-
27
-
28
-
29
-
30
-
31
-
32
-
33
-
34
-
35
-
36
-
37
-
38
-
39
-
40
-
41
-
42
-
43
-
44
-
45
-
46
-
47
-
48
-
49
-
50
-
51
-
52
-
53
-
54
-
55
-
56
-
57
-
58
-
59
-
60
-
61
-
62
-
63
-
64
-
65
-
66
-
67
-
68
-
69
-
70
-
71
-
72
-
73
-
74
-
75
-
76
-
77
-
78
-
79
-
80
-
81
-
82
-
83
-
84
-
85
-
86
-
87
-
88
-
89
-
90
-
91
-
92
-
93
-
94
-
95
-
96
-
97
-
98
-
99
-
100
-
101
-
102
-
103
-
104
-
105
-
106
-
107
-
108
-
109
-
110
-
111
-
112
-
113
-
114
-
115
-
116
-
117
-
118
-
119
-
120
 |
 |

E
n
AV Receiver
TX-SR8
0
5
TX-SR8
7
5
Instruction Manual
Thank you for purchasing an Onkyo AV Receiver.
Please read this manual thoroughly before making
connections and plugging in the unit.
Following the instructions in this manual will enable
you to obtain optimum performance and listening
enjoyment from your new AV Receiver.
Please retain this manual for future reference.
Contents
Introduction
.....................................
2
Connection
....................................
20
Turning On & First Time Setup
.....
44
Basic Operation
Playing your AV components
.......
62
Listening to the Radio
..................
63
Enjoying the Listening Modes
.....
71
Advanced Operation
.....................
86
Troubleshooting
..........................
113
TX-SR805_875_En.book Page 1 Thursday, April 26, 2007 3:00 PM