Optoma EP756 User Manual
Optoma EP756 Manual
 |
View all Optoma EP756 manuals
Add to My Manuals
Save this manual to your list of manuals |
Optoma EP756 manual content summary:
- Optoma EP756 | User Manual - Page 1
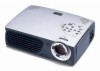
Digital Projector EP755/753 User's Guide - Optoma EP756 | User Manual - Page 2
FCC Notice This equipment has been tested and found to comply with the limits for a Class B digital device, pursuant to Part 15 of FCC Rules. These limits are designed to provide reasonable protection against harmful interference in a residential installation. Trademarks Trademarks are the rights of - Optoma EP756 | User Manual - Page 3
the Projector Height 11 ------- Adjusting the Projector Zoom/Focus 12 ------- Adjusting Projection Image Size 12 User Controls ------- Panel Control & Remote Control 13 ----+--- On-Screen Display Menus 15 ------- How to Operate 15 ------- Image-I (Computer mode 16 ------- Image-I (Video mode - Optoma EP756 | User Manual - Page 4
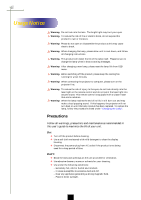
remote control is equipped with a Class II laser that emits radiation. Warning- When the lamp reaches the end of its life, it will burn out and may make a loud popping sound. If this happens, the projector will not turn back on until the lamp module has been replaced. To replace the lamp, follow - Optoma EP756 | User Manual - Page 5
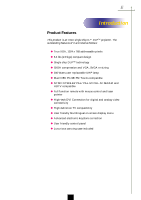
, SVGA re-sizing u 200 Watts user replaceable UHP lamp u Mac/NEC PC-98/FM Towns compatible u NTSC/NTSC4.43/PAL/PAL-M/PAL-N/SECAM and HDTV compatible u Full function remote with mouse control and laser pointer u High-tech DVI Connection for digital and analog video connectivity u High definition TV - Optoma EP756 | User Manual - Page 6
if anything is missing. 1 2 Projector with lens cap 3 Power Cord 4 VGA Cable 5 S-Video Cable 6 Audio Cable Jack/RCA 7 Composite Video Cable DVI to D-Sub Cable Remote Mouse Y Cable Remote Control with Mouse Function and Laser Pointer User's Guide Quick Start Card Warranty Card Carrying - Optoma EP756 | User Manual - Page 7
English Product Overview Main Unit 7 Introduction 1 2 6 3 5 4 8 9 10 1. Panel Control 2. Power Connector & Power Switch 3. Connection Ports 4. Focus Ring 5. Zoom Lens 6. Zoom Ring 7. Speaker 8. Remote Control Receiver 9. Elevator Button 10. Elevator Foot 5 - Optoma EP756 | User Manual - Page 8
English Introduction Panel Control 1 3 4 5 1. Lamp Warning LED 2. Temperature Warning LED 3. Volume 4. Mute 5. 1 RS232 Input Connector (RS232 is for after service purpose only) 2. Audio Input for Video 3. Composite Video Input Connector 4. S-Video Input Connector 5. Audio Input for DVI 6. DVI - Optoma EP756 | User Manual - Page 9
English Introduction Remote Control with Mouse Function & Laser Pointer LED Power / Standby Page Down Laser look directly into the laser light on the remote control and do not point the laser light into anyone's eyes. This remote control is equipped with a Class II laser that emits radiation. 7 - Optoma EP756 | User Manual - Page 10
Installation Connecting the Projector Digital Tuner Output Video Output 4 5 3 1. Power Cord 2. VGA Cable 3. S-Video Cable 4. Audio Cable Jack/RCA 5. Composite Video Cable 6. DVI to D-Sub Cable 7. Remote Mouse Y Cable 8. D-Sub to RCA Cable for HDTV/Component (optional) S-Video Output RS232 - Optoma EP756 | User Manual - Page 11
on the panel control. Ž The startup screen will display and count down for 20 seconds and the Power/Standby indicator will light solid amber. The "LAMP" LED indicator will light solid green. 5. Turn on your source (computer, notebook, or video player ,etc.). The projector will detect your source - Optoma EP756 | User Manual - Page 12
. v When the "LAMP" indicator will flash green for about 10 seconds, you will see a message "Fan Fail" on the on-screen display. Please contact your local dealer or our service center. v When the "TEMP" indicator lights solid orange, it indicates the projector has been overheated. You will see - Optoma EP756 | User Manual - Page 13
the button to lock the elevator foot into position. 3. Use Ž to fine-tune height adjustment. To lower the projector: 1. Press the elevator button. 2. Lower down the projector, then release the button to lock the elevator foot into position. 3. Use Ž to fine-tune height adjustment. 3 Elevator - Optoma EP756 | User Manual - Page 14
the image, rotate the focus ring until the image is clear. The projector will focus at distances from 3.7 feet to 40.7 feet (1.1m to Min.(WxH) Distance 28" 22" 22.4" x 16.8" 17.6" x 13.2" 3.7' v This graph is for user's reference only. 98" 78" 78.4" x 58.8" 62.4" x 46.8" 13.1' 123" 98" 98.4" x - Optoma EP756 | User Manual - Page 15
English User Controls Panel Control & Remote Control There are two ways for you to control the functions: Remote Control and Panel Control. Panel Control Remote Control Power / Standby 4 Refer to the "Power On/Off the Projector" section on page 9~10. Source 4 Press "Source" to choose RGB, DVI- - Optoma EP756 | User Manual - Page 16
User Controls vPage Up / Page Down : Under remote mouse connected status only. Four Directional Select Keys 4 When you close the cover of remote control, this key can be used as a mouse to control direction. v The above function is only enabled with the connection between computer and projector - Optoma EP756 | User Manual - Page 17
computer source, the OSD will be the "Computer OSD". In video source, the OSD will be the " Video OSD". The projector will detect the source automatically. 4To open the OSD menu, press the "Menu" button on the Remote Control or Panel Control. 4 When OSD is displayed, press key to select main menu - Optoma EP756 | User Manual - Page 18
the image. The contrast controls the degree of difference between the lightest and darkest parts of the picture. Adjusting the contrast changes the amount of black and white in the image. 4 Press the to decrease the contrast. 4 Press the to increase the contrast. Color Temperature Adjust the - Optoma EP756 | User Manual - Page 19
Tint Contrast Sharpness Color User Controls Image-I (Video mode) Brightness Adjusting the brightness of the image. 4 Press the 4 Press the Contrast to darken the image. to lighten the image. The contrast controls the degree of difference between the lightest and darkest parts of the picture - Optoma EP756 | User Manual - Page 20
English User Controls Computer mode Language Management Image-I Image-II Audio Frequency H. Position Tracking V. Position 16:9 / 4:3 Reset Yes No Image-II (Computer mode) vReset : Reset items include both - Optoma EP756 | User Manual - Page 21
Image-I Image-II Audio Keystone Color Temp. 16:9 / 4:3 Reset Yes No User Controls Image-II (Video mode) vReset : Reset items include both Image-I and Image-II settings. Keystone Correction Adjust image distortion caused by tilting the projector. (±16 degrees) 16 : 9 / 4 : 3 You can - Optoma EP756 | User Manual - Page 22
English User Controls Computer / Video mode Language Management Image-I Image-II Audio Volume Stereo / Mono Treble Mute Bass Audio Volume 4 Press the 4 Press the Treble to decrease the volume. to increase the volume. The treble setting controls the higher frequencies of your audio - Optoma EP756 | User Manual - Page 23
Reminder Projection Lamp Reset Signal Type RGB Component HDTV User Controls Management Menu Location Choose the Menu location on the display screen. Projection 4 Front-Desktop The factory default setting. 4 Rear-Desktop When you select this function, the projector reverses the image - Optoma EP756 | User Manual - Page 24
securely installed. Please refer to the "Changing the lamp" section. 4 Make sure you have removed the lens cap and the projector is switched on. Problem : Partial, scrolling or incorrectly displayed image. 4 Press the "Re-Sync" button on the Remote Control. 4 If you are using a PC: If the resolution - Optoma EP756 | User Manual - Page 25
the projection. Problem : Lamp burns out or makes a popping sound 4 When the lamp reaches its end of life, it will burn out and may make a loud popping sound. If this happens, the projector will not turn back on until the lamp module has been replaced. To replace the lamp, follow the procedures - Optoma EP756 | User Manual - Page 26
compartment is hot! Allow it to cool down before changing lamp! Changing the lamp The projector will detect the lamp life itself. It will show you a warning message "Lamp is running out of standard lifetime. Be sure to replace the lamp as soon as possible." When you see this message, change the - Optoma EP756 | User Manual - Page 27
Specifications Light Valve Contrast Ratio Lamp Number of Pixels Displayable Color Projection Lens Projection Screen Size Projection Distance Video - 600:1 (Full On / Full Off) - 200W User Replaceable UHP Lamp - 1024 pixels(H) X 768 lines(V) - 16.7M colors - F/2.44~2.69 f=28.8~34.5mm with 1.2 x zoom - Optoma EP756 | User Manual - Page 28
English Appendices Remark : "*" compression computer image. Compatibility Modes Mode VESA VGA VESA VGA VESA VGA VESA VGA VESA VGA VESA VGA VESA VGA VESA VGA SVGA SVGA SVGA SVGA SVGA VESA XGA VESA XGA VESA XGA VESA XGA VESA XGA * VESA SXGA * VESA SXGA * VESA * VESA * VESA MAC LC13" MAC II 13" MAC
-
 1
1 -
 2
2 -
 3
3 -
 4
4 -
 5
5 -
 6
6 -
 7
7 -
8
-
9
-
10
-
11
-
12
-
13
-
14
-
15
-
16
-
17
-
18
-
19
-
20
-
21
-
22
-
23
-
24
-
25
-
26
-
27
-
28
 |
 |
Digital Projector EP755/753
User’s Guide