Optoma H77 User Manual
Optoma H77 Manual
 |
View all Optoma H77 manuals
Add to My Manuals
Save this manual to your list of manuals |
Optoma H77 manual content summary:
- Optoma H77 | User Manual - Page 1
13 Adjusting the Projector's Zoom/Focus 14 User Controls Control Panel & Remote Control 15 Onscreen Display Menus 18 How to Operate ...18 Menu Tree ...19 Picture ...20 Image ...22 System ...24 Display ...25 Appendices Troubleshooting ...27 Replacing the Lamp ...30 Ceiling Mount Installation 31 1 - Optoma H77 | User Manual - Page 2
- Do not use lens cap when projector is in operation. Warning- When the lamp reaches the end of its life, it will burn out and may make a loud "popping" sound. If this occurs, the projector will not turn back on until the lamp module has been replaced. To replace the lamp, follow the procedures - Optoma H77 | User Manual - Page 3
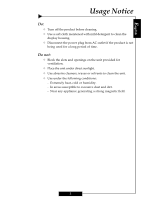
not: ™ Block the slots and openings on the unit provided for ventilation. ™ Place the unit under direct sunlight. ™ Use abrasive cleaners, waxes or solvents to clean the unit. ™ Use under the following conditions: - Extremely heat, cold or humidity. - In areas susceptible to excessive dust and dirt - Optoma H77 | User Manual - Page 4
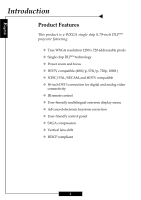
‹ Power zoom and focus ‹ HDTV compatible (480i/p, 576i/p, 720p, 1080i ) ‹ NTSC/PAL/SECAM, and HDTV compatible ‹ Hi-tech DVI-I connection for digital and analog video connectivity ‹ IR remote control ‹ User-friendly multilingual onscreen display menu ‹ Advanced electronic keystone correction - Optoma H77 | User Manual - Page 5
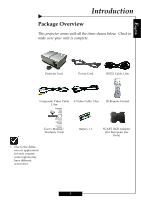
. Projector Unit Power Cord RS232 Cable 1.8m Composite Video Cable S-Video Cable 1.8m 1.8m IR Remote Control User's Manual/ Warranty Card ™ Due to the difference in applications for each country, some regions may have different accessories. Battery x 2 SCART RGB Adaptor (For European Use - Optoma H77 | User Manual - Page 6
English Introduction Product Overview Main Unit 1 2 4 5 3 6 1. Control Panel 2. Power Socket & Main Power Switch 3. Four Adjustable Feet 4. Lens 5. Lens Cap 6. Connection Ports 6 - Optoma H77 | User Manual - Page 7
Control Panel Introduction English 1 2 4 5 3 6 7 10 8 9 1. Lens Shift (Up/Down) 2. Optics Zoom In/Up 3. Optics Zoom Out/Down 4. Optics Focus -/Left 5. Optics Focus+/Right 6. Four Directional Select Keys 7. Resync 8. Source 9. Menu/Exit 10. Enter 7 - Optoma H77 | User Manual - Page 8
English Introduction Connection Ports 12 3 4 5 1 Lamp LED 2. Temp LED 3. Power LED 4. Power Socket 5. Main Power Switch 6. IR Receiver 7. RCA YPbPr Connectors 8. BNC YPbPr/RGBHV Connectors 9. +12V Relay Connectors 10. RS-232 - Optoma H77 | User Manual - Page 9
English Introduction Wireless Remote Control 9 1 2 3 4 5 6 7 8 10 11 12 16 14 15 17 13 19 18 20 22 21 1. Power On/Off 2. Display Hide 3. Brightness 4. Freeze 5. Contrast 6. Re-sync 7. Hue Adjustment 8. - Optoma H77 | User Manual - Page 10
RCA Component Cable for YPbPr (Optional) 8. BNC Cable for RGB/Compo- nent (Optional) +12V Relay Outputs RS232 Output ™ To ensure that the projector properly displays source material from your computer, please configure the display settings of your graphics card to less than or equal to 1280 x 720 - Optoma H77 | User Manual - Page 11
cable are securely connected. 3. Turn on the lamp by pressing the "Power" button on the side of the projector. o The startup screen will display in the same time, use the "Source" button on the remote control or control panel to select your desired source. ™ Turn on the projector first and the - Optoma H77 | User Manual - Page 12
After cool down, under normal conditional, user can press the "Power" button to turn on the unit again. However, if the problem persists, you should contact your local reseller or service center. ™ If the "LAMP" indicator illuminates red, the lamp may of failed. Please contact your local reseller or - Optoma H77 | User Manual - Page 13
the adjustable foot you wish to modify on the under side of the projector. 2. Rotate the adjustable foot counterclockwise to raise the projector or clockwise to lower it. Repeat with the remaining feet as needed. 3. Reset the projector on its feet and re-adjust as needed. Four Adjustable feet 13 - Optoma H77 | User Manual - Page 14
English Installation Adjusting the Projector's Zoom/Focus You may adjust the projected image size by pressing the Zoom buttons. Press to zoom in or to zoom out. To adjust focus of an image, press the focus shift buttons and . The projector will focus at distances from 3.3 to 32.8 feet (1.0 to 10.0m - Optoma H77 | User Manual - Page 15
English User Controls Control Panel & Remote Control There are two ways for you to control the functions: with control panel and remote control. Control Panel Remote Control Using the Remote Control Power 4 "Power" turns on the projector's lamp, refer to the "Powering On/Off the Projector" - Optoma H77 | User Manual - Page 16
User Controls Contrast 4 "Contrast" controls the degree of difference between the lightest and darkest parts of the picture. Hue 4 "Hue" adjusts the color balance from red to green. H.Keystone & V.Keystone 4 Correct image distortion caused by rotating and tilting the projector " then use or make - Optoma H77 | User Manual - Page 17
User Controls DVI 4 Press "DVI" to select input from the DVI-I connector RCA 4 Press "RCA" to select input from the RCA component video connector. Using the Control Panel Power 4 The power switch is located near the power socket on the side of the projector. Use it to power on/off the projector - Optoma H77 | User Manual - Page 18
projector automatically detects the source. 4 To launch the menu, press "Menu/Exit" on the Remote Control or Control Panel. 4 When the main menu is displayed, use be modified. PICTURE Main menu Mode Contrast Brightness Color Hue Sharpness Gamma Reset Cinéma 50 50 50 50 50 1 Sub-menu - Optoma H77 | User Manual - Page 19
User Controls English Menu Tree PICTURE Mode Contrast Brightness Color (Video only) Hue (Video only) Sharpness Gamma Reset IMAGE White Peaking Color Temp Image Mode Advanced Adjustment Signal Reset SYSTEM Language Bulb Source Lock Auto Shutdown Blanking Eco Mode Color Space DISPLAY Projection - Optoma H77 | User Manual - Page 20
User Controls English Picture ™ The "Color" sub menu is not supported under the digital RGB input source. ™ The "Hue" sub menu is not supported under the digital RGB, component video or analog RGB input sources. Mode Contrast Cinema 50 Brightness 50 Color 50 Hue 50 Sharpness 50 Gamma 1 - Optoma H77 | User Manual - Page 21
English Picture User Controls Mode Contrast Brightness Color Hue Sharpness Gamma Reset Cinema 50 50 50 50 50 1 PICTURE Gamma Gamma affects how dark scenery is displayed. With a greater gamma value, dark scenery will appear brighter. Use to adjust gamma values. Reset Return the - Optoma H77 | User Manual - Page 22
User Controls English Image ™ The "Signal" sub menu is supported under the Analog RGB and Analog YPbPr input sources. White Peaking 10 Color Temp. 1 Image Mode Film Advanced Adjustment Signal Reset IMAGE White Peaking Use the white peaking control to set the white peaking level of the - Optoma H77 | User Manual - Page 23
English Image User Controls White Peaking 10 Color Temp. 1 Image Mode Film Advanced Adjustment Signal Reset IMAGE Reset Return the adjustments and settings to factory default values. 4Current: Return the current menu's settings - Optoma H77 | User Manual - Page 24
User Controls English System Language English Bulb Source Lock On Auto Shutdown On Blanking Blue Eco Mode Off Color Space Auto SYSTEM Language Display a multilingual menu. Use and to select your preferred language. Bulb 4 Lamp Hour: Display the cumulative lamp operating time. 4 - Optoma H77 | User Manual - Page 25
behind a translucent screen. 4 Front-Ceiling When you select this function, the projector turns the image upside down for ceiling-mounted projection. 4 Rear-Ceiling When you select this function, the projector reverses and in- verts the image at same time. Using this setting enables you to - Optoma H77 | User Manual - Page 26
English User Controls Display Projection Front Desktop Format 4:3 Vertical Shift 0 H. Keystone 0 V. Keystone 0 Digital zoom 10 DISPLAY Format 4Native: Original image size. 416:9: The standard widescreen display format of the projector. 4Letterbox: Letterbox mode zooms a letterboxed - Optoma H77 | User Manual - Page 27
the "Replacing the lamp" section. 4 Ensure that you have removed the lens cap and that the projector is turned on. 4 Ensure that the "Hide" feature is not enabled. Problem: Partial, scrolling, or incorrectly displayed images. 4 Press "Re-Sync" on the remote control or control panel. 4 If using a PC - Optoma H77 | User Manual - Page 28
projector. Problem: The screen of the Notebook or PowerBook computer is not displaying your presentation. 4 If using a Notebook PC: Some Notebook PCs may information. 4 Change the monitor color setting on your computer. Problem: Image has a vertical flickering bar 4 Use "Frequency" to make an - Optoma H77 | User Manual - Page 29
Temp LED (Orange) Off Off Off Off On Flashing Flashing On Off Lamp LED (Red) Off Off Off On Off Off Off On On Problem: Message Reminders 4 "Lamp may fail soon! Replacement suggested!" will be shown about 10 seconds when lamp life is going to deplete. 4 "Over Temperature" will be shown momentarily - Optoma H77 | User Manual - Page 30
Replacing the Lamp The projector displays a warning message "Lamp may fail soon ! Replacement Suggested !" When you see this message, please contact your local reseller or service center. Make sure the projector has cooled down for at least 30 minutes before changing the lamp. Warning: Lamp - Optoma H77 | User Manual - Page 31
English Appendices Ceiling Mount Installation 1. To prevent damaging your projector, please use the ceiling mount package for installation. 2. If you wish to use a third party ceiling mount kit please ensure the screws used to attached a mount to the projector met the following specifications:
-
 1
1 -
 2
2 -
 3
3 -
 4
4 -
 5
5 -
 6
6 -
 7
7 -
8
-
9
-
10
-
11
-
12
-
13
-
14
-
15
-
16
-
17
-
18
-
19
-
20
-
21
-
22
-
23
-
24
-
25
-
26
-
27
-
28
-
29
-
30
-
31
 |
 |

E
nglish
1
Usage Notice
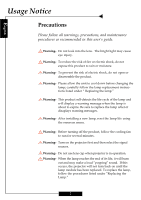
Precautions
......................................................................................................................
2
Introduction
Product Features
.............................................................................................................
4
Package Overview
...........................................................................................................
5
Product Overview
...........................................................................................................
6
Main Unit
..................................................................................................................
6
Control Panel
.............................................................................................................
7
Connection Ports
.......................................................................................................
8
Wireless Remote Control
...........................................................................................
9
Installation
Connecting the Projector
................................................................................................
10
Powering On/Off the Projector
.......................................................................................
11
Powering On the Projector
.......................................................................................
11
Powering Off the Projector
........................................................................................
12
Adjusting the Projected Image
........................................................................................
13
Adjusting the Projector’s Height
..............................................................................
13
Adjusting the Projector’s Zoom/Focus
.....................................................................
14
User Controls
Control Panel & Remote Control
....................................................................................
15
Onscreen Display Menus
..............................................................................................
18
How to Operate
.........................................................................................................
18
Menu Tree
.................................................................................................................
19
Picture
.......................................................................................................................
20
Image
.........................................................................................................................
22
System
.......................................................................................................................
24
Display
.......................................................................................................................
25
Appendices
Troubleshooting
...............................................................................................................
27
Replacing the Lamp
.........................................................................................................
30
Ceiling Mount Installation
..............................................................................................
31
Table of Contents