Optoma HD200X User's Manual
Optoma HD200X Manual
 |
View all Optoma HD200X manuals
Add to My Manuals
Save this manual to your list of manuals |
Optoma HD200X manual content summary:
- Optoma HD200X | User's Manual - Page 1
...26 SYSTEM ...30 SETUP ...34 Appendices 38 Troubleshooting 38 Image Problems 38 Other Problems 39 Projector Status Indication 40 Remote Control Problems 41 Replacing the Lamp 42 Compatibility Modes 44 Ceiling Mount Installation 46 Optoma Global Offices 47 Regulation & Safety notices 49 - Optoma HD200X | User's Manual - Page 2
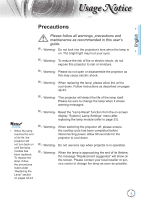
to alert the user to the presence of important operating and maintenance (servicing) instructions in the literature projector or something is loose inside. Do not attempt to service the unit yourself. Opening or removing covers may expose you to dangerous voltages or other hazards. Please call Optoma - Optoma HD200X | User's Manual - Page 3
- Please do not open or disassemble the projector as this may cause electric shock. ▀■ Warning- When replacing the lamp, please allow the unit to cool down. Follow instructions as described on pages 42-43. ▀■ Warning- This projector will detect the life of the lamp itself. Please be sure to change - Optoma HD200X | User's Manual - Page 4
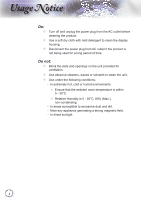
sage otice Do: Turn off and unplug the power plug from the AC outlet before cleaning the product. Use a soft dry cloth with mild detergent to clean the display housing. Disconnect the power plug from AC outlet if the product is not being used for a long period of time. Do not: Block the - Optoma HD200X | User's Manual - Page 5
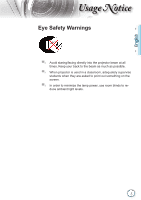
staring/facing directly into the projector beam at all times. Keep your back to the beam as much as possible. ▀■ When projector is used in a classroom, adequately supervise students when they are asked to point out something on the screen. ▀■ In order to minimize the lamp power, use room blinds to - Optoma HD200X | User's Manual - Page 6
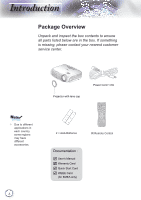
your nearest customer service center. POWER SOURCE Noottee Due to different applications in each country, some regions may have different accessories. 6 Projector with lens cap Power Cord 1.8m Lamp 2 × AAA Batteries IR Remote Control Documentation : User's Manual Warranty Card Quick - Optoma HD200X | User's Manual - Page 7
2 3 51 English POWER SOURCE 5 4 6 9 SOURCE SERVICE VGA/SCART/YPbPr Y VIDEO Pb Pr HDMI 1 HDMI 2 POWER 12V OUT 8 7 6 1. Control Panel 2. Zoom Ring 3. Focus Ring 4. Zoom Lens 5. IR Receivers 6. Tilt-Adjustment Feet 7. Security Bar 8. Input / Output Connections 9. Power Socket 7 - Optoma HD200X | User's Manual - Page 8
ntroduction Control Panel 1 2 10 34 5 SOURCE POWER 6 789 1. Source 2. Menu 3. Enter 4. Re-Sync 5. Power 6. Four Directional Select Keys 7. On/Standby LED 8. Lamp Fail LED 9. Temp LED 10. IR Receiver 8 - Optoma HD200X | User's Manual - Page 9
YPbPr Y VIDEO Pb Pr HDMI 1 HDMI 2 12V OUT English 8 9 10 1. Service Connector 2. VGA/SCART Connector (PC Analog Signal/Component Video Input/HDTV/SCART) 3. Component Video Input Connectors 4. Composite Video Input Connector Noottee 5. HDMI 1 Connector 6. HDMI 2 Connector "12V OUT - Optoma HD200X | User's Manual - Page 10
ntroduction Remote Control 1 21 22 1. Power On 2. Power Off Lamp 2 3. 16:9 4. Native 20 3 5. Contrast 6. Overscan 19 4 7. Enter 8. Re-Sync 18 5 9. D-Sub Source 10. Video Source 17 6 11. HDMI 2 Source 12. YPbPr Source 16 7 13. HDMI 1 Source 14. Menu 15 8 15. Source 16 - Optoma HD200X | User's Manual - Page 11
is turned on and continues to stay on till you turn off the projector. 1 MOLEX + 12V Output 23 4 SERVICE VGA/SCART/YPbPr Y VIDEO Pb Pr HDMI 1 HDMI 2 12V OUT E62405SP R Noottee Due to the difference in applications for each country, some regions may have different accessories - Optoma HD200X | User's Manual - Page 12
is turned on and continues to stay on till you turn off the projector. R E62405SP 3 5 2 6 + 12V Output 4 SERVICE VGA/SCART/YPbPr Y VIDEO Pb Pr HDMI 1 HDMI 2 12V OUT 5 7 Noottee Due to the difference in applications for each country, some regions may have different accessories - Optoma HD200X | User's Manual - Page 13
been set to "Off". If you connect multiple sources at the same time, press the "SOURCE" button on the control panel or direct source keys on the remote control to switch between inputs. SOURCE 2 Power POWER POWER SOURCE Noottee Turn on the projector first and then select the signal sources - Optoma HD200X | User's Manual - Page 14
Indicator these symptoms. See pages 47-48 for more information. When the "LAMP" indicator lights Red ("ON/STANDBY" indicator flashes Amber), the projector will automatically shut down. Please contact your nearest service center for assistance. When the "TEMP" indicator lights Red ("ON/STANDBY - Optoma HD200X | User's Manual - Page 15
for adjusting the image height. 1. Locate the adjustable foot you wish to modify on the underside of the projector. 2. Rotate the adjustable ring counter clockwise to raise the projector or clockwise to lower it. Repeat with the remaining feet as needed. Tilt-Adjustment Feet Tilt-Adjustment Ring 15 - Optoma HD200X | User's Manual - Page 16
the image is clear. The projector will focus at distances from 4.89 to 32.68 feet 6.64 6.64 3.74 21.79 12.26 9.96 This table is for user's reference only. 1.51 - 4.97 1.79 4.89 5.88 1.99 5.45 16.34 19.61 7.97 21.79 26.15 - 32.68 - Offset (Hd) (m) (feet) 0.08 0.25 0.09 0.29 0.10 0.33 0.12 - Optoma HD200X | User's Manual - Page 17
Press "SOURCE" to select an input signal. Menu Press "Menu" to launch the on-screen display (OSD) menu. To exit OSD, Press "Menu" again. Four Directional Select Keys Lamp LED Use to select items or make adjustments to your selection. Indicate the projector's lamp status. Temp LED Indicate - Optoma HD200X | User's Manual - Page 18
Using the Remote Control Power On Refer to the "Power On" section on page 13. Power Off Lamp Mode Mode 4:3 Refer to the "Power On/Off the Projector" section on page 14. Increase the brightness of the image. (refer to page 33) Select the display mode from Cinema, Bright, Photo, Reference and User - Optoma HD200X | User's Manual - Page 19
the Remote Control Enter Confirm your item selection. Lamp Source Press "Source" to select an input signal. Re-sync Menu HDMI 1 HDMI 2 D-Sub YPbPr Video Automatically synchronizes the projector to the input source. Display or exit the on-screen display menus for projector. Press "HDMI 1" to - Optoma HD200X | User's Manual - Page 20
you to make image adjustments and change a variety of settings. The projector will automatically detect the source. How to operate 1. To open the OSD menu, press "Menu" on the Remote Control or Projector Keypad. 2 When OSD is displayed, use keys to select any item in the main menu. While making - Optoma HD200X | User's Manual - Page 21
Menu Tree ser ontrols # English Noottee (#) "B/W Extension" can't support when source is HDMI, analog or digital RGB via DVI port. * RGB Video (*) "Signal" is not supported when the source is HDMI or DVI-D. (**) "IRE" is only supported on NTSC signal. 21 - Optoma HD200X | User's Manual - Page 22
input. Photo: Optimized for displaying photographic images. Reference: This mode is intended to reproduce, as close as possible, the image the way the movie director intended. Color, color temperature, brightness, contrast and gamma settings are all configured to standard reference levels. User - Optoma HD200X | User's Manual - Page 23
Adjust a video image from black and white to fully saturated color. Press the to decrease the color saturation in the image. Press the to increase the color saturation in the image. Tint Adjust the color balance of red and green. Press the Press the to increase the amount of green in the - Optoma HD200X | User's Manual - Page 24
user to switch among the pre-sets to obtain different image effects. (Off/On) Color Temp If set to cold temperature, the image looks more blue. (cold image) If set to warm temperature, the image looks more red. (warm image) RGB Gain/Bias Press into the next menu as below and then use or to select - Optoma HD200X | User's Manual - Page 25
ontrols IMAGE | Advanced Gamma This allows you to set up gamma curve type. After the initial setup or TV source. Graphics: for image source. Standard: for standardized setting. Curve: The type of gamma curve. Offset: The input offset of gamma can range the start level of base point in gamma - Optoma HD200X | User's Manual - Page 26
is for 16x9 input sources, like HDTV and DVD enhanced for Widescreen TV. Native: This format displays the original image without any scaling. LBX: This format is for non-16x9, letterbox source and for users who use external anamorphic lens to display 2.35:1 aspect ratio using full resolution. 26 - Optoma HD200X | User's Manual - Page 27
content (include Anamorphic DVD and HDTV film source) that support anamorphic wide is enhanced for 16x9 Display in a wide 2.35:1 image. In this case, there are no black bars. Lamp power and vertical resolution are fully utilized. Input Signal Display area Picture area Display on Screen 4 : 3 format - Optoma HD200X | User's Manual - Page 28
ser ontrols DISPLAY Noottee Each I/O has different setting of "Overscan". "Overscan" and "Edge Mask" can't work at same time. Overscan Overscan function removes the noise in a video image. Overscan the image to remove video encoding noise on the edge of video - Optoma HD200X | User's Manual - Page 29
: Only formats 4:3 and 16:9 can be selected. Auto: To solve the differences of the film formats, the option can keep the format in the same ratio. How to use "SuperWide" 1. Obtain a 2.0:1 aspect ratio screen 2. Switch SuperWide ON 3. Align the projector image correctly on the screen 4. Enjoy movies - Optoma HD200X | User's Manual - Page 30
Front-Projection This is the default selection. The image is projected straight on the screen. Rear-Desktop When selected, the image will appear reversed. Front-Ceiling When selected, the image will turn upside down. Rear-Ceiling When selected, the image will appear reversed in - Optoma HD200X | User's Manual - Page 31
English ser ontrols SYSTEM Image AI Image AI improves the contrast of the picture by optimizing the brightness of the lamp according to the picture content. On: The dynamic image performance manager is active in making sure your greatest pleasure from seeing a movie dynamically with the - Optoma HD200X | User's Manual - Page 32
supplier port. "12V OUT" is activated when the projector is turned on and continues to stay on till you turn off the projector. Background Color Use this feature to display a "Dark Blue", "Black", or "Gray" screen when no signal is available. 12V Trigger 12V trigger provides a standard trigger - Optoma HD200X | User's Manual - Page 33
ser ontrols SYSTEM | Lamp Settings Lamp Hour Display the cumulative lamp operating time. Lamp Reminder Choose this function to show or to hide the warning message when the changing lamp message is displayed. The message will appear up 30 hours before suggested replacement of lamp. Bright Mode Choose - Optoma HD200X | User's Manual - Page 34
the or key to select your preferred language. Press "Select (Enter)" to finalize the selection. Input Source Use this option to enable / disable input sources. Press to enter the sub menu and select which sources you require. Press "Enter" to finalize the selection. The projector will not search for - Optoma HD200X | User's Manual - Page 35
proper high altitude cooling of the projector. Auto Power Off (min) Set the interval of power-off of the system, if there is no signal input. Color Space Select an appropriate color matrix type from RGB or YCbCr. Reset Return the adjustments and settings to factory default values. Current : Return - Optoma HD200X | User's Manual - Page 36
ser ontrols SETUP | Signal - RGB Source Noottee "Signal" is not supported when the source is HDMI or DVI-D. Signal Phase: Change the display data frequency to match the frequency of your computer's graphic card. When you experience a vertical flickering bar, use this function to - Optoma HD200X | User's Manual - Page 37
ser ontrols SETUP | Signal - Video Source Noottee "Signal" is not supported when the source is HDMI or DVI-D. Noottee "IRE" is only supported on NTSC signal. Signal White Level: Allow user adjust White Level when inputting S-Video or Video/CVBS signals. Black Level: Allow user adjust Black - Optoma HD200X | User's Manual - Page 38
ppendices Troubleshooting If you experience a problem with your projector, please refer to the following information. If a problem persists, please contact your local reseller or service center. Image Problems No image appears on-screen Ensure all the cables and power connections are correctly and - Optoma HD200X | User's Manual - Page 39
or makes a popping sound When the lamp reaches its end of life, it will burn out and may make a loud popping sound. If this happens, the projector will not turn on until the lamp module has been replaced. To replace the lamp, follow the procedures in the "Replacing the Lamp" section on pages 42-43 - Optoma HD200X | User's Manual - Page 40
ppendices Noottee Steady light No light Projector Status Indication LED lighting message Message Standby State (Input power cord) Power on (Warming) ON/STANDBY LED (Green/Amber) Amber Flashing Green Temp-LED (Red) Lamp-LED (Red) Lamp lighting Green Power off (Cooling) Error (Over Temp - Optoma HD200X | User's Manual - Page 41
off automatically. Over temperature: The projector will switch off automatically. Replacing the lamp: Lamp is approaching the end of it's rated life. Replcement suggested. Remote Control Problems If the remote control does not work Check the operating angle of the remote control is within ±15 - Optoma HD200X | User's Manual - Page 42
or service center to change the lamp as soon as possible. Make sure the projector has been cooled down for at least 30 minutes before changing the lamp. Warning: If ceiling mounted, please use caution when opening the lamp access panel. It is recommended to wear safety glasses if changing the bulb - Optoma HD200X | User's Manual - Page 43
slowly and carefully. 4 To replace the lamp module, reverse the previous steps. 8. Turn on the projector and use "Lamp Reset" after the lamp module is replaced. Lamp Reset: (i) Press "Menu" (ii) Select "SYSTEM" (iii) Select "Lamp Settings" (iv) Select "Lamp Reset" (v) Select "Yes". 43 - Optoma HD200X | User's Manual - Page 44
ppendices Compatibility Modes Computer Compatibility Noottee For widescreen resolution (WXGA), the compatibility support is dependent on Notebook/PC models. Mode SVGA XGA WXGA HD SXGA+ UXGA Power Book G4 SVGA XGA WXGA HD SXGA+ UXGA iMAC XGA Resolution 800 x 600 800 x 600 800 x 600 800 x 600 - Optoma HD200X | User's Manual - Page 45
ppendices Video Compatibility NTSC M (3.58MHz), 4.43 MHz PAL B, D, G, H, I, M, N SECAM B, D, G, K, K1, L SDTV/HDTV 480i/p, 576i/p, 720p@50Hz/60Hz, 1080i/p@50Hz/60Hz English 45 - Optoma HD200X | User's Manual - Page 46
will invalidate the warranty. 1. To prevent damage to your projector, please use the Optoma ceiling mount. 2. If you wish to use a third party ceiling mount kit, please ensure the screws used to attach a mount to the projector meet the following specifications: Screw type: M3*3 Maximum screw - Optoma HD200X | User's Manual - Page 47
Global Offices For service or support please contact your local office. USA 715 Sycamore Drive Milpitas, CA 95035, USA www.optomausa.com Tel : 408-383-3700 Fax: 408-383-3702 Service : [email protected] Canada 5630 Kennedy Road, Mississauga, Tel : 905-361-2582 ON, L4Z 2A9, Canada Fax: 905-361 - Optoma HD200X | User's Manual - Page 48
Wan, Kowloon, Hong Kong China 5F, No. 1205, Kaixuan Rd., Changning District Shanghai, 200052, China Tel : +886-2-2218-2360 Fax: +886-2-2218-2313 Service : [email protected] asia.optoma.com Tel : +852-2396-8968 Fax: +852-2370-1222 www.optoma.com.hk Tel : +86-21-62947376 Fax: +86-21-62947375 www - Optoma HD200X | User's Manual - Page 49
the general notices of your projector. FCC notice This device has been tested and found to comply with and used in accordance with the instructions, may cause harmful interference to radio determined by turning the device off and on, the user is encouraged to try to correct the interference by one - Optoma HD200X | User's Manual - Page 50
undesired operation. Notice: Canadian users This Class B digital Canada. Declaration of Conformity for EU countries • EMC Directive 2004/108/EC (including amendments) • Low Voltage Directive 2006/95/EC • R & TTE Directive 1999/5/EC (if product has RF function) Disposal instructions Do not throw
-
 1
1 -
 2
2 -
 3
3 -
 4
4 -
 5
5 -
 6
6 -
 7
7 -
8
-
9
-
10
-
11
-
12
-
13
-
14
-
15
-
16
-
17
-
18
-
19
-
20
-
21
-
22
-
23
-
24
-
25
-
26
-
27
-
28
-
29
-
30
-
31
-
32
-
33
-
34
-
35
-
36
-
37
-
38
-
39
-
40
-
41
-
42
-
43
-
44
-
45
-
46
-
47
-
48
-
49
-
50
 |
 |

1
English
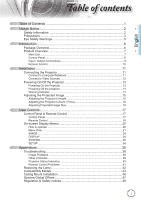
Table of Contents
...................................................................................
1
Usage Notice
..........................................................................................
2
Safety Information
.........................................................................................
2
Precautions
....................................................................................................
3
Eye Safety Warnings
.....................................................................................
5
Introduction
.............................................................................................
6
Package Overview
.........................................................................................
6
Product Overview
..........................................................................................
7
Main Unit
................................................................................................................
7
Control Panel
.........................................................................................................
8
Input / Output Connections
....................................................................................
9
Remote Control
....................................................................................................
10
Installation
............................................................................................
11
Connecting the Projector
.............................................................................
11
Connect to Computer/Notebook
..........................................................................
11
Connect to Video Sources
...................................................................................
12
Powering On/Off the Projector
.....................................................................
13
Powering On the Projector
...................................................................................
13
Powering Off the projector
...................................................................................
14
Warning Indicator
.................................................................................................
14
Adjusting the Projected Image
.....................................................................
15
Adjusting the Projector’s Height
...........................................................................
15
Adjusting the Projector’s Zoom / Focus
...............................................................
16
Adjusting Projected Image Size
...........................................................................
16
User Controls
.......................................................................................
17
Control Panel & Remote Control
.................................................................
17
Control Panel
.......................................................................................................
17
Remote Control
....................................................................................................
18
On-screen Display Menus
...........................................................................
20
How to operate
....................................................................................................
20
Menu Tree
............................................................................................................
21
IMAGE
.................................................................................................................
24
DISPLAY
..............................................................................................................
26
SYSTEM
..............................................................................................................
30
SETUP
.................................................................................................................
34
Appendices
...........................................................................................
38
Troubleshooting
...........................................................................................
38
Image Problems
..................................................................................................
38
Other Problems
...................................................................................................
39
Projector Status Indication
..................................................................................
40
Remote Control Problems
...................................................................................
41
Replacing the Lamp
.....................................................................................
42
Compatibility Modes
....................................................................................
44
Ceiling Mount Installation
............................................................................
46
Optoma Global Offices
................................................................................
47
Regulation & Safety notices
........................................................................
49
Table of contents