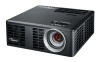
Optoma ML750 User's Manual
Optoma ML750 Manual
 |
View all Optoma ML750 manuals
Add to My Manuals
Save this manual to your list of manuals |
Optoma ML750 manual content summary:
- Optoma ML750 | User's Manual - Page 1
® User Manual FOCUS - Optoma ML750 | User's Manual - Page 2
the Projected Image 20 Raising the Projector Height 20 Lowering the Projector Height 20 Adjusting the Projector Focus 20 Adjusting Projection Image Size 21 User Controls...23 Using the On-Screen Display 23 Main Menu...23 Language...23 Source...24 Display Mode...25 Audio...25 Auto Adjust...26 - Optoma ML750 | User's Manual - Page 3
Mode 29 Power...31 Multi-Media Introduction...32 Photo Format...32 Video Format...32 Audio Format...33 Office Viewer Format 33 How to set-up File Type for 41 Appendices...42 Troubleshooting...42 Guiding Signals...44 Compatibility Modes (Analog/Digital 45 Tripod Mount the Projector 46 English 2 - Optoma ML750 | User's Manual - Page 4
to alert the user to the presence of important operating and maintenance (servicing) instructions in the literature projector or something is loose inside. Do not attempt to service the unit yourself. Opening or removing covers may expose you to dangerous voltages or other hazards. Please call Optoma - Optoma ML750 | User's Manual - Page 5
this product in adverse conditions will void the product warranty. Safety Information Please read, understand, and follow all safety information contained in these instructions prior to the use of this projector. Retain these instructions for future reference. Explanation of Signal Word Consequences - Optoma ML750 | User's Manual - Page 6
: yy Do not modify this product in any way. yy Do not attempt to service this projector. yy There are no user-serviceable parts. Service to be performed only by a Optoma authorized service provider using Optoma approved system components. yy Do not use the wall power supply in a wet environment - Optoma ML750 | User's Manual - Page 7
To reduce the risks associated with LED bright light: yy Do not stare directly into the projector lens. To reduce the risks associated NOTE: Do not expose the projector to direct sunlight in a closed space such as a vehicle. SAVE THESE INSTRUCTIONS Safety Labels MnO2-LiCECLLR2302V5OL Remote Control - Optoma ML750 | User's Manual - Page 8
Optoma and the Optoma are property of their respective companies. Video and Audio Decoder Notices MPEG-4 NOTICE THIS PRODUCT IS LICENSED IS GRANTED OR SHALL BE IMPLIED FOR ANY OTHER USE. ADDITIONAL INFORMATION INCLUDING THAT RELATING TO PROMOTIONAL, INTERNAL AND COMMERCIAL USES AND LICENSING MAY BE - Optoma ML750 | User's Manual - Page 9
conforme à la norme NMB-003 du Canada. INSTRUCTIONS TO USERS: This equipment complies with the requirements of FCC equipment provided that the following conditions are met. If the cables include a EMI ferrite core, attach the ferrite core end of the cable to the projector. Use the cables which are - Optoma ML750 | User's Manual - Page 10
CE Statement ElectroMagnectic Compatibility Statement: Meets 2004/108/EC Directive Low Voltage Directive: Meets 2006-95-EC Directive. WEEE Statement The following information is only for EU-members States: The mark shown to the right is in compliance with Waste Electrical and Electronic Equipment - Optoma ML750 | User's Manual - Page 11
shown below. Ensure that you have all the items, and contact your local reseller or service center if anything is missing. FOCUS Projector Power cable AC adapter Universal 24-pin to VGA/Audio cable Quick start card and documentation Carrying case Remote control NOTE: The remote control is - Optoma ML750 | User's Manual - Page 12
About Your Projector Main Unit FOCUS 1 2 3 4 5 FOCUS # Description 1 Control panel 2 Focus ring 3 Lens 4 Input / Output connections 5 Tilt adjusting wheel 11 English - Optoma ML750 | User's Manual - Page 13
Input / Output Connections 1 2 6 5 4 3 # Description 1 MicroSD card slot 2 USB Type A connector 3 DC input connector 4 HDMI/MHL connector 5 Universal I/O connector 6 Security cable slot English 12 - Optoma ML750 | User's Manual - Page 14
or off. Press to adjust image distortion caused by tilting the projector (+/-40 degrees). NOTE: This function is not supported on Multi-Media function. 3 Auto adjust 4 Error LED 5 Temp LED 6 Menu 7 Source Press to synchronize the projector to the input source. NOTE: Auto Adjust does not operate - Optoma ML750 | User's Manual - Page 15
file. 8 Volume down Press to decrease the volume. 9 Rewind Press to search backward. 10 LED mode Allows you to select the display mode. 11 Blank screen Press to hide/unhide the distortion caused by tilting the projector (+/-40 degrees). 15 Fast Forward Press to search forward. English 14 - Optoma ML750 | User's Manual - Page 16
TS NOTE: When you use the remote control for the first time, there is a plastic sheet between the battery and its contact. Remove the sheet before use. 3. Replace the battery holder. FOCUS Operating Range with Remote Control TS CR2302V5OL M CR2302V5OL TS ±20° 7 m/22.97 feet NOTE: Actual - Optoma ML750 | User's Manual - Page 17
Installation Connecting to a Computer 1 5 3 4 2 # Description 1 Power cord 2 AC adapter 3 Universal 24-pin to VGA/Audio cable 4 HDMI cable * 5 USB-A to USB-A cable * * NOTE: The accessory is not shipped with your projector. English 16 - Optoma ML750 | User's Manual - Page 18
Connecting to a DVD Player 1 3 2 # Description 1 Power cord 2 AC adapter 3 HDMI cable * * NOTE: The accessory is not shipped with your projector. 17 English - Optoma ML750 | User's Manual - Page 19
Connecting to Multi-Media 1 Smart Phone 4 5 3 2 # Description 1 Power cord 2 AC adapter 3 MicroSD card * 4 USB flash disk * 5 MHL cable * * NOTE: The accessory is not shipped with your projector. English 18 - Optoma ML750 | User's Manual - Page 20
control or control panel to select the desired source. Turning Your Projector Off 1. Press the Power button. Follow the instruction displayed on screen to properly turn NOTE: The "Press Power Button to Turn off Projector" message will appear on the screen. The message disappears after 5 seconds - Optoma ML750 | User's Manual - Page 21
to the desired display angle, and use the front tilt adjustment wheel to fine-tune the display angle. Lowering the Projector Height Lower the projector, and use the front tilt adjustment wheel to fine-tune the display angle. Front tilt adjustment wheel (Angle of tilt: 0 to 6 degrees) Adjusting - Optoma ML750 | User's Manual - Page 22
Adjusting Projection Image Size 80" (203.2 cm) Projector to screen distance 70" (177.8 cm) 60" (152.4 cm) 50" (127.0 cm) 40" (101.6 cm) 30" (76.2 cm) 3.18' (0.97 m) Universal I/O 21 English 7.41' (2.26 m) 6.36' (1.94 m) 5.28' (1.61 m) 4.23' (1.29 m) 8.48' (2.58 m) - Optoma ML750 | User's Manual - Page 23
) 21.26" (54 cm) 26.38" (67 cm) 31.89" (81 cm) 37.01" (94 cm) 42.52" (108 cm) NOTE: This graph is for user reference only. Distance 3.18' (0.97 m) 4.23' (1.29 m) 5.28' (1.61 m) 6.36' (1.94 m) 7.41' (2.26 m) 8.48' (2.58 m) 60" English 22 Distance: 1.94 m FOCUS - Optoma ML750 | User's Manual - Page 24
User Controls Using the On-Screen Display 1. The projector has a multi-language On-Screen Display (OSD) Menu that can be displayed with or without an input source for the OSD. Press and to select different languages and press to change the language. With 3D function Without 3D function 23 English - Optoma ML750 | User's Manual - Page 25
Source The Source menu allows you to select your projector's input source. Auto Source If you select and press available input source. VGA to activate, the Auto option will automatically find the next Press to detect a VGA signal. HDMI Press to detect a HDMI signal. English 24 - Optoma ML750 | User's Manual - Page 26
files from your USB flash disk. MicroSD Allows you to playback the photo, Audio, or Video files from your microSD card. Internal Memory Allows you to playback the photo, Audio, or Video files from internal memory of the projector. Display Mode The Display Mode menu allows you to optimize the display - Optoma ML750 | User's Manual - Page 27
below warning message appears: Reset items include both computer sources and Video source settings. Data Transferring Select and press to action. The below warning message appears: Advanced See "Advanced Menu" on pages 27~31. FW Version Display the current projector's firmware version. English 26 - Optoma ML750 | User's Manual - Page 28
Advanced Menu The Advanced menu allows you to change settings for Display, Image, and Power. Display (In PC Mode) Select and press to activate display settings. The display menu provides the following options: Horizontal Position Press to move the image right and to move the image left. Vertical - Optoma ML750 | User's Manual - Page 29
aspect ratio to adjust how the image appears. Options are: Origin, 16:9 and 4:3. yy Origin: Select Origin to maintain the aspect ratio of the image projector according to the input source. yy 16:9: The input source scales to fit the width of the screen to project a 16:9 screen image. yy 4:3: The - Optoma ML750 | User's Manual - Page 30
use and to display white intensity. NOTE: If you adjust the settings for Brightness, Contrast, Color Temperature, and White Intensity the projector automatically switches to User mode. Image (In Video Mode) Select and press to activate image settings. The image menu provides the following options - Optoma ML750 | User's Manual - Page 31
and use and to display white intensity. NOTE: 1. If you adjust the settings for Brightness, Contrast, Color Temperature, Saturation, Sharpness, Tint, and White Intensity the projector automatically switches to User mode. English 30 - Optoma ML750 | User's Manual - Page 32
reverses the image so that you can project from behind a translucent screen. yy Front Ceiling: The projector turns the image upside down for ceiling-mounted projection. yy Rear Ceiling: The projector reverses and turns the image upside down. You can project from behind a translucent screen with - Optoma ML750 | User's Manual - Page 33
Multi-Media Introduction Multi-media format supported: Photo Format Image Type (Ext Name) Sub Type panel resolution Max Size 2GB 2GB Video Format File Format Video Format Decode Max Max Bit Rate Audio Format Profile res. (bps) MPG,MPEG MPEG1 1920x1080 30fps 30M bps MPEG1 L1-3 AVI, MOV - Optoma ML750 | User's Manual - Page 34
Audio Format Music Type (Ext Name) MP3 WMA ADPCM-WAV PCM-WAV AAC Sample Rate (KHz) 8-48 22-48 8-48 8-48 8-48 Bit Rate (Kbps) 8-320 5-320 32-384 128-1536 8-256 Office Viewer Format File Format Support Version Page/Lines Limitation Size Limitation Adobe PDF PDF 1.0, 1.1, 1.2, 1.3, 1.4 Up to - Optoma ML750 | User's Manual - Page 35
nect USB port for camera since it would be exist compatibility problem. Follow these steps to playback the Photo, Video, Music, or Office Viewer files on your projector: 1. Connect the power cable with AC adapter and turn on the projector by pressing the Power button. 2. Plug in a USB flash disk to - Optoma ML750 | User's Manual - Page 36
to playback the Photo, Video, Music, or Office Viewer files on your projector: 1. Connect the power cable with AC adapter and turn on the projector by pressing the Power button. 2. Plug in a MicroSD card to your projector. The image input source will be automatically switched to microSD screen when - Optoma ML750 | User's Manual - Page 37
with Internal Memory Follow these steps to playback the Photo, Video, Music, or Office Viewer files on your projector: 1. Connect the power cable with AC adapter and turn on the projector by pressing the Power button. 2. Access the Source menu, select the Internal Memory option and press the button - Optoma ML750 | User's Manual - Page 38
Multi-Media Main Menu Multi-Media SETUP for USB, MicroSD, and Internal Memory The multi-media setup menu allows you to change settings for Photo, Video, Music, and Office Viewer. NOTE: Multi-media setup menu and set are the same for the USB, MicroSD, and Internal Memory. 37 English - Optoma ML750 | User's Manual - Page 39
want. Options are: Random, Rect., Off, Snake, Partition, Erase, Blinds, Lines, GridCross, Cross, and Spiral. NOTE: Slideshow Duration, Slideshow Repeat, and Slideshow Effect function only support Slideshow mode. English 38 - Optoma ML750 | User's Manual - Page 40
Video Setup Select and press following options: to activate video setup menu. The video setup menu provides the Display Ratio Press or to select the display ratio of the Video. yy Auto: Keep original aspect ratio. yy Full: Full screen. Play Mode Press or to select the video play mode. Options are: - Optoma ML750 | User's Manual - Page 41
Music Setup Select and press following options: to activate music setup menu. The music setup menu provides the Play Mode Press or to select the video play mode. Options are: Once, Repeat Once, Repeat, and Random. Show Spectrum Select On to show the spectrum plot while music is playing. Auto Play - Optoma ML750 | User's Manual - Page 42
Information Display the current projector's firmware version and date. 41 English - Optoma ML750 | User's Manual - Page 43
If you experience problems with your projector, see the following troubleshooting tips. If the problem persists, contact your local reseller or service center. Problem Possible Solution No image appears on the yy Ensure that the projector is turned on. screen yy Ensure that you have - Optoma ML750 | User's Manual - Page 44
projector mode by pressing and holding the Power button for 10 seconds. Please wait for about 5 minutes and try to power up again. If the problem persists, contact Optoma. The remote control is not operating smoothly or works only within a limited range yy The battery may be low. Check if the LED - Optoma ML750 | User's Manual - Page 45
Guiding Signals Projector Status Standby mode Power on Projector overheated Fan breakdown LED failure Description Power (Blue/Amber) Projector in Standby mode. Ready to Amber power on. Flashing Projector in Normal mode, ready to display an image. BLUE Air vents might be blocked or ambient - Optoma ML750 | User's Manual - Page 46
910 74.934 74.984 Hsync Frequency (KHz) 31.469 31.469 31.469 31.469 37.500 43.269 37.879 46.875 53.674 48.363 60.023 68.677 44.772 63. 28.322 25.175 31.500 36.000 40.000 49.500 56.250 65.000 78.750 94.500 74.500 108.000 135.000 79.500 85.500 146.250 106.500 148.500 83.500 74.500 27.000 27.000 74. - Optoma ML750 | User's Manual - Page 47
52.0 Tripod Mount the Projector Screw a standard tripod into the screw hole on the projector. NOTE: 1. The tripod and ceiling mount are optional accessories. 2. Please note that damage resulting from incorrect installation will void the warranty. Unit: mm 54.0 Insert Nut 1/4" - 20 UNCxL7.5mm (Screw
-
 1
1 -
 2
2 -
 3
3 -
 4
4 -
 5
5 -
 6
6 -
 7
7 -
8
-
9
-
10
-
11
-
12
-
13
-
14
-
15
-
16
-
17
-
18
-
19
-
20
-
21
-
22
-
23
-
24
-
25
-
26
-
27
-
28
-
29
-
30
-
31
-
32
-
33
-
34
-
35
-
36
-
37
-
38
-
39
-
40
-
41
-
42
-
43
-
44
-
45
-
46
-
47
 |
 |

®
FOCUS
User Manual