Optoma Pico PK102 Video Encoder Manual
Optoma Pico PK102 Manual
 |
View all Optoma Pico PK102 manuals
Add to My Manuals
Save this manual to your list of manuals |
Optoma Pico PK102 manual content summary:
- Optoma Pico PK102 | Video Encoder Manual - Page 1
Encoder converts almost all knowing formats of video to MPEG-4/PCM AVI format video for Optoma PK102 to play. It supports video formats that can be played in Windows OS. Users should install decoders for unsupported video formats which cannot be played in Windows OS. Convert Video After installation
-
 1
1
 |
 |

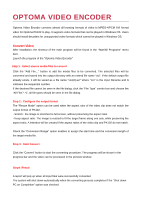
OPTOMA VIDEO ENCODER
Optoma Video Encoder converts almost all knowing formats of video to MPEG-4/PCM AVI format
video for Optoma PK102 to play. It supports video formats that can be played in Windows OS. Users
should install decoders for unsupported video formats which cannot be played in Windows OS.
Convert Video
After installation, the shortcut of the main program will be found in the “Start/All Programs” menu
item.
Launch the program of the “Optoma Video Encoder”
Step 1 : Select source media files to convert
Click the “Add File…” button to add the media files to be converted. The selected files will be
converted and saved into the output directory with an extend file name “avi”. If the default output file
already exists, it will be saved as a file name “xxx(
n
).avi” where “xxx” is the input filename and
n
indicates the sequential number.
If the destined file cannot be seen in the file dialog, click the “File Type” combo box and choose the
“All File( *.*)”, all file types should be seen in the file dialog.
Step 2 : Configure the output format
The “Resize Mode” option can be used when the aspect ratio of the video clip does not match the
output format of PK102.
- Stretch : the image is stretched to full screen, without preserving the aspect ratio
- Keep aspect ratio: The image is resized to fit the target frame along one axis, while preserving the
aspect ratio. A letterbox will be created if the aspect ratios of the video clip and PK102 do not match.
Check the “Conversion Range” option enables to assign the start time and the conversion length of
the target media file.
Step 3 : Start Convert
Click the “Convert” button to start the converting procedure. The progress will be shown in the
progress bar and the video can be previewed in the preview window.
Step4: Result
A report will pop up when all input files were successfully converted.
The system will shut down automatically when the converting process completes if the “Shut down
PC on Completion” option was checked.