Optoma TH1060P User's Manual - Page 36
Signal Power On, Black Level for HDMI: Allows user to adjust the Black Level
 |
View all Optoma TH1060P manuals
Add to My Manuals
Save this manual to your list of manuals |
Page 36 highlights
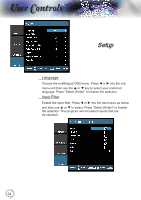
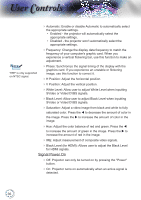
User Controls Automatic: Enable or disable Automatic to automatically select the appropriate settings. Enabled - the projector will automatically select the appropriate settings. Disabled - the projector won't automatically select the appropriate settings. Noottee "IRE" is only supported on NTSC signal. Frequency: Change the display data frequency to match the frequency of your computer's graphic card. When you experience a vertical flickering bar, use this function to make an adjustment. Phase: Synchronize the signal timing of the display with the graphics card. If you experience an unstable or flickering image, use this function to correct it. H Position: Adjust the horizontal position. V Position: Adjust the vertical position. White Level: Allow user to adjust White Level when inputting SVideo or Video/CVBS signals. Black Level: Allow user to adjust Black Level when inputting SVideo or Video/CVBS signals. Saturation: Adjust a video image from black and white to fully saturated color. Press the t to decrease the amount of color in the image. Press the u to increase the amount of color in the image. Hue: Adjust the color balance of red and green. Press the t to increase the amount of green in the image. Press the u to increase the amount of red in the image. IRE: Adjust measurement of composite video signals. Black Level (for HDMI): Allows user to adjust the Black Level for HDMI signals. Signal Power On Off: Projector can only be turned on by pressing the "Power" button. On: Projector turns on automatically when an active signal is detected. 36
-
 1
1 -
2
-
3
-
4
-
5
-
6
-
7
-
8
-
9
-
10
-
11
-
12
-
13
-
14
-
15
-
16
-
17
-
18
-
19
-
20
-
21
-
22
-
23
-
24
-
25
-
26
-
27
-
28
-
29
-
30
-
 31
31 -
 32
32 -
 33
33 -
 34
34 -
 35
35 -
 36
36 -
 37
37 -
 38
38 -
 39
39 -
 40
40 -
 41
41 -
42
-
43
-
44
-
45
-
46
-
47
-
48
-
49
-
50
-
51
-
52
-
53
-
54
-
55
-
56
-
57
 |
 |
