Palm 3C80501U Handbook
Palm 3C80501U - Vllx - OS 3.5 20 MHz Manual
 |
View all Palm 3C80501U manuals
Add to My Manuals
Save this manual to your list of manuals |
Palm 3C80501U manual content summary:
- Palm 3C80501U | Handbook - Page 1
Handbook for the Palm VII™ Handheld Palm.Net Discontinued: The Palm.Net service is discontinued as of August 31, 2004. Any information in this manual pertaining to Palm.Net, PQAs (web clipping applications), MyPalm and the WAP Browser is not applicable after that date. For wireless email and web - Palm 3C80501U | Handbook - Page 2
claims by third parties which may arise through the use of this software. Palm, Inc. and its subsidiaries assume no responsibility for any damage or loss on other media to protect against data loss. Important: Please read the End User Software License Agreement included with this product before - Palm 3C80501U | Handbook - Page 3
18 Opening applications 19 Using menus 22 Four ways to enter data 24 Customizing your handheld 28 Chapter 2: Entering Data in Your Palm VII™ Handheld Using Graffiti writing to enter data 31 Writing Graffiti characters 31 Graffiti tips 33 The Graffiti alphabet 34 Writing capital letters - Palm 3C80501U | Handbook - Page 4
Choosing preferences 45 Installing and removing applications 46 Installing add-on applications 46 Installing games 48 Removing applications 49 Removing Palm Desktop software 50 Security 50 Assigning a password 50 Changing or deleting a password 51 Locking your handheld 52 Recovering from - Palm 3C80501U | Handbook - Page 5
Internet messaging: the iMessenger application .......124 The Palm.Net wireless communication service 124 Improving signal strength 127 Using web application 138 Checking for and viewing messages 139 Opening and reading messages 140 Creating messages 145 Rerouting replies to your messages - Palm 3C80501U | Handbook - Page 6
, date, week start, and numbers formats 214 General preferences 214 Auto-off delay 214 System, alarm, and game sounds 215 Page vi Handbook for the Palm VII™ Handheld - Palm 3C80501U | Handbook - Page 7
applications 230 Deleting a service template 230 Network preferences menu commands 230 TCP/IP troubleshooting 231 Owner preferences 232 problems 248 Operating problems 249 Tapping and writing problems 250 Wireless problems 251 Application problems 252 HotSync problems 253 Beaming problems - Palm 3C80501U | Handbook - Page 8
Password problems 260 Technical support and customer care 261 Appendix C: Creating a Custom Expense return and line feed 275 Literal characters 276 Palm.Net™ Service Agreement and Other Product Information Palm.Net service agreement 277 Product regulatory information 285 FCC Statement 285 - Palm 3C80501U | Handbook - Page 9
quickly on your handheld. It describes all you need to know about how to use handhelds in the Palm VII product series and the applications that come with them. It walks you through: s Locating all , and also as a source of information if you have problems operating it. About This Book Page 1 - Palm 3C80501U | Handbook - Page 10
Page 2 About This Book - Palm 3C80501U | Handbook - Page 11
. This chapter also introduces the Palm.Net™ wireless communication service and the wireless features of the Palm VII handheld. Getting to know your Palm VII handheld What is a Palm VII handheld? With your Palm VII handheld you will no longer have trouble getting to meetings and appointments on - Palm 3C80501U | Handbook - Page 12
serial port or USB port (PalmConnect® USB Kit sold separately) See "Activating the Palm.Net wireless communication service" later in this chapter for requirements to activate the service. Optional equipment s PalmModem® accessory s Windows-compatible printer s Infrared communication device Macintosh - Palm 3C80501U | Handbook - Page 13
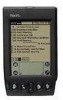
buttons Scroll button IR port Screen Power button/ Backlight control Uses infrared technology to transmit data to and receive data from other Palm OS® handhelds, and to perform HotSync operations. See "Beaming information" in Chapter 6 and "IR HotSync operations" in Chapter 7 for more information - Palm 3C80501U | Handbook - Page 14
Antenna Gives you access to the Palm.Net service. See Chapter 5 for more information. See "Buttons preferences" in Chapter 8 to learn how to open a specific application when half of the button scrolls up to view the information above the viewing area. Page 6 Introduction to Your Palm VII™ Handheld - Palm 3C80501U | Handbook - Page 15
Locating back panel components Stylus Contrast control Reset button Battery door Serial (COM) port door Stylus Battery door Contrast control Reset button Slides in and out of the slot in the back panel of the handheld. To use the stylus, remove it from the slot and hold it as you would a pen or - Palm 3C80501U | Handbook - Page 16
other device. If you are unsure about the location of the serial port on your computer, refer to your computer's documentation. Page 8 Introduction to Your Palm VII™ Handheld - Palm 3C80501U | Handbook - Page 17
Installing the batteries To use your handheld, you must install two AAA alkaline batteries. The batteries fit behind the battery door on the back of your handheld. To install the batteries: 1. Press the tab on the battery door and lift the battery door away from your handheld. Press tab to open 2. - Palm 3C80501U | Handbook - Page 18
has been charged, you can activate the service. See "Activating the Palm.Net wireless communication service" later in this chapter. s Your handheld applications that are preloaded on your handheld. To complete Setup, follow the instructions onscreen. As soon as you finish Setup, you can use all the - Palm 3C80501U | Handbook - Page 19
Read the Getting Started guide for an overview of the complete installation process. 2. Synchronize your old handheld with your old Palm example, Palm Backup), and store the copy outside the Palm Desktop software folder. 4. Follow the installation instructions in "Installing Palm Desktop software - Palm 3C80501U | Handbook - Page 20
next time you perform a HotSync operation with this old handheld, you are asked to give it a name. Be sure to give it a unique name. Palm Desktop organizer software Palm Desktop software extends many of the functions of your handheld to your computer and serves to back up all your data. Viewing and - Palm 3C80501U | Handbook - Page 21
Desktop software The following instructions guide you through installing Palm Desktop software. After installation, refer to the online Help in Palm Desktop software for information about how to use the software. To ensure a safe and uninterrupted installation of Palm Desktop software, please do - Palm 3C80501U | Handbook - Page 22
.Net service, be sure of the following: s You're within coverage of the network. To find detailed maps of coverage, visit the web site http://www.palm.net. s You're in a location that can receive a strong radio signal. See "Wireless problems" in Appendix B for tips on eliminating obstacles to the - Palm 3C80501U | Handbook - Page 23
long. Your password must be 4 to 15 characters long. 3. Read the Palm.Net service agreement, located at the back of this book. 4. After the to its position at 90°. 5. Follow the instructions onscreen to activate the wireless communication service. Important: Be sure to record and remember - Palm 3C80501U | Handbook - Page 24
network, which receives and stores messages sent to you at your @palm.net address, and delivers messages you send from your handheld to the recipient's Internet e-mail address. After you activate the wireless communication service, whenever you're within the coverage area, you can communicate with - Palm 3C80501U | Handbook - Page 25
is the basic action that gets things done on your handheld. The first time you start your handheld, setup instructions appear on the screen. These instructions include a calibration screen, or digitizer. Calibration aligns the internal circuitry of your handheld with its touch-sensitive screen so - Palm 3C80501U | Handbook - Page 26
mark. Tap the arrow to display a list of choices, and then tap an item in the list to select it. Page 18 Introduction to Your Palm VII™ Handheld - Palm 3C80501U | Handbook - Page 27
Scroll bar Previous/next arrows Scroll bar Drag the slider, or tap the top or bottom arrow, to scroll the display one line at a time. To scroll to the previous page, tap the scroll bar just above the slider. To scroll to the next page, tap the scroll bar just below the slider. You can also scroll - Palm 3C80501U | Handbook - Page 28
with a name that begins with that letter. You can also assign applications to different categories. See "Categorizing applications" in Chapter 3. Page 20 Introduction to Your Palm VII™ Handheld - Palm 3C80501U | Handbook - Page 29
antenna: s All web clipping applications s iMessenger application s Applications that support your use of the wireless features 1. Raise the antenna, located you install web clipping applications, they appear by default in the Palm.Net category of the Applications Launcher. The icons of web clipping - Palm 3C80501U | Handbook - Page 30
currently using. For example, in Memo Pad, the menus are different for the Memo list screen and the Memo screen. Page 22 Introduction to Your Palm VII™ Handheld - Palm 3C80501U | Handbook - Page 31
Graffiti menu commands Most menu commands have an equivalent Graffiti Command stroke, which is similar to the keyboard shortcuts used to execute commands on computers. The command letters appear to the right of the command names. Menu commands Command letters Draw the Command stroke anywhere in - Palm 3C80501U | Handbook - Page 32
data There are four ways to enter data into your handheld: s Using the onscreen keyboard s Using Graffiti writing s Entering or importing data in Palm Desktop software and then synchronizing with your handheld s Using an external keyboard Onscreen keyboard When you create or edit a record in an - Palm 3C80501U | Handbook - Page 33
also includes Giraffe, a game you can use to practice writing Graffiti characters. See "Installing and removing applications" in Chapter 3 for installation instructions. The Memo Pad application is ideal for practicing Graffiti writing. This section explains how to open Memo Pad and use it to - Palm 3C80501U | Handbook - Page 34
text will appear. New memo cursor Tap New Write in Graffiti area See "Using Graffiti writing to enter data" in Chapter 2 for more information. Using Palm Desktop software If you have new records you want to add to your handheld and prefer to use the computer keyboard rather than Graffiti writing - Palm 3C80501U | Handbook - Page 35
data stored in computer applications such as spreadsheets and databases, or from another Palm OS handheld. When you import data, you transfer the records to your handheld without having to enter them manually. See "Importing data" in Chapter 2 for more information. External keyboard You can connect - Palm 3C80501U | Handbook - Page 36
handheld can also display time based on a 24-hour clock. See "Formats preferences" in Chapter 8 for more information. 5. Tap OK. Page 28 Introduction to Your Palm VII™ Handheld - Palm 3C80501U | Handbook - Page 37
To set the current date: 1. Tap the Set Date box. 2. Tap the arrows to select the current year. Tap arrows to select year Tap to select month Tap to select date 3. Tap a month. 4. Tap the current date. Chapter 1 Page 29 - Palm 3C80501U | Handbook - Page 38
Page 30 Introduction to Your Palm VII™ Handheld - Palm 3C80501U | Handbook - Page 39
VII™ Handheld This chapter explains how to enter data into your Palm VII™ handheld, by writing with the stylus in the Graffiti® writing area, by using the onscreen keyboard, by using the computer keyboard, or by importing - Palm 3C80501U | Handbook - Page 40
you'll see later, you use the same shape to create both the uppercase and lowercase version of a letter. Page 32 Entering Data in Your Palm VII™ Handheld - Palm 3C80501U | Handbook - Page 41
3. Position the stylus in the left-hand side of the Graffiti writing area. 4. Start your stroke at the heavy dot and draw the stroke shape as it appears in the tables. 5. Lift the stylus from the screen at the end of the stroke shape. That's all there is to it! When you lift the stylus from the - Palm 3C80501U | Handbook - Page 42
The Graffiti® alphabet Letter A B C D Strokes Letter N O P Q E R F S G T H U I V J W K X L Y M Z Strokes Space Carriage Return Back Space Period tap twice Page 34 Entering Data in Your Palm VII™ Handheld - Palm 3C80501U | Handbook - Page 43
Writing capital letters You make capital letters with the same stroke shapes as the basic alphabet characters. To make capital letters, you must first "shift" to caps - just as you press the Shift key on a keyboard - and then write the character strokes. Note: Graffiti writing includes a feature - Palm 3C80501U | Handbook - Page 44
Shift is active, you can make a symbol stroke anywhere in the Graffiti writing area (the letters or numbers side). Page 36 Entering Data in Your Palm VII™ Handheld - Palm 3C80501U | Handbook - Page 45
Symbol Period . Comma , Apostrophe ' Question ? Exclamation ! Stroke Symbol Dash - Left Paren ( Right Paren ) Slash / Dollar $ Stroke Additional Graffiti punctuation tab Writing symbols and extended characters All symbols and extended characters begin with the stroke in the Graffiti - Palm 3C80501U | Handbook - Page 46
shifting: c ae Note: You must write these non-English characters in the left side of the Graffiti writing area. Page 38 Entering Data in Your Palm VII™ Handheld - Palm 3C80501U | Handbook - Page 47
Navigation strokes In addition to character symbols, Graffiti writing includes special strokes that you can use to navigate within text or fields in your applications. Command Move cursor right Stroke Move cursor left Previous field Next Field Open Address Record (Address Book only) Graffiti - Palm 3C80501U | Handbook - Page 48
you need. 5. After you finish, tap Done to close the onscreen keyboard and place the text in the record. Page 40 Entering Data in Your Palm VII™ Handheld - Palm 3C80501U | Handbook - Page 49
or prefer to use the computer keyboard, you can use Palm™ Desktop software, or any supported PIM, to enter information. You can then perform a HotSync without having to key it in manually. Save the data in one of the file formats listed below, import it into Palm Desktop software, and then perform - Palm 3C80501U | Handbook - Page 50
into the Unfiled category. 4. From the File menu, choose Import. 5. Select the file you want to import. 6. Click Open. 7. To import data into the correct Palm Desktop fields, drag fields in the left-hand column so that they are opposite the corresponding imported field on the right. 8. If you do not - Palm 3C80501U | Handbook - Page 51
Chapter 3 Managing Your Applications This chapter explains how to switch between applications on your Palm VII™ handheld, how to change application settings so they are personalized to your work methods, and how to categorize applications so you view them in - Palm 3C80501U | Handbook - Page 52
To categorize an application: 1. Tap the Applications icon . 2. Tap the Menu icon . 3. Tap App, and then tap Category. 4. Tap the pick list next to each application to select a category. Tip: To create a new category, tap Edit Categories from the pick list. Tap New, enter the category name, and - Palm 3C80501U | Handbook - Page 53
To change the Applications Launcher display: 1. Tap the Applications icon . 2. Tap the Menu icon . 3. Tap Options, and then tap Preferences. 4. Tap the View By pick list and select List. 5. Tap OK. To open the Applications Launcher to the last opened category: 1. Tap the Applications icon . 2. Tap - Palm 3C80501U | Handbook - Page 54
also contains several built-in web clipping applications; so after you activate the wireless communication service, you have immediate access to Internet information. The CD-ROM containing Palm Desktop software also contains many more web clipping applications. You can transfer these to your - Palm 3C80501U | Handbook - Page 55
3. Click Install. Tip: You can also access the Install Tool dialog box by selecting Install Tool from the Palm Desktop program group or by double-clicking any file with a PDB, PRC, PNC, or PQA file extension. 4. In the User drop-down list, select the - Palm 3C80501U | Handbook - Page 56
See "Exchanging and updating data: HotSync operations" in Chapter 4 for details. By default, web clipping applications appear on your handheld in the Palm.Net category of the Applications Launcher. Installing games The CD-ROM also includes several games that you can install with the Install Tool - Palm 3C80501U | Handbook - Page 57
Note: Giraffe is a fun, easy way for you to practice Graffiti® writing. After you install and start a game, the instructions appear in the Game menu. Depending on the game, the Game menu may also contain commands to show high scores, to start a new game, or - Palm 3C80501U | Handbook - Page 58
the Add/Remove Programs icon. 3. On the Install/Uninstall tab, select Palm Desktop software. 4. Click Add/Remove. Note: You need to install the your wireless transactions" in Chapter 5 for information about the security of the Palm.Net™ network. In Security, you can do the following: s Lock and - Palm 3C80501U | Handbook - Page 59
To assign a password: 1. Tap the Applications icon . 2. Tap the Security icon. 3. Tap the Password box. 4. Enter a password. Tap here 5. Tap OK. 6. Enter the same password a second time, and tap OK. Changing or deleting a password Once you define a password for your handheld, you can change or - Palm 3C80501U | Handbook - Page 60
To change the password, enter the new password, and tap OK. To delete the password, tap Delete. Locking your handheld You can also lock your handheld so that you need to enter your password to operate it. Important: If you lock your handheld, you must enter the exact password to re-activate your - Palm 3C80501U | Handbook - Page 61
Recovering from a forgotten password If you did not activate the Off & Lock feature and you forget your password, you can delete the password from your handheld. Deleting a forgotten password also deletes all entries and files marked as Private. Important: If you synchronize with your computer - Palm 3C80501U | Handbook - Page 62
Page 54 Managing Your Applications - Palm 3C80501U | Handbook - Page 63
Chapter 4 Using Your Basic Applications Your Palm VII™ handheld includes these basic applications: s Date Book s applications" briefly describes each application and explains how to open it. s "Common tasks" gives instructions on how to do tasks that you can do in most or all of the basic - Palm 3C80501U | Handbook - Page 64
Overview of basic applications Date Book Date Book lets you quickly and easily schedule appointments or any kind of activity associated with a time and date. In Date Book, you can do the following: s Enter a description of your appointment and assign it to a specific time and date. s Display a chart - Palm 3C80501U | Handbook - Page 65
Address Book Address Book enables you to keep names, addresses, phone numbers, and other information about your personal or business contacts. In Address Book, you can do the following: s Quickly look up or enter names, addresses, phone numbers, and other information. s Enter up to five phone - Palm 3C80501U | Handbook - Page 66
To Do List To Do List is a convenient place to create reminders and prioritize the things that you have to do. In To Do List, you can do the following: s Make a quick and convenient list of things to do. s Assign a priority level to each task. s Assign a due date for any or all of your To Do List - Palm 3C80501U | Handbook - Page 67
write any kind of message on your handheld. s Drag and drop memos into popular computer applications like Microsoft Word when you synchronize using Palm™ Desktop organizer software and HotSync® technology. s Assign memos to categories so that you can organize and view them in logical groups. s Write - Palm 3C80501U | Handbook - Page 68
type. s Transfer your expense information to a Microsoft Excel spreadsheet (version 5.0 or later) on your computer. (Microsoft Excel is not included in the Palm VII™ handheld package.) To open Expense: 1. Tap the Applications icon . 2. Tap the Expense icon . Page 60 Using Your Basic Applications - Palm 3C80501U | Handbook - Page 69
Common tasks The tasks described in this section use the term "records" to refer to an individual item in any of the basic applications: a single Date Book event, Address Book entry, To Do List item, Memo Pad memo, or Expense item. Creating records You can use the following procedure to create a new - Palm 3C80501U | Handbook - Page 70
Entering text For information on how to enter text using Graffiti writing, the onscreen keyboard, or the keyboard attached to your computer, see Chapter 2. Edit menu The Edit menu is available with any screen where you enter or edit text. In general, commands available in the Edit menu apply to - Palm 3C80501U | Handbook - Page 71
Pad: Delete Memo Expense: Delete Item A confirmation dialog box appears. If you want to save a copy of the deleted item to an archive file in Palm Desktop software, be sure that the check box is checked. If you don't want to save a copy, tap the check box to remove the check - Palm 3C80501U | Handbook - Page 72
Purging records Over time, as you use Date Book, To Do List, and Expense, you'll accumulate records in these applications that have outlived their usefulness. For example, events that occurred months ago remain in the Date Book, and To Do List items that you marked as completed remain in the list, - Palm 3C80501U | Handbook - Page 73
first HotSync operation with a local, direct connection, rather than using a modem. The following steps assume that you have already installed the Palm Desktop software. If you have not installed this software, See "Palm Desktop organizer software" in Chapter 1 for instructions. Chapter 4 Page 65 - Palm 3C80501U | Handbook - Page 74
, start it: on the Windows desktop, click Start, and then choose Programs. Navigate to the Palm Desktop software program group and choose HotSync Manager. Alternatively, you can start the Palm Desktop software which automatically opens the HotSync Manager. 3. Press the HotSync button ™ on the cradle - Palm 3C80501U | Handbook - Page 75
Important: The first time you perform a HotSync operation, you must select a user name in the New User dialog box and click OK. Every handheld must have a unique name. To prevent loss of a user's records, never try to synchronize more than one handheld to the same user name. The HotSync dialog box - Palm 3C80501U | Handbook - Page 76
Address Book contains the QuickList user-defined category, in which you can store the names, addresses, and phone numbers you might need in emergencies (doctor, fire department, lawyer, etc.). Expense contains two user-defined categories, New York and Paris, to show how you might sort your expenses - Palm 3C80501U | Handbook - Page 77
Tap here Note: In the Date Book Agenda view, the pick list is in the upper right of the To Do list. 2. Select the category you want to view. The list screen now displays only the records assigned to that category. Tip: Pressing an application button on the front panel of the handheld toggles through - Palm 3C80501U | Handbook - Page 78
4. Enter the name of the new category, and then tap OK. 5. Tap OK. You can assign any of your records to the new category. To rename a category: 1. Tap the category pick list in the upper-right corner of the screen or list. 2. Tap Edit Categories. 3. Select the category that you want to rename, and - Palm 3C80501U | Handbook - Page 79
5. Tap OK. Tip: You can group the records in two or more categories into one category by giving the categories the same name. For example, if you change the name of the Personal category to Business, all records formerly in the Personal category appear in the Business category. Finding records Your - Palm 3C80501U | Handbook - Page 80
To look up an Address Book record: 1. Display the Address list screen. 2. Enter the first letter of the name you want to find. Look Up line The list scrolls to the first entry that begins with that letter. If you write another letter, the list scrolls to the first entry that starts with those two - Palm 3C80501U | Handbook - Page 81
During the search, you can tap Stop at any time if the entry you want appears before your handheld finishes the search. To continue the search after you tap Stop, tap Find More. 4. Tap the text that you want to review. Using Phone Lookup Phone Lookup displays the Address list screen and lets you add - Palm 3C80501U | Handbook - Page 82
5. Tap Add. The name you selected, along with the other information associated with it, is pasted into the record you selected in step 1. In Mail and iMessenger, Phone Lookup inserts only the e-mail address. Phone Lookup tips Write the Graffiti Command stroke /L to activate the Phone Lookup feature. - Palm 3C80501U | Handbook - Page 83
Tap here 4. Tap Lookup. The Attendees Lookup screen displays all the names in your Address Book that have data in the Company field. 5. Select the name you want to add, and then tap Add. The name appears in the Attendees screen. 6. Repeat steps 4 and 5 to add more names. 7. Tap Done. 8. Tap OK. - Palm 3C80501U | Handbook - Page 84
and drag a memo to a new location in the list. Note: To make the list of your memos appear in Palm Desktop software as you manually sorted it on your handheld, open Memo Pad in Palm Desktop software and click List by. Then select Order on handheld. Making records private In all basic applications - Palm 3C80501U | Handbook - Page 85
To hide all private records: 1. Tap the Applications icon . 2. Tap Security. 3. Tap the Current Privacy pick list and select Hide Records. Tap Hide Records 4. Tap OK to confirm that you want to hide private records. To mask all private records: 1. Tap the Applications icon . 2. Tap Security. 3. Tap - Palm 3C80501U | Handbook - Page 86
To display private records: 1. Do one of the following: Tap the Applications icon , tap Security, then tap the Current Privacy pick list and select Show Records. If you do not have a password, hidden and masked records become visible. If you have a password, the Show Private Records dialog box - Palm 3C80501U | Handbook - Page 87
Note icon . 2. Tap Delete. 3. Tap Yes. Choosing fonts In all basic applications except Expense, you can change the font style to make text easier to read. You can choose a different font style for each application. Small font Bold font Chapter 4 Large font Page 79 - Palm 3C80501U | Handbook - Page 88
To change the font style: 1. Open an application. 2. Tap the Menu icon . 3. Tap Options, and then tap Font. 4. Tap the font style you want to use. Tap here for bold font Tap here for large font Tap here for small font 5. Tap OK. Page 80 Using Your Basic Applications - Palm 3C80501U | Handbook - Page 89
Application-specific tasks Date Book When you open Date Book, the screen shows the current date and a list of times for a normal business day. Scheduling an event A record in Date Book is called an "event." An event can be any kind of activity that you associate with a day. You can enter a new event - Palm 3C80501U | Handbook - Page 90
2. Enter a description of the event. You can enter up to 255 characters. 3. If the event is one hour long, skip to step 7. If the event is longer or shorter than an hour, tap the time of the event to open the Set Time dialog box. Tap the time of an event Tip: You can also open the Set Time dialog ( - Palm 3C80501U | Handbook - Page 91
6. Tap a blank area of the screen to deselect the event. A vertical line appears next to the time, indicating the duration of the event. Note: If an event has the same start and end time, the time only appears once. To schedule an event for another day: 1. Select the date you want for the event by - Palm 3C80501U | Handbook - Page 92
To schedule an untimed event: 1. Select the date that you want for the event as described in "To schedule an event for another day." 2. Tap New. 3. Tap OK, so that no start or end times are defined for the new event. Tip: You can also create a new untimed event by making sure no event is selected - Palm 3C80501U | Handbook - Page 93
Rescheduling an event You can easily make changes to your schedule with your handheld. To reschedule an event: 1. Tap the event you want to reschedule. 2. Tap Details. 3. To change the time, tap the Time box and select a new time. 4. To change the date, tap the Date box and select a new date. 5. Tap - Palm 3C80501U | Handbook - Page 94
7. When the reminder message appears on screen, do one of the following: Tap OK to permanently dismiss the reminder and return to the current screen. Tap Snooze to dismiss the reminder and return to the current screen. The reminder message appears again five minutes after you tap Snooze. Alarm for - Palm 3C80501U | Handbook - Page 95
3. Tap the Repeat box to open the Change Repeat dialog box. Tap the Repeat box 4. Tap Day, Week, Month, or Year to set how often the event repeats. For a continuous event, tap Day. 5. Enter a number that corresponds to how often you want the event to repeat on the Every line. For example, if you - Palm 3C80501U | Handbook - Page 96
Tap Current to delete only the current event item. Tap Future to delete the current and all future event items and reset the end date of the repeating event to the last shown date. Tap All to delete all occurrences of the repeating event. 5. Tap OK. Considerations for repeating or continuous events: - Palm 3C80501U | Handbook - Page 97
Changing the Date Book view In addition to displaying the time list for a specific day, you can also display a whole week, a month, or an agenda. You can also display the current time. To cycle through Day, Week, and Month views: s Press the Date Book application button repeatedly to display the - Palm 3C80501U | Handbook - Page 98
Previous week Next week Tap for that day Bar indicates earlier event Dot indicates untimed event Bar indicates later event 3. Tap an event to show a description of the event. Event details Tap to show event details Tips for using Week View: Keep the following points in mind. s To reschedule an - Palm 3C80501U | Handbook - Page 99
Spotting event conflicts With the ability to define specific start and end times for any event, it's possible to schedule events that overlap (an event that starts before a previous event finishes). An event conflict (time overlap) appears in the Week View as overlapping bars. The Day View displays - Palm 3C80501U | Handbook - Page 100
Tips for using Month View: Keep the following points in mind. s Tap a day in the Month View to display that day in the Day View. s Tap the scroll arrows in the upper-right corner to move forward or backward a month. s Tap Go to in order to open the date selector and select a different month. s Use - Palm 3C80501U | Handbook - Page 101
Note: You can also change the category of To Do List items shown. Tap the pick list to choose another category. See "To Do List" later in this chapter for more information on working with To Do List items. Date Book menus, preferences, and display options Date Book menus are shown here for your - Palm 3C80501U | Handbook - Page 102
s Compress Day View: Controls how times appear in the Day View. When Compress Day View is off, all time slots display. When it is on, start and end times display for each event, but blank time slots toward the bottom of the screen disappear to minimize scrolling. s Month View settings: These check - Palm 3C80501U | Handbook - Page 103
also has data import capabilities that enable you to load database files into Address Book on your handheld. See "Importing data" in Chapter 2 and Palm Desktop online Help for more information. To create a new Address Book entry: 1. Press the Address Book application button handheld to display the - Palm 3C80501U | Handbook - Page 104
4. Use the Next Field Graffiti stroke to move to the First Name field. Next Field Tip: You can also move to any field by tapping it directly. 5. Enter the person's first name in the First Name field. 6. Enter the other information that you want to include in this entry. Note: As you enter letters - Palm 3C80501U | Handbook - Page 105
Selecting types of phone numbers You can select the types of phone numbers or e-mail addresses that you associate with an Address Book entry. Any changes you make apply only to the current entry. To select other types of phone numbers in an entry: 1. Tap the entry that you want to change. 2. Tap - Palm 3C80501U | Handbook - Page 106
Show in List Select which type of phone or other information appears in the Address list screen. Your options are Work, Home, Fax, Other, E-mail, Main, Pager, and Mobile. The identifying letters W, H, F, O, E, M, or P appear next to the record in the Address list, depending on which information is - Palm 3C80501U | Handbook - Page 107
Options menus Address list Preferences Address View s Remember last category: Determines how Address Book appears when you return to it from another application. If you select this check box, Address Book shows the last category you selected. If you clear it, Address Book displays the All category - Palm 3C80501U | Handbook - Page 108
To Do List A To Do List item is a reminder of some task that you have to complete. A record in To Do List is called an "item." To create a To Do List item: 1. Press the To Do List application button on the front of your handheld to display the To Do list screen. 2. Tap New. New To Do List item Tap - Palm 3C80501U | Handbook - Page 109
To set the priority of a To Do List item: 1. Tap the Priority number on the left side of the To Do List item. Tap here Tap to select priority 2. Tap the Priority number that you want to set (1 is most important). Checking off a To Do List item You can check off a To Do List item to indicate that you - Palm 3C80501U | Handbook - Page 110
To display the To Do Item Details dialog box: 1. Tap the text of the item whose details you want to change. 2. Tap Details. Setting a due date You can associate a due date with any To Do List item. You can also sort the items that appear in the list based on their due date. To set a due date for a - Palm 3C80501U | Handbook - Page 111
To Do Show Options The Show Options dialog box enables you to control the appearance of To Do List and To Do List items in Date Book Agenda view. To change the Show Options settings: 1. In To Do List, tap Show. 2. Select any of the following settings: Show Completed Items: Displays your completed - Palm 3C80501U | Handbook - Page 112
To Do List menus To Do List menus are shown here for your reference, and To Do List features that are not explained elsewhere in this book are described here. See "Using menus" in Chapter 1 for information about choosing menu commands. Record menu Options menu About To Do List Shows version - Palm 3C80501U | Handbook - Page 113
Memo Pad A memo can contain up to 4,000 characters. The number of memos you can store is dependent only on the memory available on your handheld. A record in Memo Pad is called a "memo." To create a new memo: 1. Press the Memo Pad application button handheld to display the Memo list. 2. Tap New. - Palm 3C80501U | Handbook - Page 114
To review a memo: 1. In the Memo list, tap the text of the memo. Tap a memo to see its contents 2. Review or edit the text in the memo. 3. Tap Done. Memo Pad menus Memo Pad menus are shown here for your reference, and Memo Pad features that are not explained elsewhere in this book are described - Palm 3C80501U | Handbook - Page 115
Go to Top of Page Moves to the top (first) line of the memo. Go to Bottom of Moves to the bottom (last) line of the memo. Page Preferences Displays the Memo Preferences dialog box, where you define the sort order for memos. About Memo Pad Shows version information for Memo Pad. Chapter 4 - Palm 3C80501U | Handbook - Page 116
Calculator The Calculator includes several buttons to help you perform calculations. Clears the last number you entered. Use this button if you make a mistake while entering a number in the middle of a calculation. This button enables you to re-enter the number without starting the calculation over. - Palm 3C80501U | Handbook - Page 117
3. After you finish reviewing the calculations, tap OK. Calculator menus Calculator menus are shown here for your reference, and Calculator features that are not explained elsewhere in this book are described here. See "Using menus" in Chapter 1 for information about choosing menu commands. Options - Palm 3C80501U | Handbook - Page 118
Expense Expense enables you to record the date, expense type, and the amount that you spent. A record in Expense is called an "item." You can sort your Expense items into categories or add other information that you want to associate with the item. To create an Expense item: 1. Tap the Applications - Palm 3C80501U | Handbook - Page 119
Tip: Another quick way to create a new Expense item is to make sure that no Expense item is selected in the Expense list, write the first letter(s) of the expense type, and then write the numerical amount of the Expense item. This technique takes advantage of the automatic fill feature. See "Options - Palm 3C80501U | Handbook - Page 120
3. Select any of the following options: Category: See "Categorizing records" earlier in this chapter. Type: Opens a pick list of expense types. Payment: Lets you choose the payment method used to pay the Expense item. If the item is prepaid (such as airline tickets supplied by your company), you can - Palm 3C80501U | Handbook - Page 121
2. Tap each Currency pick list and select the country whose currency you want to display on that line. 3. Tap OK to close the Select Currencies dialog box. 4. Tap OK. To change your default currency: 1. Open Expense. 2. Tap the Menu icon . 3. Tap Options, and then tap Preferences. 4. Tap the Default - Palm 3C80501U | Handbook - Page 122
5. Tap OK to close the Currency Properties dialog box. 6. Tap OK. Note: If you want to use your custom currency symbol as the default for all Expense items, select the symbol in the Preferences dialog box. If you want to use your custom currency symbol only for a particular Expense item, select - Palm 3C80501U | Handbook - Page 123
of the operating system on your desktop computer. They do not reside with your Desktop application, and they are not produced by Palm, Inc. Operating System Euro Support Mac OS Windows 95 Windows 98 Contained in Mac OS 8.5 or higher. For more information, visit the following web site: http://til - Palm 3C80501U | Handbook - Page 124
Printing the euro Even with operating system support, problems may arise while printing documents that printer's built-in fonts (if allowed). Creating or printing an expense report You can use Palm Desktop software to view and print your Expense data in a Microsoft Excel spreadsheet. To create - Palm 3C80501U | Handbook - Page 125
templates, you can edit your expense data in Microsoft Excel. The templates have the extension .xlt and are stored in the template folder in the Palm Desktop software directory on your computer. To see what a template looks like before you use it, open the template in Microsoft Excel. For example - Palm 3C80501U | Handbook - Page 126
If you want to streamline or customize your expense reports, you can change these templates. For example, you can add your company name to a template. See Appendix C for information on changing templates. To view your expense data using a Microsoft Excel template: 1. Display your expense data in a - Palm 3C80501U | Handbook - Page 127
Enter name and other information Choose expense template 3. Enter name, department, and other information as necessary for your expense report. 4. Click the Templates menu; then select an expense template. Note: If you want to create your own custom expense template and have it appear in the - Palm 3C80501U | Handbook - Page 128
Preferences About Expense s Use automatic fill: Lets you select an expense type by writing the first letter of an expense type in the Graffiti writing area. For example, if you write the letter "T," it enters the "Taxi" expense type. Writing "T" and then "E" enters "Telephone" which is the first - Palm 3C80501U | Handbook - Page 129
your handheld as a wireless device, but you must activate the Palm.Net™ wireless communication service. See "Activating the Palm.Net wireless communication service" in Chapter 1 for more information. After you activate the service, you have access to two wireless features that enhance your ability - Palm 3C80501U | Handbook - Page 130
but you open them and use them just as you would a basic Palm VII application like Address Book. Web clipping applications give you access to applications available to you when you set up your handheld and install Palm™ Desktop organizer software give you access to the following kinds of information - Palm 3C80501U | Handbook - Page 131
So when you're near a desktop computer and have some time, you can take advantage of the elaborate graphics, variety, and many choices offered by a web site - But when you're in a car or on the street and need information fast, a web clipping application on your handheld makes it easy to find the - Palm 3C80501U | Handbook - Page 132
from the Mail application" later in this chapter for details. See Chapter 6 for information about Mail. The Palm.Net wireless communication service The Palm.Net wireless communication service includes the following: s The network through which you access the Internet. s The web site on which you - Palm 3C80501U | Handbook - Page 133
usage of the service and learn about the service and its features. s Customer Care. See the Getting Started guide for the support e-mail addresses and phone numbers. s Convenient credit card billing. The network The Internet is often described as a "network of networks," and the Palm.Net network is - Palm 3C80501U | Handbook - Page 134
is restricted to users who have an account with the Palm.Net wireless communication service. To access My Account, you must log in with the username and password you created during activation. s iMessenger application support: - Palm 3C80501U | Handbook - Page 135
Palm.Net web clipping application: s Tap the Palm.Net web clipping application icon: . You can do the following in the web clipping application: s Check a summary of the current status of your account s Read Customer Support where reception is poor. See "Wireless problems" in Appendix B for a list of - Palm 3C80501U | Handbook - Page 136
To monitor signal strength in the Diagnostics application: s Tap the Diagnostics icon . More bars = Stronger signal Both the bar graph and the number represent the signal strength: s The graph represents signal strength as a series of bars. The more bars displayed, the stronger the signal. s The - Palm 3C80501U | Handbook - Page 137
piece of information that you requested. Opening web clipping applications When you install web clipping applications, they appear by default in the Palm.Net category of the Applications Launcher. The icons of web clipping applications are easy to recognize: They all have a dark diamond shape - Palm 3C80501U | Handbook - Page 138
Raising the antenna automatically opens the Applications Launcher to the Palm.Net category. When the transmitter successfully connects to the network, your handheld beeps. 2. Tap the web clipping application that queries the Internet for the kind - Palm 3C80501U | Handbook - Page 139
the kilobytes included in your monthly plan or (2) if your monthly kilobytes have been used up, an additional charge. Consult http://www.palm.net or the Palm.Net web clipping application for details on billing. Over-the-air icon Simply reviewing the contents of a web clipping application does not - Palm 3C80501U | Handbook - Page 140
you tap the Stop icon appears onscreen. Important: You incur a cost for any data that is downloaded to your handheld or sent to the Palm.Net server. Reviewing current queries and clippings: Back arrow Your handheld stores the queries and clippings of your current session so that you can review - Palm 3C80501U | Handbook - Page 141
on your handheld. To find a phone number and an address: 1. Raise the antenna. Raising the antenna automatically opens the Applications Launcher to the Palm.Net category. If you moved the Yahoo! People Search web clipping application, go to that category. 2. Tap the Yahoo! People Search icon. 3. Tap - Palm 3C80501U | Handbook - Page 142
Within seconds, your clipping appears. In this case, the web clipping application found two items that satisfy your query. How big was that clipping? After you receive a clipping, you can find out the size of the clipping. If you see two exclamation points (!!) in the title area, the clipping is - Palm 3C80501U | Handbook - Page 143
To review the History list: 1. Open the web clipping application that has clippings you want to review. 2. Tap the History pick list. History pick list 3. Select the clipping you want to review. Saving information from a web clipping application You can copy the text in a clipping or a page of a - Palm 3C80501U | Handbook - Page 144
. See "Using menus" in Chapter 1 for information about choosing menu commands. Options menu About Web Clipping Shows version information for the web clipping technology that supports web clipping applications. Page 136 Web Clipping Applications and the iMessenger® Application - Palm 3C80501U | Handbook - Page 145
messaging. By activating the Palm.Net wireless communication service, you acquire an address and mailbox on the Palm.Net network. You can can do the following: s Download messages waiting for you on the Palm.Net network. s Read, delete, reply to, and reroute incoming messages. s Create outgoing - Palm 3C80501U | Handbook - Page 146
Mail does not use the transmitter or the Palm.Net wireless communication service. See Chapter 6 for complete information about at 90°. Raising the antenna automatically opens the Applications Launcher to the Palm.Net category. When the transmitter successfully connects to the network, your handheld - Palm 3C80501U | Handbook - Page 147
, the date they were received. (See "Date column" later in this chapter.) s Unread messages have a dash ( - ) next to them. s Messages you've already read have a check mark ( ) next to them. s Messages you create have a diamond (x) next to them. You can tap these symbols to open a menu of commands - Palm 3C80501U | Handbook - Page 148
screen, tap a message to open it. Subject Recipient Sender Time and date sent Message body To close a message: s Tap Done. Opening and reading messages A message is downloaded from the network in compressed characters. When you open the message, the characters are converted to an uncompressed - Palm 3C80501U | Handbook - Page 149
readable characters are left to be retrieved. You can download as much of the rest of the message as you want or ignore what's left. Palm.Net service returns the message to the sender as undeliverable. Marks the end of a message Tap right arrow to view the next message, left arrow for - Palm 3C80501U | Handbook - Page 150
the remainder of a long message You download long messages in separate segments so that you can choose how much of the message you want to read (and pay for). To download more of a long message: 1. At the bottom of the screen, tap More. Indicates there's at least one more screen to - Palm 3C80501U | Handbook - Page 151
500 characters, you have a maximum of 30 days to download the remainder of the message. Then it's deleted from your mailbox on the Palm.Net network. Displaying header information Complete header information includes the distribution lists and the From:, Subj:, and Date: fields. By default, the - Palm 3C80501U | Handbook - Page 152
must be truncated, an ellipsis (. . .) appears after the last name. There is no way to retrieve the truncated part of the list. Your address ([email protected]) always appears as the first address in the distribution list you are part of. After your address is downloaded, as much of the remaining - Palm 3C80501U | Handbook - Page 153
support attachments, with one exception: If an attachment is a simple ASCII text file, the iMessenger application appends the text of the file to the end of the message, so you can read sent to you is to have all messages delivered to your Palm.Net mailbox also delivered to your e-mail address. See " - Palm 3C80501U | Handbook - Page 154
2. Enter the e-mail address of the recipient. You have two ways to enter the at sign (@): Tap once in the Graffiti writing area to activate Punctuation Shift. A dot appears @ Then make this stroke Or, tap "123" in the Graffiti writing area. Then tap @ on the numeric keyboard When you enter more - Palm 3C80501U | Handbook - Page 155
Tap the name of the field to open Tap to return to New Message screen To reply to a message: 1. Tap a message in the iMessenger list to display it onscreen. 2. Tap Reply. 3. Select whom you want to reply to: Sender only or Forward (for someone who didn't see the original message). Note: Although - Palm 3C80501U | Handbook - Page 156
Looking up an address To identify the recipient of a message, you need to enter that person's e-mail address. You can do this either by entering the data directly into the field or by using the Look Up command to access the information in your Address Book. To look up an e-mail address: 1. Tap the - Palm 3C80501U | Handbook - Page 157
Rerouting replies to your messages The From: field of your outgoing iMessenger messages contains your @palm.net address. If you don't want people who receive your messages to reply to you at your @palm.net address, you can specify a different address for recipients to use. To reroute replies to - Palm 3C80501U | Handbook - Page 158
Adding a signature to your message Adding a signature to your message is a two-part process. First, you create your signature. Then, every time you want to add your signature to a message, you must tap Add Signature. The signature for your wireless Internet messages can be different from the - Palm 3C80501U | Handbook - Page 159
messages You can send wireless Internet messages anytime the handheld antenna is raised and you are located within coverage of the Palm.Net wireless communication service. To send messages: s Tap Check & Send. Tapping Check & Send sends the current message and all messages in the Outbox. This - Palm 3C80501U | Handbook - Page 160
Editing an unsent message You can make changes to a message that has not yet been sent. When you edit a message, your handheld removes the message from the Outbox folder and takes you back to the New Message screen, where you can edit the message and resend it, save it as a draft, or delete it. To - Palm 3C80501U | Handbook - Page 161
Draft messages Sometimes you may not want to send a message immediately; for example, you may want to add additional information before sending it. Your handheld stores such messages in the Draft folder until you are ready to edit them again. Note: When you're creating or editing a message, you - Palm 3C80501U | Handbook - Page 162
the newly deleted message. See "Purging deleted messages" later in this chapter to learn how to manage the size of the Deleted folder. See "Your Palm.Net mailbox" later in this chapter to learn about the storage and deletion of messages in your mailbox on the network. To delete a message: 1. Open - Palm 3C80501U | Handbook - Page 163
Removing a message from the Deleted folder You can remove a message from the Deleted folder and work with it again. To remove a message from the Deleted folder: 1. In the iMessenger list screen, tap Deleted from the pick list in the upper-right corner. 2. Tap the message you want to restore. 3. Tap - Palm 3C80501U | Handbook - Page 164
To select a folder: 1. Tap the pick list in the upper-right corner to open the list of folders: Inbox: Contains messages downloaded from the network. Outbox: Contains messages for which you tapped Outbox when you created them. Messages in the Outbox are sent out whenever you tap Check & Send. - Palm 3C80501U | Handbook - Page 165
by subject and displays messages in ascending alphabetical order, based on the first word of the Subj: field. 4. Tap OK. Your Palm.Net mailbox Your mailbox on the Palm.Net network has a storage capacity of up to 2 MB; that's more than two million readable characters. Attachments of messages in your - Palm 3C80501U | Handbook - Page 166
delete blocks of messages directly from your Palm.Net mailbox. Go to the Palm.Net web site and follow the instructions onscreen. You can delete messages older time you use the Check & Send command, only messages you have not read yet are downloaded from the network. See "Performing a hard reset" in - Palm 3C80501U | Handbook - Page 167
To enable synchronization of the iMessenger application with a Macintosh computer, Macintosh users need a special version of Palm Desktop software. Go to the web site http://www.palm.net for information about this software. iMessenger menus iMessenger menus are shown here for your reference, and - Palm 3C80501U | Handbook - Page 168
Options menus The Options menu varies depending on whether you are viewing a message, creating, or viewing the iMessenger list. iMessenger list New Message About iMessenger View Message Shows version information for the iMessenger application. Page 160 Web Clipping Applications and the - Palm 3C80501U | Handbook - Page 169
and Beaming Information In addition to web clipping and wireless Internet messaging, your Palm VII™ handheld offers features to help you stay connected: s Managing desktop E-Mail: Using your handheld, you can read, reply to, compose, and delete e-mail from your desktop E-Mail application while you - Palm 3C80501U | Handbook - Page 170
(versions 2.5, 6.0, and 7.0). You can see the full list of the supported applications when you set up Mail. If your desktop E-Mail application does not for more information. Note: The following instructions assume that you have already installed Palm Desktop software on your computer and that you - Palm 3C80501U | Handbook - Page 171
the Windows system tray (bottom- right corner of the taskbar). 2. Choose Custom. Tip: You can also choose Custom from the HotSync menu in Palm Desktop software. 3. Select Mail in the list box. 4. Click Change. 5. Click one of the following settings: Synchronize the files: Synchronizes the mail on - Palm 3C80501U | Handbook - Page 172
in the Windows system tray. Tip: You can also choose Custom from the HotSync menu in Palm Desktop software. 3. Select Mail in the list box. 4. Click Change. 5. Modify your were received. E-mail items you've read have a check next to them. High-priority e-mail items appear in bold. Previously - Palm 3C80501U | Handbook - Page 173
To open an e-mail item: s Tap an e-mail item to open it. Recipient Subject Header mode icons Sender Time and date sent E-mail body To close an e-mail item: s Tap Done to close the e-mail item. Displaying full header information By default, Mail displays abbreviated header information, which - Palm 3C80501U | Handbook - Page 174
To create an e-mail item: 1. Tap New. Tap New Tip: You can also create an e-mail item by tapping New from the Message menu. 2. Enter the e-mail address of the recipient. Tip: Enter the address as if you were entering it from your desktop E-Mail application. For example, network users sending an e- - Palm 3C80501U | Handbook - Page 175
Tip: If the address, CC, subject, or body exceeds the capacity of the screen display, tap the name of the field (for example, tap "To:") to expand that field. Tap the Done button to return to the New Message screen. Tap the name of the field to open Tap to return to New Message screen To reply to - Palm 3C80501U | Handbook - Page 176
Looking up an address To identify the recipient of an e-mail item, you need to enter that person's e-mail address. You can do this either by entering the data directly into the field or by using the Look Up command to access the information in your Address Book. To look up an e-mail address: 1. Tap - Palm 3C80501U | Handbook - Page 177
desktop E-Mail application you use. If your application does not support the attribute you select, your handheld cannot attach that attribute " later in this chapter. Confirm Read Requests a confirmation telling you when the e-mail item was read. Confirm Delivery Requests a confirmation telling - Palm 3C80501U | Handbook - Page 178
. Tap here Tap to select priority 3. Tap OK. Tip: Your handheld can flag e-mail items with a specific priority only if your desktop E-Mail application supports this feature. Sending a blind carbon copy To add a BCC field to your e-mail item: 1. In the New Message screen, tap Details. 2. Tap the BCC - Palm 3C80501U | Handbook - Page 179
your name, address, phone and fax numbers, and any other text you want to include. By defining such information as a signature, you save yourself the trouble of having to enter it every time you create an e-mail item. Adding a signature to your message is a two-part process. First, you create your - Palm 3C80501U | Handbook - Page 180
confirmation when your e-mail item is read: 1. In the New Message screen, tap Details. 2. Tap the Confirm Read check box to select it. 3. receive a confirmation unless the e-mail application to which you send mail also supports this feature. Storing e-mail to be sent later When you send e-mail - Palm 3C80501U | Handbook - Page 181
Editing unsent e-mail You can make changes to an e-mail that has not yet been sent, as long as you have not yet performed a HotSync operation. When you edit an e-mail item, your handheld removes the item from the Outbox folder and takes you back to the New Message screen, where you can edit the item - Palm 3C80501U | Handbook - Page 182
Draft e-mail Sometimes you may not want to send an e-mail item immediately; for example, you may want to add additional information before sending it. Your handheld stores such e-mail items in the Draft folder until you are ready to edit them again. Note: When you're creating or editing an e-mail - Palm 3C80501U | Handbook - Page 183
Filing e-mail Your handheld can store e-mail you receive or create in the Filed folder. The contents of this folder do not automatically synchronize with your desktop E-Mail application during a HotSync operation. Your handheld, however, stores a backup copy of the Filed folder on your computer hard - Palm 3C80501U | Handbook - Page 184
. 3. Tap Undelete to move the selected item to the Inbox and mark it as read. To remove an e-mail item you created from the Deleted folder: 1. In the , deleted e-mail can monopolize storage space. To avoid or correct this problem, purge the contents of your Deleted folder. E-mail that you purge - Palm 3C80501U | Handbook - Page 185
To select a folder: 1. Tap the pick list in the upper-right corner to open the list of folders: Inbox: Contains the e-mail from your desktop E-Mail application Inbox, minus any that you have excluded using filtering options. See "Creating special filters" later in this chapter. Outbox: Contains the - Palm 3C80501U | Handbook - Page 186
To sort the Message list: 1. In the Message list, tap Show. 2. Tap the Sort by pick list and select one of the following options: Date: Sorts e-mail by date and displays the most recent e-mail item at the top of the screen. Sender: Sorts e-mail by sender's user name and displays items in ascending - Palm 3C80501U | Handbook - Page 187
4. Tap the filtering option you want to apply: All: During synchronization, all e-mail items in your desktop EMail Inbox synchronize with your handheld, and all e-mail items in your handheld Outbox are sent to your desktop E-Mail application. Send only: During synchronization, only the e-mail items - Palm 3C80501U | Handbook - Page 188
To access the special filter settings: s Tap the Filter box in the HotSync Options dialog box. Tap here to display Filter options Ignoring or receiving e-mail The first step in establishing a special filter is to determine if you want to ignore or retrieve e-mail that matches the information you - Palm 3C80501U | Handbook - Page 189
Defining filter strings E-mail items are filtered based on the information contained in their To:, From:, and Subj: fields. The information that defines what your handheld is looking for is called a filter string. You create a filter string by listing the words you want your handheld to find and - Palm 3C80501U | Handbook - Page 190
2. Enter your filter string with commas or spaces between the words. Do not add connectors, such as AND or OR, in a string. 3. If your string exceeds the length of the field, tap the name of the field to display the Notes screen for that header field. For more information about header field Notes - Palm 3C80501U | Handbook - Page 191
Truncating e-mail items The Truncate feature lets you set a point at which long e-mail items truncate when downloading to your handheld. By default, this Truncate value is 4,000 characters. By truncating long messages, you reduce the time it takes to synchronize your desktop E-Mail and Mail, as well - Palm 3C80501U | Handbook - Page 192
Message menus The Message menu varies depending on whether you are viewing an e-mail item, creating an e-mail item, or viewing the Message list. Message list New Message View Message Options menus The Options menu varies depending on whether you are creating or editing an e-mail item. Message - Palm 3C80501U | Handbook - Page 193
infrared) port that you can use to beam information to another Palm OS handheld that's close by and also has an IR port. of the handheld, behind the small dark shield. You can beam the following information between Palm OS handhelds: s The record currently displayed in Date Book, Address Book, To Do - Palm 3C80501U | Handbook - Page 194
4 inches) and 1 meter (approximately 39 inches) apart, and the path between the two devices must be clear of obstacles. Beaming distance to other Palm OS handhelds may be different. 5. Wait for the Beam Status dialog box to indicate that the transfer is complete before you continue working on your - Palm 3C80501U | Handbook - Page 195
4. Tap Yes. Tips on beaming information s You can press the Address Book application button two seconds to beam your business card. for about s You can set the full-screen pen stroke to beam the current entry. See "Pen preferences" in Chapter 8 for more information. s You can draw the Graffiti - Palm 3C80501U | Handbook - Page 196
Page 188 Managing Desktop E-Mail and Beaming Information - Palm 3C80501U | Handbook - Page 197
organizer software or another PIM such as Microsoft Outlook. To synchronize data, you must connect your Palm VII™ handheld and Palm Desktop software. You can synchronize your data either directly or indirectly. Direct methods include placing your handheld in the cradle attached to your computer - Palm 3C80501U | Handbook - Page 198
HotSync Manager and monitors requests automatically when you open Palm Desktop software. Manual: Monitors requests only when you select HotSync Manager from or other device. See "Palm VII components" in Chapter 1 if you have trouble identifying the serial port. Page 190 Advanced HotSync® - Palm 3C80501U | Handbook - Page 199
Speed: Determines the speed at which data is transferred between your handheld and Palm Desktop software. Try the As Fast As Possible rate first, and adjust downward if you experience problems. This setting allows Palm Desktop software and your handheld to find and use the fastest speed. 5. Click - Palm 3C80501U | Handbook - Page 200
3. Select the appropriate user name from the list. 4. Select an application in the Conduit list. 5. Click Change. 6. Select the direction in which you want to write data, or click Do Nothing to skip data transfer for an application. Note: Changing the HotSync setting from the default affects only - Palm 3C80501U | Handbook - Page 201
Data Association (IrDA). This means that not only can you beam data to another Palm OS handheld that's equipped with an IR port, but you can also beam data to a cell phone and any other device that supports the IrCOMM implementation of the IrDA standards. Most importantly, you can use the IR - Palm 3C80501U | Handbook - Page 202
. 2. Go to this web site: http://www.microsoft.com/windows/downloads 3. Follow the links to the Windows 95 IrDA 2.0 (Infrared Driver), and follow the instructions to download the driver. 4. Close your Internet browser if it's in the way. 5. Find the file W95ir.exe on your computer. Before you go to - Palm 3C80501U | Handbook - Page 203
is attached. It should be different from any port used by the HotSync Manager. 5. Make a note of which port is listed as "providing application support." You need this information to configure the HotSync Manager for infrared communication. This port (COM4 in this example) is the simulated port, the - Palm 3C80501U | Handbook - Page 204
Configuring HotSync Manager for infrared communication Next, you need to go to the HotSync Manager and specify the simulated port used for infrared communication. To configure HotSync Manager for infrared communication: 1. Click the HotSync Manager icon in the Windows system tray. 2. Make sure Local - Palm 3C80501U | Handbook - Page 205
Performing an IR HotSync operation After you complete the steps to prepare for performing an IR HotSync operation, it is easy to perform the actual operation. To perform an IR HotSync operation: 1. In the Applications Launcher, tap the HotSync icon. 2. Tap Local. 3. Tap the pick list below the - Palm 3C80501U | Handbook - Page 206
, you need the following: s A modem connected to your computer s Palm Desktop software configured for use with the modem s A modem, for example with the COM port, make sure the computer is disconnected from all online services, such as America Online (AOL) and CompuServe. 2. Start HotSync Manager if - Palm 3C80501U | Handbook - Page 207
Fast As Possible rate first, and adjust downward if you experience problems. This setting allows Palm Desktop software and your handheld to find and use the fastest speed require a setup string. Refer to your modem manual and enter the setup string if recommended by the manufacturer. 4. Click OK. Chapter - Palm 3C80501U | Handbook - Page 208
Preparing your handheld There are a few steps you must perform to prepare your handheld for a modem HotSync operation. To prepare your handheld for a modem HotSync operation: 1. Tap the Applications icon . 2. Tap the HotSync icon . 3. Tap Modem. Tap here 4. Tap the pick list below the icon and - Palm 3C80501U | Handbook - Page 209
Tap here Note: If you plan to connect to your company's dial-in server (network modem) instead of connecting to a computer modem, see "Conducting a HotSync operation via a network" later in this chapter. 6. Enter the telephone number to access the modem connected to your computer. 7. If needed, - Palm 3C80501U | Handbook - Page 210
the HotSync icon . 3. Tap the Modem icon to dial the Palm Desktop modem and synchronize the applications. 4. Wait for the HotSync operation to complete. See "HotSync problems" in Appendix B if you have any problems conducting a successful HotSync operation. Page 202 Advanced HotSync® Operations - Palm 3C80501U | Handbook - Page 211
server support TCP/IP. (Your System Administrator has this information.) s You have a remote access account. (If you don't have an account, consult your System Administrator.) Everything you need to connect to your company's dial-in server (network modem) is included with Palm Desktop software - Palm 3C80501U | Handbook - Page 212
4. Click the Network tab and make sure your user name has a check mark next to it. If the check mark is not there, click the check box next to your user name. 5. Click OK. 6. Place your handheld in the cradle and perform a HotSync operation. The HotSync operation records network information about - Palm 3C80501U | Handbook - Page 213
/IP software" in Chapter 8 for information on creating a network connection. 8. Tap Service and select a service. Tap here 9. Tap Done. 10. Tap the Menu icon . 11. Tap Options, then tap Conduit Setup. Follow the instructions in "Selecting the conduits for a modem HotSync operation" earlier in this - Palm 3C80501U | Handbook - Page 214
Pad information onto your handheld from a separate external file such as a company phone list. HotSync Manager stores the data in a separate category on your Palm Desktop software and your handheld. You can configure the File Link feature to check for changes to the external file when you perform - Palm 3C80501U | Handbook - Page 215
User ID to a particular handheld. To create a user profile: 1. Open Palm Desktop software. 2. From the Tools menu, choose Users. 3. Click Profiles. profile that you want to create, and then click OK to return to Palm Desktop software. 7. Select the profile from the User list and create the data - Palm 3C80501U | Handbook - Page 216
load on the handheld, and click OK. 5. Click Yes to transfer all the profile data to the handheld. The next time you perform a HotSync operation, Palm Desktop software prompts you to assign a user name to the handheld. Page 208 Advanced HotSync® Operations - Palm 3C80501U | Handbook - Page 217
use with a network. Assign your name, phone number, and other owner information to your handheld. Define a list of Graffiti® abbreviations. View your Palm.Net™ address; change the proxy server IP address; and receive a warning when a wireless transaction is about to transmit your identification or - Palm 3C80501U | Handbook - Page 218
Viewing preferences To open the Preferences screens: 1. Tap the Applications icon . 2. Tap the Preferences icon . 3. Tap the pick list in the upper-right corner of the screen. 4. Select the Preferences screen you want to view. Buttons preferences The Buttons Preferences screen enables you to assign - Palm 3C80501U | Handbook - Page 219
To identify the application that opens when you raise the antenna: 1. Tap the pick list next to the Applications button. 2. Tap the application you want to open whenever you raise the antenna. Tip: Tap Default to have the Wireless category of the Applications Launcher open when you raise the antenna - Palm 3C80501U | Handbook - Page 220
to lock the handheld. When locked, you need to enter the password to use your handheld. Beam Data: Beams the current record to another Palm OS® handheld equipped with an IR port. 3. Tap OK. HotSync buttons preferences The Button Preferences screen also enables you to associate different applications - Palm 3C80501U | Handbook - Page 221
Digitizer preferences The Digitizer Preferences screen opens the digitizer calibration screen. This is the same screen that appears when you go through the Setup process for your handheld. You can recalibrate your screen after a hard reset, or if your digitizer drifts. Formats preferences Use the - Palm 3C80501U | Handbook - Page 222
Time, date, week start, and numbers formats The Time setting defines the format for the time of day. The time format that you select appears in all applications on your handheld. To select the time, date, week start, and numbers format: 1. Tap the Time pick list and select a format. 2. Tap the Date - Palm 3C80501U | Handbook - Page 223
System, alarm, and game sounds Your handheld uses a variety of sounds. The System, Alarm, and Game Sound settings enable you to turn the sounds on or off, and to adjust the volume level. To set the system and alarm sounds: 1. Tap the System Sound pick list and select the sound level. Note: When - Palm 3C80501U | Handbook - Page 224
(and network connection - if required) to complete the configuration. Note: You can purchase a modem for use with your handheld. See http://www.palm.com. You can also create custom configurations. There are four possible kinds of connections. Serial to PC: A local HotSync connection: the direct - Palm 3C80501U | Handbook - Page 225
Sample connection for remote IR HotSync operations The following sample configuration would enable you to perform an IR HotSync operation by sending data through the IR port of a modem attached to a cell phone, which then dials a modem attached to your desktop computer, to synchronize with your - Palm 3C80501U | Handbook - Page 226
IP software The Network Preferences settings enable you to use the TCP/IP software that is included in the Palm OS software. You can use the TCP/IP software to connect with Internet Service Providers (ISPs) or dial-in (remote access) servers. Because the TCP/IP software is a feature of the operating - Palm 3C80501U | Handbook - Page 227
template you want to use. Entering a user name The User Name setting identifies the name you use when you log into your Internet Service Provider or your dial-in server. Although this field can contain multiple lines of text, only two lines appear onscreen. To enter a user name: 1. Tap - Palm 3C80501U | Handbook - Page 228
the word "Assigned." Selecting a connection Use the Connection setting to select the method you want to use to connect to your Internet Service Provider or a dial-in server. See "Connection preferences" earlier in this chapter for information about creating and configuring connection settings. Page - Palm 3C80501U | Handbook - Page 229
. In addition, you can also define a prefix, disable Call Waiting, and give special instructions for using a calling card. Note: The Phone Setup dialog box works correctly for AT&T and Sprint long-distance services. However, because MCI works differently, MCI customers need to put the calling card - Palm 3C80501U | Handbook - Page 230
Entering a prefix A prefix is a number that you dial before the telephone number to access an outside line. For example, many offices require that you dial "9" to dial a number outside the building. To enter a prefix: 1. Tap the Dial Prefix check box to select it. Select this box if you need to use - Palm 3C80501U | Handbook - Page 231
Internet Service Provider (ISP) or your company's network (dial-in server) is easy. Note: If you are connecting to an ISP, you need a third-party application, such as a web browser or news reader, to take advantage of this connection. For information about thirdparty applications that support TCP - Palm 3C80501U | Handbook - Page 232
button. To close a connection: s Tap Disconnect to terminate the connection between your handheld and your service. Creating additional service templates You can create additional service templates from scratch or by duplicating existing templates and editing information. After you create a new or - Palm 3C80501U | Handbook - Page 233
Protocol CSLIP: Compressed Serial Line Internet Protocol Note: If you are not sure, try PPP; if that doesn't work, ask your Internet Service Provider or your System Administrator for the correct connection type. Idle timeout The Idle timeout setting defines how long your handheld waits before - Palm 3C80501U | Handbook - Page 234
section of an IP address is made up of a number from 0 to 255; numbers are the only allowable characters in this field. Ask your Internet Service Provider or System Administrator for the correct Primary or Secondary DNS IP numbers. Tip: Many systems do not require that you enter a DNS. If you - Palm 3C80501U | Handbook - Page 235
of commands that automates logging in to a network server, for example, your corporate network or your Internet Service Provider (ISP). A login script is associated with a specific service template created in Network Preferences. A login script is something that you are likely to receive from your - Palm 3C80501U | Handbook - Page 236
s In the Login Script dialog box on your handheld, accessed from the Details dialog box in Network Preferences Tap here to see the list of available commands Note: You can also use non-ASCII and literal characters in your login script. See Appendix D for more information. Creating a login script on - Palm 3C80501U | Handbook - Page 237
by a Send CR command. Delay Tells your handheld to wait a specific number of seconds before executing the next command in the login script. Get IP Reads an IP address and uses it as the IP address for your handheld. This command is used with SLIP connections. Prompt Opens a dialog box and - Palm 3C80501U | Handbook - Page 238
plug-in applications, send e-mail to Palm Developer Support at [email protected]. Deleting a service template Use the Delete command from the Service menu to delete a service template. To delete a service template: 1. Tap the Service pick list. 2. Tap the service template you want to delete. 3. Tap - Palm 3C80501U | Handbook - Page 239
Options menu TCP/IP troubleshooting If you are having a problem establishing a network connection using TCP/IP, check this section and try the suggestions listed. Displaying expanded Service Connection Progress messages It's helpful to identify at what point in the login procedure the connection - Palm 3C80501U | Handbook - Page 240
Adding a DNS number If your ISP or dial-in server requires a DNS number and you did not enter that information in the Network Preferences screen, it will appear that you successfully logged into your network. When you try to use an application or look up information, however, the connection fails. - Palm 3C80501U | Handbook - Page 241
ShortCuts preferences The ShortCuts Preferences screen enables you to define abbreviations for entering text with Graffiti strokes. This section describes how to create, edit, and delete a ShortCut. See "Graffiti ShortCuts" in Chapter 2 for more information on the use of ShortCuts. Creating a - Palm 3C80501U | Handbook - Page 242
Wireless preferences The Wireless Preferences screen enables you to do the following: s View your address on the Palm.Net network, which you create when you activate the service. s Change the proxy server with which your handheld communicates. s Receive a warning when a wireless transaction is about - Palm 3C80501U | Handbook - Page 243
as the ZIP code of the area where you are currently located Having such information enables the web clipping application to offer you better service and more accurate information in its clippings. If, however, you do not want to send this information over the airwaves, you can receive a warning - Palm 3C80501U | Handbook - Page 244
Page 236 Setting Preferences for Your Handheld - Palm 3C80501U | Handbook - Page 245
the antenna s Resetting your handheld Caring for your handheld Your handheld is designed to be rugged and reliable and to provide years of trouble-free service. Please observe the following general tips when using your handheld: s Take care not to scratch the screen of your handheld. Keep the screen - Palm 3C80501U | Handbook - Page 246
About the AAA batteries Please note the following considerations when replacing the batteries in your handheld: s Under normal conditions, depending on your usage pattern, the AAA batteries of your handheld should provide weeks of use. You can conserve battery life by minimizing the use of the - Palm 3C80501U | Handbook - Page 247
Automatic recharging of the transmitter The transmitter used by your handheld for web clipping and wireless Internet messaging contains a rechargeable storage battery. It is a NiCad (nickel-cadmium) battery. When you first set up your handheld, the initial charging of the transmitter takes about 70 - Palm 3C80501U | Handbook - Page 248
that you can replace, so do not attempt to open it. See "Palm.Net™ Service Agreement and Other Product Information" for details. For information on returning the handheld to Palm, Inc., visit the web site http://www.palm.net The RBRC Battery Recycling Seal is on the NiCad battery inside your - Palm 3C80501U | Handbook - Page 249
antenna is damaged, you can remove it and replace it with another antenna. For information on ordering a new antenna, visit the web site http://www.palm.net. Important: Do not remove the antenna until you have a new antenna ready to install. Using the wireless features without an antenna can damage - Palm 3C80501U | Handbook - Page 250
To be sure the antenna is raised to 180°, place the handheld face down on a flat surface and flatten the antenna against the surface. 4. Grasp the antenna close to the pivot point with your thumb and index finger. 5. Using your thumb, firmly push the antenna out of the pivot point. Note: After you - Palm 3C80501U | Handbook - Page 251
Resetting your handheld Under normal circumstances, you will not have to use the reset button. On rare occasions, however, your handheld may no longer respond when you press buttons or tap the screen. In this case, you need to reset your handheld so that it will work again. Reset button Performing a - Palm 3C80501U | Handbook - Page 252
a soft reset does not solve your problem. After performing a hard reset, you can transfer the data in Palm™ Desktop software to your handheld by sharp tip), to gently press and release the reset button. 3. Wait for the Palm Computing® Platform logo to appear; then release the power button. 4. When a - Palm 3C80501U | Handbook - Page 253
2. From the HotSync Manager menu, choose Custom. 3. Select the appropriate user name from the list. 4. Select an application in the Conduit list. 5. Click Change. 6. Select Desktop overwrites handheld. Note: Changing the HotSync setting from the default affects only the next HotSync operation. - Palm 3C80501U | Handbook - Page 254
Page 246 Maintaining Your Handheld - Palm 3C80501U | Handbook - Page 255
accessible at http://www.palm.com under the Support section s The latest Palm VII™ handheld customer support information on http://www.palm.net If you are still having problems, contact Technical Support. For e-mail addresses and telephone numbers, see the Getting Started guide that comes with your - Palm 3C80501U | Handbook - Page 256
Software installation problems Problem I cannot install Palm Desktop software with Windows 95/98. Solution Try the following: 1. Disable any virus disk space. 4. Delete all temporary files. 5. Run ScanDisk on your computer. 6. Reinstall Palm Desktop software. Page 248 Frequently Asked Questions - Palm 3C80501U | Handbook - Page 257
Operating problems Problem I don't see anything on my handheld's screen. I get a warning message telling me my handheld memory is full. My handheld keeps turning itself off. My handheld - Palm 3C80501U | Handbook - Page 258
Tapping and writing problems Problem Solution When I tap the buttons or screen icons, my handheld activates the wrong feature. Calibrate the screen. See "Digitizer preferences" in Chapter 8. When I tap the - Palm 3C80501U | Handbook - Page 259
Wireless problems Problem Solution The signal strength is s Make sure the antenna wires. Move from under trees. I forgot the password to my Palm.Net™ service account. Visit http://www.palm.net, or contact Customer Care. See the Getting Started guide for contact information. Appendix - Palm 3C80501U | Handbook - Page 260
Due Items is selected. I am having problems listing memos the way I want to see them. s If you cannot manually arrange the order of the memos in Memo Preferences setting. In other words, the sort settings you use with Palm Desktop software are not transferred to your handheld. I created an event - Palm 3C80501U | Handbook - Page 261
HotSync problems Problem Solution I cannot do a HotSync operation; what should I check to make sure I am doing it correctly? s Check the Windows system tray to make sure the HotSync Manager is running. If it is not, open Palm Desktop software. s Click the HotSync Manager, choose Setup, and click - Palm 3C80501U | Handbook - Page 262
s Make sure you selected Local from the HotSync Manager menu or the Palm Desktop software menu. s Check the cable connection between the cradle and the that uses the serial port you selected in the Setup dialog box. s Read the HotSync Log for the user account for which you are performing a HotSync - Palm 3C80501U | Handbook - Page 263
use these sounds to check the modem connection. s Confirm that the Speed setting in the Setup dialog box works for your modem. s If you have problems using the As Fast As Possible option or a specific speed, try using a slower speed. s Make sure you are not running another program, such as America - Palm 3C80501U | Handbook - Page 264
successfully. (continued) Check the following on your handheld: s Confirm that the telephone cables are securely attached to your modem. s Make sure the dialing instruction dials the correct phone number. s If you need to dial an outside line prefix, make sure you selected the Dial Prefix option on - Palm 3C80501U | Handbook - Page 265
. Tap the HotSync icon, then tap Local. s If you have performed a HotSync operation successfully, but you cannot find the data from your handheld on Palm Desktop software, check to see you have the correct user name selected for viewing data. s Click the HotSync Manager and choose Custom. Check that - Palm 3C80501U | Handbook - Page 266
your handheld away from the computer's infrared port. I want to synchronize my computer with more than one handheld. s If the computer running Palm Desktop software synchronizes with more than one handheld, each handheld must have a unique name. Assign a user name to your handheld the first time - Palm 3C80501U | Handbook - Page 267
Beaming problems Problem Solution I cannot beam data to s For best results, Palm VII handhelds another Palm OS should be between between the two handheld must be clear of obstacles. Beaming distance to other Palm OS handhelds may be different. s Move your handheld closer to the receiving - Palm 3C80501U | Handbook - Page 268
Password problems Problem Solution I forgot the password, and my handheld is not locked. information. I forgot the password Visit http://www.palm.net, or contact Customer to my Palm.Net Care. See the Getting Started guide for service account. contact information. Page 260 Frequently Asked - Palm 3C80501U | Handbook - Page 269
guide, which comes with your handheld. Before requesting support, please experiment a bit to reproduce and isolate the problem. When you do contact support Palm OS handhelds. Unfortunately, we are not able to support such a large number of third-party applications. If you are having a problem with - Palm 3C80501U | Handbook - Page 270
Page 262 Frequently Asked Questions - Palm 3C80501U | Handbook - Page 271
consult your company's Information Services department or another experienced user Expense.txt). When you open the Expense application in Palm Desktop software, an Excel macro starts, and populates ." The function of the mapping table is to guide the Excel macro in extracting the Expense data. The - Palm 3C80501U | Handbook - Page 272
Desktop software. These templates are stored in the Template folder (which is in the same folder as Palm Desktop software). If the layout of one (or more) of these templates is appropriate for your reporting needs, you can easily customize the templates with - Palm 3C80501U | Handbook - Page 273
list and choose Template (*.xlt). 6. Navigate to the Template folder (in the Palm Desktop software directory). Note: If you do not need to change the Maptable. template, see "Programming the mapping table" later in this appendix. Read all of the sections of this appendix before making changes to the - Palm 3C80501U | Handbook - Page 274
Sections A Section is an area of the report that has common formatting. It is common for an Expense report to have more than one Section. For example, the following sample Expense Report named Sample3.xlt contains several Sections. Section 1 (not prepaid) Section 2 (prepaid) Section 3 Because your - Palm 3C80501U | Handbook - Page 275
can have only one kind of Fixed or Variable Label for columns. s Place a copy of your custom Expense Report in the Template folder (in the Palm Desktop software directory). Change the file name so it has the file extension .xlt (which defines it as a Microsoft Excel template). Make a note of the - Palm 3C80501U | Handbook - Page 276
Microsoft Excel. Note: This file is located in the same folder as the Palm Desktop software application. Make a backup copy of this file before you make of the Maptable.xls file, next to the cell highlighted in green that reads "Template Name:". If you did not modify an existing template, move to - Palm 3C80501U | Handbook - Page 277
5. Scroll down to a blank area of the Maptable.xls file (below the rows used for Sample4.xlt), and click on a row number to select a blank row. 6. From the Edit menu, choose Paste. A copy of the rows you selected in step 3 is pasted into the Maptable.xls file. 7. Name the table. In the cell - Palm 3C80501U | Handbook - Page 278
10. Define the dimensions of the Section. The dimensions of the Section appear in the green columns (10-13). # of Rows: Represents the total number of rows in the Section, excluding any header or total rows. In other words, this includes only the number of rows in the Section where your handheld - Palm 3C80501U | Handbook - Page 279
12. Define whether the Section is in list format. This setting appears in the light purple columns (18-19). If the Section will present the data in a list format, enter the word "yes". Otherwise, enter the word "no". The following diagram shows data presented in a list format: Only if your section - Palm 3C80501U | Handbook - Page 280
15. Mark a Section for prepaid expenses (yellow column). If a row in the map table is for prepaid (company paid) expenses, type a "yes" in the cell on that Section's row. Type "no" in all the cells of this column that do not pertain to prepaid expenses. 16. Repeat steps 9 through 15 for each Section - Palm 3C80501U | Handbook - Page 281
Expense file details The Expense.txt file contains four groups of data. It will be easier to see these four distinct groups of data if you open the file with a spreadsheet application. Trips Currency Trip Expenses Shows the number of Expense application categories, and lists each one followed by - Palm 3C80501U | Handbook - Page 282
Page 274 Creating a Custom Expense Report - Palm 3C80501U | Handbook - Page 283
Appendix D Non-ASCII Characters for Login Scripts The following information enables you to create custom login scripts that require non-ASCII characters. It is provided for advanced users who understand the use and requirements of such characters in a custom login script. Use of ^char You may use - Palm 3C80501U | Handbook - Page 284
Literal characters The backslash ( \ ) character defines that the next character is transmitted as a literal character, and is not subject to any special processing ordinarily associated with that character. Examples: \^ \< \\ Includes a caret as part of the string Includes a < as part of the - Palm 3C80501U | Handbook - Page 285
Agreement and Other Product Information Palm.Net service agreement NOTICE TO END USER: CAREFULLY READ THE FOLLOWING LEGAL AGREEMENT ("AGREEMENT"). USE OF THE PALM.NET™ WIRELESS COMMUNICATION SERVICE (THE "SERVICE") CONSTITUTES YOUR ACCEPTANCE OF THESE TERMS. IF YOU DO NOT AGREE TO THE TERMS OF - Palm 3C80501U | Handbook - Page 286
the terms of the license contained herein. 3. Interruptions of Service. In the event that the Service is interrupted or you experience some other difficulty with the Service, including any problems or outages with the Network, Palm, Inc. shall use commercially reasonable efforts to try to correct - Palm 3C80501U | Handbook - Page 287
incurred but not yet billed to your account) may be included in your next monthly bill. If you have elected to pay for the Service by credit card and Palm, Inc. does not receive payment from the card issuer or its agent, you agree to pay all amounts due upon demand by - Palm 3C80501U | Handbook - Page 288
agree that your sole remedy shall be to terminate this Agreement. 7.1 Compliance with Laws. You shall not use the Service in any manner contrary to local, state or federal law. Palm, Inc. expressly disclaims any and all responsibility or liability for any action by you that is contrary to such law - Palm 3C80501U | Handbook - Page 289
IN NO WAY WARRANTS THE CAPABILITIES OF ANY SUCH PROVIDED EQUIPMENT OR SOFTWARE USED IN CONJUNCTION WITH THE SERVICE OR THE PALM VII DEVICE. PALM, INC. FURTHER MAKES NO REPRESENTATIONS OR WARRANTIES THAT THE PALM VII DEVICE OR THE SERVICE WILL ACHIEVE THE MAXIMUM NETWORK ACCESS SPEED SET FORTH IN ANY - Palm 3C80501U | Handbook - Page 290
OR DATA, INCLUDING BUT NOT LIMITED TO, DAMAGES FOR LOSS OF PROFITS, USE, DATA OR OTHER INTANGIBLE, EVEN IF PALM, INC., WIRELESS SERVICE PROVIDERS AND/OR PALM, INC.'S LICENSORS HAVE BEEN ADVISED OF THE POSSIBILITY OF SUCH DAMAGES. 9.3 NOTWITHSTANDING ANY OTHER PROVISION OF THIS AGREEMENT, THE - Palm 3C80501U | Handbook - Page 291
lists to any person who has not given specific permission to be included in such a process. 11.2 Modifications To Messaging Service. Palm, Inc. reserves the right to modify or discontinue the Messaging Service with or without notice. Palm, Inc. shall not be liable to you or any third party should - Palm 3C80501U | Handbook - Page 292
, fire flood, epidemic, quarantine, energy crisis, strike, labor trouble, war, riot, accident, shortage, delay in transportation, or any affiliate or in connection with a merger or other business combination in which Palm, Inc. is not the surviving entity. Any attempted assignment in violation of - Palm 3C80501U | Handbook - Page 293
frequency energy and, if not installed and used in accordance with the instructions, may cause harmful interference to radio communications. However, there is no guarantee the dealer or an experienced radio/TV technician for help. Palm.Net™ Service Agreement and Other Product Information Page 285 - Palm 3C80501U | Handbook - Page 294
: Changes or modifications not covered in this manual must be approved in writing by the manufacturer authority to operate this equipment. Responsible Party: Palm, Inc. 5400 Bayfront Plaza PO Box 58007 used batteries according to the manufacturer's instructions and in accordance with your local - Palm 3C80501U | Handbook - Page 295
Uwaga Palm.Net™ Service Agreement and Other Product Information Page 287 - Palm 3C80501U | Handbook - Page 296
Page 288 - Palm 3C80501U | Handbook - Page 297
characters Graffiti writing 38 onscreen keyboard 40 Account on Palm.Net service 126 Activating the Palm.Net service 14, 125 Add-on applications 46-49, 244 Address -49 Memo Pad 59 opening 20 plug-in 230 preferences for 45 problems with 252 removing 49 security 50 size in kilobytes 261 third-party - Palm 3C80501U | Handbook - Page 298
185-187 categories 186 location of IR port 5 pen stroke to activate 212 problems with 259 Billing 126, 131, 279 Bold font for text 79 Brightness control 31 Charging the transmitter 10 Check boxes 18 Check marks to mark read items e-mail (Mail) 164 messages (iMessenger application) 139 Clearing - Palm 3C80501U | Handbook - Page 299
135 Copying text 62 Country default setting 213 Coverage of Palm.Net service 125, 126 Cradle connecting to serial port 8 for local 113 Custom expense reports 263-273 Custom fields in Address Book 99 Customer support 125, 127, 247, 261 Customizing. See Preferences Cutting text 62 Cycling - Palm 3C80501U | Handbook - Page 300
154 iMessenger messages from network 158 passwords 51 records 63 service templates 230 text 62 See also Purging records Delivering e-mail (iMessenger application) 151 Desktop E-Mail application applications supported 162 managing 161-184 support of Mail features 169 Desktop software 12-13 - Palm 3C80501U | Handbook - Page 301
keyboard 41 using the onscreen keyboard 40 Entries. See Address Book Eudora 162 Euro displaying on desktop computer 115 in Expense 113 printing 116 problems with 252 Events. See Date Book Excel, transferring Expense data to 115-119 Exchange 162 Exchanging data. See HotSync Exclamation marks in To Do - Palm 3C80501U | Handbook - Page 302
marks 36 ShortCuts for entering data 39, 233-234 symbols 37 tips 33 writing 31-40 writing area 6, 32 H Handheld interface elements 18 locking 52 problems with 247-261 setting up 10 turning on and off 5 unique name 12 Hard reset 244 effect on iMessenger application 158 after upgrading 12 Header - Palm 3C80501U | Handbook - Page 303
197, 217-218 installing Windows 95 driver 194 port 193, 195 problems with IR HotSync operations 256 requirements for computer 193 Infrared port. clipping applications IP address for Network preferences 226 for Palm.Net proxy server 234 for service template 224 IR port 5 See also Beaming information - Palm 3C80501U | Handbook - Page 304
changing setup 164 closing e-mail 165 confirm delivery 169, 172 confirm read 169, 172 creating e-mail 165-167 deleting e-mail 175 desktop viewing e-mail 164 Mailbox on Palm.Net network 157 Main applications 19 Maintenance information 237 MapQuest 123 Maps of Palm.Net coverage 126 Masking records - Palm 3C80501U | Handbook - Page 305
Desktop software. See Desktop software Palm.Net service account status 126 activating 14 mailbox on 157 maps of coverage 126 network 125 overview 14, 124 password 15 protection of wireless transactions 125 service agreement 277 signal strength 127 support information 127 username 15 web clipping - Palm 3C80501U | Handbook - Page 306
) 170 Private records displaying and creating 76-78, 252 lost with forgotten password 53 See also Security Problems with handheld 247-261 Profiles 207 Proxy server for Palm.Net service 234 Punctuation marks Graffiti writing 36 onscreen keyboard 40 Purging deleted e-mail (Mail) 176 deleted messages - Palm 3C80501U | Handbook - Page 307
Date Book 81 defined 61 deleting 63, 87 displaying a category of 68 duplicating address 98 editing 61-63 Expense 110 fonts 79 hiding private 50, 76 lost 252 masking private 50, 76 Memo Pad 105 notes for 78-79 number of 261 private 76-78 purging 64 sorting 75-76 To Do List 100 Recovering deleted e- - Palm 3C80501U | Handbook - Page 308
Serial port 8, 190, 198 Service agreement, Palm.Net 277 Service templates 224, 230 Service, Palm.Net 124 Service, selecting for network 219 17, 250 TCP/IP 218, 231 TDA (To Do List archive file) 41 Technical Support 125, 127, 247, 261 Templates for expense reports 117 Text copying 62 cutting 62 entry - Palm 3C80501U | Handbook - Page 309
58 prioritizing records 100, 103 private records 78 problems with 252 purging records 64, 103 sorting records data. See Beaming information Troubleshooting 247-261 Truncated messages ( 67 Username identifying handheld 232 for ISP 219 for Palm.Net service 15, 234 unique for each handheld 12 V Vendor - Palm 3C80501U | Handbook - Page 310
Wireless preferences 234 Writing area 6 Writing. See Entering data X XLT (Expense report template in Excel) 117 Y Yahoo! People Search 133 Page 302 Index
-
 1
1 -
 2
2 -
 3
3 -
 4
4 -
 5
5 -
 6
6 -
 7
7 -
8
-
9
-
10
-
11
-
12
-
13
-
14
-
15
-
16
-
17
-
18
-
19
-
20
-
21
-
22
-
23
-
24
-
25
-
26
-
27
-
28
-
29
-
30
-
31
-
32
-
33
-
34
-
35
-
36
-
37
-
38
-
39
-
40
-
41
-
42
-
43
-
44
-
45
-
46
-
47
-
48
-
49
-
50
-
51
-
52
-
53
-
54
-
55
-
56
-
57
-
58
-
59
-
60
-
61
-
62
-
63
-
64
-
65
-
66
-
67
-
68
-
69
-
70
-
71
-
72
-
73
-
74
-
75
-
76
-
77
-
78
-
79
-
80
-
81
-
82
-
83
-
84
-
85
-
86
-
87
-
88
-
89
-
90
-
91
-
92
-
93
-
94
-
95
-
96
-
97
-
98
-
99
-
100
-
101
-
102
-
103
-
104
-
105
-
106
-
107
-
108
-
109
-
110
-
111
-
112
-
113
-
114
-
115
-
116
-
117
-
118
-
119
-
120
-
121
-
122
-
123
-
124
-
125
-
126
-
127
-
128
-
129
-
130
-
131
-
132
-
133
-
134
-
135
-
136
-
137
-
138
-
139
-
140
-
141
-
142
-
143
-
144
-
145
-
146
-
147
-
148
-
149
-
150
-
151
-
152
-
153
-
154
-
155
-
156
-
157
-
158
-
159
-
160
-
161
-
162
-
163
-
164
-
165
-
166
-
167
-
168
-
169
-
170
-
171
-
172
-
173
-
174
-
175
-
176
-
177
-
178
-
179
-
180
-
181
-
182
-
183
-
184
-
185
-
186
-
187
-
188
-
189
-
190
-
191
-
192
-
193
-
194
-
195
-
196
-
197
-
198
-
199
-
200
-
201
-
202
-
203
-
204
-
205
-
206
-
207
-
208
-
209
-
210
-
211
-
212
-
213
-
214
-
215
-
216
-
217
-
218
-
219
-
220
-
221
-
222
-
223
-
224
-
225
-
226
-
227
-
228
-
229
-
230
-
231
-
232
-
233
-
234
-
235
-
236
-
237
-
238
-
239
-
240
-
241
-
242
-
243
-
244
-
245
-
246
-
247
-
248
-
249
-
250
-
251
-
252
-
253
-
254
-
255
-
256
-
257
-
258
-
259
-
260
-
261
-
262
-
263
-
264
-
265
-
266
-
267
-
268
-
269
-
270
-
271
-
272
-
273
-
274
-
275
-
276
-
277
-
278
-
279
-
280
-
281
-
282
-
283
-
284
-
285
-
286
-
287
-
288
-
289
-
290
-
291
-
292
-
293
-
294
-
295
-
296
-
297
-
298
-
299
-
300
-
301
-
302
-
303
-
304
-
305
-
306
-
307
-
308
-
309
-
310
 |
 |

Handbook
for the
Palm VII
™
Handheld