Panasonic AG-AC160A Operating Instructions Advanced - Page 10
Basic shooting operations, Preparing for shooting
 |
View all Panasonic AG-AC160A manuals
Add to My Manuals
Save this manual to your list of manuals |
Page 10 highlights
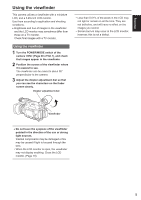
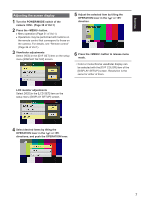
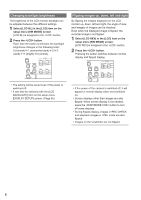
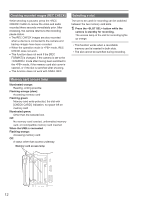
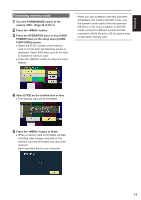
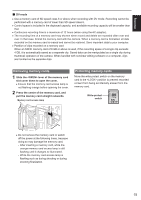
Basic shooting operations Preparing for shooting 1 Turn the POWER/MODE switch of the camera . (Page 30 of Vol.1) ••Make sure the mode lamp is lit. 2 Slide the lever of the memory card slot cover down to open the cover. 3 Fully insert a memory card with the notch up into the memory card slot. 4 Close the memory card slot cover. ••Close until it clicks firmly into place. Insert from the terminal side straight forward as shown in the picture, until you hear a "click". • Do not perform the following operations while the memory card access lamp is flashing. You may damage the memory card or its contents, or cause the camera to fail to operate correctly. - Opening the door and removing the memory card - Switching off the power - Connecting and disconnecting the USB2.0 connection cable - Removing the battery - Shaking or striking the camera • Always format memory cards that have been used on other devices when first using them with this camera. (Page 13) • If [CHECK CARD.] (check the memory card.) is displayed on the viewfinder or LCD monitor, remove the memory card and reinsert it. • Images shot from the start of shooting until it is stopped, are recorded as one clip. • When recording is paused after a short recording, time may be required after pressing the button before writing to the memory card is completed. This means that if the button is pressed, operations cannot be accepted immediately. • The camera reads information from the memory card immediately after the memory card is inserted, therefore, after [PAUSE] is displayed in the operation status display (Page 76), press the button to start shooting. • The recording formats of factory default are [SYSTEM FREQ] = [59.94Hz]*, [PH 1080/60i] in AVCHD mode, and [DV 480/60i] in DV mode. To check current setting status, see "Checking and displaying shooting status" (Page 25). • The upper limit for the number of clips that can be recorded in AVCHD mode on a single memory card is 900. (However, this number may exceed 900 clips when shooting immediately after the POWER/MODE switch has been turned .) The upper limit for the number of clips that can be recorded in DV mode is 900. * The factory setting values may vary depending on the region. 10
-
 1
1 -
2
-
3
-
4
-
 5
5 -
 6
6 -
 7
7 -
 8
8 -
 9
9 -
 10
10 -
 11
11 -
 12
12 -
 13
13 -
 14
14 -
 15
15 -
16
-
17
-
18
-
19
-
20
-
21
-
22
-
23
-
24
-
25
-
26
-
27
-
28
-
29
-
30
-
31
-
32
-
33
-
34
-
35
-
36
-
37
-
38
-
39
-
40
-
41
-
42
-
43
-
44
-
45
-
46
-
47
-
48
-
49
-
50
-
51
-
52
-
53
-
54
-
55
-
56
-
57
-
58
-
59
-
60
-
61
-
62
-
63
-
64
-
65
-
66
-
67
-
68
-
69
-
70
-
71
-
72
-
73
-
74
-
75
-
76
-
77
-
78
-
79
-
80
-
81
-
82
-
83
-
84
-
85
-
86
-
87
-
88
-
89
-
90
-
91
-
92
-
93
-
94
-
95
-
96
-
97
-
98
-
99
-
100
-
101
-
102
-
103
-
104
-
105
-
106
-
107
-
108
-
109
-
110
 |
 |