Panasonic AG-AC160A Operating Instructions Advanced - Page 24
Using convenient shooting functions, Low angle shooting, Self-portrait recording
 |
View all Panasonic AG-AC160A manuals
Add to My Manuals
Save this manual to your list of manuals |
Page 24 highlights
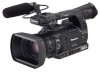
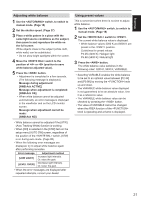
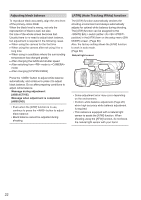
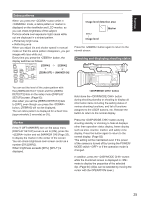
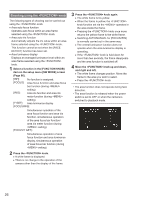
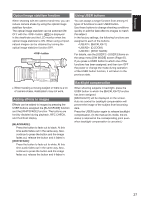
Using convenient shooting functions Low angle shooting When shooting at a low angle, it is convenient to use the button on the side of the handle. Release the switch and press the button to start shooting. ••When not using the button on the handle, lock it with the switch to prevent unintentional operation. Turn clockwise to lock. switch button (handle side) • When you press the button, images are not played back in right and left flipped state. • Operation status displays when shooting a self-portrait No display: You cannot record (no memory card, etc.) [ ]: Shooting in progress, during transition to shooting pause [ ]: Shooting paused (shooting standby) [ ]: Warning display in progress • Only part of the screen is displayed. When [ ] appears, rotate the LCD monitor to the normal shooting orientation, and check the message content. • When checking screen display information with the viewfinder, rotate the LCD monitor to the normal shooting orientation. • Images that are the same as normal shooting are output to external devices. Self-portrait recording Open the LCD monitor, rotate it 180° to the lens side to record yourself. Selecting [MIRROR] in the [SELF SHOOT] item on the setup menu [DISPLAY SETUP] screen displays left and right flipped images so that you can shoot yourself like looking in the mirror. However, even though shooting in mirror mode, the recorded images are the same as normal shooting. Images are not recorded as mirrored images. 24
-
 1
1 -
2
-
3
-
4
-
5
-
6
-
7
-
8
-
9
-
10
-
11
-
12
-
13
-
14
-
15
-
16
-
17
-
18
-
 19
19 -
 20
20 -
 21
21 -
 22
22 -
 23
23 -
 24
24 -
 25
25 -
 26
26 -
 27
27 -
 28
28 -
 29
29 -
30
-
31
-
32
-
33
-
34
-
35
-
36
-
37
-
38
-
39
-
40
-
41
-
42
-
43
-
44
-
45
-
46
-
47
-
48
-
49
-
50
-
51
-
52
-
53
-
54
-
55
-
56
-
57
-
58
-
59
-
60
-
61
-
62
-
63
-
64
-
65
-
66
-
67
-
68
-
69
-
70
-
71
-
72
-
73
-
74
-
75
-
76
-
77
-
78
-
79
-
80
-
81
-
82
-
83
-
84
-
85
-
86
-
87
-
88
-
89
-
90
-
91
-
92
-
93
-
94
-
95
-
96
-
97
-
98
-
99
-
100
-
101
-
102
-
103
-
104
-
105
-
106
-
107
-
108
-
109
-
110
 |
 |