Panasonic AG-AC160A Operating Instructions Advanced - Page 49
Uploading metadata [META DATA], Selecting the [USER CLIP NAME] recording method, CLIP COUNTER RST]
 |
View all Panasonic AG-AC160A manuals
Add to My Manuals
Save this manual to your list of manuals |
Page 49 highlights
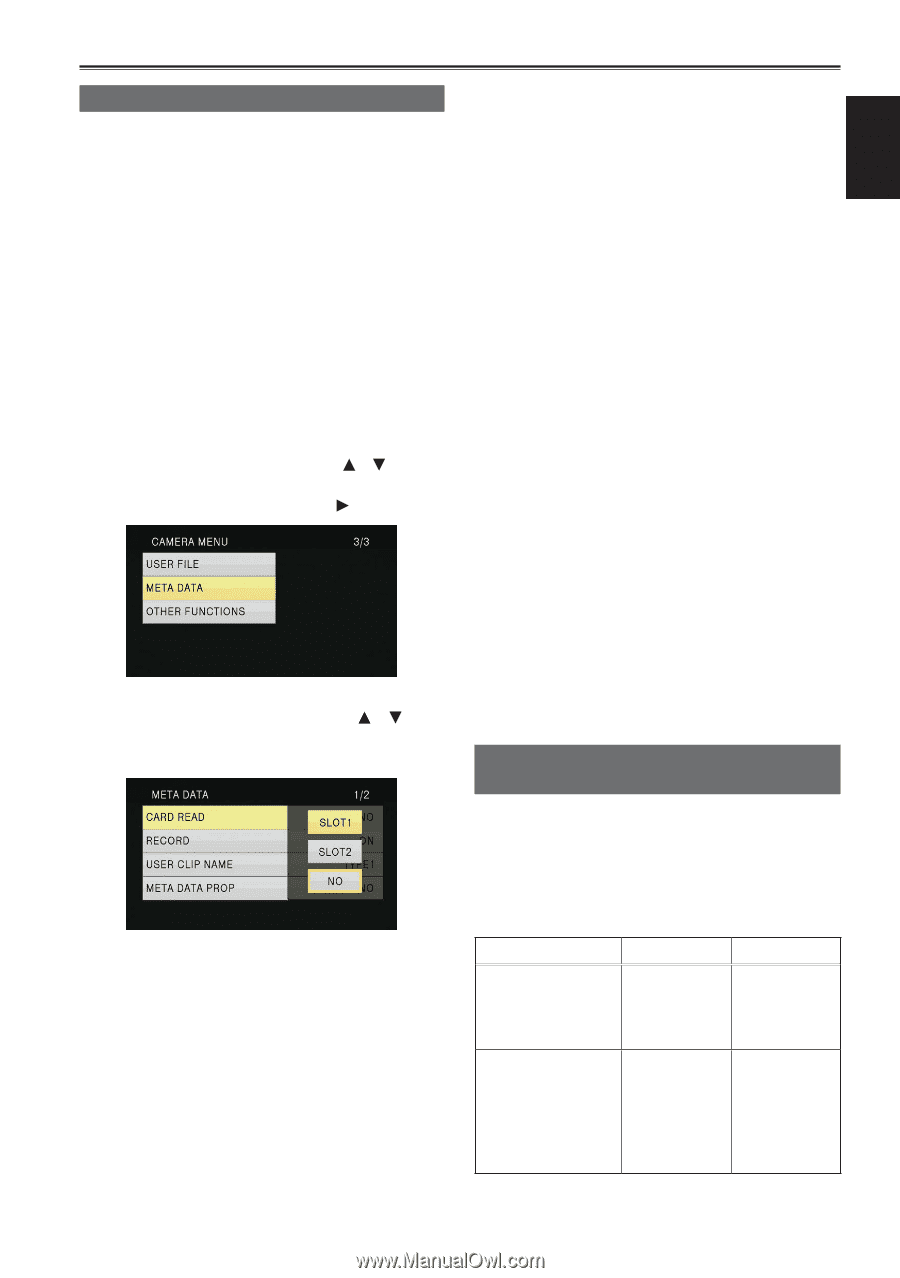
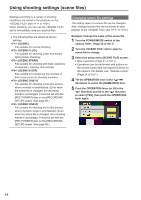
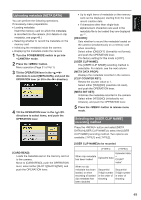
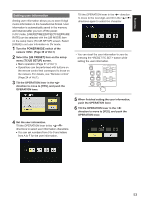
Shooting Uploading metadata [META DATA] You can perform the following operations. If necessary make preparations. ••Loading metadata Insert the memory card on which the metadata is recorded into the camera. (For details on clip metadata, see page 48.) ••Selecting whether to record the metadata on the memory card ••Initializing the metadata inside the camera ••Displaying the metadata inside the camera 1 Turn the POWER/MODE switch to go into mode. 2 Press the button. Menu operation (Page 31 of Vol.1) 3 Tilt the OPERATION lever in the < >< > directions to select [META DATA], and push the OPERATION lever (or tilt in the < > direction). 4 Tilt the OPERATION lever in the < >< > directions to select items, and push the OPERATION lever. [CARD READ]: Loads the metadata set on the memory card on to the camera. Move to [CARD READ], push the OPERATION lever, select either [SLOT1]/[SLOT2]/[NO], and push the OPERATION lever. ••Up to eight items of metadata on the memory card can be displayed, starting from the most recent creation date. ••If characters other than single-byte alphanumeric characters are used in the metadata file to be loaded they are displayed as "*". [RECORD]: Sets whether to record the metadata loaded on the camera simultaneously on a memory card when recording. Select either [ON]/[OFF] (format/do not format), and push the OPERATION lever. The factory setting for this mode is [OFF]. [USER CLIP NAME]: The [USER CLIP NAME] recording method is selectable. For details, see the next column. [META DATA PROP]: Displays the metadata recorded in the camera. [CLIP COUNTER RST]: Resets the counter value to 1. Select either [YES]/[NO] (reset/do not reset), and push the OPERATION lever. [META INIT SET]: Initializes the metadata recorded in the camera. Select either [YES]/[NO] (initialize/do not initialize), and push the OPERATION lever. 5 Press the button to release menu mode. Selecting the [USER CLIP NAME] recording method Press the button and select [META DATA][USER CLIP NAME] to select the [USER CLIP NAME] recording method. Two options are available: [TYPE1] and [TYPE2]. [USER CLIP NAME] to be recorded [TYPE1] [TYPE2] Uploaded data When clip metadata has been loaded Uploaded data + COUNT value* When no clip metadata has been loaded, or when recording of loaded clip metadata has been disabled Sequential 5-digit number in the order of shooting Sequential 5-digit number in order of shooting 49
-
 1
1 -
2
-
3
-
4
-
5
-
6
-
7
-
8
-
9
-
10
-
11
-
12
-
13
-
14
-
15
-
16
-
17
-
18
-
19
-
20
-
21
-
22
-
23
-
24
-
25
-
26
-
27
-
28
-
29
-
30
-
31
-
32
-
33
-
34
-
35
-
36
-
37
-
38
-
39
-
40
-
41
-
42
-
43
-
 44
44 -
 45
45 -
 46
46 -
 47
47 -
 48
48 -
 49
49 -
 50
50 -
 51
51 -
 52
52 -
 53
53 -
 54
54 -
55
-
56
-
57
-
58
-
59
-
60
-
61
-
62
-
63
-
64
-
65
-
66
-
67
-
68
-
69
-
70
-
71
-
72
-
73
-
74
-
75
-
76
-
77
-
78
-
79
-
80
-
81
-
82
-
83
-
84
-
85
-
86
-
87
-
88
-
89
-
90
-
91
-
92
-
93
-
94
-
95
-
96
-
97
-
98
-
99
-
100
-
101
-
102
-
103
-
104
-
105
-
106
-
107
-
108
-
109
-
110
 |
 |