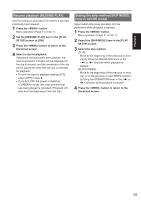
Panasonic AG-AC160A Operating Instructions Advanced - Page 62
Repairing clips (only in DV mode), Press the <MENU> button on the thumbnail - avchd camcorder
 |
View all Panasonic AG-AC160A manuals
Add to My Manuals
Save this manual to your list of manuals |
Page 62 highlights
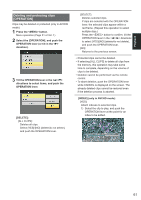
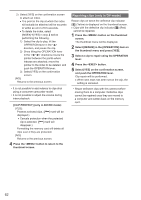
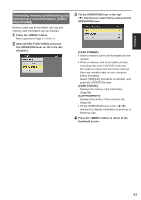
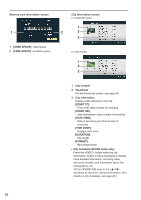
2) Select [YES] on the confirmation screen to attach an index. ••The point in the clip at which the index will actually be attached will be accurate to within an error of 0.5 seconds. ••To delete the index, select [INDEX][YES] in step 3 before performing the following. 1) Select the clip to play, tilt the OPERATION lever in the < > direction, and pause the clip. 2) Since tilting the OPERATION lever in the < >< > directions moves the pointer between the points where indexes are attached, move the pointer to the index to be deleted, and push the OPERATION lever. 3) Select [YES] on the confirmation screen. [NO]: Returns to the previous screen. • It is not possible to add indexes to clips shot using a consumer camcorder model. • It is not possible to adjust the volume during index playback. [CLIP PROTECT] (only in AVCHD mode): [YES]: Protects selected clips. ([ ] mark will be displayed.) ••Cancels protection when the protected clip is selected. ([ ] mark will disappear.) Formatting the memory card will delete all clips even if they are protected. [NO]: Returns to the previous screen. 4 Press the button to return to the thumbnail screen. Repairing clips (only in DV mode) Repair clips on which the defective clip indicator [ X ] (Yellow) is displayed on the thumbnail screen. ••Clips with the defective clip indicator [ X ] (Red) cannot be repaired. 1 Press the button on the thumbnail screen. The thumbnail menu will be displayed. 2 Select [REPAIR] in the [OPERATION] item on the thumbnail menu and press [YES]. 3 Select a clip to repair using the OPERATION lever. 4 Press the button. 5 Select [YES] on the confirmation screen, and push the OPERATION lever. Clip repair will be performed. ••When shot mark has been set on the clip, the setting is canceled. • Repair defective clips with this camera before moving them to a computer. Defective clips cannot be repaired once they are moved to a computer and written back on the memory card. 62
-
 1
1 -
2
-
3
-
4
-
5
-
6
-
7
-
8
-
9
-
10
-
11
-
12
-
13
-
14
-
15
-
16
-
17
-
18
-
19
-
20
-
21
-
22
-
23
-
24
-
25
-
26
-
27
-
28
-
29
-
30
-
31
-
32
-
33
-
34
-
35
-
36
-
37
-
38
-
39
-
40
-
41
-
42
-
43
-
44
-
45
-
46
-
47
-
48
-
49
-
50
-
51
-
52
-
53
-
54
-
55
-
56
-
 57
57 -
 58
58 -
 59
59 -
 60
60 -
 61
61 -
 62
62 -
 63
63 -
 64
64 -
 65
65 -
 66
66 -
 67
67 -
68
-
69
-
70
-
71
-
72
-
73
-
74
-
75
-
76
-
77
-
78
-
79
-
80
-
81
-
82
-
83
-
84
-
85
-
86
-
87
-
88
-
89
-
90
-
91
-
92
-
93
-
94
-
95
-
96
-
97
-
98
-
99
-
100
-
101
-
102
-
103
-
104
-
105
-
106
-
107
-
108
-
109
-
110
 |
 |