Panasonic AG-AC160A Operating Instructions Advanced - Page 66
Frame-by-frame playback, Adjusting volume, Viewing images on a television or another monitor
 |
View all Panasonic AG-AC160A manuals
Add to My Manuals
Save this manual to your list of manuals |
Page 66 highlights
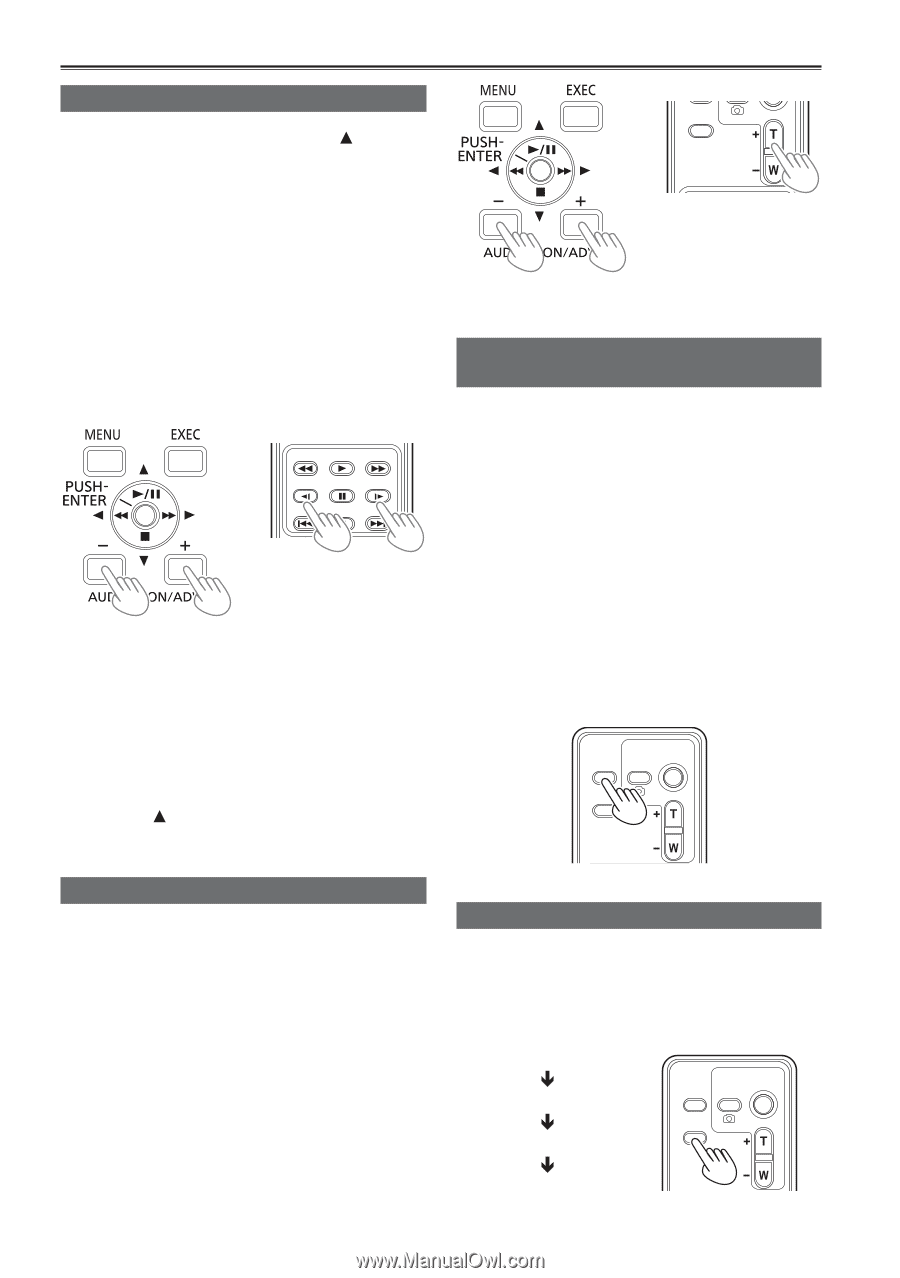
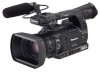
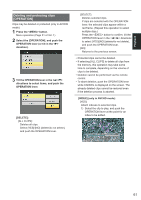
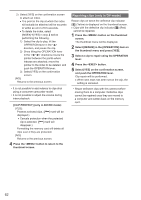
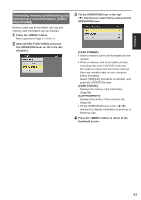
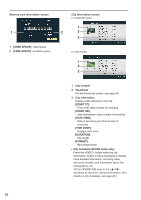
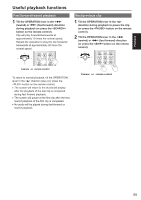
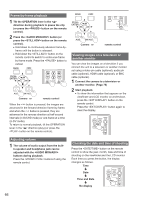
Frame-by-frame playback 1 Tilt the OPERATION lever in the < > direction during playback to pause the clip (or press the button on the remote control). 2 Press the button (or press the button on the remote control). ••Hold down to continuously advance frame-byframe until the button is released. ••Hold down the button on the remote control to switch to continuous frame by frame mode. Press the button to cancel. SEARCH PLAY SEARCH STILL ADV PAUSE STILL ADV SKIP STOP SKIP Camera or remote control When the button is pressed, the images are advanced in the forward direction frame-by-frame, and when the button is pressed, they are advanced in the reverse direction at half-second intervals (in AVCHD mode) or one frame at a time (in DV mode). To return to normal playback, tilt the OPERATION lever in the < > direction (play) (or press the button on the remote control). Adjusting volume 1 The volume of audio output from the builtin speaker and headphone jack can be adjusted with the buttons during playback. Press the / buttons if using the remote control. 66 DATE/ TIME ZOOM VOL Camera or remote control Viewing images on a television or another monitor You can view the images on a television if you connect the unit to a television or another monitor set using a video pin cable (optional), audio pin cable (optional), HDMI cable (optional), or BNC cable (optional). 1 Connect the camera to a television or another monitor. (Page 70) 2 Start playback. ••To show the information that appears on the viewfinder and LCD monitor on a television, press the button on the remote control. Press the button again to clear the display. START/ EXT PHOTO STOP DISPLAY SHOT DATE/ TIME ZOOM VOL SEARCH PLAY SEARCH STILL ADV PAUSE STILL ADV Checking the date and time of shooting SKIP STOP SKIP Press the button on the remote MENU control to show the year, month, date and time of shooting on the viewfindeENTrERand the LCD monitor. Each time you press the button, the display changes as follows. Time Date Time and Date EXT DISPLAY PHOTO SHOT START/ STOP DATE/ TIME ZOOM VOL No display SEARCH PLAY SEARCH STILL ADV PAUSE STILL ADV SKIP STOP SKIP
-
 1
1 -
2
-
3
-
4
-
5
-
6
-
7
-
8
-
9
-
10
-
11
-
12
-
13
-
14
-
15
-
16
-
17
-
18
-
19
-
20
-
21
-
22
-
23
-
24
-
25
-
26
-
27
-
28
-
29
-
30
-
31
-
32
-
33
-
34
-
35
-
36
-
37
-
38
-
39
-
40
-
41
-
42
-
43
-
44
-
45
-
46
-
47
-
48
-
49
-
50
-
51
-
52
-
53
-
54
-
55
-
56
-
57
-
58
-
59
-
60
-
 61
61 -
 62
62 -
 63
63 -
 64
64 -
 65
65 -
 66
66 -
 67
67 -
 68
68 -
 69
69 -
 70
70 -
 71
71 -
72
-
73
-
74
-
75
-
76
-
77
-
78
-
79
-
80
-
81
-
82
-
83
-
84
-
85
-
86
-
87
-
88
-
89
-
90
-
91
-
92
-
93
-
94
-
95
-
96
-
97
-
98
-
99
-
100
-
101
-
102
-
103
-
104
-
105
-
106
-
107
-
108
-
109
-
110
 |
 |