Panasonic AG-AC7 Operating Instructions
Panasonic AG-AC7 Manual
 |
View all Panasonic AG-AC7 manuals
Add to My Manuals
Save this manual to your list of manuals |
Panasonic AG-AC7 manual content summary:
- Panasonic AG-AC7 | Operating Instructions - Page 1
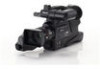
Operating Instructions Memory Card Camera-Recorder Model No. AG-AC7P Before connecting, operating or adjusting this product, please read the instructions completely. VQT3Q78 - Panasonic AG-AC7 | Operating Instructions - Page 2
WITH LIQUIDS, SUCH AS VASES, SHALL BE PLACED ON THE APPARATUS. ≥ USE ONLY THE RECOMMENDED ACCESSORIES. ≥ DO NOT REMOVE THE COVER (OR BACK); THERE ARE NO USER SERVICEABLE PARTS INSIDE. REFER SERVICING TO QUALIFIED SERVICE PERSONNEL. CAUTION! DO NOT INSTALL OR PLACE THIS UNIT IN A BOOKCASE, BUILT - Panasonic AG-AC7 | Operating Instructions - Page 3
FCC NOTICE (USA) Declaration of Conformity Model Number: AG-AC7P Trade Name: Panasonic Responsible Party: Panasonic Corporation of North America One Panasonic Way, Secaucus, NJ 07094 Support contact: 1-800-524-1448 This device complies with Part 15 of FCC Rules. Operation is subject to the - Panasonic AG-AC7 | Operating Instructions - Page 4
125 V, ensure the cord you use is suited to the voltage of the AC supply and the rated current of the AC adaptor. ≥ Contact an electrical parts distributor for assistance in selecting a suitable AC plug adaptor or AC cord set. The unit should be installed near an accessible AC power outlet, with the - Panasonic AG-AC7 | Operating Instructions - Page 5
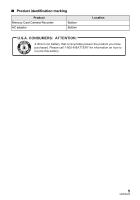
Product identification marking Product Memory Card Camera-Recorder AC adaptor Bottom Bottom Location U.S.A. CONSUMERS: ATTENTION: A lithium ion battery that is recyclable powers the product you have purchased. Please call 1-800-8-BATTERY for information on how to recycle this battery. 5 VQT3Q78 - Panasonic AG-AC7 | Operating Instructions - Page 6
replacement of the obsolete outlet. 11) Only use attachments/accessories specified by the manufacturer. 12) Use only with the cart, stand, tripod, Refer all servicing to qualified service personnel. Servicing is required when the apparatus has been damaged in any way, such as power-supply cord or - Panasonic AG-AC7 | Operating Instructions - Page 7
parts of your camera. Do not attempt to disassemble this unit. There are no user serviceable parts inside. Unplug your camera from the power supply DO NOT LEAVE YOUR CAMERA OR THE POWER SUPPLY TURNED ON WHEN NOT IN USE. ≥ STORAGE OF YOUR CAMERA ... Store and handle your camera in a manner that - Panasonic AG-AC7 | Operating Instructions - Page 8
Indemnity about recorded content Panasonic does not accept any responsibility for damages directly or indirectly due to any type of problems that result in used for motion picture recording/motion picture playback are indicated by in these operating instructions. ≥ Functions that can be used - Panasonic AG-AC7 | Operating Instructions - Page 9
Preparation Basic Advanced Contents Accessories 11 Preparation Before using [1] Parts identification and handling 12 About the supplied accessories...... 16 Setup [1] Power supply 17 Charging the battery 17 Inserting/removing the battery ..... 18 Charging and recording time........ 19 - Panasonic AG-AC7 | Operating Instructions - Page 10
Indications 90 [2] Messages 92 About recovery 92 Troubleshooting 93 Cautions for use 99 About copyright 104 Recording modes/approximate recordable time 105 Approximate number of recordable pictures 106 Specifications 107 Optional accessories 111 Limited Warranty (ONLY FOR U.S.A. AND PUERTO - Panasonic AG-AC7 | Operating Instructions - Page 11
Accessories Check the accessories before using this unit. Keep the accessories out of reach of children to prevent swallowing. Battery pack Lens cap AC adaptor AC cable DC cable AV cable Component cable USB cable Stylus pen Shoulder strap 11 VQT3Q78 - Panasonic AG-AC7 | Operating Instructions - Page 12
using 1 1 2 3 45 6 Parts identification and handling 1 LCD monitor (Touch screen) (l 25) ≥ It can open up to 90o. 7 89 10 MANUAL FOCUS POWER as the recording start/stop button. 5 Sub zoom lever (l 45) ≥ This lever functions in the same manner as the zoom lever. 6 Speaker 7 Sub menu button [ - Panasonic AG-AC7 | Operating Instructions - Page 13
ring (l 66) 14 Accessory shoe (l 111) 15 Recording lamp (l 42) 16 Lens 17 Lens hood ≥ This will reduce the extra light entering the lens in unite the mark A and fasten the lens hood attachment knob. ≥ If you use the filter kit (optional) or the conversion lens (optional), remove the lens hood - Panasonic AG-AC7 | Operating Instructions - Page 14
power supply and the noise will stop. 25 Internal microphones 26 Headphone terminal [PHONES] (l 52) ≥ Excessive sound pressure from earphones and headphones can cause hearing loss. ≥ Listening at full volume for long periods may damage the user's ears. 27 Photoshot button [ ] (l 32) 28 Zoom - Panasonic AG-AC7 | Operating Instructions - Page 15
[HDMI] (l 78, 82) 35 USB terminal [ ] (l 88) 36 DC input terminal [DC IN] (l 20) ≥ Always use the supplied AC adaptor or a genuine Panasonic AC adaptor (VW-AD21PP-K; optional). 37 Status indicator (l 23) 38 Power switch (l 23) 39 Recording start/stop button (l 30) 40 Grip belt Adjust the length of - Panasonic AG-AC7 | Operating Instructions - Page 16
About the supplied accessories ∫ About the Lens cap When not using the unit, attach the lens cap to protect the lens. 2 Fold the tip of the shoulder strap, run it through the shoulder strap length adjuster, and pull it. ≥ Pull it out more than 2 cm (0.79 q) 1 from the shoulder strap length - Panasonic AG-AC7 | Operating Instructions - Page 17
Setup 1 Power supply ∫ About batteries that you can use with this unit The battery that can be used with this unit is VW-VBG130/VW-VBG260/VW-VBG6. ≥ The unit has a function for distinguishing batteries which can be used safely. The dedicated battery (VW-VBG130/VW-VBG260/VW-VBG6) supports this - Panasonic AG-AC7 | Operating Instructions - Page 18
inserting it in the direction shown in the figure and slide it until it clicks and locks. Removing the battery Be sure to set the power switch to OFF and the status indicator goes off. Then remove the battery while supporting the unit to prevent it dropping. While pushing the PUSH button, slide the - Panasonic AG-AC7 | Operating Instructions - Page 19
vary depending on the usage conditions such as high/low temperature. ≥ The actual recordable time refers to the recordable time when repeatedly starting/stopping recording, turning the unit on/off, moving the zoom lever etc. ≥ The batteries heat up after use or charging. This is not a malfunction - Panasonic AG-AC7 | Operating Instructions - Page 20
: While the DC cable is connected to the AC adaptor, the battery will not charge. ≥ Do not use the AC cable with any other equipment as it is designed only for this the AC adaptor, be sure to set the power switch to OFF and the status indicator goes off. Then remove the AC adaptor. 20 VQT3Q78 - Panasonic AG-AC7 | Operating Instructions - Page 21
picture recording. Card type Capacity Motion picture recording 8 MB/16 MB Cannot be used. SD Memory Card 32 MB/64 MB/ 128 MB/256 MB Cannot be guaranteed card, etc. Still picture recording Cannot be guaranteed in operation. Can be used. ≥ 4 GB or more Memory Cards that do not have the SDHC - Panasonic AG-AC7 | Operating Instructions - Page 22
/removing an SD card When using an SD card not from Panasonic, or one previously used on other equipment, for the gone off. Access lamp [ACCESS] A ≥ When this unit is accessing the SD card, the access lamp lights up. 1 Open the SD card cover and insert (remove) the SD card into (from) - Panasonic AG-AC7 | Operating Instructions - Page 23
3 Turning the unit on/off You can turn the unit on and off using the power switch. Turning the unit on and off with the power switch Set the power switch to ON to turn on the unit OFF ON ≥ Rotate the power switch if changing from OFF to ON. ≥ Align with A. ≥ Status indicator B The - Panasonic AG-AC7 | Operating Instructions - Page 24
Preparation Setup 4 Selecting a mode Change the mode to recording or playback. Operate the mode switch to change the mode to , or . Motion picture recording mode (l 30) Still picture recording mode (l 32) Playback mode (l 36, 67) 24 VQT3Q78 - Panasonic AG-AC7 | Operating Instructions - Page 25
the stylus pen (supplied) for detailed operation or if it is hard to operate with your fingers. ≥ The unit supports both operations using the cursor buttons and operations using the touch screen. Select the optimal method according to the situation. ≥ In this operating instructions, the majority of - Panasonic AG-AC7 | Operating Instructions - Page 26
point pens. ≥ Perform the touch screen calibration when the touch is not recognized or wrong location is recognized. (l 44) Viewfinder adjustment ∫ Using the viewfinder Pull out the viewfinder and turn the viewfinder upward/downward by pinching the viewfinder extension knob. ∫ Adjusting the field - Panasonic AG-AC7 | Operating Instructions - Page 27
date and time to be set using the cursor button right or left, then adjust the desired value using the cursor button up or down. ≥ The date and time function is driven by a built-in lithium battery. ≥ If the time display becomes [- -], the builtin lithium battery needs to be charged. To recharge - Panasonic AG-AC7 | Operating Instructions - Page 28
you know how to use the unit. ∫ Holding the unit for recording Normal recording Low-angle recording ≥ When walking while recording, keep both eyes open so that you can see where you are going and what is happening around you. ≥ Place the unit on your right shoulder - Panasonic AG-AC7 | Operating Instructions - Page 29
held steady when recording. ≥ If you move the unit when recording, do so slowly, maintaining a constant speed. ≥ The zoom operation is useful for recording subjects you cannot get close to, but overuse of zoom in and zoom out can make the resulting motion picture less enjoyable to watch. 29 VQT3Q78 - Panasonic AG-AC7 | Operating Instructions - Page 30
Basic Recording/ Playback 2 Recording motion pictures ≥ Remove the lens cap before turning on the unit. (l 16) 1 Change the mode to . 2 Press the recording start/stop button to start recording. ≥ When you begin recording, ; changes to ¥ on the screen. OFF ON 3 Press the recording start/stop - Panasonic AG-AC7 | Operating Instructions - Page 31
are not compatible with devices other than those that support AVCHD. Images cannot be played with equipment that does not support AVCHD (ordinary DVD recorders). Confirm that your equipment supports AVCHD by referring to the operating instructions. ≥ There are some cases where the recorded motion - Panasonic AG-AC7 | Operating Instructions - Page 32
A Focus indication ± (The white lamp flashes.): Focusing ¥ (The green lamp lights up.): When in focus No mark: When focusing is unsuccessful. B Focus area (area displayed when the button is pressed.) ≥ It is recommended using a tripod when recording still pictures in dark places because the - Panasonic AG-AC7 | Operating Instructions - Page 33
≥ The focus indication does not appear in manual focus mode. ≥ The focus indication does the scene is dark j When there is a bright part in the scene j When the scene is filled with only following conditions. j When the Extra optical zoom is used Recording still pictures in motion picture recording - Panasonic AG-AC7 | Operating Instructions - Page 34
about manual focus mode. Mode Scene Effect Scenery *1 Spotlight *2 Macro *1 Normal *2 Recording outdoors The whole landscape will be recorded vividly without whiting out the background sky, which may be very bright. Under a spotlight Very bright object is recorded clearly. Recording zooming - Panasonic AG-AC7 | Operating Instructions - Page 35
speed are automatically adjusted for an optimum brightness. ≥ Color balance and focus may not be adjusted automatically depending on light sources or scenes. If so, manually adjust these settings. (l 64, 66) Automatic white balance The illustration shows the range over which automatic white balance - Panasonic AG-AC7 | Operating Instructions - Page 36
can also perform operations by touch operation. (l 25) 1 Change the mode to . 2 Select the play mode select icon A using the cursor button, then press the button in the center. 3 Select [VIDEO] or [PICTURE] and press the button in the center. 4 Select the scene or the still picture to be - Panasonic AG-AC7 | Operating Instructions - Page 37
5 Select the playback operation by selecting the operation icon and press the button in the center. ≥ Select F / F and press the button in the center to display/not-display the operation icon. 0h00m00s F A Operation icon Motion picture playback 1/;: 6: 5: ∫: 1: Playback/Pause Rewind playback - Panasonic AG-AC7 | Operating Instructions - Page 38
display changes in the following order if the zoom lever or sub zoom lever are operated to (T) side or (W) unit is based on the AVCHD format. ≥ The video signal that can be played support AVCHD. Still picture compatibility ≥ This unit is compliant with the unified standard DCF (Design rule for Camera - Panasonic AG-AC7 | Operating Instructions - Page 39
or press the button in the center. ≥ Next (previous) page can be displayed by using / . 5 Select [EXIT], then press the button in the center or press the MENU button to exit the menu setting. ∫ About guide display After selecting and press the button in the center, selecting the submenus and - Panasonic AG-AC7 | Operating Instructions - Page 40
is possible to display and record the time at the travel destination by selecting your home region and the travel destination. 1 Select [SET WORLD TIME] using the cursor button and press the button in the center. ≥ If the clock is not set, adjust the clock to the current time. (l 27) ≥ When - Panasonic AG-AC7 | Operating Instructions - Page 41
indicated. To return the display to the home setting Set the home region using step 1 to 3, and close the setting by selecting [EXIT], then press automatically turns off to save battery life. ≥ The power save function will not activate when: j connected to AC adaptor j using the USB cable for PC - Panasonic AG-AC7 | Operating Instructions - Page 42
start time may be longer than 1 second. ≥ In the quick power on mode, the zoom magnification becomes 1k. [REC LAMP] [OFF]/[ON] The recording lamp lights up during recording. When this is set to [OFF], it does not light during recording. [ALERT SOUND] [OFF]/ / Touch screen operation, start and - Panasonic AG-AC7 | Operating Instructions - Page 43
the SD card, while formatting. Do not expose the unit to vibrations or shock. Use this unit to format media. Do not format an SD card using any other equipment such as a PC. The card may not be used on this unit. [CARD STATUS] The amount of space left on the SD card - Panasonic AG-AC7 | Operating Instructions - Page 44
only by touch operation. 1 Open the LCD monitor. 2 Touch [CALIBRATION]. ≥ Touch [ENTER]. 3 Touch the [_] that appears on the screen with the supplied stylus pen. ≥ Touch [_] in sequence (up left # down left # down right # up right # center). 4 Touch [ENTER]. ≥ Calibration cannot be performed when - Panasonic AG-AC7 | Operating Instructions - Page 45
. (l 54) ¬ Change the mode to or . T Zoom lever/Sub zoom lever T side: T Close-up recording (zoom in) W W W side: Wide-angle recording (zoom out) ≥ The zoom speed varies depending on the range over which the zoom lever is moved. ≥ The sub zoom lever are useful for making fine adjustments to the - Panasonic AG-AC7 | Operating Instructions - Page 46
Advanced Recording (Advanced) 2 Image stabilizer function Use the image stabilizer to reduce the effects of image stabilization for recording while walking, or holding the unit and recording a distant subject with zoom. ≥ This function's default setting is [ON]. ≥ When [HYBRID O.I.S.] is [ON], - Panasonic AG-AC7 | Operating Instructions - Page 47
image stabilization by touching and holding O.I.S. LOCK icon. With this function, you can further reduce the effects of the shake that tends to occur when using zoom. ≥ This function can be performed only by touch operation. F A O.I.S. LOCK icon ≥ Open the LCD monitor before - Panasonic AG-AC7 | Operating Instructions - Page 48
will not affect the images actually recorded. POWER LCD Power LCD button Each time the POWER LCD button is pressed, the indication changes Makes brighter) * It is not displayed in the manual mode or in the playback mode. ≥ When the AC adaptor is in use, the LCD monitor is set to +1 automatically. - Panasonic AG-AC7 | Operating Instructions - Page 49
images to be recorded. ¬ Change the mode to or . 1 Select F using the cursor 2 (e.g. Backlight compensation) button and press the button in Select an again to cancel the function. Operation icons Fade*1 Intelligent contrast control*1, 2 PRE-REC PRE-REC*1 Intelligent exposure*2, 3 Backlight - Panasonic AG-AC7 | Operating Instructions - Page 50
fade in/out MENU : [RECORD SETUP] # [FADE COLOR] # [WHITE] or [BLACK] (Fade in) (Fade out) ≥ The thumbnails of scenes recorded using fade in become black (or white). Intelligent contrast control This brightens parts that are in shadow and difficult to see and suppresses white saturation in bright - Panasonic AG-AC7 | Operating Instructions - Page 51
there are extremely dark parts or the brightness is insufficient be recorded clearly. In this case, cancel soft skin mode or zoom in on the face (close-up) to record. Tele macro A pictures and still pictures. The function can also be used to estimate the balance of the composition. ∫ Selecting - Panasonic AG-AC7 | Operating Instructions - Page 52
rec This function allows you to record color images in very low light situations. (Minimum required illumination: approx. 1 lx) ≥ Bright dots that are usually invisible may be seen, but this is not a malfunction. ≥ Using a tripod is recommended. ≥ In darker areas, auto focus may focus a bit slower. - Panasonic AG-AC7 | Operating Instructions - Page 53
apertures. ≥ Change the mode to or . ≥ Set the iA/MANUAL/FOCUS switch to manual mode. (l 63) MENU : [RECORD SETUP] # [SCENE MODE] # desired setting [OFF]: 5Sports: Portrait: Spotlight: Snow: Beach: Sunset: Fireworks: Scenery: Low light: Night scenery: Night portrait: Cancel the setting To make - Panasonic AG-AC7 | Operating Instructions - Page 54
ZOOM MODE] # desired setting [i.Zoom OFF]: Up to 20k [i.Zoom 23k]: This zoom function allows you to maintain high-definition picture quality. (Up to 23k) [D.Zoom 50k]: Digital zoom (Up to 50k) [D.Zoom 1200k]: Digital zoom ≥ Recordable time using the battery (l 19) ≥ This function - Panasonic AG-AC7 | Operating Instructions - Page 55
≥ Change the mode to . ≥ Set the iA/MANUAL/FOCUS switch to manual mode. (l 63) MENU : [RECORD SETUP] # [Digital Cinema Color] # [ON] ≥ For more realistic colors, use an HDMI cable with a TV that supports the x.v.Color™. ≥ This function cannot be used when set to intelligent auto mode. ≥ When motion - Panasonic AG-AC7 | Operating Instructions - Page 56
near the front of the unit are recorded more clearly if you zoom in (close-up) and surrounding sounds are recorded more realistically if you zoom out (wide angle). ≥ Change the mode to . ≥ Set the iA/MANUAL/FOCUS switch to manual mode. (l 63) MENU : [RECORD SETUP] # [ZOOM MIC] # [ON] 56 VQT3Q78 - Panasonic AG-AC7 | Operating Instructions - Page 57
Change the mode to . ≥ Set the iA/MANUAL/FOCUS switch to manual mode. (l 63) 1 Select the menu. MENU setting for microphone input level. 3 Select [ENTER] using the cursor button and press the button in the ≥ When [ZOOM MIC] is [ON], the volume will be different depending on the zoom rate. ≥ The - Panasonic AG-AC7 | Operating Instructions - Page 58
picture recording mode and still picture recording mode) ≥ Set the iA/MANUAL/FOCUS switch to manual mode. (l 63) 1 Select the menu. MENU : [RECORD SETUP] # [PICTURE ADJUST] 2 Select the desired setting items using the cursor button and press the button in the center. [SHARPNESS]: Sharpness - Panasonic AG-AC7 | Operating Instructions - Page 59
lit or shiny parts) are displayed with diagonal lines (zebra pattern). ≥ Change the mode to or . ≥ Set the iA/MANUAL/FOCUS switch to manual mode. (l surroundings. Adjust the brightness using [IRIS]. (l 65) ≥ Change the mode to or . ≥ Set the iA/MANUAL/FOCUS switch to manual mode. (l 63) - Panasonic AG-AC7 | Operating Instructions - Page 60
of the whole image by looking at the distribution in the graph. Adjust the brightness using [IRIS]. (l 65) ≥ Change the mode to or . ≥ Set the iA/MANUAL/FOCUS switch to manual mode. (l 63) MENU : [RECORD SETUP] # [HISTOGRAM] # desired setting [OFF]: Cancel the setting. [ALWAYS]: Constantly - Panasonic AG-AC7 | Operating Instructions - Page 61
size. 4:3: Aspect ratio of 4:3 television 3:2: Aspect ratio of conventional film camera or prints (such as L-size print) 16:9: Aspect ratio of high-definition 4:3 3:2 16:9 Extra optical zoom (l 45) -* 40k -* -* * Extra optical zoom cannot be used. The maximum zoom magnification is 20k. ∫ Picture - Panasonic AG-AC7 | Operating Instructions - Page 62
[QUALITY] Selecting the picture quality. ≥ Change the mode to or . MENU : [PICTURE] # [QUALITY] # desired setting : Still pictures with a high picture quality are recorded. : Priority is given to the number of still pictures recorded. Still pictures are recorded in normal picture quality. [ - Panasonic AG-AC7 | Operating Instructions - Page 63
motion picture recording mode and still picture recording mode.) Set the iA/MANUAL/FOCUS switch to manual mode. ≥ MNL appears on the screen. MANUAL FOCUS F WB SHTR IRIS WB White balance (l 64) SHTR Manual shutter speed (l 65) IRIS Iris adjustment (l 65) Perform the setting by selecting - Panasonic AG-AC7 | Operating Instructions - Page 64
under cloudy sky Indoor mode 1 Incandescent light, video lights like in the studio, etc. Indoor mode 2 Color fluorescent lamps, sodium lamps in gymnasiums etc. Manual adjustment mode ≥ Mercury-vapor lamps, sodium lamps, some fluorescent lights ≥ Lights used for wedding receptions at hotels, stage - Panasonic AG-AC7 | Operating Instructions - Page 65
record under indoor lighting, color and screen brightness may change or a horizontal line may appear on the screen. In this case, record in the intelligent auto mode or set the shutter speed to 1/60 in areas where the power supply frequency is 60 Hz, or 1/100 in areas of 50 Hz. Manual iris/gain - Panasonic AG-AC7 | Operating Instructions - Page 66
due to the conditions, then use manual focus. ¬ Change the mode to or . (The manual focus setting is retained when you change between motion picture recording mode and still picture recording mode.) Set the iA/MANUAL/FOCUS switch to manual focus mode, then slide the iA/MANUAL/FOCUS switch to FOCUS - Panasonic AG-AC7 | Operating Instructions - Page 67
playback Frame-by-frame playback The motion picture is advanced one frame at a time. Playback display During Playback During Pause Operating steps Select 5 using the cursor button and press the button in the center during playback to fast forward. (Select 6 and press the button in the center to - Panasonic AG-AC7 | Operating Instructions - Page 68
16:9 0.2M SA/SX 4:3 0.3M 640k360 640k480 1 Pause at the scene you want to save as a still picture during playback. ≥ It is convenient to use slow-motion playback and frame-by-frame playback. 2 Press the button. ≥ Date the motion picture was recorded will be registered as date of the still - Panasonic AG-AC7 | Operating Instructions - Page 69
scene you wish to see. ≥ Operate the zoom lever or the sub zoom lever to (T) side and change over the thumbnail using / . Repeat playback Playback of the first scene starts after playback of the last scene finishes. MENU : [VIDEO SETUP] # [REPEAT PLAY] # [ON] The indication appears on the full - Panasonic AG-AC7 | Operating Instructions - Page 70
Resuming the previous playback If playback of a scene was stopped halfway, the playback can be resumed from where it was stopped. MENU : [VIDEO SETUP] # [RESUME PLAY] # [ON] If playback of a motion picture is stopped, scene. appears on the thumbnail view of the stopped ≥ The memorized resume - Panasonic AG-AC7 | Operating Instructions - Page 71
pictures by date The scenes or the still pictures recorded on the same day can be played back in succession. 1 Select the date select icon using the cursor button and press the button in the center. A Date select icon 2 Select the playback date and press the button in the center. The - Panasonic AG-AC7 | Operating Instructions - Page 72
Changing the playback settings and playing back the slide show 1 Select using the cursor button and press the button in the center. 2 Select the desired item and press the button in the center. [DATE SETUP]: Select the - Panasonic AG-AC7 | Operating Instructions - Page 73
in the center. ≥ To adjust the volume of music during playback of the slide show or audio testing, operate the volume lever or the sub zoom lever. (l 38) ≥ Select [ENTER] and press the button in the center. (To test the music audio) Select [START], then press the button in the center - Panasonic AG-AC7 | Operating Instructions - Page 74
Advanced Editing 1 Deleting scenes/still pictures Deleted scenes/still pictures cannot be restored, so perform appropriate confirmation of the contents before proceeding with deletion. ¬ Change the mode to . ∫ Deleting multiple scenes/still pictures from the thumbnail display 1 Select the menu. - Panasonic AG-AC7 | Operating Instructions - Page 75
When you stop deleting halfway Select [CANCEL], then press the button in the center or press the MENU button while deleting. ≥ The scenes or still pictures that have already been deleted when the deletion is canceled cannot be restored. To complete editing Press the MENU button. ≥ Scenes which - Panasonic AG-AC7 | Operating Instructions - Page 76
≥ Select the play mode select icon and press the button in the center to select [VIDEO] (l 36) 1 Select the menu. MENU : [EDIT SCENE] # [DIVIDE] # press the button in the center to set the dividing point. 0h00m00s ≥ Using slow-motion playback or frame-by-frame playback makes it easy to search - Panasonic AG-AC7 | Operating Instructions - Page 77
by mistake. (Even if you protect some scenes/still pictures, formatting the media will delete them.) ≥ Change the mode to . 1 Select the menu. MENU : [VIDEO SETUP] or [PICT. SETUP] # [SCENE PROTECT] 2 Select the scene/still picture to be protected and press the button in the center. ≥ When the - Panasonic AG-AC7 | Operating Instructions - Page 78
the terminals. Image quality may vary with the connected terminals. A High quality 1 HDMI terminal 2 Component terminal 3 Video terminal ≥ Use the supplied component cable and AV cable. Use of the following Panasonic HDMI cables is recommended to connect the unit to the HDMI terminal. ≥ HDMI is the - Panasonic AG-AC7 | Operating Instructions - Page 79
with 480i 3 Standard images when connecting to video terminal ≥ Check that the plugs are inserted as far as they go. ≥ Always use a genuine Panasonic HDMI cable (RP-CDHG15, RP-CDHG30, RP-CDHG50; optional). ≥ Do not use any other component cables except the supplied one. ≥ When connecting to the - Panasonic AG-AC7 | Operating Instructions - Page 80
supplied) to play back. Reference items ≥ Connecting with a HDMI cable (l 81) ≥ Playback using VIERA Link™ (HDAVI Control setting on the TV. (Refer to the operating instructions of the TV for details.) ≥ If the Refer to the following support site for information about the Panasonic TVs that you can - Panasonic AG-AC7 | Operating Instructions - Page 81
to be displayed on your TV. (Please read the operating instructions for the TV.) ≥ Image will not display on TV for a few seconds following cases. j When switching between scenes recorded using [HA], [HG], [HX] or [HE] and scenes recorded using [SA] or [SX] in playback mode Connecting - Panasonic AG-AC7 | Operating Instructions - Page 82
you to use your remote control for the Panasonic TV for easy operations when this unit has been connected to a VIERA Link compatible device using a HDMI TV. (Read the operating instructions of the TV for how to set etc.) ≥ Always use a genuine Panasonic HDMI cable (RP-CDHG15, RP-CDHG30, RP - Panasonic AG-AC7 | Operating Instructions - Page 83
, and then press the button in the center to set it. 2) Activate the operation icons that are displayed on TV screen with the remote control for the TV. A Operation icons B Display operation icons C Cancel operation icons D Display/Cancel operation icons ≥ The following operations are available by - Panasonic AG-AC7 | Operating Instructions - Page 84
In this case, use the remote control for the TV to switch the input channel. ≥ If you are unsure whether or not the TV and AV amplifier you are using are compatible with VIERA Link, read the operating instructions for the devices. ≥ Available linked operations between this unit and a Panasonic TV is - Panasonic AG-AC7 | Operating Instructions - Page 85
to which the unit is connected. ≥ See the operating instructions of the video device for details. ≥ Insert the plugs as far as they will go. ≥ Do not use any other AV cables except the supplied one. A AV cable (supplied) 1 Connect this unit to a video device and then change the mode to . 2 Start - Panasonic AG-AC7 | Operating Instructions - Page 86
to a PC (for nonlinear editing/file transfer) Non-linear editing of video data on SD cards can be performed by connecting the unit via the Even if the system requirements mentioned in these operating instructions are fulfilled, some PCs cannot be used. ≥ Operation is not guaranteed in the following - Panasonic AG-AC7 | Operating Instructions - Page 87
1 GB or more Interface USB port Other requirements Mouse or equivalent pointing device ≥ Even if the system requirements mentioned in these operating instructions are fulfilled, some PCs cannot be used. ≥ The USB equipment operates with the driver installed as standard in the OS. 87 VQT3Q78 - Panasonic AG-AC7 | Operating Instructions - Page 88
PC], reconnect the USB cable. ≥ When using the battery, the LCD monitor turns off after about operating instructions. ≥ Do not use any other USB cables except the supplied one using an SDXC Memory Card, check the following support site. http://panasonic.net/avc/sdcard/information/SDXC.html 88 VQT3Q78 - Panasonic AG-AC7 | Operating Instructions - Page 89
icon in task tray displayed on the PC, and then click [Eject Panasonic Camcorder]. ≥ Depending on your PC's settings, this icon may not be supported by this unit has been recorded on a PC, it will not be recognized by this unit. ≥ Always use this unit to format SD cards. ≥ Data recorded in AVCHD - Panasonic AG-AC7 | Operating Instructions - Page 90
3000 1/100 OPEN 0dB 99%ˢ 1h30m F Remaining battery power (l 19) 1h30m Remaining battery time (l 19) R 1h20m Remaining time for MNL PRE-REC (l 50) Manual mode (l 63) //// Intelligent auto mode (l 34) F/ F MF Operation icon is displayed/ not displayed. (l 49) Manual focus (l 66) AWB / - Panasonic AG-AC7 | Operating Instructions - Page 91
Fade (White), Fade (Black) (l 50) Color night rec function (l 52) Intelligent contrast control (l 50) Intelligent exposure (l 51) 99% Luminance level (l 59) ± (White)/¥ ( ∫ Confirmatory indications -- (Time The built-in battery is low. display) (l 27) SD card is not inserted or is - Panasonic AG-AC7 | Operating Instructions - Page 92
that is compatible with this unit. (l 17) If using a Panasonic battery compatible with this unit, remove the battery and then insert it again. If the message appears even after repeating this several times, this unit needs repair. Detach the power and consult the dealer who you purchased this unit - Panasonic AG-AC7 | Operating Instructions - Page 93
operating time is still too short even after the battery is fully charged, the battery has worn out and needs to be replaced. This unit is turned off automatically. ≥ If the unit turns off when you turn off the power to the TV using the TV remote control, the VIERA Link is at work. If you - Panasonic AG-AC7 | Operating Instructions - Page 94
position or set [AGS] to [OFF]. (l 55) ≥ Set the iA/MANUAL/FOCUS switch to intelligent auto mode. ≥ If you are trying to record a scene which is hard to bring into focus in auto focus mode, use the manual focus mode to adjust the focus. (l 35, 66) ≥ In a place with multiple light sources, such as - Panasonic AG-AC7 | Operating Instructions - Page 95
Problem recognized by this unit. Use this unit to format SD the operating instructions of the light, mercury light or sodium light, etc., but this is not a malfunction. ≥ In motion picture recording mode, record in intelligent auto mode or set the shutter speed to 1/60 in areas where the power supply - Panasonic AG-AC7 | Operating Instructions - Page 96
needed if it is repeatedly displayed even if it is restarted. Detach the power connected, and consult the dealer who you purchased this unit from. Do not the input using the TV remote control. ≥ Check the VIERA Link setting on the connected device. ≥ Please refer to the operating instructions of the - Panasonic AG-AC7 | Operating Instructions - Page 97
Problem When the USB cable is disconnected, an error message will appear on the PC. Cannot copy scenes on the SD card by connecting to other equipment with the USB cable. Check points ≥ To disconnect the USB cable safely, double-click the icon in the task tray and follow the instructions on the - Panasonic AG-AC7 | Operating Instructions - Page 98
for not playing back smoothly ≥ When the scenes were recorded on different dates ≥ When scenes lasting under 3 seconds have been recorded ≥ When PRE-REC was used for recording ≥ When deleting scenes ≥ When scenes recorded more than 99 scenes on the same date ≥ When switching between scenes recorded - Panasonic AG-AC7 | Operating Instructions - Page 99
or high-voltage lines, the recorded pictures and/or sound may be adversely affected. Make sure to use the supplied cords and cables. If you use optional accessories, use the cords and the cables supplied with them. Do not extend the cords and the cables. Do not spray insecticides or volatile - Panasonic AG-AC7 | Operating Instructions - Page 100
temperature and the effect increases the more the temperature rises or falls. In cold areas, the full charge indication may not appear or the low battery indication may appear about 5 minutes after starting use. At high temperatures, the protection function may be triggered, making it impossible to - Panasonic AG-AC7 | Operating Instructions - Page 101
the AC adaptor. If the charging lamp is still flashing, the temperature of the battery may be extremely high or extremely low or something may be wrong with the battery or AC adaptor. Contact your dealer. ≥ If you use the AC adaptor near a radio, radio reception may be disturbed. Keep the AC adaptor - Panasonic AG-AC7 | Operating Instructions - Page 102
SD card is physically destroyed or the SD card is physically formatted using this unit when disposing of or giving away the SD card. ≥ card data deletion screen appears, select [YES], and then follow the on-screen instructions. ≥ The customer is responsible for the management of the data in the SD - Panasonic AG-AC7 | Operating Instructions - Page 103
. ≥ When this unit is in a very humid place where the air is thick with steam. (e.g. a heated swimming pool) Helpful hint If, for example, you have used this unit for recording on a ski slope and are taking it into a heated room, place the unit inside a plastic bag, remove as much of the - Panasonic AG-AC7 | Operating Instructions - Page 104
video tapes and other materials may infringe the right of copyright owners and be contrary to copyright laws." ∫ Licenses ≥ SDXC Logo is a trademark of SD-3C, LLC. ≥ "AVCHD" and the "AVCHD" Logo are trademarks of Panasonic products mentioned in these instructions are usually the registered - Panasonic AG-AC7 | Operating Instructions - Page 105
Image quality prioritized B Recording time prioritized ≥ If recording for long periods, prepare batteries for 3 or 4 times the period you wish to record for. (l 19) recordable time may be reduced if recording of short scene is repeated. ≥ Use time in the row of 4 GB in above table as a guideline for - Panasonic AG-AC7 | Operating Instructions - Page 106
2.1 M 1920k1080 2500 10000 42000 4000 16000 66000 3600 14000 59000 5600 23000 93000 ≥ The number of recordable pictures depends on whether and are used together and on the subject being recorded. ≥ Maximum number of recordable pictures that can be displayed is 99999. If the number of recordable - Panasonic AG-AC7 | Operating Instructions - Page 107
Camera-Recorder Information for your safety Power source: DC 9.3 V (When using AC adaptor)/DC 7.2 V (When using battery) Power consumption: Recording; 5.0 W Signal system: AVCHD; 1080/60i, 480/60i Recording format: AVCHD; AVCHD Zoom, F1.8 to F2.6 Focal length; 2.9 mm to 48.7 mm Macro (Full range - Panasonic AG-AC7 | Operating Instructions - Page 108
/writer function (No copyright protection support) Hi-Speed USB (USB 2.0), USB terminal Type Mini B Dimensions: 216 mm (W)k224 mm (H)k432 mm (D) [8.50q (W)k8.82q (H)k17.01q (D)] (excluding projecting parts) Mass (Weight): Approx. 1800 g (Approx. 3.97 lbs.) [without battery (supplied) and an SD card - Panasonic AG-AC7 | Operating Instructions - Page 109
∫ Motion pictures Recording media: SD Memory Card (FAT12 and FAT16 system compliant) SDHC Memory Card (FAT32 system compliant) SDXC Memory Card (exFAT system compliant) Refer to page 21 for details on SD cards usable in this unit. Compression: MPEG-4 AVC/H.264 Recording mode and transfer rate: HA; - Panasonic AG-AC7 | Operating Instructions - Page 110
cards usable in this unit. Compression: JPEG (Design rule for Camera File system, based on Exif 2.2 standard) Picture size: Picture your safety Power source: Power consumption: DC output: AC 110 V to 240 V, 50/60 Hz 19 W DC 9.3 V, 1.2 A (Unit operation) DC 8.4 V, 0.65 A (Battery charging) - Panasonic AG-AC7 | Operating Instructions - Page 111
optional accessories on the accessory shoe The video DC light/VW-LDC103PP (optional) etc. can be mounted the accessory shoe. Wide conversion lens (VW-W4607H) Filter kit (VW-LF46N)*2 Video DC light (VW-LDC103PP) Light bulb for video DC light (VZ-LL10PP) *1 The supplied DC cables cannot be used on - Panasonic AG-AC7 | Operating Instructions - Page 112
as follow: Warranty Part Warranty All Monitors, VCRs, Cameras, Camcorders, P2 Product, DVDs, Switchers, and Plug-in Computers. 1 Year Exceptions D3 & D5 Video Heads 90 days or 500 Hours Camera CCD 2 Years Monitor CRT 2 Years All Accessories Including batteries, cables, and tapes - Panasonic AG-AC7 | Operating Instructions - Page 113
from faulty installation, set-up adjustments, improper antenna, inadequate signal pickup, maladjustment of user controls, improper operation, power line surge, improper voltage supply, lighting damage, or service by anyone other than an authorized repair facility, or damage that is attributable to - Panasonic AG-AC7 | Operating Instructions - Page 114
17, 20, 101 Accessory shoe 13, 111 Alert sound 42 Approximate number of recordable pictures 106 Audio output connector 14, 78, 85 Auto focus 35 Auto Ground-Directional Standby (AGS 55 Automatic white balance 35 ∫B Backlight compensation 51 Bass setting 58 Battery 17, 100 Battery capacity - Panasonic AG-AC7 | Operating Instructions - Page 115
power Speed Class Rating 21 SDHC Memory Card 21 SDXC Memory Card 21 Shoulder strap fixture 14, 16 Shutter sound 62 Shutter speed 65 Simultaneous recording 25 Touch screen calibration 44 Tripod receptacle 13 TV aspect 80 ∫V Video output connector 14, 78, 85 VIERA Link 82 Viewfinder 12, 26 - Panasonic AG-AC7 | Operating Instructions - Page 116
© Panasonic Corporation 2011 Printed in Japan P VQT3Q78 F0511TS0 ( 2000 )
-
 1
1 -
 2
2 -
 3
3 -
 4
4 -
 5
5 -
 6
6 -
 7
7 -
8
-
9
-
10
-
11
-
12
-
13
-
14
-
15
-
16
-
17
-
18
-
19
-
20
-
21
-
22
-
23
-
24
-
25
-
26
-
27
-
28
-
29
-
30
-
31
-
32
-
33
-
34
-
35
-
36
-
37
-
38
-
39
-
40
-
41
-
42
-
43
-
44
-
45
-
46
-
47
-
48
-
49
-
50
-
51
-
52
-
53
-
54
-
55
-
56
-
57
-
58
-
59
-
60
-
61
-
62
-
63
-
64
-
65
-
66
-
67
-
68
-
69
-
70
-
71
-
72
-
73
-
74
-
75
-
76
-
77
-
78
-
79
-
80
-
81
-
82
-
83
-
84
-
85
-
86
-
87
-
88
-
89
-
90
-
91
-
92
-
93
-
94
-
95
-
96
-
97
-
98
-
99
-
100
-
101
-
102
-
103
-
104
-
105
-
106
-
107
-
108
-
109
-
110
-
111
-
112
-
113
-
114
-
115
-
116
 |
 |

Operating Instructions
Memory Card Camera-Recorder
Model No.
AG-AC7P
Before connecting, operating or adjusting this product, please read the instructions completely.
VQT3Q78