Panasonic BL-C10E Installation Guide
Panasonic BL-C10E Manual
 |
View all Panasonic BL-C10E manuals
Add to My Manuals
Save this manual to your list of manuals |
Panasonic BL-C10E manual content summary:
- Panasonic BL-C10E | Installation Guide - Page 1
- Panasonic BL-C10E | Installation Guide - Page 2
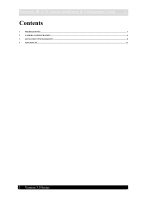
Panasonic BL-C10 Camera Installation & Configuration Guide 2 Contents 1 PREREQUISITES...3 2 CAMERA CONFIGURATION ...4 3 ADVANCED CONFIGURATION ...8 4 APPENDICES...11 Version 3.0 Series - Panasonic BL-C10E | Installation Guide - Page 3
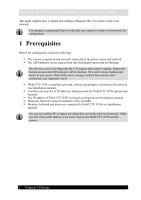
Panasonic BL-C10 Camera Installation & Configuration Guide 3 This guide explains how to install and configure Panasonic BL-C10 camera in the local network. It is strongly recommended that you add only one camera at a time to the network for configuration. 1 Prerequisites Before the configuration - Panasonic BL-C10E | Installation Guide - Page 4
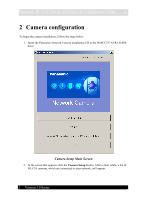
Panasonic BL-C10 Camera Installation & Configuration Guide 4 2 Camera configuration To begin the camera installation, follow the steps below: 1. Insert the Panasonic Network Camera installation CD in the WebCCTV NVR CD-RW drive. Camera Setup Main Screen 2. In the screen that appears click the Camera - Panasonic BL-C10E | Installation Guide - Page 5
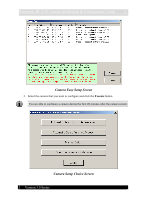
Panasonic BL-C10 Camera Installation & Configuration Guide 5 Camera Easy Setup Screen 3. Select the camera that you want to configure and click the Execute button. You are able to configure a camera during the first 20 minutes after the camera restart. Camera Setup Choice Screen Version 3.0 Series - Panasonic BL-C10E | Installation Guide - Page 6
Panasonic BL-C10 Camera Installation & Configuration Guide 6 4. In the window that appears choose Automatic Setup (Local Access Only). 5. Wait until the automatic setup dialog window appears. Specify the correct IP address and subnet mask and click OK. 6. Wait until the web page appears. Specify - Panasonic BL-C10E | Installation Guide - Page 7
Panasonic BL-C10 Camera Installation & Configuration Guide 7 Manual Setup Screen 11. When notified of setup completion click the Close button. 12. Close all windows and open WebCCTV NVR Web client. Log in as the administrator. 13. Go to the System menu and add your camera to WebCCTV (see WebCCTV - Panasonic BL-C10E | Installation Guide - Page 8
Panasonic BL-C10 Camera Installation & Configuration Guide 8 3 Advanced configuration You are able to configure the camera using the camera's setup page while logged onto WebCCTV NVR. Use the Go to link from WebCCTV NVR System menu or simply specify the camera IP address in the Internet Explorer - Panasonic BL-C10E | Installation Guide - Page 9
Panasonic BL-C10 Camera Installation & Configuration Guide 9 If your camera image flickers, this may be caused by interference from the indoor lighting where the camera is located. To solve this problem adjust the AC Power Source Frequency setting on the camera Setup page to match the frequency of - Panasonic BL-C10E | Installation Guide - Page 10
Panasonic BL-C10 Camera Installation & Configuration Guide 10 To insure uninterrupted recordings from the camera you are configuring you may disable the privacy button that is located on the camera front panel. Follow the steps below: 1. Go to the camera Setup page. Choose Privacy Mode menu item. 2. - Panasonic BL-C10E | Installation Guide - Page 11
Panasonic BL-C10 Camera Installation & Configuration Guide 11 4 Appendices Appendix A Indicator status Color Red Orange Orange Green Green State Steady Steady Flashing Steady Flashing Description Privacy Mode is enabled. Press the Privacy button that is located on the camera front side to
-
 1
1 -
 2
2 -
 3
3 -
 4
4 -
 5
5 -
 6
6 -
 7
7 -
8
-
9
-
10
-
11
 |
 |
