Panasonic BT-LH2550 Operating Instructions
Panasonic BT-LH2550 Manual
 |
View all Panasonic BT-LH2550 manuals
Add to My Manuals
Save this manual to your list of manuals |
Panasonic BT-LH2550 manual content summary:
- Panasonic BT-LH2550 | Operating Instructions - Page 1
Operating Instructions LCD Video Monitor Model No. BT-LH2550P Model No. BT-LH2550E DEUTSCH FRANÇAIS ITALIANO ESPAÑOL Für el CD-ROM uministrado. Before operating this product, please read the instructions carefully and save this manual for future use. S1108T0 -P D Printed in Japan ENGLISH VQT2A05 - Panasonic BT-LH2550 | Operating Instructions - Page 2
of a different AC plug. Please contact either a local or foreign Panasonic authorized service center for assistance in selecting an alternate AC plug. CAUTION: This Monitor is for use only with Panasonic Wall Mount Adaptor, BT-WMA26G. Use with other Wall Mount is capable of resulting in instability - Panasonic BT-LH2550 | Operating Instructions - Page 3
BT-LH2550P Trade Name: Panasonic Responsible Party: Panasonic Corporation of North America One Panasonic Way, Secaucus, NJ07094 Support contact: Panasonic Broadcast compliance, follow the attached installation instructions and the user must use only shielded interface cables when connecting - Panasonic BT-LH2550 | Operating Instructions - Page 4
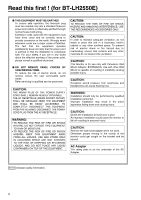
of electric shock, do not remove covers. No user serviceable parts inside. Refer servicing to qualified service personnel. CAUTION: THE MAINS PLUG OF THE POWER the ventilation. CAUTION: This Monitor is for use only with Panasonic Wall Mount Adaptor, BT-WMA26G. Use with other Wall Mount is capable - Panasonic BT-LH2550 | Operating Instructions - Page 5
BT-LH2550E . This product is equipped used until a replacement cover is obtained. A replacement fuse cover can be purchased from your local Panasonic monitor by grabbing the panel. Do not place the monitor face down during transportation to prevent damaging it. Keep it upright. Do not expose the LCD - Panasonic BT-LH2550 | Operating Instructions - Page 6
EMC NOTICE FOR THE PURCHASER/USER OF THE APPARATUS 1. Applicable standards and operating environment (BT-LH2550E) The apparatus is compliant use a cable with a ferrite core. • If your apparatus is supplied with ferrite core(s), they must be attached on cable(s) following instructions in this manual - Panasonic BT-LH2550 | Operating Instructions - Page 7
Maintenance inspecions 52 Maintenance 52 Error Display 52 Specifications 53 Standard accessories Power cord × 1 Power cord hook × 1 Screw × 1 (for securing power cord) AC Adaptor × 1 DC cord × 1 CD-ROM × 1 Optional units AC mains lead × 2 AC mains lead hook - Panasonic BT-LH2550 | Operating Instructions - Page 8
Outline The BT-LH2550 LCD monitor is a 25.5 inch full HD LCD display panel designed especially for broadcasting service and business use. ■ Compact 25.5 type full HD monitor • The monitor is equipped with a high-resolution (1920 x 1200) IPS LCD panel. • Efforts to develop a small footprint have - Panasonic BT-LH2550 | Operating Instructions - Page 9
60 (2.4) 343.8 (13.5) 410 (16.1) 440 (17.3) 215 (8.5) 100 (3.9) 116.5 (4.6) 200 (7.9) 100 (3.9) 169 (6.7) 10-M4,L=10mm Max 30 (1.2) 46 (1.8) • When installing the monitor in one place permanently, we recommend that you fix the monitor in place using the screw holes in the lower part of the - Panasonic BT-LH2550 | Operating Instructions - Page 10
Front view Rear view 6 5 Tally lamp ( page 35, 48) The color of the tally lamp Indicates monitor status. Front panel controls ( page 11) POWER switch ( / ) The POWER switch is located at the bottom of the front panel. This switch turns the power - Panasonic BT-LH2550 | Operating Instructions - Page 11
/SD compatible) SDI2 : Serial digital interface input (HD/SD compatible) YPBPR/RGB : Analog component input (YPBPR) or RGB input also compatible with RGB input from a PC. DVI-D : DVI-D input (HDCP compatible) • When the power is turned on, the input line used when the power was last turned off - Panasonic BT-LH2550 | Operating Instructions - Page 12
or [SDI2] is selected using the [INPUT] button. It is not output when something other than SDI is selected. This terminal supports embedded audio. 12 DVI is possible by using an RS232 signal. 19 HEADPHONES output connector (stereo mini-jack M3) Connect a pair of headphones to monitor the sound. • - Panasonic BT-LH2550 | Operating Instructions - Page 13
Controls and Their Functions (continued) AC Adapter 1 23 4 AC IN (AC inlet) This is the AC input terminal. POWER switch (ON : , OFF : ) This switch turns the AC adapter on and off. POWER lamp This lamp lights green when the POWER switch is set to on. DC OUT This is the DC output terminal. This - Panasonic BT-LH2550 | Operating Instructions - Page 14
adapter. 4. Connect the power cord to an AC outlet. 5. Turn on the POWER switch. The POWER LED lights green. Power cord hook Screw Power cord Use the supplied screw (for securing power cord) and the power cord hook to secure the power cord to the AC adapter. 2. Slide the supplied DC - Panasonic BT-LH2550 | Operating Instructions - Page 15
page 29). 3. Various indications (FILM mode) • This indicates that "GAMMA SELECT" is set to "FILM" in the "VIDEO CONFIG" menu. 4. Signal format • Use "STATUS DISPLAY" in the "SYSTEM CONFIG" menu to set the display status ( page 29). • "UNSUPPORT SIGNAL" appears if an unsupported signal is input. It - Panasonic BT-LH2550 | Operating Instructions - Page 16
4 • You can switch the level display on/off and set the 6 8 number of displayed channels using the menu ( page 38, "AUDIO"). • The 0 dB line and channel display can be switched on/ position of the display ( "MENU POSITION"). page 29, Displays instructions on menu button operations. 16 - Panasonic BT-LH2550 | Operating Instructions - Page 17
On Screen Menu (continued) TIME CODE display (TC) • Use the menu to display and set the time code for HD-SDI signal input. It also allows you to switch display mode (VITC, LTC, VUB, LUB). In VITC and LTC display mode: • Displays the time code - Panasonic BT-LH2550 | Operating Instructions - Page 18
How to Use the On Screen Menu (continued) Menu operations 1. Press [MENU] to display the MAIN menu. 3. Press [ , ] to select a sub menu and press [ENTER]. The settings in - Panasonic BT-LH2550 | Operating Instructions - Page 19
How to Use the On Screen Menu (continued) Picture/volume adjusting menu operations 1. Press [ADJUST] to display the picture/volume adjusting menu. 2. Press [ , ] to select item to adjust. - Panasonic BT-LH2550 | Operating Instructions - Page 20
function settings on the monitor front panel) • Screen adjustments made in the picture/volume adjustments menu Saving user data Loading user data 1. Press [MENU DISPLAY SETUP LOAD SETUP SAVE POWER ON SETUP POWER SAVE MODE CALIBRATION BACKLIGHT -- CENTER 3SEC OFF FACTORY USER1 LAST OFF B.LIGHT/ - Panasonic BT-LH2550 | Operating Instructions - Page 21
SPACE POWER SAVE MODE CALIBRATION FUNCTION1 FUNCTION2 FUNCTION3 dB POINT CH INFO. CONTROL LOCAL ENABLE OPERATION LCD GAMMA SELECT COLOR SPACE COLOR TEMP. SHARPNESS MODE SHARPNESS BLUE BIAS RED BIAS GREEN BIAS BLUE RESET COLOR TEMP. GAIN RED GAIN GREEN GAIN BLUE BIAS RED BIAS GREEN BIAS BLUE - Panasonic BT-LH2550 | Operating Instructions - Page 22
80% area marker 89% area marker (TYPE1) 88% area marker (TYPE2) This area marker can be varied in 1% increments in the range between 80% to 95 48) is used to control the marker setting. They are also disabled in split screen mode. *3 This setting is enabled only for HD and SD signal - Panasonic BT-LH2550 | Operating Instructions - Page 23
80% area marker for 4:3 aspect ratio This area marker can be varied in 1% increments in the monitor or camera recorder marker size. Marker size compliant with the camera recorder (Panasonic) The marker has the same size as that of the previous model (BT-LH2600W - Panasonic BT-LH2550 | Operating Instructions - Page 24
. 90% Area marker 88% Area marker 80% Area marker (Displayed for HD input and SD input in 16:9 ratio mode.) This marker is displayed as Area marker 95% Area marker ■ Center marker 80% Area marker USER area marker *1 *1 Use the and buttons to increase or decrease the area marker in 1% - Panasonic BT-LH2550 | Operating Instructions - Page 25
turns the function on and off. Each press of the FUNCTION button to which the "CROSS HATCH" function is assigned changes the display as shown. HD/SD (16:9) mode SD (4:3) mode 1st press 2nd press Light cross hatch Dense cross hatch 3rd press (back to original image without cross hatch) 25 - Panasonic BT-LH2550 | Operating Instructions - Page 26
BT. 709 standard Sets the gamma curve to 2.2 in wide color gamut (using LOW and SHARPNESS H/V: 0) 2) HD for any other input (the USER" changes to blue). 2) Use [ , ] to select 0 - 63 and press [ENTER]. *7 Factory default setting: SMPTE-C (U.S.A. and Canada), EBU (other countries) 26 - Panasonic BT-LH2550 | Operating Instructions - Page 27
is fixed at 0. ANAMO*2*8 OFF ON With an Anamo lens and HD-SDI input, the picture is resized to Anamo magnification (the vertically enlarged SPACE" produces the gamma curve fixed to that "COLOR SPACE." *6 To use the "TWO WINDOW" ( page 34) function, 1) Change settings after exiting the "TWO WINDOW - Panasonic BT-LH2550 | Operating Instructions - Page 28
BIAS RED BIAS GREEN BIAS BLUE Settings Description USER0 - 6 D93 D65 D56 Selects the color temperature that will become the basis for adjustment. Adjustable settings 0 - 63 (equivalent to a color temperature range of 3,000 - 9,300K) Equivalent to a color temperature of - Panasonic BT-LH2550 | Operating Instructions - Page 29
in the mode used when the power was last turned off. Starts up using the factory defaults. Starts up using USER registered settings. Sets and use this submenu to make a calibration. It also returns calibration data to factory defaults. ( page 30, 31) *1 When the monitor is - Panasonic BT-LH2550 | Operating Instructions - Page 30
function in this unit measures LCD panel characteristics from low to high brightness values and internal monitor processing handles CALIBRATION. CALIBRATION does not rely on image quality settings since internal signals are used for a calibration. CALIBRATION in this unit is made at D65 color - Panasonic BT-LH2550 | Operating Instructions - Page 31
*1 RESET*2 Setting Description Connect a CA-210 color analyzer and use this submenu to make a calibration. Select "AUTO CALIBRATION" and select "YES" in the confirmation screen that appears to start calibration. Returns calibration data to their factory defaults. Select "RESET" and select - Panasonic BT-LH2550 | Operating Instructions - Page 32
changes in the following order. DELAY OFF H DELAY V DELAY HV DELAY DELAY OFF Performs auto setup for PC display. Cuts the red and green signals. Use this function to check phase and chroma. This button toggles between ON and OFF. *1 Displays the gamma curve. The - Panasonic BT-LH2550 | Operating Instructions - Page 33
that operation is disabled. SD ASPECT When GPI is set, "INVALID FUNCTION" appears to indicate that operation is disabled. In TWO WINDOW mode and HD signal display, "INVALID FUNCTION" appears to indicate that operation is disabled. SCAN When GPI is set, "INVALID FUNCTION" appears to indicate that - Panasonic BT-LH2550 | Operating Instructions - Page 34
AUTOSETUP COMP.AUTOSETUP, COMPLETE, INCOMPLETE, NOT RGB-COMP.CH • BLUE ONLY BLUE ONLY ON, BLUE ONLY OFF • GAMMA SELECT GAMMA STANDARD, GAMMA FILM, GAMMA , 88% MARKER, 80% MARKER, ××% MARKER (××% indicates an 80 to 95% USER setting), MARKER ON • AUDIO LEVEL METER METER OFF, METER 2CH, METER 4CH, - Panasonic BT-LH2550 | Operating Instructions - Page 35
Menu (continued) GPI "GPI CONTROL" is used to enable and disable GPI functions and assign ( page 48). Note: This function is not available when, • "SD ASPECT" operation when input signal is HD or PC • "SCAN" operation when the input signal is PC • "GAMMA SELECT" operation when the input signal - Panasonic BT-LH2550 | Operating Instructions - Page 36
this function when using 7.5% setup signals. (Adjusts the interior of the monitor to the 7.5% 100% chroma. Select this when connecting a Betacam or similar device with a setup function. (Adjusts the interior of the monitor specific format when there is risk that the input signal - Panasonic BT-LH2550 | Operating Instructions - Page 37
if setup could not be completed. AUTOSETUP may not provide adequate adjustment for some video input. Use H POSITION, V POSITION, PHASE and CLOCK to adjust. *2 Each input format can be adjusted but not when user data is loaded ("SETUP LOAD" page 29) or saved ("SETUP SAVE" page 29). *3 "CLOCK" factory - Panasonic BT-LH2550 | Operating Instructions - Page 38
Main Menu (continued) AUDIO Use the following submenus to set headphone output and audio level meters. Underlined values indicate factory defaults. Sub menu INPUT SELECT Settings AUTO ANALOG Description Selects - Panasonic BT-LH2550 | Operating Instructions - Page 39
LB RB RT LT VECTOR × 8 MODE × 4 × 2 × 1 VECTOR SCALE 100% 75% TIME CODE POSITION OFF ON TOP LEFT CENTER RIGHT FONT SIZE LARGE SMALL Displays user bits included in VITC. Turns closed caption display on and off.*2 Selects the closed caption display mode.*2 *1 Available during HD-SDI - Panasonic BT-LH2550 | Operating Instructions - Page 40
Main Menu (continued) ■ "WFM/VECTOR" The "WFM/VECTOR" function enables display of the waveform and vector display. Use "DISPLAY SETUP" in the main menu to select "WFM" and "VECTOR" display. ( page 39) Press the button ([FUNCTION1] to [FUNCTION5] ( page 32)) to which the " - Panasonic BT-LH2550 | Operating Instructions - Page 41
Main Menu (continued) ■ TWO WINDOW function The "TWO WINDOW" function displays two inputs selected from VIDEO, SDI1/2, YPBPR/RGB or DVI-D in two windows. Each press of the button ([FUNCTION1] to [FUNCTION5]) (page 32) to which the "TWO WINDOW" function has been assigned changes the display mode. ( - Panasonic BT-LH2550 | Operating Instructions - Page 42
960 640 1280 "TWO WINDOW SIZE" setting: L/S "TWO WINDOW SIZE" setting: M/M "TWO WINDOW SIZE" setting: S/L Display size: 4:3 or 5:4 • Main window (HD) and sub-window (HD) 1920 1280 640 960 960 640 1280 "TWO WINDOW SIZE" setting: L/S Display size: 16:9 or 16:10 "TWO WINDOW SIZE" setting - Panasonic BT-LH2550 | Operating Instructions - Page 43
Main Menu (continued) • Main window (HD) and sub-window (SD) 1920 1280 640 960 960 640 of sub-window: 4:3 or 5:4 "TWO WINDOW SIZE" setting: S/L • Main window (SD) and sub-window (HD) 1920 1280 640 960 960 640 1280 "TWO WINDOW SIZE" setting: L/S "TWO WINDOW SIZE" setting: M/M Display - Panasonic BT-LH2550 | Operating Instructions - Page 44
screen display, the TWO WINDOW screen is synchronized to the frame rate frequency of the input signal format. In split screen display, the screen used as a reference for synchronization changes with the input signal format and "TWO WINDOW SIZE" settings as shown in the following table. Screen - Panasonic BT-LH2550 | Operating Instructions - Page 45
"CONTROL". Disables all front panel operations. Operation using button other than the [INPUT] button is invalid. *1 The menu can "REMOTE" is selected under "CONTROL." HOURMETER Sub menu OPERATION LCD Settings XXXXXXh*3 XXXXXXh*3 Description Displays the number of hours it has - Panasonic BT-LH2550 | Operating Instructions - Page 46
LEVEL SELECT SYNC COMP. DVI-D MODE INPUT SELECT EMBEDED SELECT L EMBEDED SELECT R LEVEL METER CH SELECT 0dB POINT CH INFO. VIDEO SDI 1/2 SD HD × YPBPR SD HD × × × × × × × × × × × × × × × × × × × × × × × × × × × × × RGB-VIDEO SD HD RGB-COMP. DVI-VIDEO SD - Panasonic BT-LH2550 | Operating Instructions - Page 47
Main Menu (continued) Input CH VIDEO SDI 1/2 YPBPR RGB-VIDEO RGB-COMP. CH SD HD SD HD SD HD TWO WINDOW SIZE × SUB INPUT SEL. WFM/VECTOR *5 *5 *5 × × × POSITION × × × VECTOR MODE × × × × × × DISPLAY VECTOR SCALE SETUP*2 TIME CODE × × × × × × × × × × × × × - Panasonic BT-LH2550 | Operating Instructions - Page 48
Specifications This monitor permits remote operation via GPI/RS-232C terminal. GPI terminal GPI screen items correspond to the following terminals. Use the main window to STDIO/PST mode. Selects the SYNC when using YPBPR and RGBVIDEO input. Operating conditions - Level operation (Short-circuited - Panasonic BT-LH2550 | Operating Instructions - Page 49
Specifications show RS-232C terminal pin arrangement and connections. For details on systems using RS-232C, be sure to consult your dealer. RS-232C terminals 4 DTR 5 GND 6 DSR 7 RTS 8 CTS 9 N.C. (Straight) BT-LH2550 Side Pin number Signal 1 N.C. 2 TXD 3 RXD 4 DSR 5 GND - Panasonic BT-LH2550 | Operating Instructions - Page 50
Specifications (continued) ■ Setting command No Command Description 1 IIS*1 Input switch VPC*2 2 Image quality adjustment 3 OBO*2 4 OHV*1 5 VBL*2 6 DCH*2 7 DSD*2 8 ISM*2 9 IRF*2 10 ISM*2 DMK*3 Blue 88% MK204: 95% MK211: USER Marker background BAK0: NORMAL Center marker CMK0: OFF MK101: 80 - Panasonic BT-LH2550 | Operating Instructions - Page 51
Specifications : Phase setting value 00-60 3 QBO Blue only 0: OFF 1: ON 4 QBL Backlight : VISTA 02: 88% 05: 14:9 08: 90% 11: USER BAK : Background 0: NORMAL 1: HALF 2: BLACK CMK : Center marker BT-LH2550 *1 When both 16:9 and 4:3 markers are displayed, the 16:9 marker state is returned - Panasonic BT-LH2550 | Operating Instructions - Page 52
are essential to keep the monitor in optimum condition and ensure safe operation. Be sure to conduct the following maintenance inspections to enable long-term, full use of all its functions. Necessity of periodic maintenance service The backlight in the LCD panel is a consumable component that - Panasonic BT-LH2550 | Operating Instructions - Page 53
XLR 4 pins × 1 Output: VIDEO output terminals BNC × 1 Through-out (Automatic 75 Ω termination) ■ Standard accessories Power cord Power cord hook Screw AC Adaptor DC cord CD-ROM AC mains lead AC mains lead hook Screw AC Adaptor DC cord CD-ROM ■ Optional units Wall - Panasonic BT-LH2550 | Operating Instructions - Page 54
Other various marker displays will use the 1080/60i marker. *3 Only compatible with VESA (Video Electronics Standards Association) Reduced Blanking (Clock: 154 MHz, Hsync: negative logic, Vsync: positive logic). Weight and dimensions when shown are approximately. Specifications are subject to change - Panasonic BT-LH2550 | Operating Instructions - Page 55
MEMO 55 - Panasonic BT-LH2550 | Operating Instructions - Page 56
24 Hr. Fax: 800-334-4880 Emergency after hour parts orders Tel: 800-334-4881 e-mail: [email protected] TECHNICAL SUPPORT: Emergency 24 Hour Service Tel: 800-222-0741 e-mail: [email protected] Panasonic Canada Inc. 5770 Ambler Drive, Mississauga, Ontario L4W 2T3 Tel: 905-624-5010
-
 1
1 -
 2
2 -
 3
3 -
 4
4 -
 5
5 -
 6
6 -
 7
7 -
8
-
9
-
10
-
11
-
12
-
13
-
14
-
15
-
16
-
17
-
18
-
19
-
20
-
21
-
22
-
23
-
24
-
25
-
26
-
27
-
28
-
29
-
30
-
31
-
32
-
33
-
34
-
35
-
36
-
37
-
38
-
39
-
40
-
41
-
42
-
43
-
44
-
45
-
46
-
47
-
48
-
49
-
50
-
51
-
52
-
53
-
54
-
55
-
56
 |
 |

Operating Instructions
LCD Video Monitor
S1108T0 -P
Printed in Japan
VQT2A05
ENGLISH
D
Model No.
BT-LH2550P
Model No.
BT-LH2550E
Before operating this product, please read the instructions carefully and save this manual for future use.
DEUTSCH
Für Erlauterungen in Deutsch, konsultieren Sie bitte die mitgelieferte CD-ROM.
FRANÇAIS
Pour des explications en français, veuillez vous reporter au CD-ROM fourni.
ITALIANO
Per le istruzioni in italiano, vedere il CD-ROM in dotazione.
ESPAÑOL
Para la explicación en español, consulte el CD-ROM uministrado.