Panasonic CS-ME7SD3UA install manual
Panasonic CS-ME7SD3UA Manual
 |
View all Panasonic CS-ME7SD3UA manuals
Add to My Manuals
Save this manual to your list of manuals |
Panasonic CS-ME7SD3UA manual content summary:
- Panasonic CS-ME7SD3UA | install manual - Page 1
Install Indoor Unit CS-ME5SD3UA CS-ME7SD3UA Destination USA Please file and use this manual together with the service manual for Model No. CU-2E18SBU, Order No. PAPAMY1604017CE. WARNING This service information is designed for experienced repair technicians only and is not designed for use by the - Panasonic CS-ME7SD3UA | install manual - Page 2
11. Installation Instruction Attached Accessories No. Accessory part Remote control 1 2 Battery Remote control holder 3 4 Remote control actually face a different way. x Respective outdoor unit installation procedure shall refer to instruction manual provided in the outdoor unit packaging. 17 - Panasonic CS-ME7SD3UA | install manual - Page 3
location x Do not install the unit in excessive oil fume area such as kitchen, workshop and etc. x The location should be strong enough to support the main unit without vibration. x There should not be any heat or steam source nearby. x Drainage should be easy. Avoid locating the drain port - Panasonic CS-ME7SD3UA | install manual - Page 4
Required Minimum Space for Installation and Service 22 7/32" (564) Min. 7 7/8" (200) o r more 32 7/16" (824) (Suspension bolt pitch) Min. 7 7/8" (200) or more Electrical component box Inspection access 17 23/32" x 17 - Panasonic CS-ME7SD3UA | install manual - Page 5
") (60 to 90 mm) Approx. 4 1/2" (144) Hanging bolt M10 Roof beam Ceiling surface x Secure the hanging bolts (M10, locally purchased) firmly in a manner capable of supporting the unit weight. x Consult your construction or interior contractor for details on finishing the ceiling opening. 20 - Panasonic CS-ME7SD3UA | install manual - Page 6
Installing an Intake and Discharge Duct Type x Ensure the range of unit external static pressure is not exceeded. Refer technical manual for the range of external static pressure setting. x Connect the duct as shown. x When attaching duct to the intake side, remove the product filter frame - Panasonic CS-ME7SD3UA | install manual - Page 7
Mounting Remote Controller Receiver Install the remote controller receiver cable at least 1 31/32" (50 mm) away from electric wires of other appliances to avoid miss-operation (electromagnetic noise). 1 Remove the bottom case. 2 Mount to the wall. Attention Mounting the bottom case x Tighten the - Panasonic CS-ME7SD3UA | install manual - Page 8
x Connect the indoor unit and the remote control receiver 5. (Refer to the illustration.) x Fix the green wire from receiver cable 8 to the grounding location provided inside control board. Receiver cable 8 Control box Remote control receiver 5 11.1.4 Connecting the Drain Piping x Lay the drain - Panasonic CS-ME7SD3UA | install manual - Page 9
11.1.6 Connect the Cable to the Indoor Unit x Remove control box cover. x Remove the plugs. x Fix the conduit connections to the knockout holes together with lock nuts, then secure them against the control box side panel. x Receiver cable wires 8 must pass through the upper conduit hole. Make sure - Panasonic CS-ME7SD3UA | install manual - Page 10
11.1.6.1 Wire Stripping and Connecting Requirement Wire stripping No loose strand when inserted 13/32" ± 1/32" 10 ± 1 mm Indoor/outdoor connection terminal board 7/32" (5 mm) or more (gap between wires) Conductor Conductor Conductor not fully inserted over inserted fully inserted ACCEPT
-
 1
1 -
 2
2 -
 3
3 -
 4
4 -
 5
5 -
 6
6 -
 7
7 -
8
-
9
-
10
 |
 |

© Panasonic Corporation 2016
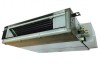
Indoor Unit
CS-ME5SD3UA
CS-ME7SD3UA
Destination
USA
Please file and use this manual together with the service manual for Model No. CU-2E18SBU, Order No. PAPAMY1604017CE.
This service information is designed for experienced repair technicians only and is not designed for use by the general public.
It does not contain warnings or cautions to advise non-technical individuals of potential dangers in attempting to service a product.
Products powered by electricity should be serviced or repaired only by experienced professional technicians. Any attempt to service
or repair the product or products dealt with in this service information by anyone else could result in serious injury or death.
WARNING
PRECAUTION OF LOW TEMPERATURE
In order to avoid frostbite, be assured of no refrigerant leakage during the installation or repairing of refrigerant circuit.
Install