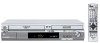
Panasonic DMR-ES40VS DMRES40 User Guide
Panasonic DMR-ES40VS Manual
 |
View all Panasonic DMR-ES40VS manuals
Add to My Manuals
Save this manual to your list of manuals |
Panasonic DMR-ES40VS manual content summary:
- Panasonic DMR-ES40VS | DMRES40 User Guide - Page 1
Operating Instructions DVD Recorder Model No. DMR-ES40V Recording DVD Editing Convenient functions Playback VHS Recording read these instructions carefully. Before connecting, operating or adjusting this product, please read the instructions completely. Please keep this manual for future - Panasonic DMR-ES40VS | DMRES40 User Guide - Page 2
COVERS AND DO NOT REPAIR YOURSELF. REFER SERVICING TO QUALIFIED PERSONNEL. WARNING . NO USER-SERVICEABLE PARTS INSIDE. REFER SERVICING TO QUALIFIED SERVICE PERSONNEL. The operating and maintenance (servicing) instructions in the literature Panasonic Corporation of North America One Panasonic - Panasonic DMR-ES40VS | DMRES40 User Guide - Page 3
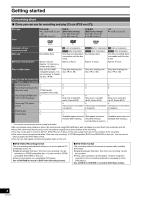
all servicing to qualified service personnel. Servicing is required when the apparatus has been damaged in any way, such as power-supply cord or instructions are examples. Actual display depends on discs. Useful features You can enjoy both DVD and VHS with the unit. This DVD Recorder can record - Panasonic DMR-ES40VS | DMRES40 User Guide - Page 4
26 ≥Chasing play 26 ≥Simultaneous recording and play 26 ≥TIME SLIP 26 ≥Playing VHS while recording 26 ≥DV automatic recording (DV AUTO RECORDING 27 Cautions for using scheduled recording on DVD 28 Scheduled Recording 28 ≥Using VCR Plus_ system 28 ≥Manual programming 29 Check, change or - Panasonic DMR-ES40VS | DMRES40 User Guide - Page 5
(dubbing) (DVD l VHS 56 Recording from an external device 57 ≥Manual recording 57 - DVD 57 - VHS 57 Reference Glossary 58 Frequently asked questions 59 Error messages 60 ≥Common 60 ≥DVD 60 ≥VHS 60 Troubleshooting guide 61 ≥Common 61 ≥DVD 63 ≥VHS 65 Product Service 65 ≥Product - Panasonic DMR-ES40VS | DMRES40 User Guide - Page 6
sides. ≥We recommend using Panasonic discs. We recommend using DVD-RAM discs with cartridges to protect them from scratches and dirt. ≥Discs from other manufactures may not be recorded or played due to the condition of the recording. ≥You may not be able to record to DVD-R, DVD-RW and +R discs on - Panasonic DMR-ES40VS | DMRES40 User Guide - Page 7
(3z)] Disc type Logo DVD-Video DVD-RW (DVD Video Recording format) rRW Audio CD - Video CD - Indicated in these instructions with [DVD-V] [-RW‹VR›] [DVD-V] [CD] [VCD] Instructions High quality movie and music discs DVD-RW° recorded on another DVD recorder +RW° ≥You can play programs - Panasonic DMR-ES40VS | DMRES40 User Guide - Page 8
unit. ≥Before using chemically treated cloth, carefully read the instructions that came with the cloth. Observe the following points to Quick Start for Recording on DVD-RAM° ° When the unit is turned off, press [Í, DVD/VHS POWER] and then [¥, REC] (Quick Start Mode). Recording on DVD-RAM starts - Panasonic DMR-ES40VS | DMRES40 User Guide - Page 9
DVD-R, etc. ∫ When recording an SAP program to DVD-R, etc. Select the audio to record before recording record or transfer (dub).° ° You can record and transfer (dub) again if you format DVD-RW. Record to DVD-R, etc. Finalize Play on other DVD parts . ∏ 1 AC power supply cord (K2CB2CB00006) ∏ 1 - Panasonic DMR-ES40VS | DMRES40 User Guide - Page 10
DVD or VHS l above (4) Select channels and title numbers etc./Enter numbers (5) Cancel/Reset the tape counter (6) Basic operations for recording button" is not used in these operating instructions so "Press the [ENTER] button." the batteries, please re-enter the codes (l 18). Note ≥Keep the transmission - Panasonic DMR-ES40VS | DMRES40 User Guide - Page 11
VHS CH DVD REC /k1.3 OPERATION SELECT VHS DUBBING DVD DV IN DV IN (8) (9) (1) Remote control signal sensor/ DVD/VHS POWER on/off button (Í/I, POWER l 27 (15)Recording button (¥, REC l 24, 49 (16)One Touch Transfer (Dubbing) operation button ≥From VHS to DVD l 55 ≥From DVD to VHS l 56 ∫ Off - Panasonic DMR-ES40VS | DMRES40 User Guide - Page 12
read the appropriate operating instructions. ∫ Connecting a TV cable 2 1 2 Cooling fan 3 4 AC power supply cord Connect to household AC outlet only after all other cable To household AC outlet (AC 120 V, 60 Hz) Video cassette recorder R L VIDEO AUDIO OUT OUT VHF/UHF RF IN ≥If the antenna - Panasonic DMR-ES40VS | DMRES40 User Guide - Page 13
service provider regarding an appropriate cable TV box or satellite receiver. ≥You can enjoy viewing cable TV or satellite TV programming. To AUDIO/VIDEO IN Audio/Video cable To VHF/UHF RF IN TV ≥You can record your TV. Refer to the TV's operating instructions. ∫ A twin lead and coaxial plug - Panasonic DMR-ES40VS | DMRES40 User Guide - Page 14
- L VIDEO DVD PRIORITY output DVD/VHS COMMON OUT ≥For DVD/VHS COMMON output terminals, both DVD and VHS signals can be output. DVD PRIORITY OUT ≥You can also playback a tape with the DVD PRIORITY output terminal except while recording, or making a scheduled recording, on the DVD. ∫ Connecting an - Panasonic DMR-ES40VS | DMRES40 User Guide - Page 15
tune to your local PBS for Auto Clock Setting to work. If there is no local PBS, set the clock manually (l 44, "Set Clock Manually"). [1] Press [Í, DVD/VHS POWER]. Select Language Seleccione el idioma Sélection de Langue English Español Français Press ENTER Pulse ENTER Appuyer sur ENTER [2] Press - Panasonic DMR-ES40VS | DMRES40 User Guide - Page 16
Getting started Numbered buttons 3, 4, 2, 1 ENTER DVD/VHS POWER TV POWER INPUT SELECT TV/VIDEO CH VOLUME VHS OPERATION SELECT DVD TRACKING/V-LOCK AUDIO CANCEL/RESET SKIP/INDEX VCR Plus+ CM SKIP PLAY SLOW/ REW SEARCH FF DIRECT NAVIGATOR PFLUANCYTIONS TOP MENU SUB MENU S RETURN TIME - Panasonic DMR-ES40VS | DMRES40 User Guide - Page 17
: A to Z, 0 to 9 space) ≥To delete the caption, press [CANCEL/RESET, ¢]. ≥Repeat this step to enter the other characters. SETUP Manual Channel Captions Channel Setup Disc Video Audio Display TV Screen VHS Channel Number Caption 6 ---- 8 ---- 10 AAAA 12 ---- 23 ---- ENTER [8] Use - Panasonic DMR-ES40VS | DMRES40 User Guide - Page 18
DVD/VHS POWER TV POWER INPUT SELECT TV/VIDEO CH VOLUME Numbered buttons 3, 4, 2, 1 ENTER VHS OPERATION SELECT DVD TRACKING/V-LOCK AUDIO CANCEL/RESET [Í POWER TV], enter the code using the numbered buttons. e.g., 01: press [0] > [1]. Manufacturer and Code No. Panasonic National QUASAR - Panasonic DMR-ES40VS | DMRES40 User Guide - Page 19
SETUP Channel Setup Disc Video Audio Display TV Screen VHS TV Type 4:3 TV Aspect 4:3 & 480i Aspect is distorted, press and hold [CANCEL/ RESET, ¢] until the picture is displayed correctly. RF output channel of the DVD Recorder to "OFF" (RF OFF) when the DVD Recorder is connected to a TV via - Panasonic DMR-ES40VS | DMRES40 User Guide - Page 20
[DVD-V] [-RW‹VR›] [VCD] [CD] [1] Press [Í, DVD/VHS POWER] to turn the unit on. [2] Insert a disc. (l 8) [3] Press [1, PLAY]. ≥The disc tray closes and play begins. (The unit takes some time to read the disc before play starts.) ≥Playback starts from the most recently recorded title. [RAM] [-R] [-RW - Panasonic DMR-ES40VS | DMRES40 User Guide - Page 21
Picture) screen (TV image) is displayed in the lower right part of the main screen. You can watch both playback images and " is selected. DVD-RAM Play Stereo [RAM] [-RW‹VR›] [When playing an SAP broadcast recorded on DVD- RAM, DVD-RW (DVD Video Recording format)] MAIN () SAP [DVD-V] (l 38) - Panasonic DMR-ES40VS | DMRES40 User Guide - Page 22
Playback DVD DVD/VHS POWER TV POWER INPUT SELECT TV/VIDEO CH VOLUME Numbered buttons :, 9 VHS OPERATION SELECT DVD TRACKING/V-LOCK AUDIO CANCEL/RESET VCR Plus+ CM SKIP SKIP/INDEX SLOW/ REW SEARCH FF PLAY DVD TOP MENU 3, 4, 2, 1 ENTER SUB MENU 2 Preparation ≥Press [DVD]. DIRECT - Panasonic DMR-ES40VS | DMRES40 User Guide - Page 23
Playback Playback DVD ∫ Using the tree screen to find a group [1] While the file list is displayed (l 4] and press [ENTER]. [3] Select "JPEG Menu" with [3, 4] and press [ENTER]. FUNCTIONS DVD CD(MP3/JPEG) Playback Menu MENU Playback Mode: MP3 Menus Select a playback mode from the following - Panasonic DMR-ES40VS | DMRES40 User Guide - Page 24
Recording DVD Recording TV programs Í TV/VIDEO Numbered buttons ∫ 3, 4, 2, 1 ENTER µ DVD/VHS POWER TV POWER INPUT SELECT TV/VIDEO CH VOLUME VHS OPERATION SELECT DVD TRACKING/V-LOCK AUDIO CANCEL/RESET VCR Plus+ CM SKIP SKIP/INDEX SLOW/ REW SEARCH FF PLAY DIRECT NAVIGATOR TOP MENU - Panasonic DMR-ES40VS | DMRES40 User Guide - Page 25
recording. ≥The recording is unaffected. Flexible Recording mode (FR) [RAM] [-R] [-RW‹V›] [+R] The unit calculates a recording rate that enables the recording to DVD]. ≥Select the channel to record. [1] While stopped Press [FUNCTIONS]. [2] Select "Other Functions" with [3, 4] FUNCTIONS DVD DVD - Panasonic DMR-ES40VS | DMRES40 User Guide - Page 26
Recording DVD ∫ DIRECT NAVIGATOR 3, 4, 2, 1 ENTER DVD/VHS POWER TV POWER INPUT SELECT TV/VIDEO CH VOLUME VSHKIPS/INDEX OPERATRIEOWN SELECT SLOW/ SEADRCVH DFF TRACKING/V-LOCK PLAY DIRECT NAVIGATOR TOP MENU FUNCTIONS SUB MENU S RETURN TIME - Panasonic DMR-ES40VS | DMRES40 User Guide - Page 27
recording slightly earlier. If the DV automatic recording function does not work properly, check the connections and DV equipment settings, and turn the unit off and back on. If that does not work, follow the instructions for "Recording from an external device" (l 57). DVD 27 VQT0R73 Recording - Panasonic DMR-ES40VS | DMRES40 User Guide - Page 28
Recording DVD Í DVD/VHS POWER TV POWER INPUT SELECT TV/VIDEO CH VOLUME Numbered buttons ∫ VHS OPERATION SELECT DVD TRACKING/V-LOCK AUDIO CANCEL/RESET VCR Plus+ CM SKIP SKIP/INDEX SLOW/ REW SEARCH FF PLAY DIRECT NAVIGATOR FUNCTIONS DVD VCR Plusi 3, 4, 2, 1 ENTER SCHEDULE TOP MENU - Panasonic DMR-ES40VS | DMRES40 User Guide - Page 29
activated. ∫ To release the unit from scheduled recording standby Press [Í, DVD/VHS POWER]. The unit turns on and " " goes out. ≥Be sure to press [Í, DVD/VHS POWER] to return the unit to standby mode before the scheduled recording time. Scheduled recording will work only if " " is displayed. ∫ To - Panasonic DMR-ES40VS | DMRES40 User Guide - Page 30
DVD 3, 4, 2 ENTER DVD/VHS POWER TV POWER INPUT SELECT TV/VIDEO CH VOLUME VHS OPERATION SELECT PDLVAYD TRACKING/V-LOCK DIRECT NAVIGATOR FUNCTIONS TOP MENU SUB MENU S RETURN TIME SLIP SCHEDULE DISPLAY STATUS JET REW DVD FUNCTIONS RETURN DISC MANAGEMENT [RAM] [-R] [-RW recorded contents - Panasonic DMR-ES40VS | DMRES40 User Guide - Page 31
minutes. ≥Do not disconnect the AC power supply cord while finalizing. This can render the disc unusable. [7] Press [ENTER]. Note ≥You can only finalize DVD-R, DVD-RW (DVD-Video format) or +R that were recorded on the unit. ≥When finalizing a high-speed recording compatible disc, it may take longer - Panasonic DMR-ES40VS | DMRES40 User Guide - Page 32
DVD/VHS POWER TV POWER INPUT SELECT TV/VIDEO CH VOLUME VHS OPERATION SELECT DVD TRACKING/V-LOCK AUDIO CANCEL/RESET recording) 44 ≥Disc 64 [-R] [-RW‹V›] [+R] ≥Title ≥Disc Characters 44 40 Note ≥If a name is long, part of it may not be shown in some screens. Preparation ≥Insert a recorded - Panasonic DMR-ES40VS | DMRES40 User Guide - Page 33
time may not increase after erasing short titles. ≥The available recording space on DVD-R or +R does not increase when you erase titles. ≥Available recording space on a DVD-RW (DVD-Video format) increases only when the last recorded title is erased. It does not increase if other titles are erased - Panasonic DMR-ES40VS | DMRES40 User Guide - Page 34
Editing DVD DVD/VHS POWER TV POWER INPUT SELECT TV/VIDEO CH VOLUME :, 9 CANCEVL/HRESSET OPERVATCIRONPlus+ Press [RETURN]. ∫ To exit the screen Press [RETURN] several times. 11 Title Name [RAM] [-R] [-RW‹V›] [+R] ≥Follow steps 1 to 3 of "Edit Title". [4] Select "Title Name" with [3, 4] and press - Panasonic DMR-ES40VS | DMRES40 User Guide - Page 35
DVD-RAM 08 PLAY Create Exit 0:43.21 [8] Select "Exit" with [4] and press [ENTER]. Note ≥A short portion of the recording just after the creation point may be lost. For your reference ≥It is not possible to carry out "Create" when the resulting part ] [-R] [-RW‹V›] [+R] [-RW‹VR›] ≥ - Panasonic DMR-ES40VS | DMRES40 User Guide - Page 36
Editing DVD/VHS POWER TV POWER INPUT SELECT TV/VIDEO CH VOLUME Numbered buttons ∫ VHS OPERATION SELECT DVD TRACKING/V-LOCK AUDIO CANCEL/RESET VCR Plus+ CM SKIP SKIP/INDEX SLOW/ REW SEARCH FF PLAY DIRECT NAVIGATOR FUNCTIONS 3, 4, 2, 1 ENTER SUB MENU TOP MENU SUB MENU S RETURN TIME - Panasonic DMR-ES40VS | DMRES40 User Guide - Page 37
Editing ∫ Other functions for playlists [RAM] [-RW‹VR›] (Properties only) Preparation ≥Press [DVD]. [1] While stopped Press [FUNCTIONS]. [2] Select "Other Functions" with [3, 4] and press [ENTER]. [3] Select "PLAYLISTS" with [3, 4] and press [ENTER]. [4] Use [3, 4, 2, 1] to select a playlist - Panasonic DMR-ES40VS | DMRES40 User Guide - Page 38
POWER TV POWER INPUT SELECT TV/VIDEO CH VOLUME VHS OPERATION SELECT PDLVAYD TRACKING/V-LOCK DIRECT NAVIGATOR FUNCTIONS DVD 3, 4, 1 TOP MENU SUB MENU S RETURN TIME SLIP SCHEDULE DISPLAY STATUS JET REW DISPLAY REC REC MODE DVD ERASE ADD/DLT CREATE COPYING CHAPTER FREC [RAM] [-R] [-RW - Panasonic DMR-ES40VS | DMRES40 User Guide - Page 39
Disc Play Video Audio Other Position 1 Note ≥Turn V.S.S. off if it causes distortion. ≥Turn V.S.S. off for SAP recordings. Dialog Enhancer [RAM] [-R] [-RW‹V›] [+R] [DVD-V] [-RW‹VR›] (Dolby Digital, 3-channel or over only, including a center channel) The volume of the center channel is raised - Panasonic DMR-ES40VS | DMRES40 User Guide - Page 40
Convenient functions DVD DVD/VHS POWER TV POWER INPUT SELECT TV/VIDEO CH VOLUME Numbered buttons VHS OPERATION SELECT DVD TRACKING/V-LOCK AUDIO CANCEL/RESET VCR Plus+ CM SKIP SKIP/INDEX SLOW/ REW SEARCH FF PLAY DVD 3, 4, 2, 1 ENTER DIRECT NAVIGATOR TOP MENU FUNCTIONS SUB MENU S - Panasonic DMR-ES40VS | DMRES40 User Guide - Page 41
Set Clock Manually (l 44) Adjust Time Zone (l 44) This corrects the time set in Auto Clock Setting. The status is not displayed on the Set Up menu when the Auto Clock Setting is not set. [j1] [0] [i1] Quick Start About 1 second after turning on the unit, you can start recording to DVD-RAM. Power - Panasonic DMR-ES40VS | DMRES40 User Guide - Page 42
] [Off] Select MTS Select whether to record the main or secondary audio type (SAP) when recording or transferring (dubbing) to DVD-R, DVD-RW (DVDVideo format) or +R. (You cannot select the audio type on the unit when recording audio to DVD-R, DVD-RW (DVD-Video format) or +R from an external device - Panasonic DMR-ES40VS | DMRES40 User Guide - Page 43
disappears. While using this mode the standby power consumption can be reduced. ∫ TV Screen TV recorded for a widescreen is played in the letterbox style. 4:3 TV Settings for DVD recorded for a widescreen is played in the letterbox style. ∫ VHS (l 52) TAPE SELECT JET SEARCH Language code - Panasonic DMR-ES40VS | DMRES40 User Guide - Page 44
Off Disc Protection Off PLAYLISTS FLEXIBLE RECORDING DV AUTO RECORDING SETUP DISC MANAGEMENT ENTER Other Functions Return SETUP Channel Setup Disc Video Audio Display TV Screen VHS Off Timer Remote Control Code Clock Settings 6 Hours Set Code 1 Quick Start On Restore Default Settings - Panasonic DMR-ES40VS | DMRES40 User Guide - Page 45
Convenient functions By using the FUNCTIONS window you can access the main functions quickly and easily. Preparation ≥Press [DVD]. [1] 45 VQT0R73 - Panasonic DMR-ES40VS | DMRES40 User Guide - Page 46
Press [ - Panasonic DMR-ES40VS | DMRES40 User Guide - Page 47
AV input) on the TV. ≥Press [VHS]. [1] Press [Í, DVD/VHS POWER] to turn the unit on. [2] Insert a recorded video cassette. (l 46) [3] Press [1, PLAY condition, the rewind speed may change somewhat. ≥The tape counter is reset to "00:00.00" when the tape is rewound to the beginning. ≥ - Panasonic DMR-ES40VS | DMRES40 User Guide - Page 48
VHS TV/VIDEO VHS Numbered buttons ∫ DVD/VHS POWER TV POWER INPUT SELECT TV/VIDEO CH VOLUME VHS OPERATION SELECT DVD TRACKING/V-LOCK AUDIO CANCEL/RESET ∫ Manual tracking The unit usually makes tracking adjustments, but you may need to do it manually if noise appears on a tape recorded on - Panasonic DMR-ES40VS | DMRES40 User Guide - Page 49
≥You can also do this if the unit is making a scheduled recording. ≥The recording is not affected. ∫ Playing DVD while VHS recording You can play discs while recording. The recording will not be affected. ≥DVD playback (l 20) Playback Recording Note ≥Even if the video cassette you use is labeled - Panasonic DMR-ES40VS | DMRES40 User Guide - Page 50
Recording VHS Í DVD/VHS POWER TV POWER INPUT SELECT TV/VIDEO CH VOLUME VHS Numbered buttons ∫ VHS OPERATION SELECT DVD TRACKING/V-LOCK AUDIO CANCEL/RESET VCR Plus+ CM SKIP SKIP/INDEX SLOW/ REW SEARCH FF PLAY DIRECT NAVIGATOR FUNCTIONS VCR Plusi 3, 4, 2, 1 ENTER SCHEDULE REC MODE - Panasonic DMR-ES40VS | DMRES40 User Guide - Page 51
activated. ∫ To release the unit from scheduled recording standby Press [Í, DVD/VHS POWER]. The unit turns on and " " goes out. ≥Be sure to press [Í, DVD/VHS POWER] to return the unit to standby mode before the scheduled recording time. Scheduled recording will work only if " " is displayed. ∫ To - Panasonic DMR-ES40VS | DMRES40 User Guide - Page 52
VHS VHS DVD/VHS POWER TV POWER INPUT SELECT TV/VIDEO CH VOLUME VHS OPERATION SELECT DVD TRACKING/V-LOCK :, 9 ∫ 3, 4, 2, 1 ENTER AUDIO CANCEL/RESET SEARCH when playing EP and VP tapes. ≥It is possible to view the picture recorded in EP or VP mode at approx. 27 or 35 times speed. [k27] [k----3--5--] - Panasonic DMR-ES40VS | DMRES40 User Guide - Page 53
message displayed will change. ∫ DVD side not recording: VHS operation when not recording or making a scheduled recording on the DVD side. ∫ DVD side recording: VHS operation when recording or making a scheduled recording on the DVD side. When the DVD side is not recording Press [STATUS] to change - Panasonic DMR-ES40VS | DMRES40 User Guide - Page 54
(dubbing) from VHS to DVD ≥Copy-protected video tapes cannot be dubbed. Most video tapes are copy-protected to prevent illegal reproduction and they cannot be recorded. ≥When a copy-protected tape is inserted, a message appears on the display and the recording stops on the spot. ≥If a part of a tape - Panasonic DMR-ES40VS | DMRES40 User Guide - Page 55
is played back on VHS, select the audio to be recorded on disc in "Select MTS" in the "SETUP" menu. (l 42) [-R] [-RW‹V›] [+R] VHS ≥Insert the video cassette containing the program to be copied (l 46). [1] While both DVD and VHS are stopped Press and hold [" DVD, DUBBING] for about 3 seconds - Panasonic DMR-ES40VS | DMRES40 User Guide - Page 56
DVD VHS Transfer (Dubbing) from DVD INPUT SELECT VHS DVD/VHS POWER TV POWER INPUT SELECT TV/VIDEO CH VOLUME VHS OPERATION SELECT DVD TRACKING/V-LOCK :, 9 ∫ µ VHS - CANCEL/RESET SKIP/INDEX CANCEL/RESET (dubbing) (DVD l VHS) [RAM] [-R] [-RW‹V›] [+R] You can transfer (dub) titles recorded on a - Panasonic DMR-ES40VS | DMRES40 User Guide - Page 57
connecting any cables, first make sure that the power for the unit and the external device are off Manual recording Preparation ≥Connect an external device to this unit's input terminals (l above). DVD [RAM] [-R] [-RW‹V›] [+R] ≥Release protection (disc l 30, cartridge l 30). [RAM] ≥Press [DVD]. VHS - Panasonic DMR-ES40VS | DMRES40 User Guide - Page 58
recorded only once. Such broadcasts can be recorded only with CPRM compatible recorders and discs. Decoder A decoder restores the coded audio signals on DVDs play of a recorded CD-R, CD-RW, DVD-R, etc. possible on equipment that can play such media. You can finalize DVD-R, DVD-RW (DVD-Video format) - Panasonic DMR-ES40VS | DMRES40 User Guide - Page 59
DVD-RW (DVD-Video format) and +R, and plays DVD-RW (DVD Video Recording format) and +RW. ≥The unit also records and plays high speed recording compatible DVD-R, DVD-RW, +R discs. ≥After formatting +R discs - You may not be able to play +R discs on this unit after formatting them on other Panasonic - Panasonic DMR-ES40VS | DMRES40 User Guide - Page 60
Reference DVD VHS Error messages ∫ Common On the unit's display H, F, U stands for a number.) ≥An error has occurred. The number following "H", "F" or "U" depends on the status of the unit. Reset procedure: ("The unit is on but cannot be operated." l 62) ≥If the service numbers fail to - Panasonic DMR-ES40VS | DMRES40 User Guide - Page 61
Reference DVD VHS Troubleshooting guide Before requesting service, make the following checks. If you are in doubt about some of the check points, or if the remedies indicated in the chart do not solve the problem, refer to the "Customer Services Directory" on page 66 if you reside in the U.S.A., - Panasonic DMR-ES40VS | DMRES40 User Guide - Page 62
seconds. The unit is forcibly switched to standby. Alternatively, disconnect the AC power supply cord, wait for about 1 minute, then reconnect it. (2) Press [POWER Í/I] to turn the unit on. ≥The unit is recording. ≥The unit may have a problem. While the unit is off, hold down [∫] and [CH, W] on the - Panasonic DMR-ES40VS | DMRES40 User Guide - Page 63
. Correct the program. ≥The unit is not on schedule recording standby. (" " on the unit's display is not on.) Press [Í, DVD/VHS POWER] to turn the unit off and make sure that " " is on. ≥The clock is not correct. Set the clock. ≥Correct the guide channels with "VCR Plus_ Ch. Setting" in the SETUP - Panasonic DMR-ES40VS | DMRES40 User Guide - Page 64
recording or editing of DVD-R, DVD-RW (DVD-Video format), +R may be disabled. ≥A DVD-R, DVD-RW (DVD-Video format), +R recorded on the unit may not be recordable on other Panasonic DVD recorders. ≥The material you are trying to record is copy-protected. A part or whole of a recorded ≥If the power - Panasonic DMR-ES40VS | DMRES40 User Guide - Page 65
part of the tape. ≥You can damage the unit if you play dirty or damaged tapes and this can cause the blue background to appear. Consult your dealer. ≥When the unit starts making a scheduled recording on the DVD during VHS playback, some picture distortion may occur. This does not indicate a problem - Panasonic DMR-ES40VS | DMRES40 User Guide - Page 66
repair or replace will be made by the warrantor. Product or Part Name DVD Recorder Rechargeable Batteries, DVD-RAM Disc (in exchange for defective item) Parts (Fax Only) (Monday - Friday 9 am to 8 pm, EST.) Panasonic Services Company 20421 84th Avenue South, Kent, WA 98032 (We Accept Visa, - Panasonic DMR-ES40VS | DMRES40 User Guide - Page 67
Panasonic DVD Recorder One (1) year, parts and labour In-home Service panasonic.ca FOR PRODUCT REPAIRS, please locate your nearest Authorized Servicentre at www.panasonic.ca : Link : "ServicentresTM locator" under "Customer support" Panasonic Factory Service: Richmond, British Columbia Panasonic - Panasonic DMR-ES40VS | DMRES40 User Guide - Page 68
: AC 120 V, 60 Hz ∫Power Consumption: 29 W ∫Recording system: DVD Video Recording format (DVD-RAM) DVD-Video format (DVD-R) DVD-Video format (DVD-RW) ∫Recordable discs: DVD-RAM: Ver. 2.0 Ver. 2.1/3k-SPEED DVD-RAM Revision 1.0 Ver. 2.2/5k-SPEED DVD-RAM Revision 2.0 DVD-R: for General Ver. 2.0 for - Panasonic DMR-ES40VS | DMRES40 User Guide - Page 69
guide channel 16 scheduled recording (DVD 28 scheduled recording (VHS 50 DVD Angle 38 Audio attributes 38 channel 38 playback 21 receiving, recording 30, 33 , Finalize 31 58 Flexible Recording 25 Format disc 31 FUNCTIONS window 45 Language audio 41 code list 43 sound track 38 , subtitle - Panasonic DMR-ES40VS | DMRES40 User Guide - Page 70
. 2,1 W Aprox. 2,1 W VQT0R73 ∫ Accionamiento rápido Inicio rápido de 1 s. para grabar en el DVD-RAM° ° Cuando la unidad está apagada, pulsar [Í, DVD/VHS POWER] y después [¥, REC] (Modo de Accionamiento rápido). La grabación en el DVD-RAM inicia cerca de 1 segundo después de pulsar estas teclas. - Panasonic DMR-ES40VS | DMRES40 User Guide - Page 71
Cómo empezar Í DVD/VHS POWER TV POWER INPUT SELECT TV/VIDEO CH VOLUME 3, 4, 2, 1 ENTER VHS OPERATION SELECT DVD TRACKING/V-LOCK AUDIO CANCEL/RESET SKIP/INDEX VCR Plus+ CM SKIP PLAY SLOW/ REW SEARCH FF DIRECT NAVIGATOR PFLUANCYTIONS TOP MENU SUB MENU S RETURN TIME SLIP SCHEDULE - Panasonic DMR-ES40VS | DMRES40 User Guide - Page 72
a esta unidad. ≥Pulse [DVD]. [RAM] [-R] [-RW‹V›] [+R] [DVD-V] [-RW‹VR›] [VCD] [CD] [1] Pulse [Í, DVD/VHS POWER] para encender la unidad. . ∫ Reproducción de cámara lenta [RAM] [-R] [-RW‹V›] [+R] (Sólo partes de imagen en movimiento) [DVD-V] [-RW‹VR›] [VCD] Durante la pausa Pulse [6, SLOW/SEARCH - Panasonic DMR-ES40VS | DMRES40 User Guide - Page 73
∫ Visión cuadro por cuadro [RAM] [-R] [-RW‹V›] [+R] (Sólo partes de imagen en movimiento) [DVD-V] [-RW‹VR›] [VCD] Durante la pausa Pulse [2;] ([2]) o [;1] ([1]). ≥Cada vez que se pulsa aparece el cuadro siguiente o el anterior. ≥Mantenga pulsado para cambiar sucesivamente hacia delante o hacia - Panasonic DMR-ES40VS | DMRES40 User Guide - Page 74
2, 1 ENTER DVD/VHS POWER TV POWER INPUT SELECT TV/VIDEO CH VOLUME VHS OPERATION SELECT DVD TRACKING/V-LOCK AUDIO CANCEL/RESET VCR Plus+ CM permiten "Grabación sólo una vez" en discos DVD-R, DVD-RW, iR o DVD-RAM de 8 cm (3q). Utilice un DVD-RAM compatible con CPRM. ≥La grabación tendrá lugar - Panasonic DMR-ES40VS | DMRES40 User Guide - Page 75
grabación temporizada pulse [∫, STOP], luego [ENTER] dentro de 5 segundos. - Puede también seguir pulsando [∫] en la unidad principal durante más de 3 segundos para detener la grabación temporizada. DVD 75 VQT0R73 Español - Panasonic DMR-ES40VS | DMRES40 User Guide - Page 76
Grabación DVD Í DVD/VHS POWER TV POWER INPUT SELECT TV/VIDEO CH VOLUME VHS Teclas numéricas ∫ VHS OPERATION DVD SELECT TRACKING/V-LOCK AUDIO CANCEL/RESET VCR Plus+ CM SKIP SKIP/INDEX SLOW/ REW SEARCH FF PLAY DIRECT NAVIGATOR FUNCTIONS DVD VCR Plusi 6, 5 1 ; 3, 4, 2, 1 ENTER SCHEDULE - Panasonic DMR-ES40VS | DMRES40 User Guide - Page 77
preliminares ≥Seleccione el canal que ve la imgen de la unidad (por ejemplo la entrada AV) en el televisor. ≥Pulse [VHS]. [1] Pulse [Í, DVD/VHS POWER] para encender la unidad. [2] Inserte un cassette de vídeo grabado. (l arriba) [3] Pulse [1, PLAY]. ≥La reproducción inicia automáticamente si inserta - Panasonic DMR-ES40VS | DMRES40 User Guide - Page 78
Grabación VHS Í DVD/VHS POWER TV POWER INPUT SELECT TV/VIDEO CH VOLUME VHS Teclas numéricas ∫ VHS OPERATION SELECT DVD TRACKING/V-LOCK AUDIO CANCEL/RESET VCR Plus+ CM SKIP SKIP/INDEX SLOW/ REW SEARCH FF PLAY DIRECT NAVIGATOR FUNCTIONS CH, W, X ; 3, 4, 2, 1 ENTER SCHEDULE µ TOP - Panasonic DMR-ES40VS | DMRES40 User Guide - Page 79
Grabación VHS ∫ Programación manual ≥Cuando se conecte una caja TV de cable o un receptor de Para hacer salir la unidad de la espera de la grabación temporizada Pulse [Í, DVD/VHS POWER]. ≥Tenga cuidado de pulsar [Í, DVD/VHS POWER] para que la unidad vuelva al modo de espera antes de la hora de la - Panasonic DMR-ES40VS | DMRES40 User Guide - Page 80
decoding technology licensed from Fraunhofer IIS and Thomson multimedia. Panasonic Consumer Electronics Company, Division of Panasonic Corporation of North America One Panasonic Way, Secaucus, New Jersey 07094 http://www.panasonic.com Panasonic Puerto Rico, Inc. Ave. 65 de Infantería, Km. 9.5 San
-
 1
1 -
 2
2 -
 3
3 -
 4
4 -
 5
5 -
 6
6 -
 7
7 -
8
-
9
-
10
-
11
-
12
-
13
-
14
-
15
-
16
-
17
-
18
-
19
-
20
-
21
-
22
-
23
-
24
-
25
-
26
-
27
-
28
-
29
-
30
-
31
-
32
-
33
-
34
-
35
-
36
-
37
-
38
-
39
-
40
-
41
-
42
-
43
-
44
-
45
-
46
-
47
-
48
-
49
-
50
-
51
-
52
-
53
-
54
-
55
-
56
-
57
-
58
-
59
-
60
-
61
-
62
-
63
-
64
-
65
-
66
-
67
-
68
-
69
-
70
-
71
-
72
-
73
-
74
-
75
-
76
-
77
-
78
-
79
-
80
 |
 |
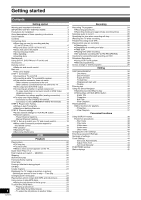
Getting started
Playback
Recording
Editing
Convenient
functions
Playback
Recording
Convenient
functions
Transferring
(Dubbing)
Reference
Español
DVD
VHS
P
PC
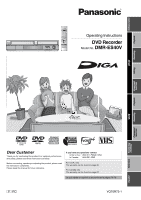
Operating Instructions
DVD Recorder
Model No.
DMR-ES40V
Dear Customer
Thank you for purchasing this product. For optimum performance
and safety, please read these instructions carefully.
Before connecting, operating or adjusting this product, please read
the instructions completely.
Please keep this manual for future reference.
VQT0R73
VQT0R73-1
If you have any questions contact
In the U.S.A.:
1-800-211-PANA (7262)
In Canada:
1-800-561-5505
For U.S.A. only
The warranty can be found on page 66.
For Canada only
The warranty can be found on page 67.
La guía rápida en español se encuentra en la página 70–79.