Panasonic DMREZ485V Dvd Recorder - English/spanish - Page 66
Output Range, then, Select Tape Length, Jet Search
 |
View all Panasonic DMREZ485V manuals
Add to My Manuals
Save this manual to your list of manuals |
Page 66 highlights
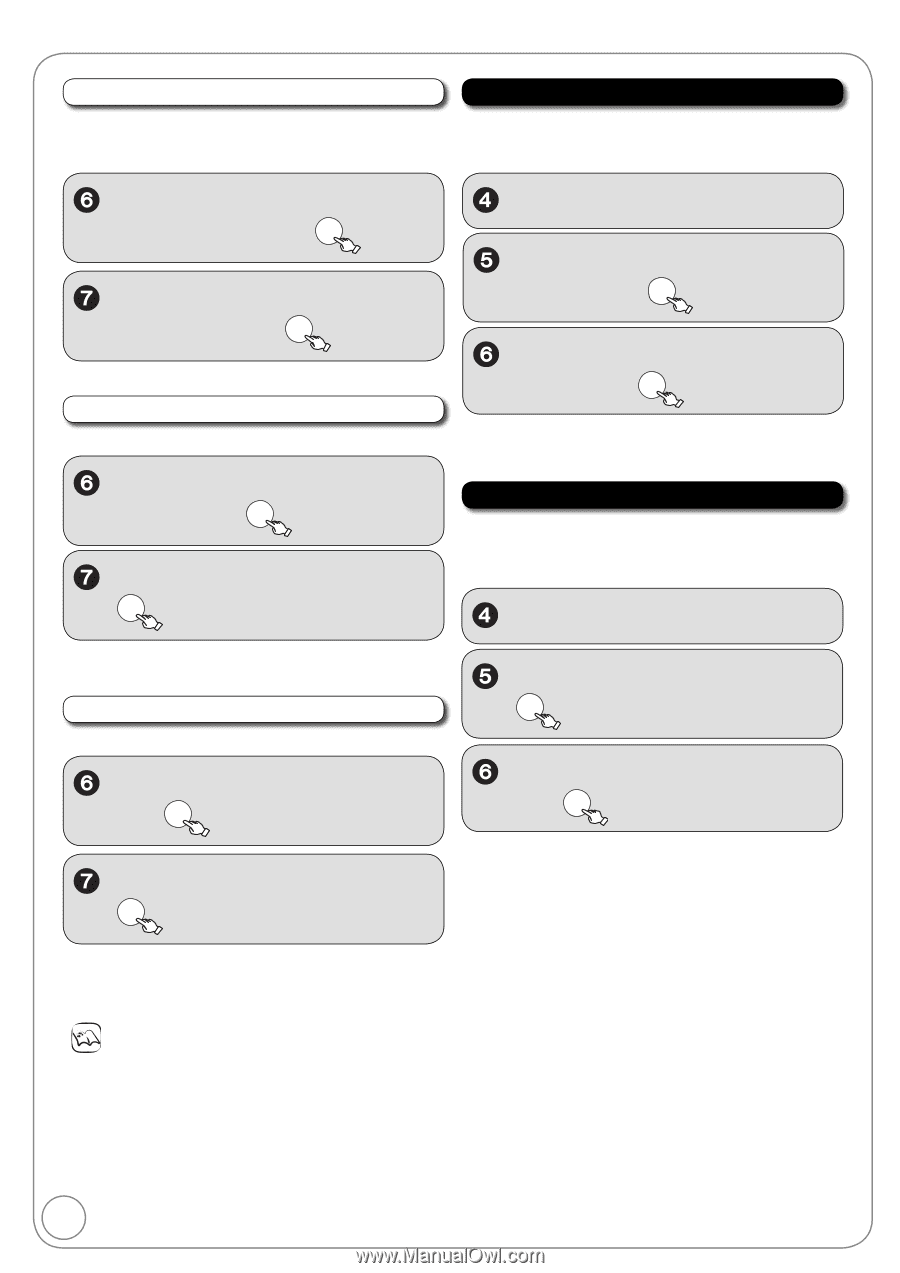
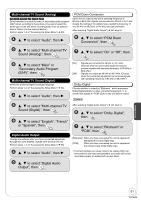
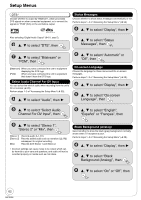
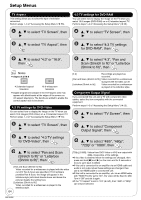
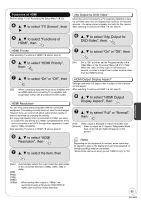
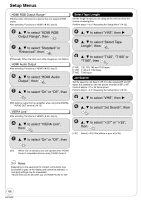
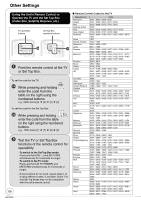
Setup Menus HDMI RGB Output Range Effective when connected to a device that only supports RGB output. After selecting "Functions of HDMI" ( 65, step 5). Select Tape Length Set the length of tape you are using so the unit can show the correct remaining time. Perform steps 1−3 of "Accessing the Setup Menu" ( 55). , to select "HDMI RGB Output Range", then OK , to select "Standard" or "Enhanced", then OK [Enhanced] When the black and white images are not distinct. HDMI Audio Output After selecting "Functions of HDMI" ( 65, step 5). , to select "HDMI Audio Output", then OK , to select "On" or "Off", then OK , to select "VHS", then , to select "Select Tape Length", then OK , to select "T120", "T160" or "T180", then OK [T120] T30, T60, T90 and T120 tapes [T160] T140 and T160 tapes [T180] T180 tapes Jet Search Set the speed for Jet Search ( 37) when playing EP and VP tapes. It is possible to view the picture recorded in EP or VP mode at approx. 27 or 35 times speed. Perform steps 1−3 of "Accessing the Setup Menu" ( 55). , to select "VHS", then [Off] Audio is output from an amplifier when using the DIGITAL AUDIO OUT terminal ( 72). VIERA Link After selecting "Functions of HDMI" ( 65, step 5). , to select "Jet Search", then OK , to select "VIERA Link", then OK , to select "27" or "35", then OK [27] Select [27] if the picture is poor at [35]. , to select "On" or "Off", then OK [On] When "On" is selected, you can operate other "HDAVI Control" compatible devices using "HDAVI Control". Notes Depending on the equipment to connect, some items may be shaded in gray on the display and cannot be selected, or changing settings may be unavailable. Above items can be set when you set "HDMI Priority" to "On". 66 RQT9056
-
 1
1 -
2
-
3
-
4
-
5
-
6
-
7
-
8
-
9
-
10
-
11
-
12
-
13
-
14
-
15
-
16
-
17
-
18
-
19
-
20
-
21
-
22
-
23
-
24
-
25
-
26
-
27
-
28
-
29
-
30
-
31
-
32
-
33
-
34
-
35
-
36
-
37
-
38
-
39
-
40
-
41
-
42
-
43
-
44
-
45
-
46
-
47
-
48
-
49
-
50
-
51
-
52
-
53
-
54
-
55
-
56
-
57
-
58
-
59
-
60
-
 61
61 -
 62
62 -
 63
63 -
 64
64 -
 65
65 -
 66
66 -
 67
67 -
 68
68 -
 69
69 -
 70
70 -
 71
71 -
72
-
73
-
74
-
75
-
76
-
77
-
78
-
79
-
80
-
81
-
82
-
83
-
84
-
85
-
86
-
87
-
88
-
89
-
90
-
91
-
92
-
93
-
94
-
95
-
96
-
97
-
98
-
99
-
100
 |
 |