Panasonic GP-KH232A Operating Instructions
Panasonic GP-KH232A Manual
 |
View all Panasonic GP-KH232A manuals
Add to My Manuals
Save this manual to your list of manuals |
Panasonic GP-KH232A manual content summary:
- Panasonic GP-KH232A | Operating Instructions - Page 1
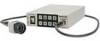
OFF GAIN FMREEENZUE D RANGE SEL AWC D RANGE GP-KH232 CAMERA DEUTSCH FRANÇAIS ESPAÑOL ITALIANO Camera head: Option Camera cable: Option Before attempting to connect or operate this product, please read these instructions carefully and save this manual for future use. The model number is - Panasonic GP-KH232A | Operating Instructions - Page 2
exclamation point within an equilateral triangle is intended to alert the user to the presence of important operating and maintenance (servicing) instructions in the literature accompanying the appliance. 2 We declare under our sole responsibility that the product to which this declaration relates - Panasonic GP-KH232A | Operating Instructions - Page 3
instructions...4 Limitation of liability...5 Disclaimer of warranty...5 Preface ...6 Trademarks and registered trademarks 6 Precautions ...7 Major operating controls and their functions 9 Camera head (Option)...9 Camera ...38 Troubleshooting...39 Specifications...41 Standard accessories...42 Optional - Panasonic GP-KH232A | Operating Instructions - Page 4
Important safety instructions 1) Read these instructions. 2) Keep these instructions. 3) Heed all warnings. 4) Follow all instructions. 5) Do to avoid injury from tip-over. S3125A 12) Refer all servicing to qualified service personnel. Servicing is required when the apparatus has been damaged in any - Panasonic GP-KH232A | Operating Instructions - Page 5
PROBLEM, CONSEQUENTIAL INCONVENIENCE, OR LOSS OR DAMAGE, ARISING OUT OF THE SYSTEM COMBINED BY THE DEVICES OF THIRD PARTY; (6) ANY CLAIM OR ACTION FOR DAMAGES, BROUGHT BY ANY PERSON OR ORGANIZATION BEING A PHOTOGENIC SUBJECT, DUE TO VIOLATION OF PRIVACY WITH THE RESULT OF THAT SURVEILLANCE-CAMERA - Panasonic GP-KH232A | Operating Instructions - Page 6
functions by introducing digital signal processing. The camera head is separately mounted. • GP-KH232CUE: HD Camera Control Unit This product is used in combination with the optional HD camera head (hereafter called camera head). • GP-KH232HE: HD Camera head • The multi-format output is available - Panasonic GP-KH232A | Operating Instructions - Page 7
power off immediately and contact qualified service personnel for service. Do not attempt to disassemble or Select an installation area that can support the total weight. Selecting an inappropriate heaters in consideration of heat release at the camera location. Handle this product with care. Do - Panasonic GP-KH232A | Operating Instructions - Page 8
subject Blooming Cleaning this product body Turn the power off when cleaning this product. Failure to observe this may cause injury or trouble. Do not use strong abrasive detergent when cleaning this product. Otherwise, it may cause discoloration. When using a chemical cloth for cleaning, read - Panasonic GP-KH232A | Operating Instructions - Page 9
One of the following optional HD camera cables (hereafter called camera cables) is connected to this connector. • GP-KC23202/V (2 m) • GP-KC232M4 (4 m) • GP-KC23206/V (6 m) • GP-KC23215/V (15 m) e Tripod mount base The tripod socket hole is used when the camera head is secured to the tripod. Tripod - Panasonic GP-KH232A | Operating Instructions - Page 10
FREEZE SEL AWC MENU GP-KH232 OFF GAIN D RANGE CAMERA i Gain selection button [GAIN] !0 Left button [e] !3 Camera cable connector !2 Dynamic range/Down button [D RANGE [h]] !1 Right button [f] r Power switch [DC POWER] This switch toggles the power of the CCU and camera head on and off - Panasonic GP-KH232A | Operating Instructions - Page 11
setting item while the SETUP menu is displayed. Note: • The dynamic range can be set in the scene file. (☞ Page 29) !3 Camera cable connector The camera cable (option) is connected to this connector. !5 RGB/YPbPr output connector [RGB/YPbPr] !4 HDMI output connector [HDMI] !6 S-video output - Panasonic GP-KH232A | Operating Instructions - Page 12
!4 HDMI output connector [HDMI] This connector is used to connect to an HDMI-ready monitor. !5 RGB/YPbPr output connector [RGB/YPbPr] This connector provides the RGB signal (red, green, and blue) output or the YPbPr signal (luminance, color difference B, and color difference R) output. The output - Panasonic GP-KH232A | Operating Instructions - Page 13
Setting the video format Starting up the CCU by turning the power switch to ON while holding down the corresponding button can select the video format for each video output connector. The default video format is 1080/50i. To change video format Select the video format. (Default: 1080/50i) Turn the - Panasonic GP-KH232A | Operating Instructions - Page 14
face 1080/59.94p 1080/59.94i 720/59.94p 1080/50p 1080/50i 720/50p DC POWER ON SCENE FREEZE MENU SEL AWC GP-KH232 OFF GAIN D RANGE CAMERA 1080/29.97p(sF) 480/59.94i 1080/25p(sF) 576/50i 480/59.94p 59.94Hz/50Hz 576/50p Selection of video - Panasonic GP-KH232A | Operating Instructions - Page 15
, discoloration and malfunction. Keep this product away from water. Procure a tripod separately. The tripod to mount the camera head is not supplied. Prepare it according to the area where the camera is to be installed. Avoid moist or dusty places to install this system. Otherwise, lifetime of the - Panasonic GP-KH232A | Operating Instructions - Page 16
How to Install The following shows how to mount the camera on the tripod (locally procured). Important: • The tripod and CCU shall be horizontally placed. • The CCU shall be horizontally placed. Do not place the unit in an upright or tilted position. 16 - Panasonic GP-KH232A | Operating Instructions - Page 17
method varies with the lens. For further information, refer to the operating instructions C mount: 7 mm or less for the lens. • When the lens is removed, be sure to put the cap on the lens mount section of the camera head. • Securing the lens excessively to the lens mount may deviate the back - Panasonic GP-KH232A | Operating Instructions - Page 18
for further information about the SEL menu. About the setup menus The following items can be set with use of the SETUP menu: Setup item q CAMERA ID w ELC e SHUTTER r GAIN t SENS UP y OUTPUT SEL u HDMI OUTPUT i SD ASPECT o SCENE FILE DTL MODE RED DTL GAMMA KNEE BLACK STRECH D RANGE WHITE CLIP - Panasonic GP-KH232A | Operating Instructions - Page 19
how to perform the basic operations in the SETUP menu. Important: • The color bar will be called out on the screen when the camera head is not connected. In this case, the following functions will become unavailable. • AWC startup for white balance • MATRIX • ELECTRIC ZOOM • FREEZE • FLIP • MIRROR - Panasonic GP-KH232A | Operating Instructions - Page 20
attached to the target item. Return to previous setup screen: Move the cursor to "RET" and press the [SEL] button. Step 4 To return to the camera image screen after saving the setting contents, move the cursor to "END" and press the [SEL] button. The setting contents can be saved even if - Panasonic GP-KH232A | Operating Instructions - Page 21
set to "OFF", pressing the [SEL] button allows the title creation screen to appear. Important: • When "CAMERA ID" is set to "OFF", the camera title does not appear even after setting the camera title. Step 2 Move the cursor to the target character by pressing the [g], [h], [e] and [f] buttons, and - Panasonic GP-KH232A | Operating Instructions - Page 22
phenomenon, masking bright areas allows users to perform backlight compensation to hide bright areas. Top screen of SETUP menu "ELC CONT" screen ** SET UP ** P1 CAMERA ID ELC SHUTTER GAIN SENS UP OUTPUT SEL HDMI OUTPUT SD ASPECT *OFF *OFF OFF OFF OFF RGB YPbPr(422) SIDE CUT END ** ELC CONT - Panasonic GP-KH232A | Operating Instructions - Page 23
in the "P" direction, the peak value (maximum value) is detected. When the cursor is moved in the "A" direction, the average value is detected. Manual detection area setting Select the divided areas to be masked. The areas without masking will become the detection areas. "ELC CONT" screen Mask - Panasonic GP-KH232A | Operating Instructions - Page 24
adjustment [GAIN] Select a gain control setting from the following: OFF (default): No gain adjustment AUTO(L), AUTO(H): Automatic gain adjustment MANU(L), MANU(H): Manual gain adjustment Fine adjustment of gain level The gain can be finely adjusted in both "LOW" and "HIGH" levels. Step 1 Select an - Panasonic GP-KH232A | Operating Instructions - Page 25
Step 2 Move the cursor to "HIGH" or "LOW" and adjust the level by pressing the [e] and [f] buttons. Important: • The "LOW" level cannot be larger than the "HIGH" level. • When "SENS UP" is set to "OFF" or "---", "AUTO(L)" is not available. • "MANU(L)" and "MANU(H)" are not available when "SENS UP" - Panasonic GP-KH232A | Operating Instructions - Page 26
8. SD ASPECT setting Specifies the aspect ratio for the SD format. SIDE CUT (default), SQUEEZE, LETTER BOX 16:9A4:3 SIDE CUT 16:9A4:3 SQUEEZE 16:9A4:3 LETTER BOX 9. Scene file setting [SCENE FILE] Registration of details, gamma, hue, etc. as a scene file in accordance with an installation - Panasonic GP-KH232A | Operating Instructions - Page 27
"2" and "3" and press the [SEL] button. A The setting contents of "DTL BAND" and "DTL LEVEL" are applied to "USER". The band and level can be manually adjusted in "USER". Perform adjustment on an as needed basis. Be sure to view a monitor when the adjustment is performed. Note: • The band and level - Panasonic GP-KH232A | Operating Instructions - Page 28
red edge. The red edge enhancement level of images through the camera is adjusted. The level is selectable from the following: OFF ( adjustment method from the following: MANU (default): The knee point adjustment is manually adjusted. AUTO: The knee point is automatically adjusted. When "MANU" is - Panasonic GP-KH232A | Operating Instructions - Page 29
[BLACK STRETCH] Toggles the black stretch function on and off. Selection of "ON" or "OFF" (default) determines whether or not to perform the black stretch function. When "ON" is selected, black crushing is corrected at low illuminance to make an image more viewable. Important: • When "D-RANGE" is - Panasonic GP-KH232A | Operating Instructions - Page 30
[MATRIX] Adjust the hue and chroma. Be sure to view a vector scope or a color video monitor when the hue and chroma adjustment is performed. "SCENE FILE" screen ** SCENE FILE 1 ** P2 LABEL FLARE COMP OFF DNR LOW MATRIX *USER CHROMA GAIN ..|......38 TOTAL PED |........77 FILE LABEL *OFF - Panasonic GP-KH232A | Operating Instructions - Page 31
at the center of the subject with which the color is detected. If the camera is immovable, move the rectangle cursor to the area with the target color by pressing the [g], [h], [e] and [f] buttons. Note: • Every time the [SEL] button is - Panasonic GP-KH232A | Operating Instructions - Page 32
[FILE LABEL] Puts a label name instead of a scene file number. Characters (label) are displayed instead of the scene file number that is displayed on the screen when the [SCENE] button on the front face of the CCU is pressed. Up to 16 alphanumerics and symbols can be used to create a label. The - Panasonic GP-KH232A | Operating Instructions - Page 33
. • The illumination of the light illuminating the subject is low or too high. MANU: Manually adjusts the white balance. When "AWC" is selected, follow the steps below to adjust the white balance. Step 1 Aim the camera at a white subject. Step 2 Hold down the [AWC [g]] button on the front face of - Panasonic GP-KH232A | Operating Instructions - Page 34
Note: • The destination to save "AWC" can be specified for each scene file. (☞ Page 33) • If "AWC NG" appears and the indicator stays on or if the indicator lights when a scene file is changed, retry the steps 1 and 2. When "MANU" is selected, follow the steps below to adjust the white balance. - Panasonic GP-KH232A | Operating Instructions - Page 35
Step 3 Press the [SEL] button after making sure that "EXT2" is displayed. A The "SYNC" screen appears. Step 5 The horizontal phase is adjusted by pressing the [e] or [f] button. Step 4 Provide the output signal in the same video format from both CCUs to the oscilloscope to observe the horizontal - Panasonic GP-KH232A | Operating Instructions - Page 36
14. Setting of vertical flip function [FLIP ENABLE] Selection of "ON" or "OFF" determines whether or not to enable the vertical flip function by pressing the [g] button. OFF (default): Locks the normal display. OFF (FLIP): Locks the vertically flipped display. ON (FLIP): Selects the vertically - Panasonic GP-KH232A | Operating Instructions - Page 37
SEL menu The SEL menu is a simplified menu that can be called up by pressing the [SEL] button while an image is displayed. The following items can be set with use of the SEL menu: Image level [BRIGHTNESS]: Adjusts the brightness (ELC, gain (AUTO)), and the convergence level of electronic sensitivity - Panasonic GP-KH232A | Operating Instructions - Page 38
Button assignment Only pressing the [e] or [f] button allows users to assign the settings in the SEL menu while an image is displayed. How to assign settings Step 1 Call up the screen of the setting to be assigned in the SEL menu to a button. Step 2 Hold down the [SEL] and [FREEZE MENU ] buttons - Panasonic GP-KH232A | Operating Instructions - Page 39
cable appropriately connected at both the connector of the CCU and the connector of the camera head? Connection between the camera head and camera cable is required to adjust the image quality. Check whether the connection is appropriately established. • Is the lens aperture appropriately adjusted - Panasonic GP-KH232A | Operating Instructions - Page 40
Symptom Black bars at right and left of image Vertically longer image No sound from monitor Cause/solution Reference pages • This phenomenon depends on the specifications of the monitor. Select the wide and full screen display at the - monitor side. • This unit provides outputs on the - Panasonic GP-KH232A | Operating Instructions - Page 41
Mass: Finish: 12 V DC ±10 % Approx. 7.8 W (including camera head) 1/3 type Full HD MOS Internal or external synchronization S-video output: S- ) 0 °C to 40 °C 30 % to 90 % GP-KH232CUE: 120 mm (W) x 36 mm (H) x 157 mm (D) (excluding rubber feet and projections) GP-KH232HE: 28 mm (W) x 27 mm (H) x 39 - Panasonic GP-KH232A | Operating Instructions - Page 42
Standard accessories Operating Instructions (this document 1 pc. Optional accessories HD Camera Head GP-KH232HE HD Camera Cable GP-KC23202/V GP-KC232M4 GP-KC23206/V GP-KC23215/V 42 - Panasonic GP-KH232A | Operating Instructions - Page 43
Information on Disposal for Users of Waste Electrical & Electronic Equipment (private households) This symbol on the products and/or accompanying documents means that used electrical and electronic products should not be mixed with general household waste. For proper treatment, recovery and - Panasonic GP-KH232A | Operating Instructions - Page 44
DEUTSCHE AUSGABE (GERMAN VERSION) WARNUNG: • Das Gerät sollte vor Regen und Feuchtigkeit geschützt werden, um der Gefahr eines Brandes oder elektrischen Schlags vorzubeugen. • Das Gerät sollte vor Tropf- und Spritzwasser geschützt und es sollten keine Flüssigkeiten enthaltende Gefäße wie Vasen - Panasonic GP-KH232A | Operating Instructions - Page 45
...58 Befestigen des Objektivs ...59 Einstellung über das SETUP-Men 60 Setupmenüs...60 Allgemeine Bedienungshinweise 61 1. Einstellen des Kameranamens [CAMERA ID 63 2. ELC-Einstellung [ELC] ...64 3. Einstellen der elektronischen Verschlusszeit [SHUTTER 66 4. Einstellen der Verstärkung [GAIN 66 - Panasonic GP-KH232A | Operating Instructions - Page 46
Wichtige Sicherheitsinstruktionen 1) Bitte lesen Sie diese Instruktionen aufmerksam durch. 2) Bewahren Sie die Instruktionen sorgfältig auf. 3) Befolgen Sie alle Warnungen. 4) Befolgen Sie alle Instruktionen. 5) Verwenden Sie dieses Gerät niemals in der Nähe von Wasser. 6) Reinigen Sie dieses Gerät - Panasonic GP-KH232A | Operating Instructions - Page 47
KANN DER INHALT JEDERZEIT KORRIGIERT BZW. ERGÄNZT WERDEN. Haftungsausschluss Panasonic System Networks Co., Ltd. IST UNTER ANDEREM IN KEINEM DER NDEN ODER URSACHEN NICHT ANGEZEIGT WERDEN, EINSCHLIESSLICH EINES AUSFALLS ODER PROBLEMS DES GERÄTS; (5) JEGLICHE STÖRUNGEN, MITTELBARE UNANNEHMLICHKEITEN, - Panasonic GP-KH232A | Operating Instructions - Page 48
), bei dem hohe Bildqualität und eine Vielzahl von Funktionen durch digitale Bildverarbeitung realisiert werden. Der Kamerakopf wird getrennt montiert. • GP-KH232CUE: HD-Kamerabediengerät Dieses Produkt wird in Verbindung mit dem als Option erhältlichen HD-Kamerakopf (nachfolgend Kamerakopf genannt - Panasonic GP-KH232A | Operating Instructions - Page 49
Vorsichtsmaßregeln Für alle Installationsarbeiten den Verkaufshändler beauftragen. Die Installation dieser Kamera erfordert entsprechendes Fachwissen und Erfahrung. Eine unsachgemäße Installation kann ein Feuer, einen Elektroschock, Verletzungen oder eine Beschädigung des Produkts zur Folge haben. - Panasonic GP-KH232A | Operating Instructions - Page 50
Das Produkt nicht auf helle Lichtquellen richten. Bei Auftreffen einer Lichtquelle wie z.B. einer Punktleuchte auf den MOS-Sensor kann Leuchtfahnen (Regenbogen ) verursachen. Helles Objekt Leuchtfahne Reinigen des Gehäuses Das Produkt zum Reinigen ausschalten. Andernfalls kann es zu Verletzungen - Panasonic GP-KH232A | Operating Instructions - Page 51
Eines der folgenden optionalen HD-Kabel (nachfolgend Kamerakabel genannt) wird an diesen Steckverbinder angeschlossen. • GP-KC23202/V (2 m) • GP-KC232M4 (4 m) • GP-KC23206/V (6 m) • GP-KC23215/V (15 m) e Stativfassung Bei Verwendung eines Stativs wird der Kamerakopf am Stativgewinde befestigt - Panasonic GP-KH232A | Operating Instructions - Page 52
(MENU)] u Wahltaste [SEL] o AWC/Hoch-Taste [AWC [g]] DC POWER ON SCENE FREEZE SEL AWC MENU GP-KH232 OFF GAIN D RANGE CAMERA i Verstärkungstaste [GAIN] !0 Links-Taste [e] !3 Kamerakabel-Steckverbinder !2 Dynamikbereich/Runter-Taste [D RANGE [h]] !1 Rechts-Taste [f] r Netzschalter [DC - Panasonic GP-KH232A | Operating Instructions - Page 53
Mindestens 2 Sekunden gedrückt halten: Aktiviert AWC bei angezeigtem Bild, wenn im SETUP-Menü "WHITE BAL" auf "AWC" steht (☞ Seite 75). !0 Links-Taste [e] Bewegt den Cursor im SETUP-Menü nach links oder wählt einen Einstellposten. Die Taste verringert Einstellwerte oder wählt Einstellposten im SEL- - Panasonic GP-KH232A | Operating Instructions - Page 54
!4 HDMI-Ausgangsstecker [HDMI] Diese Steckbuchse dient zum Anschluss eines HDMI-kompatiblen Monitors. !5 RGB/YPbPr-Ausgangsstecker [RGB/YPbPr] Dieser Stecker liefert das RGB-Signal (rot, grün und blau) bzw. das YPbPr-Signal (Luminanz, Farbdifferenz B und Farbdifferenzsignal R). Das Ausgangssignal - Panasonic GP-KH232A | Operating Instructions - Page 55
Einstellung des Videoformats Zum Wählen des Videoformats für jeden der Video-Ausgangsstecker die entsprechende Taste gedrückt halten und dabei den Netzschalter des Kamerabediengeräts (CCU) einschalten. Laut Vorgabe ist das Videoformat 1080/50i. Ändern des Videoformats Ein Videoformat wählen. ( - Panasonic GP-KH232A | Operating Instructions - Page 56
Vorderseite 1080/59,94p 1080/59,94i 720/59,94p 1080/50p 1080/50i 720/50p DC POWER ON SCENE FREEZE MENU SEL AWC GP-KH232 OFF GAIN D RANGE CAMERA 1080/29,97p(sF) 480/59,94i 1080/25p(sF) 576/50i 480/59,94p 59,94Hz/50Hz 576/50p Wahl des Videoformats - Panasonic GP-KH232A | Operating Instructions - Page 57
Vorsichtshinweise zur Installation Die Installation muss den örtlichen elektrotechnischen Vorschriften entsprechen. Dieses Produkt ist für die Verwendung im Gebäudeinnern vorgesehen. Das Produkt ist für einen Betrieb im Freien nicht geeignet. Das Gerät nicht an Orten installieren, wo es längere Zeit - Panasonic GP-KH232A | Operating Instructions - Page 58
Installation Die folgenden Abbildungen zeigen, wie die Kamera auf dem Stativ (vor Ort zu beschaffen) befestigt wird. Wichtig: • Stativ und CCU horizontal ausrichten. • CCU horizontal ausrichten. Die CCU nicht vertikal oder schräg positionieren. 58 - Panasonic GP-KH232A | Operating Instructions - Page 59
Befestigen des Objektivs Wichtig: • Ein Objektiv mit einem Überhang von max. 7 mm über die Objektivfassung verwenden. • Als Blendenbereich wird F2,8 bis F16 empfohlen. Bei Wahl einer Blende von F2,8 oder geringer kann Unschärfe auftre- ten. • Bei Verwendung eines Zoom-Objektivs bitte beachten - Panasonic GP-KH232A | Operating Instructions - Page 60
Zu Einzelheiten über das SEL-Menü siehe Seite 79. Setupmenüs Im SETUP-Menü können folgende Einstellungen erfolgen: Einstellposten Beschreibung q CAMERA ID Über diesen Posten wird der Kameraname festgelegt. Hier wird ein aus alphanummerischen Zeichen und Symbolen bestehender Kameraname erstellt - Panasonic GP-KH232A | Operating Instructions - Page 61
ist. In diesem Fall können folgende Funktionen nicht genutzt werden: • AWC-Anfangseinstellung für Weißabgleich • MATRIX • ELECTRIC ZOOM • FREEZE • FLIP • MIRROR ** SET UP ** P1 CAMERA ID ELC SHUTTER GAIN SENS UP OUTPUT SEL HDMI OUTPUT SD ASPECT *OFF *OFF OFF OFF OFF RGB YPbPr(422) SIDE CUT END - Panasonic GP-KH232A | Operating Instructions - Page 62
Erste Seite des SETUP-Menüs Schritt 1 Die [FREEZE MENU ]-Taste mindestens 2 Sekunden gedrückt halten. A Die erste Seite des SETUP-Menüs erscheint. Schritt 2 Das SETUP-Menü besteht aus 3 Seiten. Zum Wechseln der Seite den Cursor auf "P1" oder "P2", "P3" bewegen und die [e] oder [f]-Taste drücken. - Panasonic GP-KH232A | Operating Instructions - Page 63
dem Bildschirm angezeigt werden. Den Kameranamen in bis zu 16 Zeichen eingeben. Dabei wie unten beschrieben vorgehen. Erste Seite des SETUP-Menüs "CAMERA ID"-Seite ** SET UP ** P1 CAMERA ID ELC SHUTTER GAIN SENS UP OUTPUT SEL HDMI OUTPUT SD ASPECT *OFF *OFF OFF OFF OFF RGB YPbPr(422) SIDE CUT - Panasonic GP-KH232A | Operating Instructions - Page 64
zu dunkel erscheinen. Gegenlichtkompensation durch Maskieren des hellen Hintergrundbereichs beseitigt diese Erscheinung. Erste Seite des SETUP-Menüs "ELC CONT"-Seite ** SET UP ** P1 CAMERA ID ELC SHUTTER GAIN SENS UP OUTPUT SEL HDMI OUTPUT SD ASPECT *OFF *OFF OFF OFF OFF RGB YPbPr(422) SIDE CUT - Panasonic GP-KH232A | Operating Instructions - Page 65
L CIRCLE: Der Erkennungsbereich ist der große Kreis in der Mitte des Bildschirms Schritt 3 Den Cursor auf "PEAK/AVE" bewegen und mit den Tasten [e] oder [f] eine Erkennungsempfindlichkeit wählen. Wird der Cursor auf "P" bewegt, so wird der Spitzenwert (Maximum) erfasst. Wird der Cursor auf "A" - Panasonic GP-KH232A | Operating Instructions - Page 66
3. Einstellen der elektronischen Verschlusszeit [SHUTTER] Legt die elektronische Verschlusszeit fest. Die folgenden Verschlussgeschwindigkeiten stehen zur Verfügung: Bei Bildfrequenz 59,94 Hz: OFF (Vorgabe), 1/100, 1/250, 1/500, 1/1000, 1/2000, 1/4000, 1/10000 oder MANU Bei Bildfrequenz 50 Hz: OFF ( - Panasonic GP-KH232A | Operating Instructions - Page 67
Schritt 2 Den Cursor auf "HIGH" oder "LOW" bewegen und den Verstärkungswert mit den Tasten [e] und [f] einstellen. Wichtig: • Der für "LOW" eingestellte Wert darf nicht größer sein als der für "HIGH" eingestellte. • Wenn "SENS UP" auf "OFF" oder "---" steht, ist "AUTO(L)" nicht wählbar. • "MANU(L)" - Panasonic GP-KH232A | Operating Instructions - Page 68
8. Einstellung von SD ASPECT Legt das Bildseitenverhältnis für das SD-Anzeigeformat fest. SIDE CUT (Vorgabe), SQUEEZE, LETTER BOX 16:9A4:3 SIDE CUT 16:9A4:3 SQUEEZE 16:9A4:3 LETTER BOX 9. Einstellen von Szenendateien [SCENE FILE] Details, Gammakurve, Farbmatrix usw. können dem Standort der - Panasonic GP-KH232A | Operating Instructions - Page 69
[DTL MODE] legt die Details fest. Legt Frequenzband und Pegel der Kantenkorrektur fest. "SCENE FILE"-Seite ** SCENE FILE 1 ** P1 LABEL DTL MODE *MANU RED DTL OFF GAMMA ....|.... 45 KNEE *MANU BLACK STRETCH OFF D-RANGE NORMAL WHITE CLIP ........|109 RET END "DTL MODE"-Seite ** DTL - Panasonic GP-KH232A | Operating Instructions - Page 70
[RED DTL] Legt die Verstärkung der Rotkanten fest. Die Verstärkung der Rotkanten des durch die Kamera aufgenommenen Bildes wird eingestellt. Eine der folgenden Verstärkungen wählen: OFF (Vorgabe): Auf den Rotanteil wird keine Kantenkorrektur angewendet. LOW: Auf den Rotanteil wird geringfügige - Panasonic GP-KH232A | Operating Instructions - Page 71
[BLACK STRETCH] Schaltet Schwarzdehnung ein und aus. Die Schwarzdehnung kann durch Wahl von "ON" oder "OFF" (Vorgabe) aktiviert bzw. deaktiviert werden. Bei Wahl von "ON" wird bei schwacher Beleuchtung Schattenschwärzung korrigiert, um das Bild besser sichtbar zu machen. Wichtig: • Wenn "D-RANGE" - Panasonic GP-KH232A | Operating Instructions - Page 72
[MATRIX] Legt die Farbmatrix fest. Bei der Einstellung der Farbmatrix das Resultat unbedingt auf einem Wellenform- oder Videomonitor beobachten. "SCENE FILE"-Seite "MATRIX"-Seite ** SCENE FILE 1 ** P2 LABEL FLARE COMP OFF DNR LOW MATRIX *USER CHROMA GAIN ..|......38 TOTAL PED |........ - Panasonic GP-KH232A | Operating Instructions - Page 73
Schritt 1 Die Kamera auf die Mitte des Fotomotivs richten, dessen Farbe erkannt werden soll. Falls die Kamera nicht beweglich ist, das Cursorviereck mit den Tasten [g], [h], [e] und [f] auf den die gewünschte Farbe enthaltenden Bereich bewegen. Hinweis: • Mit jeder Betätigung der [SEL]-Taste - Panasonic GP-KH232A | Operating Instructions - Page 74
[FILE LABEL] Setzt einen Label-Namen anstatt einer Szenendatei-Nummer. In diesem Fall werden Zeichen (Label) anstatt der Szenendatei-Nummer angezeigt; die SzenendateiNummer erscheint am Bildschirm, wenn die [SCENE]-Taste an der Vorderseite der CCU gedrückt wird. Zum Erstellen eines Labels können bis - Panasonic GP-KH232A | Operating Instructions - Page 75
[AWC MEMORY] Spezifiziert den Bestimmungsort, an dem die AWC-Einstellungen abgespeichert wurden. Zur Wahl des spezifizierten Bestimmungsorts, der zum Abspeichern der AWC verwendet werden soll, muss die [AWC [g]]-Taste an der Vorderseite der CCU mindestens 2 Sekunden gedrückt gehalten werden. Der - Panasonic GP-KH232A | Operating Instructions - Page 76
Hinweis: • Der Bestimmungsort zum Abspeichern von "AWC" kann für jede Szenendatei separat spezifi- ziert werden. (☞ Seite 75) • Wenn "AWC NG" angezeigt wird und der Indikator weiterhin aufleuchtet, oder wenn der Indikator beim Ändern einer Szenendatei aktiviert wird, müssen die Schritte 1 und 2 - Panasonic GP-KH232A | Operating Instructions - Page 77
Schritt 3 Sicherstellen, dass die Anzeige auf "EXT2" wechselt und die [SEL]-Taste drücken. A Die "SYNC"-Seite erscheint. Schritt 4 Das Ausgangssignal beider CCUs in demselben Videoformat auf ein Oszilloskop geben und die horizontale Synchronkomponente beobachten. Schritt 5 Die Horizontalphase mit - Panasonic GP-KH232A | Operating Instructions - Page 78
14. Einstellung der Vertikal-Umdrehfunktion [FLIP ENABLE] Durch die Wahl von "ON" oder "OFF" kann bestimmt werden, ob die Vertikal-Umdrehfunktion durch Drücken der [g]-Taste aktiviert werden soll oder nicht. OFF (Vorgabe): Verriegelt das normale Display. OFF (FLIP): Verriegelt das vertikal - Panasonic GP-KH232A | Operating Instructions - Page 79
SEL-Menü Das SEL-Menü ist ein vereinfachtes Menü, das bei Anzeige eines Bildes durch Drücken der [SEL]Taste aufgerufen werden kann. Im SEL-Menü können folgende Einstellungen erfolgen: Helligkeit [BRIGHTNESS]: Stellt die Helligkeit (ELC, Verstärkung (AUTO)) und Konvergenz mit der elektronischen - Panasonic GP-KH232A | Operating Instructions - Page 80
Tastenzuordnung Durch Drücken der Tasten [e] und [f] bei angezeigtem Bild können die im SEL-Menü eingestellten Werte unter bestimmten Tasten abgespeichert werden. Abspeichern Schritt 1 Die Seite des Einstellpostens aufrufen, der über das SEL-Menü unter einer Taste abgespeichert werden soll. Schritt - Panasonic GP-KH232A | Operating Instructions - Page 81
durch die hier vorgeschlagenen Kontrollen und Abhilfen nicht beheben lässt, hier nicht behandelt sein sollte oder ein Problem bei der Installation auftritt. Symptom Ursache/Abhilfe Seitenverweis • Sind die Kabel korrekt an die Ausgangsstecker S-VIDEO, RGB/YPbPr und HDMI angeschlossen? Den - Panasonic GP-KH232A | Operating Instructions - Page 82
Symptom Schwarze Streifen am rechten und linken Bildrand Bildhöhe ist größer als Bildbreite Monitor gibt keinen Ton ab Ursache/Abhilfe Seitenverweis • Diese Erscheinung ist auf die technischen Daten des Monitorbildschirms zurückzuführen. Das Bild im Vollbildformat über die gesamte - - Panasonic GP-KH232A | Operating Instructions - Page 83
RS-232C-konformer Signalpegel) Umgebungstemperatur: 0 °C bis 40 °C Luftfeuchtigkeit: 30 % bis 90 % Abmessungen: GP-KH232CUE: 120 mm (B) x 36 mm (H) x 157 mm (T) (ausgenommen Gummifüsse und Auskragungen) GP-KH232HE: 28 mm (B) x 27 mm (H) x 39 mm (T) (ausgenommen Gummifüsse und Auskragungen - Panasonic GP-KH232A | Operating Instructions - Page 84
Standardzubehör Bedienungsanleitung (vorliegendes Buch 1 St. Sonderzubehör HD-Kamerakopf GP-KH232HE HD-Kamerakabel GP-KC23202/V GP-KC232M4 GP-KC23206/V GP-KC23206/V 84 - Panasonic GP-KH232A | Operating Instructions - Page 85
Benutzerinformationen zur Entsorgung von elektrischen und elektronischen Geräten (private Haushalte) Entsprechend der grundlegenden Firmengrundsätzen der Panasonic-Gruppe wurde ihr Produkt aus hochwertigen Materialien und Komponenten entwickelt und hergestellt, die recycelbar und wieder verwendbar - Panasonic GP-KH232A | Operating Instructions - Page 86
connexions doivent être conformes au code électrique local. ATTENTION: • Avant d'effectuer le branchement ou de mettre cet appareil en service, veuillez lire les instructions de l'étiquette collée dessous. Nous déclarons sous notre propre responsabilité que le produit auquel se réfère la présente - Panasonic GP-KH232A | Operating Instructions - Page 87
FRANÇAIS Table des matières Instructions de sécurité importantes 88 Limitation de responsabilité ... menus de configuration 102 Opération de base ...103 1. Paramétrage de titre de caméra vidéo [CAMERA ID 105 2. Paramétrage ELC [ELC 106 3. Paramétrage d'obturateur électronique [SHUTTER 108 4. Ré - Panasonic GP-KH232A | Operating Instructions - Page 88
sec. 7) N'obturer aucune des ouvertures d'aération. Installer conformément aux instructions du fabri- cant. 8) Ne pas utiliser à proximité de sources de accessoires spécifiés par le fabricant. 11) Utiliser uniquement le chariot, le support, le trépied, la platine de fixation ou la tablette spécifiée - Panasonic GP-KH232A | Operating Instructions - Page 89
OU DU PRODUIT CORRESPONDANT(S). Déni de la garantie EN AUCUN CAS Panasonic System Networks Co., Ltd. NE SERA TENU POUR RESPONSABLE POUR TOUTE A LA VIOLATION DE L'INTIMITÉ AVEC POUR RÉSULTAT DES IMAGES DE SURVEILLANCE DE CAMERA VIDÉO, Y COMPRIS DES DONNÉES SAUVEGARDÉES, POUR UNE RAISON QUELCONQUE, EST - Panasonic GP-KH232A | Operating Instructions - Page 90
numériques. La tête de caméra vidéo est montée séparément. • GP-KH232CUE: Contrôleur caméra HD Ce produit est utilisé en combinaison avec la tête de caméra HD optionnelle (ultérieurement appelé la tête de caméra vidéo). • GP-KH232HE: Tête de caméra HD • La sortie multi-format est disponible. • La - Panasonic GP-KH232A | Operating Instructions - Page 91
cette recommandation risque d'entraîner une chute capable de blesser quelqu'un ou provoquer des accidents. Sélectionner un secteur d'installation capable de supporter le poids total. Le fait de sélectionner une surface inadéquate pour l'installation peut faire tomber le produit ou le renverser, ceci - Panasonic GP-KH232A | Operating Instructions - Page 92
ce produit risquent une détérioration et ceci peut écourter la durée de service utile du produit s'il est utilisé dans des emplacements à hautes temp Étiquette d'instructions Se référer aux étiquettes d'instructions collées sur les surfaces de le produit quant aux instructions de classification - Panasonic GP-KH232A | Operating Instructions - Page 93
suivants de caméra vidéo HD (désignés ci-après sous l'appellation de câbles de caméra vidéo) est connecté à ce connecteur. • GP-KC23202/V (2 m) • GP-KC232M4 (4 m) • GP-KC23206/V (6 m) • GP-KC23215/V (15 m) e Embase de fixation de trépied Le trou fileté de trépied est utilisé quand la tête de caméra - Panasonic GP-KH232A | Operating Instructions - Page 94
u Bouton de sélection [SEL] o AWC/Bouton de commande vers le haut [AWC [g]] DC POWER ON SCENE FREEZE MENU SEL AWC GP-KH232 OFF GAIN D RANGE CAMERA i Bouton de sélection de gain [GAIN] !0 Bouton de commande vers la gauche [e] r Commutateur d'alimentation [DC POWER] Ce commutateur permet de - Panasonic GP-KH232A | Operating Instructions - Page 95
Appuyer pendant au moins 2 secondes: Démarre AWC tandis qu'une image est affichée si "WHITE BAL" dans le menu SETUP est réglé su "AWC" (☞ page 117). !0 Bouton de commande vers la gauche [e] Ce bouton déplace le curseur vers la gauche ou sélectionne un paramétrage tandis que le menu SETUP est affich - Panasonic GP-KH232A | Operating Instructions - Page 96
!4 Connecteur de sortie HDMI [HDMI] Ce connecteur est utilisé pour assurer une connexion à un moniteur vidéo prêt HDMI. !5 Connecteur de sortie RGB/YPbPr [RGB/YPbPr] Ce connecteur fournit la sortie de signal RGB (rouge, vert, et bleu) ou la sortie de signal YPbPr (luminance, de différence de - Panasonic GP-KH232A | Operating Instructions - Page 97
Paramétrage du format vidéo L'exécution du démarrage du CCU en tournant l'interrupteur d'alimentation en position ON tout en maintenant le bouton correspondant permet de choisir le format vidéo pour chacun des connecteurs de sortie vidéo. Le format vidéo par défaut est 1080/50i. Pour changer le - Panasonic GP-KH232A | Operating Instructions - Page 98
çade 1080/59,94p 1080/59,94i 720/59,94p 1080/50p 1080/50i 720/50p DC POWER ON SCENE FREEZE MENU SEL AWC GP-KH232 OFF GAIN D RANGE CAMERA 1080/29,97p(sF) 480/59,94i 1080/25p(sF) 576/50i 480/59,94p 59,94Hz/50Hz 576/50p Sélection de format - Panasonic GP-KH232A | Operating Instructions - Page 99
doit être conforme au code électrique local. Ce produit a été conçu pour être utilisé dans un local. Ce produit ne peut pas pour mise en service à l'extérieur. Ce produit ne doit pas être exposé directement au soleil pendant des heures ni ne doit être installé près d'un appareil de chauffage - Panasonic GP-KH232A | Operating Instructions - Page 100
Procédure d'installation Ce qui suit montre comment installer la caméra vidéo sur le trépied (à se procurer localement). - Panasonic GP-KH232A | Operating Instructions - Page 101
de réglage de Monture C: mise au point varie selon l'objectif. Pour obtenir de plus amples 7 mm ou moins renseignements, se référer aux instructions d'utilisation de l'ob- jectif. • Quand l'objectif est retiré, s'assurer de remettre le bouchon d'objectif sur la section de mon- tage d'objectif - Panasonic GP-KH232A | Operating Instructions - Page 102
rer à la page 121. À propos des menus de configuration Les rubriques suivantes peuvent être réglées avec l'utilisation du menu SETUP: Rubrique de configuration q CAMERA ID w ELC e SHUTTER r GAIN t SENS UP y OUTPUT SEL u HDMI OUTPUT i SD ASPECT o SCENE FILE DTL MODE RED DTL GAMMA KNEE BLACK STRECH - Panasonic GP-KH232A | Operating Instructions - Page 103
, les fonctions suivantes ne seront plus disponibles. • Démarrage de AWC pour la balance des blancs • MATRIX • ELECTRIC ZOOM • FREEZE • FLIP • MIRROR ** SET UP ** P1 CAMERA ID ELC SHUTTER GAIN SENS UP OUTPUT SEL HDMI OUTPUT SD ASPECT *OFF *OFF OFF OFF OFF RGB YPbPr(422) SIDE CUT END ** SET UP - Panasonic GP-KH232A | Operating Instructions - Page 104
Écran d'ouverture de menu SETUP Étape 1 Maintenir le bouton [FREEZE MENU ] pressé pendant au moins 2 secondes. A Le premier écran du menu SETUP appa- raît. Étape 2 Le menu SETUP se compose de 3 pages de contenu. Pour tourner une page, déplacer le curseur sur "P1" ou "P2", "P3" et appuyer sur le - Panasonic GP-KH232A | Operating Instructions - Page 105
caméra vidéo. Écran d'ouverture de menu SETUP Écran "CAMERA ID" ** SET UP ** P1 CAMERA ID ELC SHUTTER GAIN SENS UP OUTPUT SEL HDMI OUTPUT SD SEL] permet à l'écran de création de titre d'apparaître. Important: • Lorsque "CAMERA ID" est paramétré sur "OFF", le titre de caméra vidéo n'apparaît pas - Panasonic GP-KH232A | Operating Instructions - Page 106
utilisateurs d'exécuter une compensation d'éclairage à contre-jour pour cacher les secteurs lumineux. Écran d'ouverture de menu SETUP Écran "ELC CONT" ** SET UP ** P1 CAMERA ID ELC SHUTTER GAIN SENS UP OUTPUT SEL HDMI OUTPUT SD ASPECT *OFF *OFF OFF OFF OFF RGB YPbPr(422) SIDE CUT END ** ELC - Panasonic GP-KH232A | Operating Instructions - Page 107
L CIRCLE: La cible de détection est la grande zone en forme de cercle au centre de l'écran. MANU: La cible de détection est spécifiée manuellement. (☞ Page 107) AUTO: Les zones sombres sont automatiquement masquées et seules les zones lumineuses sont détectées. Étape 3 Déplacer le curseur jusqu'à " - Panasonic GP-KH232A | Operating Instructions - Page 108
3. Paramétrage d'obturateur électronique [SHUTTER] Spécifie la vitesse d'obturation électronique. Ce qui suit est disponible pour la vitesse d'obturation: Quand la fréquence de trame est de 59,94 Hz: OFF (réglage implicite), 1/100, 1/250, 1/500, 1/1000, 1/2000, 1/4000, 1/10000 et MANU Quand la fré - Panasonic GP-KH232A | Operating Instructions - Page 109
Étape 2 Déplacer le curseur jusqu'à "HIGH" ou "LOW" et ajuster le niveau en appuyant sur les boutons [e] et [f]. Important: • Le niveau "LOW" ne peut pas être plus grand que le niveau "HIGH". • Quand "SENS UP" est réglé sur "OFF" ou "---", "AUTO(L)" n'est pas disponible. • "MANU(L)" et "MANU(H)" ne - Panasonic GP-KH232A | Operating Instructions - Page 110
8. Paramétrage de SD ASPECT Spécifie le rapport hauteur-largeur d'image pour le format SD. SIDE CUT (réglage implicite), SQUEEZE, LETTER BOX 16:9A4:3 SIDE CUT 16:9A4:3 SQUEEZE 16:9A4:3 LETTER BOX 9. Paramétrage de fichier de scène [SCENE FILE] L'enregistrement des détails, du gamma, de la teinte - Panasonic GP-KH232A | Operating Instructions - Page 111
[DTL MODE] Spécifie les détails. La bande et le niveau de la correction de bordure sont indiqués. Écran "SCENE FILE" ** SCENE FILE 1 ** P1 LABEL DTL MODE *MANU RED DTL OFF GAMMA ....|.... 45 KNEE *MANU BLACK STRETCH OFF D-RANGE NORMAL WHITE CLIP ........|109 RET END Écran "DTL - Panasonic GP-KH232A | Operating Instructions - Page 112
[RED DTL] Permet d'ajuster le rehaussement de bordure rouge. Le niveau de rehaussement de bordure rouge des images par l'intermédiaire de la caméra vidéo est réglé. Le niveau peut être sélectionné parmi les options suivantes: OFF (réglage implicite): Aucun rehaussement de bordure n'est exécuté sur - Panasonic GP-KH232A | Operating Instructions - Page 113
[BLACK STRETCH] Bascule l'activation ou la désactivation de l'étalement adaptatif du noir. La sélection de "ON" ou "OFF" (réglage implicite) détermine s'il faut utiliser ou non la fonction d'étalement adaptatif du noir. Quand "ON" est sélectionné, l'écrasement du noir est corrigé sous faible é - Panasonic GP-KH232A | Operating Instructions - Page 114
[MATRIX] Ajuste la teinte et le chroma. Faire en sorte d'observer un vecteurscope ou un moniteur vidéo couleur au moment de faire le réglage de la teinte et de chroma. Écran "SCENE FILE" Écran "MATRIX" ** SCENE FILE 1 ** P2 LABEL FLARE COMP OFF DNR LOW MATRIX *USER CHROMA GAIN ..|...... - Panasonic GP-KH232A | Operating Instructions - Page 115
Étape 1 Diriger la caméra vidéo vers la partie centrale du sujet avec laquelle la couleur est détectée. Si la caméra vidéo ne peut être déplacée, déplacer le curseur rectangulaire jusqu'à la zone comportant la couleur cible en appuyant sur les boutons [g], [h], [e] et [f]. Remarque: • Chaque fois - Panasonic GP-KH232A | Operating Instructions - Page 116
[FILE LABEL] Place un nom d'étiquette au lieu d'un numéro de fichier de scène. Les caractères (l'étiquette) sont affichés au lieu du numéro de fichier de scène qui est affiché sur l'écran quand le bouton de [SCENE] implanté en façade du CCU est pressé. Jusqu'à 16 caractères alphanumériques et - Panasonic GP-KH232A | Operating Instructions - Page 117
[AWC MEMORY] Spécifie la destination où le paramétrage AWC est sauvegardé. La destination pour sauvegarder AWC qui commence en maintenant le bouton [AWC [g]] immobilisé en façade du CCU pendant 2 secondes ou plus est spécifiée. La destination de sauvegarde de AWC est sélectionnée en utilisant le - Panasonic GP-KH232A | Operating Instructions - Page 118
Remarque: • La destination pour sauvegarder "AWC" peut être spécifiée pour chaque fichier de scène. (☞ Page 117) • Si "AWC NG" apparaît et que le témoin reste allumé ou si l'indicateur s'allume quand un fichier de scène est changé, refaire les opérations indiquées aux étapes 1 et 2. Lorsque "MANU" - Panasonic GP-KH232A | Operating Instructions - Page 119
Étape 3 Appuyer sur le bouton [SEL] après s'être assuré que "EXT2" est affiché. A L'écran "SYNC" apparaît. Étape 4 Fournir le signal de sortie dans le même format vidéo à partir des deux CCU à l'oscilloscope pour observer le composant de synchronisation horizontale. Étape 5 La phase horizontale est - Panasonic GP-KH232A | Operating Instructions - Page 120
14. Paramétrage de la fonction de bascule verticale [FLIP ENABLE] La sélection de "ON" ou de "OFF" détermine s'il faut valider ou non la fonction de bascule verticale en appuyant sur le bouton [g]. OFF (réglage implicite): Verrouille l'affichage normal. OFF (FLIP): Verrouille l'affichage basculé - Panasonic GP-KH232A | Operating Instructions - Page 121
Menu SEL Le menu SEL est un menu simplifié qui peut être appelé en appuyant sur le bouton [SEL] tandis qu'une image est affichée. Les rubriques suivantes peuvent être réglées avec l'utilisation du menu SEL: Niveau d'image [BRIGHTNESS]: Ajuste la luminosité (ELC, le gain (AUTO) et le niveau de conver - Panasonic GP-KH232A | Operating Instructions - Page 122
Attribution de bouton Le fait d'appuyer seulement sur le bouton [e] ou [f] permet à des utilisateurs d'attribuer les paramétrages dans le menu SEL tandis qu'une image est affichée. Comment attribuer les paramétrages Étape 1 Appeler l'écran de la paramétrages à attribuer dans le menu SEL à un bouton. - Panasonic GP-KH232A | Operating Instructions - Page 123
Dépannage Avant de faire une demande de réparation, veuillez vérifier les symptômes mention- nés dans le tableau suivant. Si une panne ne peut pas être corrigée même après avoir vérifié et essayer d'y remédier avec la solution proposée ou si un problème n'est pas décrit ci-dessous ou encore si l'on - Panasonic GP-KH232A | Operating Instructions - Page 124
Symptôme Origine/Solution Pages de référence • Ce phénomène dépend des caractéristiques du Barres noires à droite et à gauche de l'image moniteur. Sélectionner l'affichage large et plein écran sur le - moniteur. • Cet appareil fournit des sorties sur la supposition que l'écran est de 16:9. - Panasonic GP-KH232A | Operating Instructions - Page 125
: Mini-prise de ø3.5 mm (3 pôles, conforme au niveau de signal de RS-232C) Température ambiante en service: 0 °C à 40 °C Humidité ambiante de service: 30 % à 90 % Dimensions: GP-KH232CUE: 120 mm (L) x 36 mm (H) x 157 mm (P) (à l'exception des pieds en caoutchouc et des parties saillantes - Panasonic GP-KH232A | Operating Instructions - Page 126
Accessoires standard Manuel d'utilisation (cette brochure 1 él. Accessoires optionnels Tête de caméra HD GP-KH232HE Câble de caméra HD GP-KC23202/V GP-KC232M4 GP-KC23206/V GP-KC23215/V 126 - Panasonic GP-KH232A | Operating Instructions - Page 127
Informations relatives à l'évacuation des déchets, destinées aux utilisateurs d'appareils électriques et électroniques (appareils ménagers domestiques) Lorsque ce symbole figure sur les produits et/ou les documents qui les accompagnent, cela signifie que les appareils électriques et électroniques ne - Panasonic GP-KH232A | Operating Instructions - Page 128
VERSION ESPAÑOLA (SPANISH VERSION) ADVERTENCIA: • Para evitar el peligro de incendios o sacudidas eléctricas, no exponga este aparato a la lluvia ni a la humedad. • El aparato no deberá exponerse a goteo ni salpicaduras y no deberá ponerse ningún objeto lleno de líquido, como puedan ser jarrones, - Panasonic GP-KH232A | Operating Instructions - Page 129
...143 Efectúe la configuración con el menú SETUP 144 Acerca de los menús SETUP 144 Operación básica...145 1. Ajuste del título de la cámara [CAMERA ID 147 2. Ajuste de ELC [ELC]...148 3. Ajuste del obturador electrónico [SHUTTER 150 4. Ajuste de la ganancia [GAIN 150 5. Ajuste de la mejora de - Panasonic GP-KH232A | Operating Instructions - Page 130
Instrucciones importantes de seguridad 1) Lea este manual de instrucciones. 2) Guarde este manual de instrucciones. 3) Observe todas las advertencias. 4) Siga todas las instrucciones. 5) No emplee este aparato cerca del agua. 6) Límpielo sólo con un paño seco. 7) No bloquee - Panasonic GP-KH232A | Operating Instructions - Page 131
, EN CUALQUIER MOMENTO, POR MOTIVOS DE MEJORA DE ESTA PUBLICACIÓN Y/O DEL (DE LOS) PRODUCTO(S) CORRESPONDIENTE(S). Renuncia de la garantía Panasonic System Networks Co., Ltd. NO ACEPTA NINGÚN TIPO DE RESPONSABILIDAD CON PERSONAS LEGALES O FÍSICAS, A EXCEPCIÓN DEL REEMPLAZO O MANTENIMIENTO RAZONABLE - Panasonic GP-KH232A | Operating Instructions - Page 132
de cámara HD opcional (denominado el cabezal de cámara de aquí en adelante). • GP-KH232HE: Cabezal de cámara HD • Está disponible la salida de formatos múltiples. • y contraste para mejorar la visibilidad. Las descripciones de este manual están preparadas para un sistema provisto del cabezal de cá - Panasonic GP-KH232A | Operating Instructions - Page 133
Precauciones Solicite el trabajo de instalación al distribuidor. Es necesario poseer técnica y experiencia para realizar el trabajo de instalación. Si no lo hace así, pueden ocasionarse incendios, descargas eléctricas, heridas, o daños al aparato. Consúltelo sin falta con el distribuidor. Detenga - Panasonic GP-KH232A | Operating Instructions - Page 134
No oriente el producto a fuentes de iluminación potente. Las luces potentes como la de un foco sobre una parte del sensor MOS causan floración (dispersión de la luz). Motivo claro Floración Limpieza del cuerpo del producto Antes de limpiar este producto desconecte la alimentación. Si no sigue esta - Panasonic GP-KH232A | Operating Instructions - Page 135
conecta uno de los siguientes cables opcionales de la cámara HD (denominados "cables de la cámara" de aquí en adelante). • GP-KC23202/V (2 m) • GP-KC232M4 (4 m) • GP-KC23206/V (6 m) • GP-KC23215/V (15 m) Base de montaje de trípode El orificio roscado para trípode se emplea para fijar el cabezal de - Panasonic GP-KH232A | Operating Instructions - Page 136
menú [FREEZE (MENU)] u Botón de selección [SEL] o AWC/Botón de arriba [AWC [g]] DC POWER ON SCENE FREEZE MENU SEL AWC GP-KH232 OFF GAIN D RANGE CAMERA i Botón de selección de ganancia [GAIN] !0 Botón de izquierda [e] r Interruptor de la alimentación [DC POWER] Este interruptor sirve para - Panasonic GP-KH232A | Operating Instructions - Page 137
Presionándolo durante 2 o más segundos: Se inicia el AWC mientras se está visualizando una imagen si se había ajustado "WHITE BAL" en "AWC" en el menú SETUP (☞ página 159). !0 Botón de izquierda [e] Este botón mueve el cursor hacia arriba la izquierda o selecciona un ajuste mientras se visualiza el - Panasonic GP-KH232A | Operating Instructions - Page 138
!4 Conector de salida HDMI [HDMI] Este conector se usa para la conexión a un monitor compatible con HDMI. !5 Conector de salida RGB/YPbPr [RGB/YPbPr] Este conector suministra la salida de la señal RGB (rojo, verde y azul) o la salida de la señal YPbPr (luminancia, diferencia de color B y diferencia - Panasonic GP-KH232A | Operating Instructions - Page 139
Ajuste del formato de vídeo Encendiendo la CCU mediante la conexión del interruptor de alimentación mientras se mantiene presionado el botón correspondiente, podrá seleccionarse el formato de vídeo para cada conector de salida de vídeo. El formato de vídeo predeterminado es 1080/50i. Para cambiar el - Panasonic GP-KH232A | Operating Instructions - Page 140
frontal 1080/59,94p 1080/59,94i 720/59,94p 1080/50p 1080/50i 720/50p DC POWER ON SCENE FREEZE MENU SEL AWC GP-KH232 OFF GAIN D RANGE CAMERA 1080/29,97p(sF) 480/59,94i 1080/25p(sF) 576/50i 480/59,94p 59,94Hz/50Hz 576/50p Selección del formato - Panasonic GP-KH232A | Operating Instructions - Page 141
Precauciones para la instalación La instalación deberá cumplir las regulaciones locales sobre electricidad. Este aparato ha sido diseñado para su utilización en interiores. Este aparato no puede funcionar al aire libre. No exponga el aparato a la luz directa del sol durante mucho tiempo y no lo - Panasonic GP-KH232A | Operating Instructions - Page 142
Modo de instalación A continuación se muestra la forma de montar la cámara en el trípode (de venta en los establecimientos del ramo). Importante: • El trípode y la CCU deben ponerse horizontalmente. • La CCU debe ponerse horizontalmente. No ponga la - Panasonic GP-KH232A | Operating Instructions - Page 143
imágenes borrosas. • Cuando se emplea un objetivo zoom, el método de ajuste del enfoque varía según el objetivo. Para más información, consulte el manual de instrucciones del objetivo. Montura C: 7 mm o menos • Cuando extraiga el objetivo, no se olvide de colocar la tapa en la sección de la - Panasonic GP-KH232A | Operating Instructions - Page 144
la página 163. Acerca de los menús SETUP Empleando el menú SETUP podrá ajustar los elementos siguientes: Elementos de configuración Descripción Página q CAMERA ID Este elemento especifica el título de la cámara. Con este 147 elemento, se crea un título de cámara con caracteres alfanuméricos - Panasonic GP-KH232A | Operating Instructions - Page 145
caso, no podrán utilizarse las funciones siguientes. • Inicio de AWC para el equilibrio del blanco • MATRIX • ELECTRIC ZOOM • FREEZE • FLIP • MIRROR ** SET UP ** P1 CAMERA ID ELC SHUTTER GAIN SENS UP OUTPUT SEL HDMI OUTPUT SD ASPECT *OFF *OFF OFF OFF OFF RGB YPbPr(422) SIDE CUT END ** SET UP - Panasonic GP-KH232A | Operating Instructions - Page 146
Pantalla principal del menú SETUP Paso 1 Mantenga presionado el botón [FREEZE MENU ] durante 2 o más segundos. A Aparecerá la pantalla principal del menú SETUP. Paso 2 El menú SETUP consta de un contenido de 3 páginas. Para pasar de página, mueva el cursor a "P1", "P2" o "P3" y presione el botón [e] - Panasonic GP-KH232A | Operating Instructions - Page 147
de la cámara. Siga el procedimiento siguiente para especificar el título de la cámara. Pantalla principal del menú SETUP Pantalla "CÁMARA ID" ** SET UP ** P1 CAMERA ID ELC SHUTTER GAIN SENS UP OUTPUT SEL HDMI OUTPUT SD ASPECT *OFF *OFF OFF OFF OFF RGB YPbPr(422) SIDE CUT END Pantalla de - Panasonic GP-KH232A | Operating Instructions - Page 148
permite al usuario efectuar la compensación de contraluz ocultando las áreas más iluminadas. Pantalla principal del menú SETUP Pantalla "ELC CONT" ** SET UP ** P1 CAMERA ID ELC SHUTTER GAIN SENS UP OUTPUT SEL HDMI OUTPUT SD ASPECT *OFF *OFF OFF OFF OFF RGB YPbPr(422) SIDE CUT END ** ELC CONT - Panasonic GP-KH232A | Operating Instructions - Page 149
. (☞ Página 149) AUTO: Las áreas oscuras se enmascaran automáticamente y sólo se detectan las áreas claras. Ajuste del área de detección manual Seleccione las áreas divididas que deban enmascararse. Las áreas sin máscara se convertirán en las áreas de detección. Pantalla "ELC CONT" Pantalla de - Panasonic GP-KH232A | Operating Instructions - Page 150
entre los siguientes: OFF (ajuste predeterminado): Sin ajuste de la ganancia AUTO(L), AUTO(H): Ajuste automático de la ganancia MANU(L), MANU(H): Ajuste manual de la ganancia Ajuste preciso del nivel de la ganancia La ganancia puede ajustarse con precisión en los niveles "LOW" y "HIGH". Paso - Panasonic GP-KH232A | Operating Instructions - Page 151
Paso 2 Mueva el cursor a "HIGH" o "LOW" y ajuste el nivel empleando los botones [e] y [f]. Importante: • El nivel de "LOW" no puede ser mayor que el nivel de "HIGH". • "AUTO(L)" no está disponible cuando se ajusta "SENS UP" en "OFF" o MANU(L)" y "MANU(H)" no están disponibles cuando se ajusta "SENS - Panasonic GP-KH232A | Operating Instructions - Page 152
8. Ajuste del SD ASPECT Especifica la relación de aspecto para el formato SD. SIDE CUT (ajuste predeterminado), SQUEEZE, LETTER BOX 16:9A4:3 SIDE CUT 16:9A4:3 SQUEEZE 16:9A4:3 LETTER BOX 9. Ajuste del archivo de escena [SCENE FILE] El registro de los detalles, gamma, matiz, etc. como un archivo - Panasonic GP-KH232A | Operating Instructions - Page 153
[DTL MODE] Especifica los detalles. Se especifican la banda y el nivel de corrección de los bordes. Pantalla "SCENE FILE" ** SCENE FILE 1 ** P1 LABEL DTL MODE *MANU RED DTL OFF GAMMA ....|.... 45 KNEE *MANU BLACK STRETCH OFF D-RANGE NORMAL WHITE CLIP ........|109 RET END Pantalla - Panasonic GP-KH232A | Operating Instructions - Page 154
[RED DTL] Ajusta la mejora de los bordes rojos. Se ajusta el nivel de mejora de los bordes rojos de las imágenes con la cámara. Podrá seleccionar uno de los siguientes niveles: OFF (ajuste predeterminado): No se efectúa ninguna mejora de los bordes en la parte roja. LOW: Se efectúa el nivel bajo de - Panasonic GP-KH232A | Operating Instructions - Page 155
[BLACK STRETCH] Activa y desactiva la función de expansión del negro. La selección de "ON" y "OFF" (ajuste predeterminado) determina si debe efectuarse la función de expansión del negro. Cuando se selecciona "ON", se corrige el aplastamiento del negro con poca iluminación para que la imagen pueda - Panasonic GP-KH232A | Operating Instructions - Page 156
[MATRIX] Ajusta el matiz y la crominancia. Cuando efectúe el ajuste del matiz y de la crominancia, observe un osciloscopio de vectores o monitor de vídeo en color. Pantalla "SCENE FILE" Pantalla "MATRIX" ** SCENE FILE 1 ** P2 LABEL FLARE COMP OFF DNR LOW MATRIX *USER CHROMA GAIN - Panasonic GP-KH232A | Operating Instructions - Page 157
Paso 1 Oriente la cámara al centro del motivo en el que se detecta el color. Si la cámara no puede moverse, mueva el cursor rectangular al área del color deseado presionando los botones [g], [h], [e] y [f]. Nota: • Cada vez que presione el botón [SEL], cambiará el tamaño del cursor rectangular en el - Panasonic GP-KH232A | Operating Instructions - Page 158
[FILE LABEL] Pone un nombre de etiqueta en lugar de un número de archivo de escena. Se visualizan los caracteres (la etiqueta) en lugar del número de archivo de escena que se visualiza en la pantalla cuando se presiona el botón [SCENE] del panel frontal de la CCU. Para crear una etiqueta podrá - Panasonic GP-KH232A | Operating Instructions - Page 159
[AWC MEMORY] Especifica el destino en el que se guarda el ajuste de AWC. Se especifica el destino en el que se guarda el AWC que se inicia manteniendo presionado el botón [AWC [g]] del panel frontal de la CCU durante 2 o más segundos. El destino para guardar el AWC se selecciona empleando el botón - Panasonic GP-KH232A | Operating Instructions - Page 160
Nota: • El destino para almacenar el "AWC" puede especificarse para cada archivo de escena. (☞ Página 159) • Si aparece "AWC NG" y el indicador queda encendido o si se enciende el indicador cuando se cambia un archivo de escena, vuelva a realizar los pasos 1 y 2. Cuando se seleccione "MANU", siga - Panasonic GP-KH232A | Operating Instructions - Page 161
Paso 3 Presione el botón [SEL] después de haberse asegurado que se visualiza "EXT2". A Aparecerá la pantalla de "SYNC". Paso 4 Proporcione la señal de salida en el mismo formato de vídeo desde ambas CCU al osciloscopio para observar la componente de sincronización horizontal. Paso 5 La fase - Panasonic GP-KH232A | Operating Instructions - Page 162
14. Ajuste de la función de desplazamiento vertical [FLIP ENABLE] La selección de "ON" u "OFF" determina si debe habilitarse la función de desplazamiento vertical presionando el botón [g]. OFF (ajuste predeterminado): Bloquea la visualización normal. OFF (FLIP): Bloquea la visualización - Panasonic GP-KH232A | Operating Instructions - Page 163
Menú SEL El menú SEL es un menú simplificado que puede abrirse presionando el botón [SEL] mientras se visualiza una imagen. Empleando el menú SEL podrá ajustar los elementos siguientes: Nivel de la imagen [BRIGHTNESS]: Ajusta el brillo (ELC, ganancia (AUTO)), y el nivel de conver- gencia de la - Panasonic GP-KH232A | Operating Instructions - Page 164
Asignación de botones Presionando sólo el botón [e] o [f], el usuario podrá asignar los ajustes del menú SEL mientras se visualiza una imagen. Forma de asignar los ajustes Paso 1 Abra la pantalla del ajuste que desee asignar a un botón en el menú SEL. Paso 2 Mantenga presionados simultáneamente los - Panasonic GP-KH232A | Operating Instructions - Page 165
Solución de problemas Antes de solicitar reparaciones, compruebe los síntomas en la tabla siguiente. Si no puede resolver el problema después de haber comprobado y de haber intentado la solución, o si el problema no se describe a continuación, así como cuando se trate de problemas de instalación, - Panasonic GP-KH232A | Operating Instructions - Page 166
Síntoma Causa/solución Páginas de referencia Hay barras negras a la derecha e izquierda de la imagen • Este fenómeno depende de las especificaciones del monitor. Seleccione la visualización de pantalla ancha y completa en el lado del monitor. - • Esta unidad proporciona salidas al asumir que - Panasonic GP-KH232A | Operating Instructions - Page 167
de diámetro (3 polos, que cumpla el nivel de señal RS-232C) 0 °C a 40 °C 30 % a 90 % GP-KH232CUE: 120 mm (An) x 36 mm (Al) x 157 mm (Prf) (excluyendo las patas de goma y los salientes) GP-KH232HE: 28 mm (An) x 27 mm (Al) x 39 mm (Prf) (excluyendo las patas de goma y los salientes - Panasonic GP-KH232A | Operating Instructions - Page 168
Accesorios estándar Manual de Instrucciones (este documento 1 ejemplar Accesorios opcionales Cabezal de cámara HD GP-KH232HE Cable de la cámara HD GP-KC23202/V GP-KC232M4 GP-KC23206/V GP-KC23215/V 168 - Panasonic GP-KH232A | Operating Instructions - Page 169
Información sobre la eliminación para los usuarios de equipos eléctricos y electrónicos usados (particulares) La aparición de este símbolo en un producto y/o en la documentación adjunta indica que los productos eléctricos y electrónicos usados no deben mezclarse con la basura doméstica general. Para - Panasonic GP-KH232A | Operating Instructions - Page 170
VERSION ITALIANA (ITALIAN VERSION) AVVERTENZA: • Per prevenire il rischio di incendio o di scossa elettrica, non esporre questa apparecchiatura alla pioggia o all'umidità. • L'apparecchiatura non deve essere esposta a gocciolamenti o spruzzi e nessun oggetto riempito di liquidi, come ad esempio un - Panasonic GP-KH232A | Operating Instructions - Page 171
attraverso il menu SETUP 186 Riguardo ai menu di configurazione 186 Operazioni di base...187 1. Impostazione del titolo della telecamera [CAMERA ID 189 2. Impostazione di ELC [ELC 190 3. Impostazione dell'otturatore elettronico [SHUTTER 192 4. Regolazione del guadagno [GAIN 192 5. Impostazione - Panasonic GP-KH232A | Operating Instructions - Page 172
Istruzioni per la sicurezza importanti 1) Leggere queste istruzioni. 2) Conservare queste istruzioni. 3) Tener conto di tutte le avvertenze. 4) Seguire tutte le istruzioni. 5) Non utilizzare questa apparecchiatura vicino all'acqua. 6) Pulire soltanto con un panno asciutto. 7) Non bloccare alcuna - Panasonic GP-KH232A | Operating Instructions - Page 173
, IN QUALSIASI MOMENTO, PER IL MIGLIORAMENTO DI QUESTA PUBBLICAZIONE E/O DEL(-I) PRODOTTO(-I) CORRISPONDENTE(-I). Esonero dalla garanzia IN NESSUN CASO Panasonic System Networks Co., Ltd. DOVRÀ ESSERE RITENUTA RESPONSABILE NEI CONFRONTI DI ALCUNA PARTE O PERSONA, FATTA ECCEZIONE PER LA SOSTITUZIONE - Panasonic GP-KH232A | Operating Instructions - Page 174
opzionale (d'ora in poi chiamata la testa della telecamera). • GP-KH232HE: Testa della telecamera HD • È disponibile l'uscita multiformato della luminosità e migliorarne la visibilità. Le descrizioni contenute in questo manuale sono basate su un sistema con la testa della telecamera. Marchi di - Panasonic GP-KH232A | Operating Instructions - Page 175
Precauzioni Rivolgersi al rivenditore per i lavori di installazione. I lavori di installazione richiedono tecnica ed esperienza. La mancata osservanza di questa precauzione può causare incendi, scosse elettriche ferite o danni al prodotto. Non esitare a rivolgersi al rivenditore. Interrompere - Panasonic GP-KH232A | Operating Instructions - Page 176
Non indirizzare questo prodotto verso fonti di luce forte. Una fonte di luce come un riflettore su una parte del sensore MOS causa bagliori (dispersione di luce). Soggetto luminoso Bagliore Pulitura del corpo di questo prodotto Spegnere questo prodotto quando lo si pulisce. La mancata osservanza di - Panasonic GP-KH232A | Operating Instructions - Page 177
viene collegato uno dei seguenti cavi della telecamera HD opzionali (di seguito denominati cavi della telecamera). • GP-KC23202/V (2 m) • GP-KC232M4 (4 m) • GP-KC23206/V (6 m) • GP-KC23215/V (15 m) e Base di montaggio del cavalletto Il foro dell'attacco del cavalletto viene utilizzato quando - Panasonic GP-KH232A | Operating Instructions - Page 178
menu [FREEZE (MENU)] u Tasto di selezione [SEL] o AWC/Tasto Su [AWC [g]] DC POWER ON SCENE FREEZE MENU SEL AWC GP-KH232 OFF GAIN D RANGE CAMERA i Tasto di selezione del guadagno [GAIN] !0 Tasto Sinistra [e] r Interruttore di alimentazione [DC POWER] Questo interruttore accende e spegne la - Panasonic GP-KH232A | Operating Instructions - Page 179
!0 Tasto Sinistra [e] Questo tasto sposta il cursore verso l'alto per cambiare un elemento di impostazione mentre è visualizzato il menu SETUP. Questo tasto sposta il cursore nella direzione meno sulla scala di regolazione del livello o seleziona un elemento di impostazione mentre è visualizzato il - Panasonic GP-KH232A | Operating Instructions - Page 180
!4 Connettore di uscita HDMI [HDMI] Questo connettore viene utilizzato per la connessione ad un monitor predisposto HDMI. !5 Connettore di uscita RGB/YPbPr [RGB/YPbPr] Questo connettore fornisce l'uscita del segnale RGB (rosso, verde e blu) o l'uscita del segnale YPbPr (luminanza, differenza con il - Panasonic GP-KH232A | Operating Instructions - Page 181
Impostazione del formato video Avviando la CCU spostando l'interruttore di alimentazione su ON mentre si tiene premuto il tasto corrispondente si può selezionare il formato video per ciascun connettore di uscita video. Il formato video predefinito è 1080/50i. Per cambiare il formato video - Panasonic GP-KH232A | Operating Instructions - Page 182
anteriore 1080/59,94p 1080/59,94i 720/59,94p 1080/50p 1080/50i 720/50p DC POWER ON SCENE FREEZE MENU SEL AWC GP-KH232 OFF GAIN D RANGE CAMERA 1080/29,97p(sF) 480/59,94i 1080/25p(sF) 576/50i 480/59,94p 59,94Hz/50Hz 576/50p Selezione del formato - Panasonic GP-KH232A | Operating Instructions - Page 183
Precauzioni per l'installazione L'installazione deve essere conforme alla normativa elettrica locale. Questo prodotto è stato progettato per essere utilizzato all'interno. Questo prodotto non è utilizzabile all'esterno. Non esporre questo prodotto alla luce solare diretta per ore e non installare il - Panasonic GP-KH232A | Operating Instructions - Page 184
Metodo di installazione Quanto segue illustra come montare la telecamera sul cavalletto (da procurarsi localmente). Importante: • Il cavalletto e la CCU devono essere posizionati orizzontalmente. • La CCU deve essere posizionata orizzontalmente. - Panasonic GP-KH232A | Operating Instructions - Page 185
un obiettivo zoom, il metodo di regolazione della messa a fuoco varia a seconda dell'obiettivo. Per ulteriori informazioni, far riferimento al manuale di istruzioni dell'obiettivo. Attacco C: 7 mm o inferiore • Quando si rimuove l'obiettivo, assicurarsi di mettere il coper- chietto sulla sezione - Panasonic GP-KH232A | Operating Instructions - Page 186
circa il menu SEL. Riguardo ai menu di configurazione Gli elementi seguenti possono essere impostati utilizzando il menu SETUP: Elemento di configurazione q CAMERA ID w ELC e SHUTTER r GAIN t SENS UP y OUTPUT SEL u HDMI OUTPUT i SD ASPECT o SCENE FILE DTL MODE RED DTL GAMMA KNEE BLACK STRECH - Panasonic GP-KH232A | Operating Instructions - Page 187
caso, le funzioni seguenti non saranno disponibili. • Avvio dell'AWC per il bilanciamento del bianco • MATRIX • ELECTRIC ZOOM • FREEZE • FLIP • MIRROR ** SET UP ** P1 CAMERA ID ELC SHUTTER GAIN SENS UP OUTPUT SEL HDMI OUTPUT SD ASPECT *OFF *OFF OFF OFF OFF RGB YPbPr(422) SIDE CUT END ** SET UP - Panasonic GP-KH232A | Operating Instructions - Page 188
Schermata principale del menu SETUP Passaggio 1 Tenere premuto il tasto [FREEZE MENU ] per 2 o più secondi. A Appare la schermata principale del menu SETUP. Passaggio 2 Il menu SETUP è composto da 3 pagine di contenuti. Per cambiare pagina, spostare il cursore su "P1", "P2" o "P3" e premere il tasto - Panasonic GP-KH232A | Operating Instructions - Page 189
con un massimo di 16 caratteri. Seguire la procedura seguente per specificare il titolo della telecamera. Schermata principale del menu SETUP Schermata "CAMERA ID" ** SET UP ** P1 CAMERA ID ELC SHUTTER GAIN SENS UP OUTPUT SEL HDMI OUTPUT SD ASPECT *OFF *OFF OFF OFF OFF RGB YPbPr(422) SIDE CUT - Panasonic GP-KH232A | Operating Instructions - Page 190
agli utenti di eseguire la compensazione del controluce per nascondere le aree luminose. Schermata principale del menu SETUP Schermata "ELC CONT" ** SET UP ** P1 CAMERA ID ELC SHUTTER GAIN SENS UP OUTPUT SEL HDMI OUTPUT SD ASPECT *OFF *OFF OFF OFF OFF RGB YPbPr(422) SIDE CUT END ** ELC CONT - Panasonic GP-KH232A | Operating Instructions - Page 191
di picco (valore massimo). Quando il cursore viene spostato nella direzione "A", viene rilevato il valore di picco (valore massimo). Impostazione manuale dell'area di rivelazione Selezionare le aree suddivise da mascherare. Le aree senza mascheratura diventeranno le aree di rivelazione. Schermata - Panasonic GP-KH232A | Operating Instructions - Page 192
dalle seguenti: OFF (regolazione predefinita): Nessuna regolazione del guadagno AUTO(L), AUTO(H): Regolazione automatica del guadagno MANU(L), MANU(H): Regolazione manuale del guadagno Regolazione precisa del livello del guadagno Il guadagno può essere regolato con precisione in entrambi i livelli - Panasonic GP-KH232A | Operating Instructions - Page 193
Passaggio 2 Spostare il cursore su "HIGH" o "LOW" e regolare il livello premendo i tasti [e] e [f]. Importante: • Il livello "LOW" non può essere superiore al livello "HIGH". • Quando "SENS UP" è impostato su "OFF" o "---", "AUTO(L)" non è disponibile. • "MANU(L)" e "MANU(H)" non sono disponibili - Panasonic GP-KH232A | Operating Instructions - Page 194
8. Impostazione di SD ASPECT Specifica il formato di visualizzazione per il formato SD. SIDE CUT (regolazione predefinita), SQUEEZE, LETTER BOX 16:9A4:3 SIDE CUT 16:9A4:3 SQUEEZE 16:9A4:3 LETTER BOX 9. Impostazione del file di scena [SCENE FILE] La registrazione di dettagli, gamma, tinta, etc. - Panasonic GP-KH232A | Operating Instructions - Page 195
[DTL MODE] Specifica i dettagli. Vengono specificati la banda ed il livello della correzione dei contorni. Schermata "SCENE FILE" ** SCENE FILE 1 ** P1 LABEL DTL MODE *MANU RED DTL OFF GAMMA ....|.... 45 KNEE *MANU BLACK STRETCH OFF D-RANGE NORMAL WHITE CLIP ........|109 RET END - Panasonic GP-KH232A | Operating Instructions - Page 196
[RED DTL] Regola il miglioramento dei contorni del rosso. Viene regolato il livello di miglioramento dei contorni del rosso delle immagini attraverso la telecamera. Il livello è selezionabile dai seguenti: OFF (regolazione predefinita): Non viene eseguito nessun miglioramento dei contorni della - Panasonic GP-KH232A | Operating Instructions - Page 197
[BLACK STRETCH] Attiva e disattiva la funzione di black stretch. La selezione di "ON" o "OFF" (regolazione predefinita) determina se eseguire o meno la funzione di black stretch. Quando si seleziona "ON", la compressione del nero (black crushing) viene corretta in condizioni di scarsa illuminazione - Panasonic GP-KH232A | Operating Instructions - Page 198
[MATRIX] Regola tinta e croma. Assicurarsi di osservare un vettorscopio o un monitor video a colori quando si esegue la regolazione di tinta e croma. Schermata "SCENE FILE" Schermata "MATRIX" ** SCENE FILE 1 ** P2 LABEL FLARE COMP OFF DNR LOW MATRIX *USER CHROMA GAIN ..|......38 TOTAL - Panasonic GP-KH232A | Operating Instructions - Page 199
Passaggio 1 Rivolgere la telecamera al centro del soggetto con il quale viene rilevato il colore. Se la telecamera è fissa, spostare il cursore rettangolare sull'area con il colore desiderato premendo i tasti [g], [h], [e] e [f]. Nota: • Ogni volta che si preme il tasto [SEL], la dimensione del - Panasonic GP-KH232A | Operating Instructions - Page 200
[FILE LABEL] Mette un'etichetta col nome al posto del numero di file di scena. Vengono visualizzati caratteri (etichetta) al posto del numero del file di scena che viene visualizzato sulla schermata quando si preme il tasto [SCENE] sul pannello anteriore della CCU. Per creare un'etichetta si possono - Panasonic GP-KH232A | Operating Instructions - Page 201
[AWC MEMORY] Specifica la destinazione del salvataggio dell'impostazione AWC. Viene specificata la destinazione del salvataggio di AWC che viene avviato tenendo premuto il tasto [AWC [g]] sul pannello anteriore della CCU per 2 o più secondi. La destinazione del salvataggio di AWC viene selezionata - Panasonic GP-KH232A | Operating Instructions - Page 202
Nota: • La destinazione del salvataggio di "AWC" può essere specificata per ciascun file di scena. (☞ Pagina 201) • Se appare "AWC NG" e l'indicatore rimane acceso o se l'indicatore si accende quando si cam- bia file di scena, riprovare i passaggi 1 e 2. Quando si seleziona "MANU", seguire i - Panasonic GP-KH232A | Operating Instructions - Page 203
Passaggio 3 Premere il tasto [SEL] dopo aver verificato che è visualizzato "EXT2". A Appare la schermata "SYNC". Passaggio 4 Fornire il segnale di uscita nello stesso formato video da entrambe le CCU all'oscilloscopio per osservare la componente di sincronizzazione orizzontale. Passaggio 5 La fase - Panasonic GP-KH232A | Operating Instructions - Page 204
14. Impostazione della funzione di flip verticale [FLIP ENABLE] La selezione di "ON" o "OFF" determina se abilitare o meno la funzione di flip verticale premendo il tasto [g]. OFF (regolazione predefinita): Blocca la visualizzazione normale. OFF (FLIP): Blocca la visualizzazione ribaltata - Panasonic GP-KH232A | Operating Instructions - Page 205
Menu SEL Il menu SEL è un menu semplificato che può essere richiamato premendo il tasto [SEL] mentre è visualizzata un'immagine. Gli elementi seguenti possono essere impostati utilizzando il menu SEL: Livello dell'immagine [BRIGHTNESS]: Regola la luminosità (ELC, guadagno (AUTO)) ed il livello di - Panasonic GP-KH232A | Operating Instructions - Page 206
Assegnazione dei tasti La semplice pressione dei tasti [e] o [f] consente agli utenti di assegnare le impostazioni nel menu SEL mentre è visualizzata un'immagine. Metodo di assegnazione delle impostazioni Passaggio 1 Richiamare la schermata con l'impostazione da assegnare nel menu SEL ad un tasto. - Panasonic GP-KH232A | Operating Instructions - Page 207
Correzione dei difetti di funzionamento Prima di richiedere la riparazione, controllare i sintomi con la tabella seguente. Rivolgersi ad un rivenditore se un problema non può essere risolto anche dopo aver controllato e provato la soluzione, oppure se un problema non è descritto sotto, o quando si - Panasonic GP-KH232A | Operating Instructions - Page 208
Sintomo Barre nere sulla destra e sulla sinistra dell'immagine Immagine allungata verticalmente Nessun suono dal monitor Causa/soluzione Pagine di riferimento • Questo fenomeno dipende dalle specifiche del monitor. Selezionare la visualizzazione wide-screen e a - schermo intero sul monitor. • - Panasonic GP-KH232A | Operating Instructions - Page 209
, visualizzazione dello stato Minijack ø3.5 (3 poli conforme al livello del segnale RS-232C) 0 °C a + 40 °C dal 30 % al 90 % GP-KH232CUE: 120 mm (L) x 36 mm (A) x 157 mm (P) (esclusi piedini di gomma e sporgenze) GP-KH232HE: 28 mm (L) x 27 mm (A) x 39 mm (P) (esclusi piedini di gomma e sporgenze - Panasonic GP-KH232A | Operating Instructions - Page 210
Accessori standard Manuale di istruzioni (questo documento 1 pz. Accessori opzionali Testa della telecamera HD GP-KH232HE Cavo della telecamera HD GP-KC23202/V GP-KC232M4 GP-KC23206/V GP-KC23215/V 210 - Panasonic GP-KH232A | Operating Instructions - Page 211
Informazioni per gli utenti sullo smaltimento di apparecchiature elettriche ed elettroniche obsolete (per i nuclei familiari privati) Questo simbolo sui prodotti e/o sulla documentazione di accompagnamento significa che i prodotti elettrici ed elettronici usati non devono essere mescolati con i - Panasonic GP-KH232A | Operating Instructions - Page 212
.net Importer's name and address to follow EU rules: Panasonic Testing Centre Panasonic Marketing Europe GmbH Winsbergring 15, 22525 Hamburg F.R.Germany © Panasonic System Networks Co., Ltd. 2012 NF0512-0 PGQX1184ZA Printed in Japan Gedruckt in Japan Imprimé au Japon Impreso en Japón Stampato
-
 1
1 -
 2
2 -
 3
3 -
 4
4 -
 5
5 -
 6
6 -
 7
7 -
8
-
9
-
10
-
11
-
12
-
13
-
14
-
15
-
16
-
17
-
18
-
19
-
20
-
21
-
22
-
23
-
24
-
25
-
26
-
27
-
28
-
29
-
30
-
31
-
32
-
33
-
34
-
35
-
36
-
37
-
38
-
39
-
40
-
41
-
42
-
43
-
44
-
45
-
46
-
47
-
48
-
49
-
50
-
51
-
52
-
53
-
54
-
55
-
56
-
57
-
58
-
59
-
60
-
61
-
62
-
63
-
64
-
65
-
66
-
67
-
68
-
69
-
70
-
71
-
72
-
73
-
74
-
75
-
76
-
77
-
78
-
79
-
80
-
81
-
82
-
83
-
84
-
85
-
86
-
87
-
88
-
89
-
90
-
91
-
92
-
93
-
94
-
95
-
96
-
97
-
98
-
99
-
100
-
101
-
102
-
103
-
104
-
105
-
106
-
107
-
108
-
109
-
110
-
111
-
112
-
113
-
114
-
115
-
116
-
117
-
118
-
119
-
120
-
121
-
122
-
123
-
124
-
125
-
126
-
127
-
128
-
129
-
130
-
131
-
132
-
133
-
134
-
135
-
136
-
137
-
138
-
139
-
140
-
141
-
142
-
143
-
144
-
145
-
146
-
147
-
148
-
149
-
150
-
151
-
152
-
153
-
154
-
155
-
156
-
157
-
158
-
159
-
160
-
161
-
162
-
163
-
164
-
165
-
166
-
167
-
168
-
169
-
170
-
171
-
172
-
173
-
174
-
175
-
176
-
177
-
178
-
179
-
180
-
181
-
182
-
183
-
184
-
185
-
186
-
187
-
188
-
189
-
190
-
191
-
192
-
193
-
194
-
195
-
196
-
197
-
198
-
199
-
200
-
201
-
202
-
203
-
204
-
205
-
206
-
207
-
208
-
209
-
210
-
211
-
212
 |
 |

Before attempting to connect or operate this product, please read these
instructions carefully and save this manual for future use.
The model number is abbreviated in some descriptions in this manual.
Operating Instructions
HD Camera Control Unit
Model No.
GP-KH232CUE
DC POWER
GP-KH232
CAMERA
ON
OFF
D RANGE
SEL
AWC
FREEZE
MENU
GAIN
D RANGE
Camera head: Option
Camera cable: Option
FRANÇAIS
DEUTSCH
ENGLISH
ESPAÑOL
ITALIANO