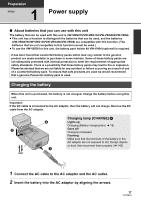
Panasonic HDC-TM20K8 User Manual - Page 12
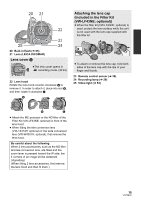
Lens cover, Attaching the lens cap, Included in the Filter Kit, VW-LF43NE; optional
 |
View all Panasonic HDC-TM20K8 manuals
Add to My Manuals
Save this manual to your list of manuals |
Page 12 highlights
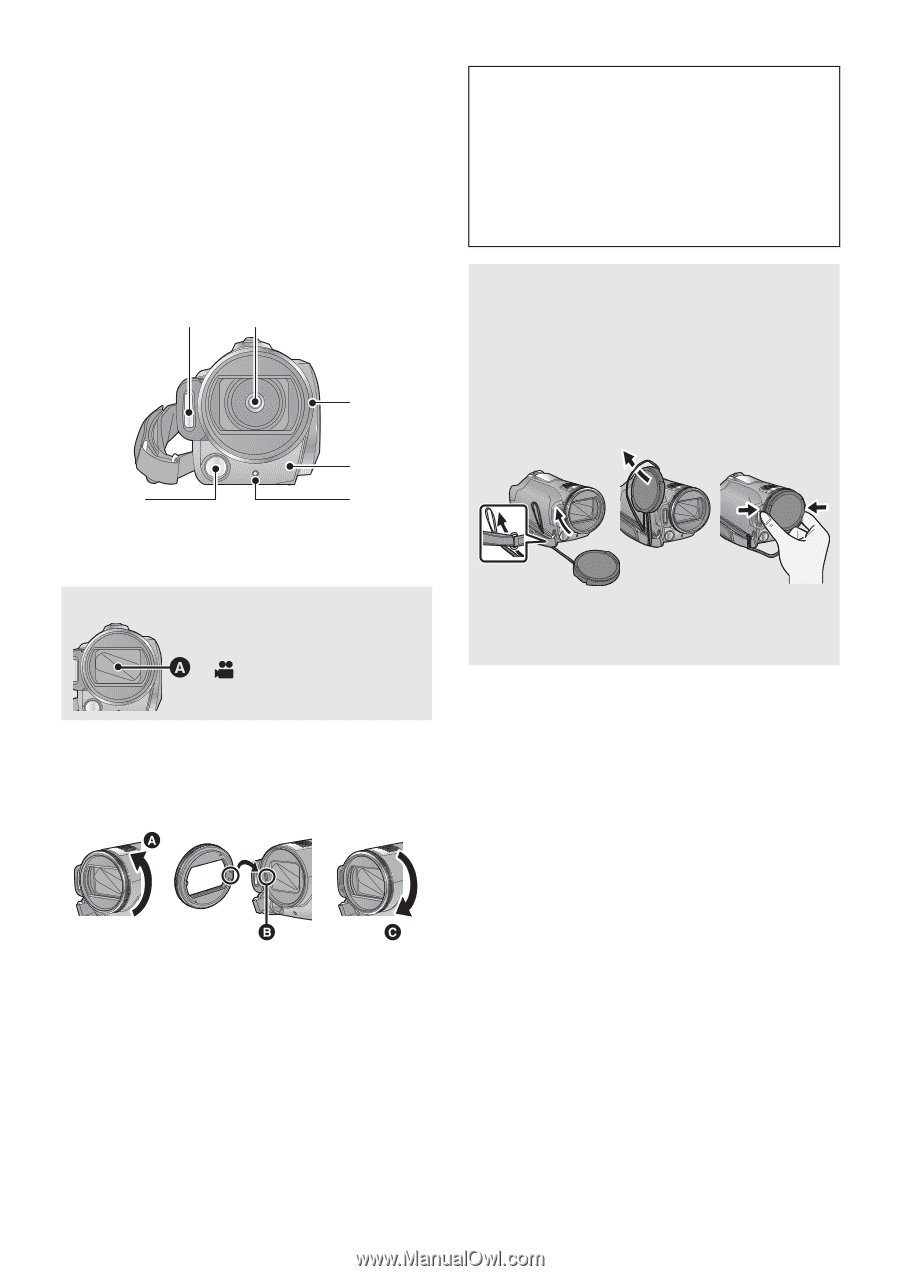
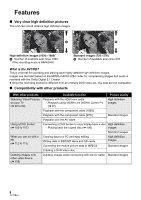
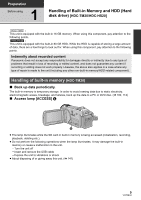
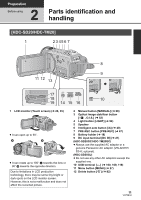
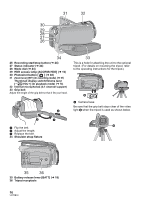
13 SD card open lever [OPEN] (l 23) 14 Audio-video output terminal [A/V] (l 92, 108) ≥ Use the AV cable (only the supplied cable). 15 Component terminal [COMPONENT] (l 92) 16 HDMI mini connector [HDMI] (l 92, 97) 17 Access lamp [ACCESS] (l 9, 23) 18 Card slot (l 23) 19 SD card cover (l 23) 20 21 22 23 25 24 20 Built-in flash (l 65) 21 Lens (LEICA DICOMAR) Lens cover A ≥The lens cover opens in recording mode. (l 24) 22 Lens hood Rotate the lens hood counter-clockwise A to remove it. In order to attach it, place into slot B, and then rotate it clockwise C. Be careful about the following. When 2 lens accessories, such as the ND filter and tele conversion lens, are fitted and the zoom lever is pressed toward the W side, the 4 corners of an image will be darkened. (Vignetting) (When fitting 2 lens accessories, first remove the lens hood and then fit them.) Attaching the lens cap (Included in the Filter Kit (VW-LF43NE; optional)) ≥ When the filter kit (VW-LF43NE; optional) is used, protect the lens surface while the unit is not used with the lens cap supplied with the filter kit. ≥ To attach or remove the lens cap, hold both sides of the lens cap with the tips of your finger and thumb. 23 Remote control sensor (l 38) 24 Recording lamp (l 29) 25 Video light (l 54) ≥ Attach the MC protector or the ND filter of the Filter Kit (VW-LF43NE; optional) in front of the lens hood. ≥ When fitting the tele conversion lens (VW-T4314H; optional) or the wide conversion lens (VW-W4307H; optional), first remove the lens hood. 12 VQT2B34
-
 1
1 -
2
-
3
-
4
-
5
-
6
-
 7
7 -
 8
8 -
 9
9 -
 10
10 -
 11
11 -
 12
12 -
 13
13 -
 14
14 -
 15
15 -
 16
16 -
 17
17 -
18
-
19
-
20
-
21
-
22
-
23
-
24
-
25
-
26
-
27
-
28
-
29
-
30
-
31
-
32
-
33
-
34
-
35
-
36
-
37
-
38
-
39
-
40
-
41
-
42
-
43
-
44
-
45
-
46
-
47
-
48
-
49
-
50
-
51
-
52
-
53
-
54
-
55
-
56
-
57
-
58
-
59
-
60
-
61
-
62
-
63
-
64
-
65
-
66
-
67
-
68
-
69
-
70
-
71
-
72
-
73
-
74
-
75
-
76
-
77
-
78
-
79
-
80
-
81
-
82
-
83
-
84
-
85
-
86
-
87
-
88
-
89
-
90
-
91
-
92
-
93
-
94
-
95
-
96
-
97
-
98
-
99
-
100
-
101
-
102
-
103
-
104
-
105
-
106
-
107
-
108
-
109
-
110
-
111
-
112
-
113
-
114
-
115
-
116
-
117
-
118
-
119
-
120
-
121
-
122
-
123
-
124
-
125
-
126
-
127
-
128
-
129
-
130
-
131
-
132
-
133
-
134
-
135
-
136
-
137
-
138
-
139
-
140
-
141
-
142
-
143
-
144
-
145
-
146
-
147
-
148
 |
 |