Panasonic HPX500 Operating Instructions
Panasonic HPX500 - Camcorder - 1080i Manual
 |
UPC - 791871302965
View all Panasonic HPX500 manuals
Add to My Manuals
Save this manual to your list of manuals |
Panasonic HPX500 manual content summary:
- Panasonic HPX500 | Operating Instructions - Page 1
Card Camera-Recorder Model No. AG-HPX500P Model No. AG-HPX500E FRANÇAIS Pour des explications en français, veuillez vous reporter au CD-ROM fourni. Before operating this product, please read the instructions carefully and save this manual for future use. S0407T1067 -P D Printed in Japan ENGLISH - Panasonic HPX500 | Operating Instructions - Page 2
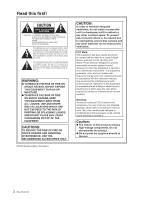
AND ANNOYING INTERFERENCE, USE THE RECOMMENDED ACCESSORIES ONLY. indicates safety used in accordance with the instruction manual, may cause harmful interference to radio communications. Operation of this equipment in a residential area is likely to cause harmful interference in which case - Panasonic HPX500 | Operating Instructions - Page 3
installation method described in this manual. ● If a battery made by any other manufacturer is to be used, check the Operating Instructions accompanying the battery. Back-up Battery (Lithium Battery) ● For the removal of the battery for disposal at the end of its service life, please consult your - Panasonic HPX500 | Operating Instructions - Page 4
lens. PLEASE NOTE: ● When preparing to record important images, always shoot some advance test footage, to verify that both pictures and sound are being recorded normally. ● Should video or audio recording fail due to a malfunction of this camera-recorder or the P2 cards used panasonic AG. - Panasonic HPX500 | Operating Instructions - Page 5
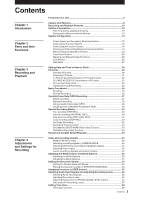
for Recording Precautions for Use 4 Camera Unit Features 8 Recording and Playback Features 10 Outline of operations 12 Flow of shooting, playing and saving 12 Saving and editing on external devices 13 System Configuration 14 Power Supply and Accessory Mounting Section 15 Audio (input - Panasonic HPX500 | Operating Instructions - Page 6
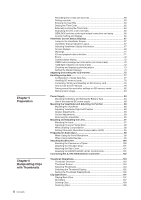
LCD monitor 75 Handling setup data 77 Configuration of setup data files 77 Handling SD memory cards 78 Formatting, Writing and Reading an SD memory card 78 How to Use Scene File Data 79 Saving scene files and other settings on SD memory cards 82 Memory Card Usage 83 Power Supply 84 Mounting - Panasonic HPX500 | Operating Instructions - Page 7
113 P2 Card Status Display 113 SD memory card Status Display 115 Confirmation of Metadata Upload 115 Viewfinder and LCD Menus 116 Using the menus 116 Initializing the menu settings 117 Setup menu structure 118 Camera (CAM) mode menu 118 MCR mode menu 119 Setup menu list 120 SCENE FILE screen - Panasonic HPX500 | Operating Instructions - Page 8
1 Introduction 1 Chapter Introduction The AG-HPX500P/E memory card camera recorder is equipped with a 2/3-inch lens mount system that enables use of high-performance interchangeable lenses, and comes with a 50 Hz/59.94 Hz selector function to permit use of a multitude of HD and SD formats. Also - Panasonic HPX500 | Operating Instructions - Page 9
the registration error caused by the slight chromatic aberration that the lens cannot compensate for, in order to minimize color bleeding into surrounding image areas. ■Remote control support The camera supports the AJ-RC10G (optional accessory) remote control unit. The remote control allows you to - Panasonic HPX500 | Operating Instructions - Page 10
without degradation. This interface allows you to transfer video data for nonlinear editing on a Windows® PC or Macintosh® with DVCPRO HD compliant software or for backing up on a connected DVCPRO HD digital VTR (AJ-HD1400) or FOCUS FS100 HDD recorder. ■P2 cards for high capacity, high speed and - Panasonic HPX500 | Operating Instructions - Page 11
be filled with text on a PC (P2 Viewer). ■SD memory card slot The camera provides an SD memory card slot for saving and loading scene files and user settings. A metadata upload file (created using P2 Viewer) containing the name of the person who shot the video, the name of the reporter, the shooting - Panasonic HPX500 | Operating Instructions - Page 12
of shooting, playing and saving The setting values such as the user file are saved to and read from the SD memory card. P2 mode shooting and playback (Pages 30 and 34) P2 card You can use the following features: • HD (High Definition) recording • Multi format recording • Variable frame rates Slow - Panasonic HPX500 | Operating Instructions - Page 13
The data (file) is transferred for nonlinear editing on your computer or other unit. P2 card Computer USB2 file) to it. IEEE1394 (SBP-2*) External hard disk IEEE1394 (Windows®/Macintosh®) Computer/ Memory card recorder Component video cable BNC cable (composite/SDI) Video equipment/ Monitor - Panasonic HPX500 | Operating Instructions - Page 14
Viewfinder AJ-VF15B AJ-VF20WB AG-VF11G Microphone (Phantom +48 V) AG-MC200G AJ-MC700P Lens (Bayonet type) Fujinon, Canon Rain cover SHAN-RC700 Soft carrying case AJ-SC900 Hard carrying case Remote control unit AG-HPX500P/E Tripod adapter SHAN-TM700 AJ-RC10G Remote control cable AJ-C10050G - Panasonic HPX500 | Operating Instructions - Page 15
and their 2 Chapter Functions Power Supply and Accessory Mounting Section 6 13 2 16 6 5 14 7 8 Chapter 2 Parts and their Functions 1 4 3 15 10 12 11 9 1 POWER switch Used to turn on/off the power. 2 Battery mount A battery pack from Anton/Bauer is mounted here. For details, refer to - Panasonic HPX500 | Operating Instructions - Page 16
Parts and their Functions 1 4 5 6 1 MIC IN (microphone input) jacks FRONT1/FRONT2 (XLR, 3-pin) • Connect microphones (optional accessories) to these jacks. Power for the microphone comes from this jack. • A phantom-powered microphone may be connected. To use a phantom-powered AG-MC200G the MONITOR - Panasonic HPX500 | Operating Instructions - Page 17
input + 48V) selector switch Used to select the audio signal input from the REAR1/REAR2 connectors. LINE: Audio signal line-input from the audio device is input. MIC: Audio signal from a self-powered (active) microphone is input. (The main unit does not supply power to the remote microphone). + 48V - Panasonic HPX500 | Operating Instructions - Page 18
1 Chapter 2 Parts and their Functions 2 56 7 1 MONITOR SELECT (audio channel) CH1/2 / CH3/4 selector switch Use this switch to select for audio monitoring (stereo) earphones. When earphones are connected, sound from the speakers is automatically muted. 6 DC OUT (DC power supply) output socket - Panasonic HPX500 | Operating Instructions - Page 19
Chapter 2 Parts and their Functions Shooting and Recording/Playback Functions Section 1 8 2 9 34 567 Shooting and Recording (camera unit) 1 ND FILTER (filter switching) control This control adjusts the amount of light entering the CCD. Use this control in strong outdoor lighting. Control - Panasonic HPX500 | Operating Instructions - Page 20
Chapter 2 Parts and their Functions 6 OUTPUT/AUTO KNEE selector switch This switch selects the video signals sent from the camera unit to the memory card recorder unit, viewfinder and video monitor. Video being recorded through the camera CAM. is output with the AUTO KNEE circuit AUTO - Panasonic HPX500 | Operating Instructions - Page 21
Chapter 2 Parts and their Functions 25 26 19 34 10 10 11 32 16 22 24 21 20 33 31 27 30 18 13 15 17 14 12 28 23 29 21 - Panasonic HPX500 | Operating Instructions - Page 22
control unit AJRC10G (optional accessory), some functions of the camera can be remote-controlled. For details, refer to [Connecting the AJ-RC10G Extension Controller] (page 102). 24 VIDEO OUT (video signal output) connector This connector outputs video signals. • In HD mode, down-converted composite - Panasonic HPX500 | Operating Instructions - Page 23
(D4 connector) • This connector outputs component video signals. • Use the menu option CMPNT/SDI SEL in the setting menu screen to select AUTO, 1080i, 480i, or 576i. This connector does not support up-conversion. 29 1394 connector • Connect an IEEE1394 cable to this connector. • Select - Panasonic HPX500 | Operating Instructions - Page 24
button during thumbnail display scrolls thumbnail pages forwards and backwards in page units. 7 JOG dial button • Use this button to go between menu pages and to select and set items in open setting menus (camera menu or MCR menu). • In a setting menu, turning the JOG dial downwards moves the menu - Panasonic HPX500 | Operating Instructions - Page 25
Parts and their Functions 13 78 1 GENLOCK IN connector (BNC) This connector is used to input a reference signal before the camera used to ascertain the time code or CTL count of a particular recorded scene. 5 RESET button Use ) button The LCD monitor and the view P2 card recording status. Use - Panasonic HPX500 | Operating Instructions - Page 26
Chapter 2 Parts and their Functions Warning and Status Display LCD Monitor Functions 12 3 5 4 1 2 1 Back tally 1 LCD monitor The LCD monitor displays the video in the viewfinder. Alternatively, it can show clips on the P2 card in a thumbnail format. In thumbnail display mode, you can use the - Panasonic HPX500 | Operating Instructions - Page 27
Viewfinder 13 11 8 7 9 10 Chapter 2 Parts and their Functions 12 42536 1 1 Viewfinder (supplied accessory) During recording or playback, the viewfinder displays the video image in monochrome. It also displays warnings, messages, zebra patterns, markers (safety zone and center markers), etc. 2 ZEBRA - Panasonic HPX500 | Operating Instructions - Page 28
5:20 PM on December 25, 2007. 1 Set the POWER switch to ON. 2 Press the MENU button. 3 Use the JOG dial button to select setting menu OTHER FUNCTIONS, the JOG dial button. • The CLOCK SET screen appears. OTHER FUNCTIONS USER FILE 1394 CONTROL 1394 CMD SEL PC MODE ACCESS LED ALARM SAVE LED CLOCK - Panasonic HPX500 | Operating Instructions - Page 29
Chapter 3 Recording and Playback 7 Turn the JOG dial button to select YEAR, then press the JOG dial button. CLOCK SET YEAR MONTH DAY HOUR MIN 2007 MAY 1 13 7 PUSH MENU TO RETURN 8 Turn the JOG dial button to set YEAR to 2007, then press the JOG dial button. • A year - Panasonic HPX500 | Operating Instructions - Page 30
Chapter 3 Recording and Playback P2 Cards Inserting P2 Cards When using the camera recorder for the first time, be sure to set the time data beforehand. On how the time data is set, see [Setting Date and Time of Internal Clock] (page 28). 1 Turn on the POWER switch. 2 While pressing the - Panasonic HPX500 | Operating Instructions - Page 31
being accessed is removed, the viewfinder displays "TURN POWER OFF" and the AG-HPX500P/E gives a warning using an alarm and the WARNING LED. In addition, all P2 CARD ACCESS LEDs blink rapidly in orange. If this is the case, turn the power off. For more information on warning indications, see [Warning - Panasonic HPX500 | Operating Instructions - Page 32
/25PN. • Use of cards other than the above may require updating the camera driver. For details, see [Updating Camera Drivers] (page 144). • For the latest information not available in the Operating Instructions, visit the P2 Support Desk at the following Web site. https://eww.pavc.panasonic.co.jp - Panasonic HPX500 | Operating Instructions - Page 33
device. • To prevent data loss in transferring P2 card data to a PC or write back PC data on a P2 card, use P2 Viewer, which can be downloaded from the Web site listed below. (Supported operating systems: Windows 2000, Windows XP, Windows Vista) https://eww.pavc.panasonic.co.jp/pro-av/ • Follow the - Panasonic HPX500 | Operating Instructions - Page 34
camera-recorder, see [Inspections Before Shooting] (page 137). Battery Set-up to P2 card Insertion 1 Insert a charged battery pack. 2 Turn the POWER one P2 card slot contains a P2 card, the card in the slot with the lowest number is used first. However, regardless of slot number, a P2 card inserted - Panasonic HPX500 | Operating Instructions - Page 35
P2 cards are installed, set the switches as detailed below, before starting to use your AG-HPX500P P2 CARD ACCESS LED of the selected P2 card lights orange. The slot number of the card to be recorded appears in green in the LCD monitor the setting menu SCENE FILE. 5 TCG shoot a white test subject so - Panasonic HPX500 | Operating Instructions - Page 36
4 To use the electronic shutter lamp in the viewfinder goes out. ■Operation Buttons In CAMERA mode, all operation buttons (REW, FF, PLAY, STILL, STOP) REC START/STOP button starts recording of video and sound on the P2 card. • The video and audio (including additional information) recorded - Panasonic HPX500 | Operating Instructions - Page 37
second (fps) to 60 fps. See [Video and Recording Formats] (page 45). • There Using the menus] (page 116). 2 Select the appropriate scene file using the SCENE FILE dial. • If necessary, before doing this, perform the camera settings from the setting menu, and register the scene file. See [Saving scene - Panasonic HPX500 | Operating Instructions - Page 38
Note> • In the case of a nonlinear editing system that supports Varicams equipped with an scene file using the SCENE FILE dial. • If necessary, before doing this, perform the camera settings from the setting menu, and register the scene file. 3 Using the OPERATION TYPE function on the SCENE FILE - Panasonic HPX500 | Operating Instructions - Page 39
by martial artists. If, for instance, you have shot scenes using the 24P recording format for specifying the playback frames, you video of higher quality. Using an editing system that is compatible with advanced conversion will help to produce better video quality than the normal 24P mode. • Use - Panasonic HPX500 | Operating Instructions - Page 40
is used to start recording a certain number of seconds (approx. 3 seconds for HD recordings SCENE FILE screen and REC FORMAT item in the menu option RECORDING SETUP screen are set as described below. For details on menu operation, refer to [Using the menus] (page 116). • OPERATION TYPE item: VIDEO - Panasonic HPX500 | Operating Instructions - Page 41
SCENE FILE screen and REC FORMAT item in the menu option RECORDING SETUP screen are set as described below. For details on menu operation, refer to [Using the menus] (page 116). • OPERATION TYPE item: VIDEO the REC START/STOP button. • The camera will pause recording after making a recording that - Panasonic HPX500 | Operating Instructions - Page 42
SCENE FILE screen and REC FORMAT item in the menu option RECORDING SETUP screen are set as described below. For details on menu operation, refer to [Using the menus] (page 116). • OPERATION TYPE item: VIDEO this function, turn the camera off or select NORMAL to the next). P2 cards should be inserted - Panasonic HPX500 | Operating Instructions - Page 43
lens in the CAMERA mode will automatically play back the last two seconds or so of latest clip. • Use this function to check that recording is performed normally. The camera can be used to distinguish operation, refer to [Using the menus] (page Use the setting menu refer to [Using the menus] video data - Panasonic HPX500 | Operating Instructions - Page 44
or inserted or the MCR mode has just been engaged after turning on the power, it may take some time for the camera to read clip information. If this is the case, the thumbnail screen displays "UPDATING". • If a P2 card is inserted while another P2 card is being played back, the clips on the inserted - Panasonic HPX500 | Operating Instructions - Page 45
formats Multiple HD/SD formats This unit supports recordings in 20 HD and SD video formats. 1080i/720p HD recording uses the DVCPRO HD codec, while SD recording is performed in DVCPRO50 / DVCPRO/DV multi-codec. ■Video formats and codecs supported by this camera Video format *1 Recording - Panasonic HPX500 | Operating Instructions - Page 46
Selecting video output CAMERA MODE and MCR mode allow you to select video output format. Use the setting menus listed below to select video output. Setting menu Setting Select the signal format (AUTO, 1080i, 480i/576i) CMPNT/SDI SEL to be output from the (OUTPUT SEL screen) COMPONENT OUT - Panasonic HPX500 | Operating Instructions - Page 47
recording, playback and output formats CAMERA mode (recording) ■SYSTEM recording at 24P capture*3 DVCPRO HD 720P/59.94P DVCPRO HD 720P/29.97P DVCPRO HD 720P/23.98P 4ch 4ch*5 Disabled 525i/ 59.94i 4CH or 2CH*6 Output status COMPONENT VIDEO OUT OUT 1080i/59.94i 1080i/59.94i 525i/59.94i - Panasonic HPX500 | Operating Instructions - Page 48
50i 4ch 4ch 4ch*9 Disabled 625i/ 50i 4CH or 2CH*6 Output status COMPONENT VIDEO OUT OUT 1080i/50i 1080i/50i 625i/50i 720P/50P*7 1080i/50i 625i/ 625i/ 50i 625i/ 50i 625i/50i 625i/ 50i 1394 output DVCPRO HD 1080i/50i DVCPRO HD 720P/50P*7 No output DVCPRO50, DVCPRO/DV*4 625i/50i *4 Select - Panasonic HPX500 | Operating Instructions - Page 49
Output status SDI OUT AUDIO COMPONENT OUT VIDEO Playback of 1394 OUT output 1080i/59.94i 4ch 1080i/59.94i 525i/ 59.94i DVCPRO HD 1080i/59.94i 525i/59 over 60P using a 2:2 pulldown. *3 Playback is converted to over 60P using a 2:3 pulldown. *4 Playback is converted to over 50P using a 2:2 - Panasonic HPX500 | Operating Instructions - Page 50
quality video with the AG-HPX500P/ E, the black and white balances must be adjusted according to conditions. For higher quality object (cloth or wall) may be used instead of a white pattern. The GAIN, OUTPUT and WHITE BAL switches. 4 Adjust the lens iris. • Display the center marker and adjust the - Panasonic HPX500 | Operating Instructions - Page 51
AG-HPX500P/E the first time. • Your AG-HPX500P/E has not been used for some time. • The ambient temperature has changed substantially. • The gain switchover value has been changed. • "C TEMP+7" to "C TEMP-7" will appear when COLOR TEMP of the scene the lens iris automatically becomes CLOSE. 51 Adjusting - Panasonic HPX500 | Operating Instructions - Page 52
in the memory. • Ensure that the lens connector is connected and the lens iris is CLOSE. • During a black balance adjustment, light is automatically cut off. Retaining black balances Each value in memory is retained even if the video camera-recorder is turned off. 52 Adjusting the White - Panasonic HPX500 | Operating Instructions - Page 53
50 1/60 1/120 1/250 1/500 1/1000 • In any electronic shutter mode, a slower shutter speed will reduce camera sensitivity. • In auto iris mode, a faster shutter speed will increase the aperture and lower the depth of field. • When OPERATION TYPE on the setting menu SCENE FILE screen is set to - Panasonic HPX500 | Operating Instructions - Page 54
the camera-recorder in SYNCHRO SCAN (S/S) mode. SHUTTER switch 2 In SYNCHRO SCAN mode, the speed can be switched seamlessly between 1/60.0 and 1/249.8 seconds, using the TYPE item in the setting menu SCENE FILE screen enables setting and display in opening. 54 Setting the Electronic Shutter - Panasonic HPX500 | Operating Instructions - Page 55
MAIN, USER1, and USER2 buttons can be assigned user-selected functions. Use the menu options USER MAIN, USER1, and USER2 to assign functions to METER: Assigns channel level indicator function. • MARKER: Assigns the center marker indicator function. • LCD REV: Assigns the function that flips the LCD - Panasonic HPX500 | Operating Instructions - Page 56
This AG-HPX500P/E supports independent fourchannel audio recording in any format (HD or the MONITOR SELECT CH1/2 / CH3/4 selector switch to CH3 or CH4 will result in no sound output to CH3. Use Position the MONITOR SELECT CH1/2 / CH3/4-selector switch at CH1/2 so that the audio level meter on the - Panasonic HPX500 | Operating Instructions - Page 57
the 0 dB bar. CH1 CH2 When operating the AG-HPX500P/E without a sound recordist, it is recommended that the FRONT AUDIO LEVEL control should be used to adjust the audio level. In advance, check the level meter in the viewfinder screen and use the FRONT AUDIO LEVEL control to adjust the appropriate - Panasonic HPX500 | Operating Instructions - Page 58
the year, month, day and time from the internal clock to display on video in the LCD, viewfinder and VIDEO OUT and other video output. • The internal clock is not only used to calculate the free run time code when the power is off and to set the user bit year, date and time, but - Panasonic HPX500 | Operating Instructions - Page 59
at 30) - (Playback*8: 30/24 switchable) Not recorded Not recorded (playback: frame rate data is converted and generated in synch with video pull-down) 1080i/50i Not 50 Hz CAMERA mode 1080i/25P 720P/50P 720P/25P 720P/25PN 576i/50i 576i/25P 50 Hz MCR mode (recording of 1394 input) 1080i - Panasonic HPX500 | Operating Instructions - Page 60
camera capture. A natively recorded clip is output at the same frame rate as the user bit in the VIDEO AUX area regardless of recorded values. Use this setting when a PC or other editing device is to use • UB PRESET is performed • CAMERA/MCR mode switching • The power is turned off The internal user - Panasonic HPX500 | Operating Instructions - Page 61
video information is recorded in the user bits to allow use in an editing device (PC editing software). In CAMERA mode recording, this information is always recorded in the VIDEO at F Media management data • Frame update information • Recording start/ stop mark Camera capture mode • 60i: 600 • 60P - Panasonic HPX500 | Operating Instructions - Page 62
50P (2:2) Time code digit 00 01 02 ... Video AABBCC ... Updated frame information 10 10 10 ... Setting the Time the SET button to confirm the time code setting, and use the TCG switch to select a time code. • [F-RUN] code generator functioning. When the POWER switch has been switched ON → OFF - Panasonic HPX500 | Operating Instructions - Page 63
24 frames and output uses a 2:3 pull-down camera operates in Rec Run mode and the time code output at start of recording matches the recording time code. • This is also the case for other than 30P capture at 30PN and other than 25P capture at 25PN. 24PN recording at 60P capture Rec start Video - Panasonic HPX500 | Operating Instructions - Page 64
Locking the Time Code The time code generator built into your AG-HPX500P/ E may be locked with an external generator. It is one being used as the reference device. Reference device VIDEO OUT TC OUT TC IN GENLOCK IN VIDEO OUT TC OUT TC IN GENLOCK IN VIDEO OUT TC OUT Different camera 64 Setting Time - Panasonic HPX500 | Operating Instructions - Page 65
camera picture or playback picture, set the setting menu TC VIDEO SYNCRO (OUTPUT SEL) to VIDEO OUT. Set also the setting menu GL SELECT (OTHER FUNCTIONS) to SDI or COMPOSITE to suit video output. AG-HPX500P/E SDI OUT or VIDEO OUT TC OUT TC IN TC VIDEO SYNCRO setting: VIDEO OUT VIDEO IN SDI IN HD - Panasonic HPX500 | Operating Instructions - Page 66
OUT SD (480i, 576i) SDI COMPOSITE Disabled Disabled ❍ × × ❍ ❍ ❍ (1) ■Connection diagram (1) TC HD signal or SD signal TC IN GENLOCK SDI or VIDEO OUT AG-HPX500P/E TC OUT REF VTR, etc. Counter Setting and Display Pressing the COUNTER button to view the counter displays the counter value - Panasonic HPX500 | Operating Instructions - Page 67
illustrated below. 2 3 4 The illustration above shows the supplied viewfinder and the optional AG-VF11G viewfinder, which is equivalent to the supplied one. When using a viewfinder other than these two viewfinders, see the Operating Instructions provided with that viewfinder. 1 TALLY/REC (recording - Panasonic HPX500 | Operating Instructions - Page 68
TC ) appear. When the HOLD button is used to temporarily stop the indication, the HOLD indication blinks. 2 Warnings • P2 : Flashes when no P2 card is inserted or the card is write protected. • P2 FULL: Blinks when there is no remaining capacity in the P2 card. • P2 LACK: Blinks in the loop rec mode - Panasonic HPX500 | Operating Instructions - Page 69
HD format • HD720P: Records in the 720P DVCPRO HD CAMERA power displays the color temperature when COLOR TEMP in the setting menu SCENE FILE Hours VIDEO CAM mode and shutter opening angle (degrees) in FILM CAM mode. 12 Audio level meter lens is set to manual iris, but does not function. 69 - Panasonic HPX500 | Operating Instructions - Page 70
" is shown when the AC adapter is used. 17 Text memo and shot mark indicator Scene file name display Indicates name of SCENE FILE (F1 to F6). 24 Media remaining memory display • Setting the setting menu P2 single clips Not displayed when the LCD is off in CAMERA mode. (But displayed when pre- - Panasonic HPX500 | Operating Instructions - Page 71
CANNOT REPAIR Cannot repair clips. • CARD FULL The P2 card does not have enough free space for recording. • WRITE PROTECTED The P2 card or SD memory card is writeprotected. • NO CARD A P2 card or SD memory card has not been inserted. • NO FILE There are no files (version upgrade files, etc.). P2 card - Panasonic HPX500 | Operating Instructions - Page 72
, P2 card, tape, or other component. If the problem is not fixed by turning the power off is changed. • SCENE ******: Displays the name of a scene file selected by turning the SCENE FILE dial. • ND menu VF! LED screen settings. • GAIN: Indicates the camera is using a gain value other than 0 dB. • AWB: - Panasonic HPX500 | Operating Instructions - Page 73
Display the following items on the viewfinder and LCD monitor screen by pressing the DISP/MODE CHK button or 11 Shutter speed 12 Audio level meter display 13 IRIS display 14 Zoom indication 3 × 22 Center marker display 23 Scene file name display 24 Media remaining memory - Panasonic HPX500 | Operating Instructions - Page 74
Displays Turn marker display on or off. Select the display mode from the setting menu DISPLAY SETUP screen. For directions on navigating the menu, see [Using the menus] (page 116). DISPLAY SETUP ZEBRA DETECT MARKER SAFETY ZONE DATE/TIME LEVEL MATER ZOOM CARD/BATT P2CARD REMAIN 80% ON 90% OFF ON - Panasonic HPX500 | Operating Instructions - Page 75
Adjusting and setting the LCD monitor Chapter 4 Adjustments and Settings for Recording Using the LCD Monitor 1 Turn on the POWER switch of the AGHPX500P/E. 2 Slide the OPEN button in the arrow ➀ direction to open the LCD monitor. 1 The LCD monitor opens to an angle of 120 degrees. Attempts - Panasonic HPX500 | Operating Instructions - Page 76
moisture with a soft, dry cloth. • When the camera-recorder is very cold, the video image in the LCD monitor will appear slightly darker immediately after the power is turned on. Once the interior of the camera-recorder warms up, the LCD monitor delivers normal brightness. • When the SAVE switch is - Panasonic HPX500 | Operating Instructions - Page 77
files are configured as shown below. AG-HPX500P/E SCENE FILE (Factory defaults) SCENE FILE (Current operating status values) SCENE FILE (Saved camera values) F1 Default value F2 Default value SCENE FILE screen INTIAL *1 F1 Current value F2 Current value SCENE FILE screen LOAD/SAVE *1 F1 Saved - Panasonic HPX500 | Operating Instructions - Page 78
an SD memory card. CARD FUNCTIONS SCENE FILE USER FILE YES SD CARD FORMAT PUSH MENU TO RETURN For an SD memory card formatted with a device that does not support SD/SDHC standards, the message "FORMAT ERROR" appears at the upper right of the screen. In this case, reformat the card as follows - Panasonic HPX500 | Operating Instructions - Page 79
: SCENE File suitable for normal shooting. • F2: SCENE FLUO. File suitable for shooting under fluorescent lights, ie. indoors. • F3: SCENE SPARK File suitable for SD shooting with fuller variations of resolution, coloring and contrast. • F4: SCENE B-STR File for broadening the contrast of dark parts - Panasonic HPX500 | Operating Instructions - Page 80
SCENE FILE screen. 3 Turn the JOG dial button to move the cursor to the option NAME EDIT. Then, press the JOG dial button. For details on menu operation, refer to [Using the menus] (page 116). SCENE retained after a power down and is not affected by dial position. Items set for the scene file are - Panasonic HPX500 | Operating Instructions - Page 81
scene file to the camera. 1 Turn the JOG dial button to move the cursor to the option LOAD/SAVE/INT. Then, press the JOG dial button. For details on menu operation, refer to [Using the menus] (page 116). SCENE menu level above, press the MENU button. SCENE FILE SAVE ? YES PUSH DIAL NO PUSH - Panasonic HPX500 | Operating Instructions - Page 82
• In the case of the scene files, the scene files. 1 Set the unit's POWER switch to ON. 2 Select SCENE FILE on the setting menu CARD FUNCTIONS screen, select YES, and press the JOG dial button. For details on menu operation, refer to [Using the menus] (page 116). CARD FUNCTIONS SCENE FILE USER FILE - Panasonic HPX500 | Operating Instructions - Page 83
SD/SDHC memory cards and mini SD cards is recommended. The latest information on memory cards that can be used in the camera is provided at our P2 Support Web site. See below. https://eww.pavc.panasonic.co.jp/pro-av/ • The SDHC (SD High Capacity) card is a new standard, established by the SD - Panasonic HPX500 | Operating Instructions - Page 84
with the battery charger before using it. (Please refer to the battery charger's instruction manual for information about charging.) Mounting the Battery and Setting the Battery Type Using an Anton/Bauer Battery Pack 1 Mount an Anton/Bauer battery pack. Power supply output connector for lighting - Panasonic HPX500 | Operating Instructions - Page 85
/Bauer batteries can be used: • PROPAC14 • TRIMPAC14 • HYTRON50 • HYTRON140 • DIONIC90 • DIONIC160 Battery holder 2 Mount the NP-1 type battery case on the camera-recorder. ➀Tighten the mounting screws. ➁Tighten the power contact screws. ➂Insert the upper part of the removed cover in the direction - Panasonic HPX500 | Operating Instructions - Page 86
When using a V-mount type battery pack Mount the V-mount adapter plate. Insert the plate and slide it as shown below. Use of the external DC power supply 1 Connect the external DC power supply to the DC IN socket on the unit. Attach the two ferrite cores (provided) to both ends of the DC cable in - Panasonic HPX500 | Operating Instructions - Page 87
power supply are connected, power is supplied from the external DC power supply. The battery can be removed or mounted while using an external DC power supply. • When using an external DC power supply, make sure you turn on the external DC power supply before turning on the camera-recorder's power - Panasonic HPX500 | Operating Instructions - Page 88
the optional AG-VF11G viewfinder, which is equivalent to the supplied one. When using a viewfinder other than these two viewfinders, see the Operating Instructions provided with that viewfinder. • Note that old attachment models are not supported. Mounting the Viewfinder 1 Confirm that the POWER switch is - Panasonic HPX500 | Operating Instructions - Page 89
the viewfinder. Diopter adjusting ring Screen Adjustments Use the following controls to adjust viewfinder screen. • Brightness: Turn the BRIGHT control. • Contrast: Turn the CONTRAST control. • Peaking: Turn the PEAKING control. 1 Turn on the POWER switch on the camera. 2 Set the OUTPUT switch of the - Panasonic HPX500 | Operating Instructions - Page 90
securing screw counterclockwise, slide the viewfinder in the direction of the arrow and remove it. Loosen Viewfinder securing screw 4 Disconnect the viewfinder cable and microphone cable from the clamp and remove them. 90 Mounting the Viewfinder and Adjusting its Position - Panasonic HPX500 | Operating Instructions - Page 91
mark of the lens. Mark 4 Secure the cable through the cable clamp, and plug it into the LENS connector. LENS Connector 5 Adjust the lens flange back. • Please refer to the lens instruction manual for guidance on lens handling. • When the lens is removed, install the mount cap to protect the - Panasonic HPX500 | Operating Instructions - Page 92
as long as the same lens is mounted on the camera. Please also refer to the lens instruction manual for directions on adjustment and locations of individual lens parts. 1 Mount the lens on the camera. • Make sure you connect the lens cable. 2 Set the lens iris to manual, and fully open the - Panasonic HPX500 | Operating Instructions - Page 93
Mount a lens on the camera. • Do not forget to connect the lens cable. (2) Turn off the electronic shutter and set the gain to L (0 dB). (3) If the lens comes with an extender, disengage it. (4) Open the setting menu LENS SETUP screen and select USER1, USER2 or USER3 under SHADING SELECT. (5) Use - Panasonic HPX500 | Operating Instructions - Page 94
lens iris to manual and adjust the iris so that a zebra pattern fills the entire viewfinder screen. • When the piece of paper is unevenly lit, the zebra pattern will not cover and should not be used for this adjustment. • Adjust the light source if the lens iris is out of Mounting and Adjusting the Lens - Panasonic HPX500 | Operating Instructions - Page 95
select. 3 CAC data specified by 2 4 Error messages The file cannot be used if an error message appears. Initialize the CAC data or reload the CAC file from an SD card. For details, see [Initializing CAC File] (page 97) or [Loading CAC File from an SD Card] (page 96). 95 Mounting and Adjusting the Lens - Panasonic HPX500 | Operating Instructions - Page 96
file before loading the new file. For details, see [Deleting CAC File] (page 96). • "READ NG FORMAT ERROR" indicates the file cannot be used and will not be loaded. Make sure the file is in a format the camera supports and that the file on the SD card is not corrupted. 96 Mounting and Adjusting the Lens - Panasonic HPX500 | Operating Instructions - Page 97
details on menu operation, refer to [Using the menus] (page 116). 2 Use the JOG dial button to select CAC FILE INIT. Then select YES to display the confirmation screen. LENS SETUP SHADING SELECT SHADING(USER) CAC PROPERTY CAC CARD READ CAC FILE DELETE CAC FILE INIT IRIS ADJUST DEFAULT YES PUSH - Panasonic HPX500 | Operating Instructions - Page 98
steps to prepare the camera for connecting audio input devices. When Using the Front Microphone The AJ-MC200G microphone kit (optional) includes a microphone that can be mounted on the camera. 1 Open the microphone holder. Viewfinder Microphone holder 3 Connect the microphone cable to the MIC IN - Panasonic HPX500 | Operating Instructions - Page 99
Chapter 5 Preparation When Using Audio Devices 1 Connect the audio device to the AUDIO IN jack with the XLR cable. 2 Set the AUDIO IN switch to [REAR] for the channel to which the XLR cable is connected. 3 Set the LINE/MIC/+48V selector switch on the rear panel to [LINE]. LINE/MIC/+48V Selector - Panasonic HPX500 | Operating Instructions - Page 100
Chapter 5 Preparation Attaching Accessories Mounting the Camera on a Tripod When mounting the camera on a tripod, use the tripod adapter supplied with the camera. 1 Mount the tripod adapter on the tripod. 2 Mount the camera on the tripod adapter. • Slide the camera forward along the grooves until - Panasonic HPX500 | Operating Instructions - Page 101
Press to open the hook. Make sure that the shoulder strap is securely attached. Attaching the Rain Cover Screw Marks Screw (Accessory) Remove the screw in the center of the FRONT AUDIO LEVEL control, and attach the accessory knob using the screw (included). When attaching the knob, be sure - Panasonic HPX500 | Operating Instructions - Page 102
, the values adjusted or set using the AJ-RC10G are retained, even after the camera power switch is turned OFF. • The USER switch on the camera does not function when the AJ-RC10G is connected. • Refer to the Operating Instructions of the AJ-RC10G incuded in the supplied CD-ROM. 102 Connecting the - Panasonic HPX500 | Operating Instructions - Page 103
using the cursor and SET buttons, while checking the images displayed on the LCD monitor: ●Play back, delete and repair clips ●Add or delete a shot mark and text memo on the clip thumbnail. ●Format P2 SETUP EXIT DELETE FORMAT REPAIR CLIP REPAIR CLIP (LOOP) - Panasonic HPX500 | Operating Instructions - Page 104
LCD monitor using the AJ two P2 cards power was cut off during the recording process, for instance. • Clips indicated by the yellow defective clip indicator can be repaired camera.) For detailed explanations on V , T , E , and P , refer to the Operating Instructions supplied with the devices used - Panasonic HPX500 | Operating Instructions - Page 105
MODE button to enter the MCR mode. • The thumbnail screen appears on the LCD monitor. 2 Press the thumbnail menu button to open the menu. • ALL CLIP: of the clips are displayed. • SLOT CLIPS: Display clips recorded in the P2 card inserted in the specified slot. • SETUP: Various setup operations are - Panasonic HPX500 | Operating Instructions - Page 106
mode can be customized to suit your preferences. 1 Press the MODE button to enter the MCR mode. • The thumbnail screen appears on the LCD monitor. 2 Press the thumbnail menu button to open the menu. 3 Select THUMBNAIL → SETUP. • DATE FORMAT: You can specify the display order for the shooting - Panasonic HPX500 | Operating Instructions - Page 107
to a clip thumbnail to distinguish this clip from the others. 1 Press the MODE button to enter the MCR mode. • The thumbnail screen appears on the LCD monitor. 2 Use the cursor buttons to move the pointer over the clip to which you want to attach a shot mark. 3 Press the USER button to which the - Panasonic HPX500 | Operating Instructions - Page 108
of the P2 card being LCD monitor. 2 Use the cursor buttons to move the pointer over the clip you want to restore (defective clips are indicated by corrupt clip marks), and press the SET button. • Press the SET button to select the clip. 3 Press the thumbnail menu button to select OPERATION → REPAIR - Panasonic HPX500 | Operating Instructions - Page 109
screen appears on the LCD monitor. 3 Press the thumbnail Using the latest update version of P2 viewer, metadata upload files can be written to SD memory cards using a PC. • Download the latest update version of P2 viewer from the following URL and install it to your PC: https://eww.pavc.panasonic - Panasonic HPX500 | Operating Instructions - Page 110
8 GB or more is used in this unit and a one-time continuous recording exceeds the prescribed duration (approx. 5 minutes for DVCPRO HD, approx. 10 minutes for DVCPRO50, or approx. 20 minutes for DVCPRO/DV) or when a onetime recording extends over more than one P2 card, the recording concerned will - Panasonic HPX500 | Operating Instructions - Page 111
1st card Clip 2 COUNT value = 0002 2nd card If the clip thumbnails are displayed as shown in the example above or their properties are indicated using a P2 device, the thumbnail and COUNT value of clip 1 will be displayed. Clear the uploaded metadata Select META DATA →INITIALIZE, and press the SET - Panasonic HPX500 | Operating Instructions - Page 112
LCD monitor. 2 Press the thumbnail menu button to open the menu. 3 From the menu bar, select OPERATION → FORMAT. • The following screen appears. Select the slot number for the P2 SDCARD". • Select "EXIT" if formatting is not required. 4 Use the CURSOR and SET buttons to select YES in the screen that - Panasonic HPX500 | Operating Instructions - Page 113
(remaining free space or used memory capacity) for the P2 card status display. 1 Press the MODE button to enter the MCR mode. • The thumbnail screen appears on the LCD monitor. 2 Press the thumbnail menu button to open the menu. 3 Select PROPERTY → PROPERTY SETUP → P2CARD CAP. • The following screen - Panasonic HPX500 | Operating Instructions - Page 114
indicator moves to the right as the used memory capacity increases. The following indications may appear, depending on the card status: • FORMAT ERROR: An unformatted P2 card is inserted. • NOT SUPPORTED: An unsupported card is inserted in the camera. • NO CARD: P2 cards are not inserted. Press the - Panasonic HPX500 | Operating Instructions - Page 115
used memory capacity. 5 Warning card mark The mark appears when the following P2 cards are inserted. • DIR ENTRY NG • RUN DOWN CARD Use the 2 P2 SD standard (SUPPORTED/NOT SUPPORTED). For an SDHC card, the space of 32 KB remains used even after being formatted. • USED: Space used • BLANK: - Panasonic HPX500 | Operating Instructions - Page 116
or longer. • The function screen appears in the viewfinder and on the LCD screen. CAMERA MENU 1.SCENE FILE 2.CAMERA SETUP 3.SW MODE 4.RECORDING SETUP 5.AUDIO SETUP 6.OUTPUT SEL 7.DISPLAY SETUP 8.VF!LED PUSH MENU TO EXIT 2 Use the JOG dial button (or the Up and Down cursor buttons) to highlight the - Panasonic HPX500 | Operating Instructions - Page 117
USER2 6dB 12dB 3.2K SPOTLIGHT GAIN:18dB SLOTSEL PUSH MENU TO RETURN 5 Use the JOG dial button (or the SET button) to change the setting initialize the scene file From the 6 scene files, select the one you want to initialize with the SCENE FILE dial. Then in the SCENE FILE screen, LOAD LCD Menus - Panasonic HPX500 | Operating Instructions - Page 118
7 Menu Operations Setup menu structure Camera (CAM) mode menu CAMERA MENU SCENE FILE CAMERA SETUP SW MODE RECORDING SETUP AUDIO 25M REC CH SEL TEST TONE F.MIC POWER1 F.MIC POWER2 R.MIC POWER F.MIC CH1 LEVEL F.MIC CH2 LEVEL R.MIC CH1 LEVEL R.MIC CH2 LEVEL HEADROOM MONITOR MODE GAIN WHITE SHUTTER - Panasonic HPX500 | Operating Instructions - Page 119
BATTERY SETUP CARD FUNCTIONS LENS SETUP OTHER FUNCTIONS OPTION MENU MCR mode menu MCR MENU RECORDING SETUP OUTPUT SEL DISPLAY SETUP SCENE FILE USER FILE SD CARD FORMAT SHADING SELECT SHADING (USER) CAC PROPERTY CAC CARD READ CAC FILE DELETE CAC FILE INIT IRIS ADJUST USER FILE 1394 CONTROL 1394 CMD - Panasonic HPX500 | Operating Instructions - Page 120
used in the list : Indicates that the item can be set in the CAMERA mode. : Indicates that the item can be set in the MCR mode. / : Indicates that the item can be set in both CAMERA and MCR modes. SCENE FILE at which the set values change. ●When VIDEO CAM is selected as the OPERATION TYPE option - Panasonic HPX500 | Operating Instructions - Page 121
, images with a higher resolution will be obtained with the THIN or MID setting than with the THICK setting. Edits the name of the selected scene file you have selected with the scene file dial. * The gamma curve is fixed to CINELIKE V at a gain setting of 18 dB. CAMERA SETUP screen Item ASPECT CONV - Panasonic HPX500 | Operating Instructions - Page 122
disordered for a moment. ●TEXT MEMO: Text memo recording ●SLOT SEL: Selects one of the P2 card slots. ●SHOT MARK: Shot mark recording ●LVL METER: Displays the level for channels other than those set in the menu. ●MARKER: Displays markers. ●LCD REV: Displays an upside down and reversed image on the - Panasonic HPX500 | Operating Instructions - Page 123
recording format for P2 card. ●59. are used when no HD SDI input) for backing up data, set UB MODE to FRM.RATE to enable control of recording start/stop from the camera. The external device has to be set up when automatic recording is desired. For details, refer to the Operating Instructions supplied - Panasonic HPX500 | Operating Instructions - Page 124
settings.) Selects whether slave-locked time code input via the 1394 connector is used or not when the TCG switch is set to F-RUN. ●1394: Records to FRONT2 will not output a test tone. F.MIC POWER1 Turns on and off the phantom power supply for the front microphone connected to CH1. ●ON, - Panasonic HPX500 | Operating Instructions - Page 125
LEVEL R.MIC CH1 LEVEL R.MIC CH2 LEVEL HEADROOM MONITOR MODE Description of settings (Items in bold are factory settings.) Turns on and off the phantom power supply for the front microphone connected to CH2. ●ON, OFF Turns on and off the phantom power supply for the rear microphone. ●ON, OFF Selects - Panasonic HPX500 | Operating Instructions - Page 126
LCD monitor. ●LCD COLOR LEVEL, LCD BRIGHTNESS ,LCD CONTRAST Select to set respective value using the right and left cursor keys. SELF SHOOT Selects the LCD of the screen when images are displayed at a 16:9 aspect ratio. No parts of the images are missing. MENU BACK / Selects whether to lower the - Panasonic HPX500 | Operating Instructions - Page 127
are factory settings.) EXT DC IN SEL / Selects external DC power supply type. ●AC ADPT: AC adapter ●BATTERY: battery Selects battery type NP-L7, ENDURA7, ENDURA10, ENDURA-D, PAG L95, BP-GL65/95 ●MANUAL: Manually enter near end voltage. PROPAC14 NEAR Sets near end voltage for PROPAC14 ( - Panasonic HPX500 | Operating Instructions - Page 128
SCENE FILE Reads/writes a scene file from/onto the SD memory card. ●READ: Loads the selected scene LENS SETUP screen Item SHADING SELECT SHADING (USER) CAC PROPERTY CAC CARD READ CAC FILE DELETE CAC FILE currently used CAC file number and content of CAC file currently loaded in the camera. ●----: - Panasonic HPX500 | Operating Instructions - Page 129
using the 1394 connector. Enables or disables the access LED. The L-SIDE is the P2 card slot side. (ON: LEDs turn on and blink normally. OFF: LEDs always stay off.) ●OFF L-SIDE: OFF R-SIDE: OFF ●SLOT SIDE L-SIDE: ON R-SIDE: OFF ●LCD Hz (AG-HPX500P) ●59.94 Hz, 50 Hz (AG-HPX500E) 129 Setup menu list - Panasonic HPX500 | Operating Instructions - Page 130
status by pressing and holding down the DISP/MODE CHK button. Use this screen to confirm the connection status during nonlinear editing. signal being input or output via the IEEE 1394 digital interface ●VIDEO: status of the video signal being input or output ●AUDIO: status of the audio signal - Panasonic HPX500 | Operating Instructions - Page 131
accessory P2 software for AGHPX500P/E on the PC. Select AG-HPX500 for the USB driver during installation. Refer to the Installation Manual for the details. • A USB driver must be installed on the PC. • The camera is only compatible with USB 2.0. Use a PC that supports USB 2.0. • Only one AG - Panasonic HPX500 | Operating Instructions - Page 132
Operating Instructions supplied with the PC. • Do not remove P2 cards when using POWER switch OFF. 2 Open the setting menu screen and set the menu option PC MODE to 1394DEVICE. For details on menu operation, refer to [Using the menus] (page 116). OTHER FUNCTIONS USER FILE - Panasonic HPX500 | Operating Instructions - Page 133
disk (1394.a SBP2 compliant), connect the IEEE1394 cable, and then turn on this unit. 2 Open , refer to [Using the menus] (page 116). OTHER FUNCTIONS USER FILE 1394 CONTROL 1394 CMD the POWER switch off when copying completes. To check data copied to hard disk After completing step 4, use the - Panasonic HPX500 | Operating Instructions - Page 134
cables, do not remove a P2 card that is involved in any of these activities and do not power off this unit and the hard disk. Any of these operations will require turning once off the camera repair bad clips on a P2 card before copying them. • Use a stable power supply • MISMATCH COMPONENT! There is - Panasonic HPX500 | Operating Instructions - Page 135
kHz/4CH (16 bit) on a P2 card. • It is not possible to use the GENLOCK IN connector to synchronize to an external reference signal. • Signals output from the VIDEO OUT or AUDIO OUT connectors differ from actual input signals. Use such signals for monitoring. • The following functions do not operate - Panasonic HPX500 | Operating Instructions - Page 136
video and audio signals are output via the IEEE 1394 interface during special playback. When monitored on another device, these video camera does not supply power via the cable. • Observe the following in connections using a 1394 cable controlling a P2 memory card camera-recorder using PC application - Panasonic HPX500 | Operating Instructions - Page 137
you check that the system is operating normally before embarking on a shoot. We recommend using a colour video monitor to check the image. Preparing for Inspections 1 Mount a charged battery pack. 2 Turn the POWER switch to ON to check the battery remaining level in the viewfinder. • When battery - Panasonic HPX500 | Operating Instructions - Page 138
the P2 access LED is on and showing orange, and the REC lamp in the viewfinder is turned off. 6 Using the REC START/STOP button on the handle, repeat Steps 4 to 5 to check the same operation. • Check the VTR button on the lens in the same way. 7 When a lens with an extender is mounted - Panasonic HPX500 | Operating Instructions - Page 139
with external power supply. 4 Aim the microphone at the sound source and check that the sound level indication in the LCD or viewfinder varies with changes in sound intensity. • The channels can also be checked separately by connecting a single microphone to each channel. 5 Set the MONITOR SELECT - Panasonic HPX500 | Operating Instructions - Page 140
switch to [R-RUN]. • Press the COUNTER button to display the time code on the LCD monitor or in the viewfinder. 4 Press the REC START/STOP button. • Check that down the DISP/MODE CHK button to check the date and time on the LCD monitor or in the viewfinder. • Adjust the date and time setting if the - Panasonic HPX500 | Operating Instructions - Page 141
the viewfinder or LCD monitor indicates that the internal battery is exhausted. Follow the steps below to recharge the battery. Set the date and time when the battery has been fully charged. 1 Connect the camera to an external power source. • Leave the POWER switch on the camera off. Eyepiece Lock - Panasonic HPX500 | Operating Instructions - Page 142
per second Blinks 4 times per second removed during Continuous access and card data tone was corrupted. All four access LEDs Turn off the power. Repair the P2 card if the clips on the card are corrupted. LOW BATTERY blink orange (4 Hz) Red blinking, and the battery level 3 The battery is - Panasonic HPX500 | Operating Instructions - Page 143
is output. Perform either of the following procedures to cancel this warning. • Press a playback control button. • Press the MODE (CAMERA/MCR/PC) button. • Remove the P2 card and insert another card. *4 Perform either of the following procedures to cancel this warning. • Press the REC START/STOP - Panasonic HPX500 | Operating Instructions - Page 144
on the update procedure, visit the above site. • The camera driver may not install properly if the power supply is not constant during installation. Be sure to provide a steady power supply throughout installation by using an external DC power supply, for example. • The camera uses only SD - Panasonic HPX500 | Operating Instructions - Page 145
10 Chapter Specifications Dimensions and specifications Dimensions 440mm (17-3/8 inches) 240mm (9-1/2 inches) 261mm (10-3/8 inches) 318mm (12-5/8 inches) 140mm (5-5/8 inches) Chapter 10 Specifications 145 Dimensions and specifications - Panasonic HPX500 | Operating Instructions - Page 146
parts) Camera Unit Pickup devices: Lens mount: Color separation optical system: ND filter: Gain settings: Shutter speed (preset): Shutter speed (Synchro scan): Shutter speed (slow): Shutter opening angle: Frame rates: Sensitivity: CCD image sensor OPERATION TYPE in the SCENE FILE screen is set to - Panasonic HPX500 | Operating Instructions - Page 147
cannot be used) • 1 slot (for reading and writing camera setup data) * The recording time represents one shot continuously recorded on a P2 card. The recording time may be shorter depending on the number of shots recorded. ■HD video system Sampling frequency: Quantizing: Video compression system - Panasonic HPX500 | Operating Instructions - Page 148
2.0) LCD Monitor LCD monitor: 3.5-inch LCD color monitor, 210,000 pixels (4:3) Accessories Accessories: • 1.5-inch viewfinder (4:3 CRT, NTSC/PAL switchable) • Shoulder strap • Ferrite core (2) • Front Audio Level control knob (page 101) • Control knob mounting screw • Component video cable • PIN - Panasonic HPX500 | Operating Instructions - Page 149
use correct polarity when using external power supplies. FRONT MIC IN 1 GND 2 AUDIO IN (H) 3 AUDIO IN (C) Panasonic Part No. K1AB103B0013 Manufacturer Part 6 R/C VIDEO OUT 7 R/C VIDEO GND 8 NC 9 UNREG 12V (max. 0.6 A) 10 GND Panasonic Part No. K1AY110JA001 Manufacturer Part No. - Panasonic HPX500 | Operating Instructions - Page 150
A for the supplied viewfinder (max. 0.3 A) 3 NC 4 B-Y GND 5 R-Y GND 6 VF VIDEO 7 VIDEO GND 8 VF CLK 9 VF WR 10 VF DATA 11 UNREG GND 12 ZEBRA SW 13 NC 14 NC 15 NC 16 NC 17 NC 18 NC 19 NC 20 Chassis ground Panasonic Part No. K1AB102H0001 Manufacturer Part No. HR12 - Panasonic HPX500 | Operating Instructions - Page 151
MEMO 151 - Panasonic HPX500 | Operating Instructions - Page 152
the products and/or accompanying documents means that used electrical and electronic products should not be mixed hour parts orders (800) 334-4881 TECHNICAL SUPPORT: Emergency 24 Hour Service (800) 222-0741 Panasonic Canada Inc. 5770 Ambler Drive, Mississauga, Ontario L4W 2T3 (905) 624-5010 Panasonic
-
 1
1 -
 2
2 -
 3
3 -
 4
4 -
 5
5 -
 6
6 -
 7
7 -
8
-
9
-
10
-
11
-
12
-
13
-
14
-
15
-
16
-
17
-
18
-
19
-
20
-
21
-
22
-
23
-
24
-
25
-
26
-
27
-
28
-
29
-
30
-
31
-
32
-
33
-
34
-
35
-
36
-
37
-
38
-
39
-
40
-
41
-
42
-
43
-
44
-
45
-
46
-
47
-
48
-
49
-
50
-
51
-
52
-
53
-
54
-
55
-
56
-
57
-
58
-
59
-
60
-
61
-
62
-
63
-
64
-
65
-
66
-
67
-
68
-
69
-
70
-
71
-
72
-
73
-
74
-
75
-
76
-
77
-
78
-
79
-
80
-
81
-
82
-
83
-
84
-
85
-
86
-
87
-
88
-
89
-
90
-
91
-
92
-
93
-
94
-
95
-
96
-
97
-
98
-
99
-
100
-
101
-
102
-
103
-
104
-
105
-
106
-
107
-
108
-
109
-
110
-
111
-
112
-
113
-
114
-
115
-
116
-
117
-
118
-
119
-
120
-
121
-
122
-
123
-
124
-
125
-
126
-
127
-
128
-
129
-
130
-
131
-
132
-
133
-
134
-
135
-
136
-
137
-
138
-
139
-
140
-
141
-
142
-
143
-
144
-
145
-
146
-
147
-
148
-
149
-
150
-
151
-
152
 |
 |

Before operating this product, please read the instructions carefully and save this manual for future use.
S0407T1067 -P
D
Printed in Japan
VQT1G18-1
ENGLISH
Operating Instructions
Memory Card Camera-Recorder
FRANÇAIS
Pour des explications en français, veuillez vous reporter au CD-ROM fourni.
Model No.
AG-HPX500P
Model No.
AG-HPX500E