Panasonic PVGS59 Digital Video Camera - English/ Spanish
Panasonic PVGS59 - DIGITAL VIDEO CAMERA Manual
 |
View all Panasonic PVGS59 manuals
Add to My Manuals
Save this manual to your list of manuals |
Panasonic PVGS59 manual content summary:
- Panasonic PVGS59 | Digital Video Camera - English/ Spanish - Page 1
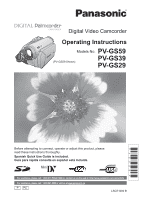
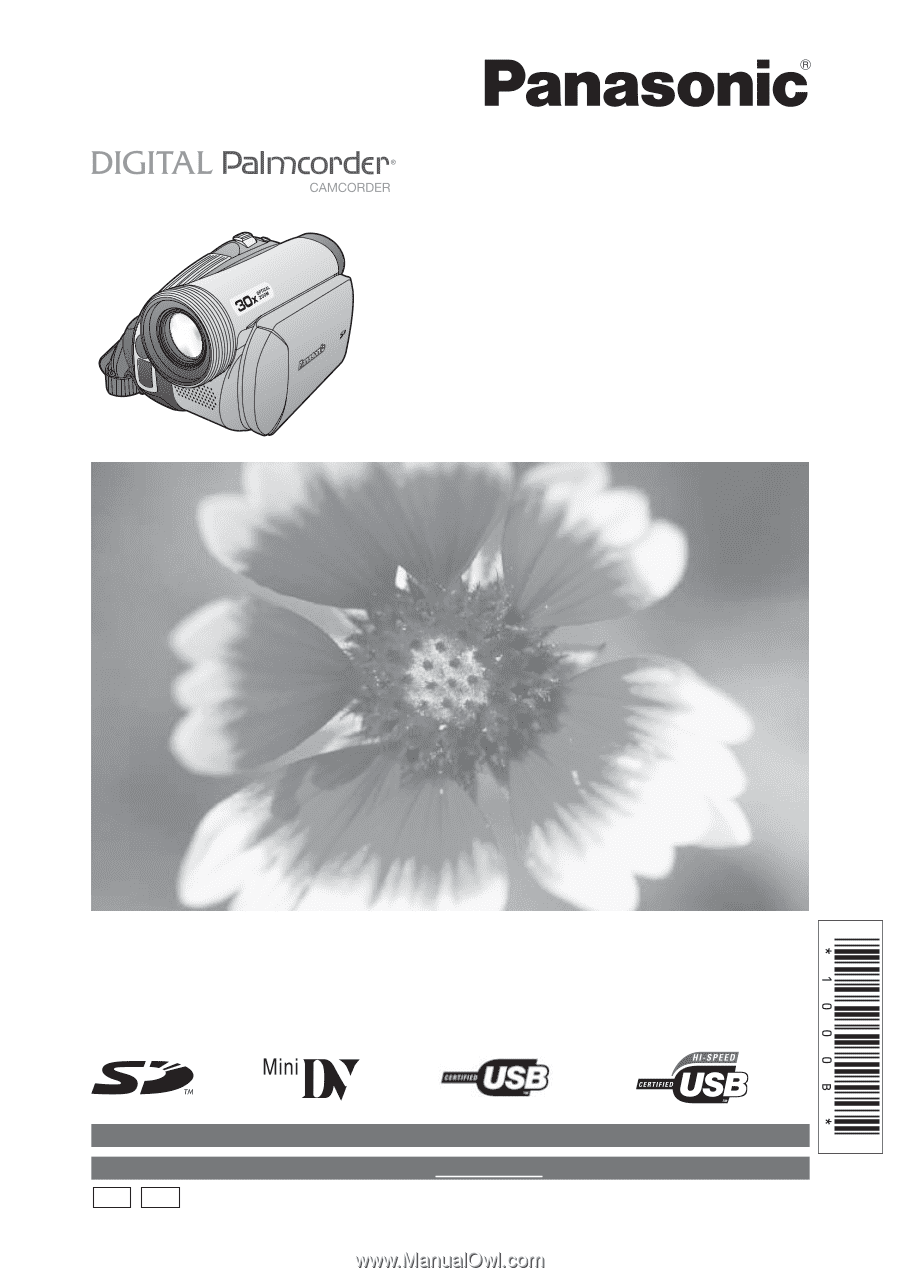
Digital Video Camcorder Operating Instructions Models No. PV-GS59 (PV-GS59 Shown) PV-GS39 PV-GS29 Before attempting to connect, operate or adjust this product, please read these instructions thoroughly. Spanish Quick Use Guide is included. Guía para rápida consulta en español está incluida. - Panasonic PVGS59 | Digital Video Camera - English/ Spanish - Page 2
serial number is on the tag located on the underside of your Camcorder. Be sure to retain this manual as your convenient Camcorder information source. Date of Purchase Dealer Purchased From Dealer Address Dealer Phone No. Model No. Serial No. Safety Precautions WARNING : TO PREVENT FIRE OR SHOCK - Panasonic PVGS59 | Digital Video Camera - English/ Spanish - Page 3
: Panasonic Model No. : PV-GS29/PV-GS39/PV-GS59 Responsibility Party : Panasonic Corporation of North America Address : One Panasonic Way Secaucus for help. FCC Caution: To assure continued compliance, follow the attached installation instructions and use only shielded interface cables when - Panasonic PVGS59 | Digital Video Camera - English/ Spanish - Page 4
Install in accordance with the manufacturer's instructions. 8) Do not install near any the apparatus. 11) Only use attachments/accessories specified by the manufacturer. 12) Use only of time. 14) Refer all servicing to qualified service personnel. Servicing is required when the apparatus has been - Panasonic PVGS59 | Digital Video Camera - English/ Spanish - Page 5
. Do not attempt to disassemble this unit. There are no user serviceable parts inside. Unplug your Camcorder from the power supply before cleaning. CAUTION ●DO NOT AIM YOUR CAMCORDER AT THE SUN OR OTHER BRIGHT OBJECTS ●DO NOT LEAVE THE CAMCORDER WITH THE EVF AIMED DIRECTLY AT THE SUN AS THIS MAY - Panasonic PVGS59 | Digital Video Camera - English/ Spanish - Page 6
License Agreement (for USB Driver, MotionDV STUDIO and Quick Movie Magic) Before opening the CD-ROM package (PV-GS59 Only), please read the following. You ("Licensee") are granted a license for the Software defined in this End User Software Agreement ("Agreement") on condition that you agree to the - Panasonic PVGS59 | Digital Video Camera - English/ Spanish - Page 7
. Features may vary, so please read carefully. Model Number PV-GS29 PV-GS39 PV-GS59 Battery Pack (Supplied) CGR-DU06 (640 mAh) CGR-DU06 (640 mAh) For U.S.A. customers: CGR-DU06 (640 mAh) For Canada customers: CGA-DU12 (1 150 mAh) CD-ROM USB Cable Card Feature - - Supplied (LSFT0648) For - Panasonic PVGS59 | Digital Video Camera - English/ Spanish - Page 8
OS Built-in SD Drive Web Camera PV-GS29 X v 10.1 - v 10.4 - - PV-GS39 X v 10.1 - v 10.4 Yes* - PV-GS59 X v 10.1 - v 10.4 Yes* - * The USB equipment operates with the driver installed standard on your OS. „ For Macintosh (DV connection) Model Number Macintosh OS iMovie/iMovieHD - Panasonic PVGS59 | Digital Video Camera - English/ Spanish - Page 9
(Digital Dubbing 54 PC Connection With DV Interface Cable 55 With a PC Using Camcorder with a PC 56 Using the USB Function 56 To disconnect USB cable safely 59 Using as a Web Camera 60 Using the Motion Picture Editing Software (PV-GS59 Only 64 If you no longer need software or driver - Panasonic PVGS59 | Digital Video Camera - English/ Spanish - Page 10
will not be charged when the DC Cable is connected to the AC Adaptor, disconnect it from the AC Adaptor. • The [CHARGE] Lamp lights up, and charging starts. • When the [CHARGE] Lamp goes off, charging is completed. 2 Attach the charged Battery to the Camcorder. Inserting a Cassette 1 Slide the [OPEN - Panasonic PVGS59 | Digital Video Camera - English/ Spanish - Page 11
icon] Recording on a Tape 1 Set the Mode Dial to Tape Recording Mode. • The [ TAPE RECORDING MODE] is displayed on the screen. (PV-GS39/ (PV-GS29) PV-GS59) 2 Press the Recording Start/Stop Button. • Recording starts. 3 Press the Recording Start/Stop Button again to pause the recording. Recording - Panasonic PVGS59 | Digital Video Camera - English/ Spanish - Page 12
The following accessories are supplied with your Camcorder. 1) PV-DAC14D K2GJ2DC00011 K2CA2CA00025 2) 3) CGA-DU12 (PV-GS59 Canada Only) CGR-DU06 4) 5) K2KC4CB00020 LSFC0018 K1HA05CD0014 LSFT0648 (For PV-GS39 (PV-GS59 Only) (Canada Only)/ PV-GS59) 1) AC Adaptor, DC Cable and AC Cable (pp - Panasonic PVGS59 | Digital Video Camera - English/ Spanish - Page 13
[OPEN/EJECT] (p. 18) 17 Cassette Holder (pp. 18~19) 18 Cassette Compartment Cover (pp. 18~19) 19 DV Input/Output Terminal (pp. 54~55, 67~68) • Connect this to the digital video equipment. 20 USB Jack [ ] (For PV-GS39/PV-GS59) (pp. 58~59, 61, 67) 21 Speaker (p. 45) 22 Built-in LED Light (pp. 33~34 - Panasonic PVGS59 | Digital Video Camera - English/ Spanish - Page 14
buttons on the Camcorder. • When the button-type battery is exhausted, replace it with a new CR2025 battery. (A battery is normally expected to type battery. WARNING ●Use Battery with Panasonic type CR2025 only. Use of another battery may present a risk of fire or explosion. ●Battery may - Panasonic PVGS59 | Digital Video Camera - English/ Spanish - Page 15
to [VCR1] Mode. 1 Connect the DC Cable to the Camcorder. 2 Connect the DC Cable to the AC Adaptor. 3 Connect the AC Cable to the AC Adaptor and the AC Jack. 1 2 3 Using the Battery Before use, fully charge the Battery. • We recommend using a Panasonic Battery. • We cannot guarantee the quality of - Panasonic PVGS59 | Digital Video Camera - English/ Spanish - Page 16
downward or DC Cable. • When attaching or removing Battery, set the [OFF/ON] Switch to [OFF] and make sure the [STATUS] Indicator is not lit. • Hold down the battery with your hand so it does not fall. Notes: • When the Camcorder has been used for a long time, the Camera body becomes warm, but - Panasonic PVGS59 | Digital Video Camera - English/ Spanish - Page 17
Before Using • "1 h 40 min." indicates 1 hour and 40 minutes. • Battery CGR-DU06 (PV-GS29/PV-GS39/PV-GS59 U.S.A.) or CGA-DU12 (PV-GS59 Canada) is supplied. • The times shown in the table are approximate times. The numbers indicate the recording time when the Viewfinder is used. The - Panasonic PVGS59 | Digital Video Camera - English/ Spanish - Page 18
.com. • For your reference if you travel frequently you should also purchase a Panasonic head cleaning tape AY-DVMCLA and use when HEAD CLOG message appears on the LCD/EVF of your Camcorder. 1 Fit the AC Adaptor or the Battery and turn on the Power. 2 Slide the [OPEN/EJECT] Lever toward the front - Panasonic PVGS59 | Digital Video Camera - English/ Spanish - Page 19
as a cable, caught battery has run down. Using a Memory Card (Optional) (For PV-GS39/PV-GS59) A Card can be used to record still pictures. • Use a genuine SD Memory Card manufactured by Panasonic only. Before inserting or removing a Card, be sure to turn off the Camcorder. • Otherwise, the Camcorder - Panasonic PVGS59 | Digital Video Camera - English/ Spanish - Page 20
unusable. • Electrical noise, static electricity, or failure of the Camcorder or the card may damage or erase the data stored on the card. We recommend saving important data on a personal computer by using a USB Cable, PC Card Adaptor, and USB Reader/Writer. „ SD Memory Card • The memory capacity - Panasonic PVGS59 | Digital Video Camera - English/ Spanish - Page 21
Select [YES] and set the date and time. Connect the AC adaptor to the Camcorder or place the battery on the Camcorder, and the built-in lithium battery will be recharged. Leave the camera as is for approx. 24 hours, and the battery will drive the date and time for approx. 6 months. (Even if the [OFF - Panasonic PVGS59 | Digital Video Camera - English/ Spanish - Page 22
downward direction. Forcefully rotating the LCD Monitor beyond these ranges will damage the Camcorder. 1 180° 2 90° • The brightness and color level of the adjusted from the Menu. • If it is forcibly opened or rotated, the Camcorder may be damaged or fail. • Check that the Card Slot Cover is - Panasonic PVGS59 | Digital Video Camera - English/ Spanish - Page 23
when recording still pictures on a card. : Picture Playback Mode (For PV-GS39/PV-GS59) Use this mode when playing back the recorded still picture on a card. : PC Mode (For PV-GS39/PV-GS59) Use this mode when you want to connect the Camcorder to your Personal Computer. You can view or edit the images - Panasonic PVGS59 | Digital Video Camera - English/ Spanish - Page 24
page. - • 1 is displayed while recording on a tape. „ Card Recording Mode (For PV-GS39/PV-GS59) • When the [AUTO/MANUAL/FOCUS] Switch is set to [AUTO]. 1/2 NEXT 2/2 NEXT ◄ Self-timer Mode p. 35 ► 1/2 ▲ Help Mode* Backlight compensation p. 25 p. 37 ▼ Go to next page. - ◄ 2/2 ▼ Soft Skin - Panasonic PVGS59 | Digital Video Camera - English/ Spanish - Page 25
NEXT MF MF - + 4/4 NEXT ◄ 4/4 ► ▼ Manual Focus Adjustment Mode Manual Focus Adjustment Mode Go to next page. „ Tape Playback Mode p. 44 p. 44 - ▲ Playback / Pause ► - ◄ Fast (Cue Playback) Rewind (Review Playback) ▼ Stop „ Picture Playback Mode (For PV-GS39/PV-GS59) p. 45 p. 46 p. 46 - Panasonic PVGS59 | Digital Video Camera - English/ Spanish - Page 26
Battery or AC Adaptor is disconnected before turning off the Camcorder, the selected setup may not be retained. • Menu operation flow is shown in this text by >>. Operating with Remote Control (PV ) [ ASPECT] (For PV-GS39/PV-GS59) Wide Screen Mode (p. 39) [ CINEMA] (For PV-GS29) Cinema-like Format - Panasonic PVGS59 | Digital Video Camera - English/ Spanish - Page 27
PV-GS39/PV-GS59) Picture Quality (p. 32) [ EIS] Image Stabilizer (p. 36) [ FADE COLOR] Fade color (p. 37) [ AUDIO REC] Audio Recording Mode (p. 28) [ USB FUNCTION] (PV-GS59 Only) USB Functions Mode (pp. 61, 67) [ D.ZOOM] Digital BASIC DATE/TIME D/T USB FUNCTION MOTION DV SETUP ENTER EXIT SETUP - Panasonic PVGS59 | Digital Video Camera - English/ Spanish - Page 28
Setup Sub-menu (p. 26) „ [PICTURE PLAYBACK MENU] (For PV-GS39/PV-GS59) e.g., BASIC BASIC DATE/TIME D/T ADVANCED PROTECT NO SETUP LANGUAGE [ SETUP] >> [ DATE/TIME] >> [D/T], [DATE] or [OFF]. • The Camcorder automatically records the date and time of picture taking on the tape. • You can - Panasonic PVGS59 | Digital Video Camera - English/ Spanish - Page 29
the Camcorder, turn it on again. • In the following cases, the power may not turn off even when set [ POWER SAVE] >> [5 MINUTES]. - When connecting to the AC Jack (When using the AC Adaptor) - When connecting the USB Cable or the DV Cable to a PC or other equipment - When the PC Mode (For PV-GS39/PV - Panasonic PVGS59 | Digital Video Camera - English/ Spanish - Page 30
• When recording still pictures on a card, set the Mode Dial to Card Recording Mode [ ] (For PV-GS39/PV-GS59). • When recording with the [AUTO/MANUAL/FOCUS] Switch set to [AUTO], the Camcorder automatically adjusts the Focus and White Balance. In some cases, they cannot be adjusted automatically and - Panasonic PVGS59 | Digital Video Camera - English/ Spanish - Page 31
Mode. • If there is no blank left on the Cassette, the Camcorder stops at the end of the tape. „ To Cancel the Blank Search Function Before Completion Move the Joystick Control [▼] to select [ ]. Recording a Still Picture on a Tape (PV-GS29 Only) Still pictures can be recorded on a tape. • Set to - Panasonic PVGS59 | Digital Video Camera - English/ Spanish - Page 32
Recording a Still Picture on a Card (Photoshot) (For PV-GS39/PV-GS59) Still pictures can be recorded on the Memory Card from the Camcorder. • Open the LCD Monitor or extend the Viewfinder before turning on the power. 1 Set the [OFF/ON] Switch to [ON]. • The [STATUS] Indicator lights Red. 2 - Panasonic PVGS59 | Digital Video Camera - English/ Spanish - Page 33
adjust the shutter speed manually to 1/60 or Camcorder. Recording Yourself You can record yourself while viewing the LCD Monitor. You can record persons in front of the camera of any trouble. • When Video Light To brighten the natural colors in a scene. Gain Up mode works with the Built-in Video - Panasonic PVGS59 | Digital Video Camera - English/ Spanish - Page 34
be within 4.9 feet (1.5 meters) of the Camcorder. • Using the LED Video Light reduces battery time. • Set the LED Video Light to off when not in use. the LCD Monitor or the Viewfinder. • The Red Lamp lights up and the camera will be put into recording pause approx. 1.7 seconds after it is turned on. - Panasonic PVGS59 | Digital Video Camera - English/ Spanish - Page 35
Recording Mode Self-timer Recording (For PV-GS39/PV-GS59) When you set the self-timer, the 2006 100 SP 3h59m59s29f 25X w T Notes: • When zooming in and taking a picture while holding the Camcorder by hand, we recommend using the image stabilizer function. • When you are zooming in on a faraway - Panasonic PVGS59 | Digital Video Camera - English/ Spanish - Page 36
Digital Zoom Function, you can select a magnification from 50× up to 1000×. • Set to Tape Recording Mode. 1 Set [ ADVANCED] >> [ D.ZOOM] >> [50×] or [1000×]. Image Stabilizer Function If the Camcorder is shaken while recording, the camera used with the Remote Control. (PV-GS59 Only) „ To Cancel the - Panasonic PVGS59 | Digital Video Camera - English/ Spanish - Page 37
Normal Recording Move the Joystick Control [▲] to select [ ] again. • The [BACKLIGHT COMPENSATION OFF] is displayed. Notes: • When setting the Iris manually, the Backlight Compensation Function does not work. • If you operate the [OFF/ON] Switch or Mode Dial, the Backlight Compensation Function is - Panasonic PVGS59 | Digital Video Camera - English/ Spanish - Page 38
color images brightly in a dark place without using the Video Light. • Set to Tape Recording Mode. 1 Press the dark place, the recorded picture is presented in a time-lapse-like manner. • Adjust the Focus manually. • White Balance cannot be set. • The Shutter Speed cannot be adjusted. • The Scene - Panasonic PVGS59 | Digital Video Camera - English/ Spanish - Page 39
Images played back vary depending on the TV connected. Please refer to the operating instructions for your TV. • This function does not widen the recording range. • not be displayed correctly, depending on the software in used. Wide/4:3 Function (For PV-GS39/PV-GS59) This allows you to record - Panasonic PVGS59 | Digital Video Camera - English/ Spanish - Page 40
Scene Mode Set [ BASIC] >> [ SCENE MODE] >> [OFF]. Or, set the [AUTO/MANUAL/FOCUS] Switch to [AUTO]. Notes: • If any of the Scene Modes are selected, you cannot • For slow motion playback (PV-GS59 Only) or playback pause of recorded pictures, this mode reduces camera shakes. • During normal playback, - Panasonic PVGS59 | Digital Video Camera - English/ Spanish - Page 41
conditions, the Automatic White Balance Adjustment Mode may not be able to bring out natural colors. In this case, the white balance can be adjusted manually. When the Camcorder is turned on with the Lens Cap on, the Automatic White Balance Adjustment may not function properly. Please turn on the - Panasonic PVGS59 | Digital Video Camera - English/ Spanish - Page 42
12:34:56AM JAN 2 2006 WB WB < > BACK 100 4 Point the Camcorder at a full-screen white subject. 5 Move the Joystick Control [▲] until the [ the MagicPix Mode About flashing of the [ ] Indication: When the manual adjustment mode is selected • Flashing indicates that the White Balance previously - Panasonic PVGS59 | Digital Video Camera - English/ Spanish - Page 43
can use this function when the screen is too bright or too dark. • Set to Tape/Card Recording Mode. 1 Set the [AUTO/MANUAL/FOCUS] Switch to [MANUAL]. • The Shutter Speed Indication appears. SP 3h59m59s29f R 2:00 ►1/100 12:34:56AM JAN 2 2006 SHTR SHTR - + BACK 100 3 Move the Joystick Control - Panasonic PVGS59 | Digital Video Camera - English/ Spanish - Page 44
not be in focus when zoomed in. First, zoom in on the subject, and then focus on it. „ To Resume Automatic Adjustment Set the [AUTO/MANUAL/FOCUS] Switch to [AUTO] or [FOCUS]. • The [ ] Indication and the One-Touch Navigation icon appears. [One-Touch Navigation icon] WB IRIS SHTR 5/5 NEXT 2 Slide - Panasonic PVGS59 | Digital Video Camera - English/ Spanish - Page 45
on the lower right of the screen. [One-Touch Navigation icon] (PV-GS39/ (PV-GS29) PV-GS59) 3 Move the Joystick Control [◄] to rewind the tape. • ON] Switch to [OFF]. • When you set [ USB FUNCTION] >> [WEB CAM] and then connect the USB Cable, the Repeat Playback Mode is canceled. Settings on the - Panasonic PVGS59 | Digital Video Camera - English/ Spanish - Page 46
Press the [►] Button or [VER SEARCH] Button. Notes: • During Cue or Review Playback, fast-moving images may show mosaic-like patterns. • The sound is muted when the Repeat Playback is active. Slow Motion Playback (PV-GS59 Only) This Camcorder can play back at a slow speed. • Scenes recorded - Panasonic PVGS59 | Digital Video Camera - English/ Spanish - Page 47
is left in the Still Playback Mode for more than 5 minutes, the Camcorder switches to the Stop Mode to protect the video heads from excessive wear and tear. Playing Back a Memory Card (For PV-GS39/PV-GS59) It plays back files recorded on a Card. • Open the LCD Monitor or extend the Viewfinder - Panasonic PVGS59 | Digital Video Camera - English/ Spanish - Page 48
Camera File system) established by JEITA (Japan Electronics and Information Technology Industries Association). • The file format supported by this Camcorder , the Folder File Number may not be displayed. Slide Show (For PV-GS39/PV-GS59) The recorded still pictures in the Card can be played back - Panasonic PVGS59 | Digital Video Camera - English/ Spanish - Page 49
the Files Recorded on a Card (For PV-GS39/PV-GS59) Using the Camcorder, you can delete the files recorded on off the power while deleting. • To delete files, use the AC Adapter or a sufficiently charged battery. • In case of [ALL FILES], the deletion may take time if there are many files on - Panasonic PVGS59 | Digital Video Camera - English/ Spanish - Page 50
supporting DPOF. Notes: • DPOF setting made on another camera may not be recognized by Camcorder. Perform the DPOF Settings on your Camcorder. • Verifying the DPOF Settings may take a little time. Wait until the Card Access Lamp goes out. Protecting the Files on a Card (Lock Setting) (For PV-GS39/PV - Panasonic PVGS59 | Digital Video Camera - English/ Spanish - Page 51
Card using the Camcorder. • PC formatted SD Memory Cards are not compatible with the Camcorder. • The Camcorder supports SD Memory Cards Connect to the TV with the AV Cable 1 . 3 Turn on this Camcorder and set the Mode Dial to the Tape Playback Mode. 4 For PV-GS39/PV-GS59 users : Set [ SETUP] >> [ - Panasonic PVGS59 | Digital Video Camera - English/ Spanish - Page 52
icon, time code and mode indication, etc.), date and time can be displayed on the TV. 1 Press the [EXT DISPLAY] Button on the Remote Control. (PV-GS59 Only) • Press the button again to erase the OSD information. Note: • Use the AC adaptor to avoid - Panasonic PVGS59 | Digital Video Camera - English/ Spanish - Page 53
PV-GS39/PV-GS59 Joystick Control [▲] to select [ ] again. • The Camcorder is in the Still Playback Mode again. „ Before Recording tape cannot be dubbed. • Sounds sent through the DV terminal cannot be dubbed. • If a tape has software, only the original sound (ST1) may be imported, depending on the - Panasonic PVGS59 | Digital Video Camera - English/ Spanish - Page 54
terminal. Using the DV Cable for Recording (Digital Dubbing) By connecting this Camcorder with other digital video equipment (such as another Camcorder of the same format/model) that has a DV input/output Terminal, and using a 4-pin to 4-pin DV Interface Cable PV-DDC9/PV-DDC9-K (optional) 1 , high - Panasonic PVGS59 | Digital Video Camera - English/ Spanish - Page 55
being OHCI compliant should have no problem working with any OHCI compliant Firewire Card/video - Editing software package. • Personal Computer must be equipped with an DV Terminal. • During Camcorder playback, do not disconnect the DV Interface Cable or turn the Camcorder off as this may cause a PC - Panasonic PVGS59 | Digital Video Camera - English/ Spanish - Page 56
when the CD-ROM drive is drive D.) Software Installation (For Windows) (PV-GS39 Only) • If you have Internet access, please download the USB Driver. „ USB Driver (pp. 56~58) When the Camcorder is connected to your PC, you can send video from your Camcorder to other parties via a network or the - Panasonic PVGS59 | Digital Video Camera - English/ Spanish - Page 57
pre-installed: Microsoft Windows XP Professional/Home Edition SP1 (PV-GS59) / SP2 (PV-GS39) or later Microsoft Windows 2000 SP4 or later (PV-GS39 Only) • For Windows 2000 users: Please download and install the USB Driver from the Web Site. • For Windows XP SP2 users: The USB equipment operates with - Panasonic PVGS59 | Digital Video Camera - English/ Spanish - Page 58
you selected additional software. PV-GS39 Only • For Windows XP users, the USB equipment operates with the driver installed standard on your OS. • If you have Internet access, please download the USB Driver. 1 To download and install the Driver, go to: (For U.S.A. consumers) http://www.panasonic.com - Panasonic PVGS59 | Digital Video Camera - English/ Spanish - Page 59
[Removable Disk] 1 (For Windows 2000 users). 5 Click [Open folder to view files using Windows Explorer] 2 and then [OK] (For Windows XP users). [Windows 2000] [Windows XP] 1 2 • After the USB Connection Cable is connected to the Camcorder, open [My Computer] or [Windows Explorer] to check that - Panasonic PVGS59 | Digital Video Camera - English/ Spanish - Page 60
video and sound from the Camcorder to the other parties via the network. • Do not connect the USB Cable until the USB Driver is installed. (pp. 57~58) Please see chart below. [Send] [Receive] Windows XP ← OK → Windows XP [Software] Windows Messenger/ MSN Messenger Windows XP ← OK → Windows - Panasonic PVGS59 | Digital Video Camera - English/ Spanish - Page 61
/ (For download and installation instructions, please refer to Help on the Home Page.) • If you are connected to the Internet through a firewall or a router, proper communication will not be possible. Connecting the Camcorder to Personal Computer (For Using as a Web Camera) 1 Install the USB Driver - Panasonic PVGS59 | Digital Video Camera - English/ Spanish - Page 62
on an OS other than Windows XP. • If the Camcorder is used as a Web Camera, the quality of the video to be exchanged will depend on the Internet connection status. • If the USB Cable is disconnected from the personal computer, the Web Camera mode is canceled. • If the Camcorder is used as a Web - Panasonic PVGS59 | Digital Video Camera - English/ Spanish - Page 63
the [Microphone] menu. • For other information about Windows Messenger, please refer to Help. • When access is finished, close Windows Messenger, then turn off the Camcorder. Finally, disconnect the USB Cable. • If the Camcorder is used as Web Camera continuously for two hours, the communication is - Panasonic PVGS59 | Digital Video Camera - English/ Spanish - Page 64
and titles to videos. Operating environment The Camcorder can be connected to the personal computer with the DV Cable. The Camcorder can be connected to the personal computer with the USB Cable, however, USB Driver must be installed. • Do not connect the USB Cable until the USB Driver is installed - Panasonic PVGS59 | Digital Video Camera - English/ Spanish - Page 65
instructions. 4 Select the Video system. • Sample data is installed concurrently with the Quick Movie Magic software. 6 Click [Finish] when the [Restarting Windows installed concurrently with the MotionDV STUDIO software. 6 Click [Finish] when the [Restarting Windows] dialog appears. • Reboot the - Panasonic PVGS59 | Digital Video Camera - English/ Spanish - Page 66
you connect the personal computer and the Camcorder with the USB Cable and then use Quick Movie Magic or MotionDV STUDIO on Windows XP (SP2 or later) or Windows 2000 (SP4 or later), check the driver of the USB host controller. • It is required to use the driver for which [Microsoft] is displayed on - Panasonic PVGS59 | Digital Video Camera - English/ Spanish - Page 67
OS. Please refer to the user manual of your OS. 2 After software or driver is uninstalled, please restart your computer. Transferring Motion DV Tape Pictures (Camcorder→Macintosh) via DV Cable (iMovie / iMovie HD) By connecting the Camcorder and Macintosh with the DV Cable, you can transfer motion - Panasonic PVGS59 | Digital Video Camera - English/ Spanish - Page 68
are shown in English for the sake of example, other languages are supported as well. • In this Manual, the Panasonic make digital video camera with USB Jack is referred to as Camcorder. • These instructions do not cover the basic operations of the personal computer or define any terms. For - Panasonic PVGS59 | Digital Video Camera - English/ Spanish - Page 69
USB Driver after the USB Cable is connected, or if you do not follow these Operating Instructions, the Camcorder will not be recognized correctly. In this case, delete the USB Driver from [Device Manager] as described below, uninstall the USB Driver Camcorder conform with DCF (Design rule for Camera - Panasonic PVGS59 | Digital Video Camera - English/ Spanish - Page 70
Camcorder status are shown on the screen. Basic indications: : Remaining battery Manual Review Video Light is on. (pp. 33~34) : Gain up (pp. 33~34) : Web Camera Mode (p. 61) Wide Mode (p. 39) [640 × 480] Image size 0.2M [640 × 320] Image size • For images not recorded with this Camcorder - Panasonic PVGS59 | Digital Video Camera - English/ Spanish - Page 71
to record pictures on a Tape/Card with the USB Cable connected to the Camcorder. PC DOES NOT SUPPORT USB2.0: The Camcorder is connected to a personal computer that does not support USB2.0. CAN NOT USE USB: You are connecting the USB Cable with the DV Cable connected in MotionDV Mode. Others 71 - Panasonic PVGS59 | Digital Video Camera - English/ Spanish - Page 72
it in a bag or case lined with soft pads so as to prevent the coating on the camera body from being worn. After use, be sure to take the Cassette out and detach the Battery from the Camcorder or pull out the AC Cable from AC Jack. • If the Cassette is left in the - Panasonic PVGS59 | Digital Video Camera - English/ Spanish - Page 73
normal. • After use, be sure to pull out the AC Cable from the AC Jack. (If they are left connected, a minute amount of current is consumed.) • Always keep the electrodes of the AC Adaptor and Battery clean. „ Condensation If you turn the Camcorder on when condensation occurs on the head or the tape - Panasonic PVGS59 | Digital Video Camera - English/ Spanish - Page 74
a soft cloth to prevent dust from getting into the Camera. • Do not leave the Camcorder in places that expose it to high temperature. Battery • Extremely high temperatures or low temperatures will shorten the life of the Battery. • If the Battery is kept in smoky or dusty places, the terminals may - Panasonic PVGS59 | Digital Video Camera - English/ Spanish - Page 75
approximately 105,000 pixels (PV-GS29) / 112,000 pixels (PV-GS39/PV-GS59). The result is instructions of your accessories. Before Requesting Service (Problems and Solutions) Power/Body The Camcorder power cannot be turned on. • Is the battery fully charged? Use a fully charged battery. • The battery - Panasonic PVGS59 | Digital Video Camera - English/ Spanish - Page 76
PV-GS59 Only). • Has the button-type battery of the Remote Control run out? Replace it with a new button-type battery . (p. 14) • Is the setting on the Remote Control correct? If the setting on the Remote Control is not in agreement with the [ REMOTE] setting on the Camcorder the manual focus - Panasonic PVGS59 | Digital Video Camera - English/ Spanish - Page 77
connection. Playback picture is not clear. • Are the heads of the Camcorder dirty? If the heads are dirty, playback image cannot be clear. Clean the heads by using the head cleaner for digital video. (p. 73) • If the terminal for the AV cable is soiled, noises may appear on the screen. Wipe the soil - Panasonic PVGS59 | Digital Video Camera - English/ Spanish - Page 78
tray and follow the instructions on the screen. • For Macintosh: To disconnect the USB cable safely, drop the [NO_NAME] icon which appeared when you connected the Camcorder with the USB Cable into the recycle bin. The Camcorder malfunctions on editing, dubbing from digital video equipment, or using - Panasonic PVGS59 | Digital Video Camera - English/ Spanish - Page 79
this Camcorder employs a digital system for recording image and sound data, it is not compatible with conventional S-VHS or VHS video equipment that conditions. Please use the Manual Focus Mode instead. 1) Recording a subject whose one end is located closer to the Camcorder and the other end farther - Panasonic PVGS59 | Digital Video Camera - English/ Spanish - Page 80
Specifications Digital Camcorder Information for your safety Power Source: DC 7.9/7.2 V Power Consumption: Recording 4.2 W (PV-GS29) 4.4 W (PV-GS39/PV-GS59) Recording Format: Mini DV (Consumer-use Digital Video SD Format) Tape Used: 6.35 mm digital video tape Recording/Playback Time: SP: 80 min.; LP - Panasonic PVGS59 | Digital Video Camera - English/ Spanish - Page 81
Camcorder Accessory System Accessory # Figure PV-DAC14 Description AC Adaptor with AC Cable and DC Cables CGR-DU06A/1B CGA-DU12A/1B 640 mAh/Rechargeable Lithium Ion Battery Pack 1 150 mAh/Rechargeable Lithium Ion Battery Pack CGA-DU21A/1B PV-DDC9 (For USA) PV-DDC9-K (For Canada) RP-SDK02GU1A - Panasonic PVGS59 | Digital Video Camera - English/ Spanish - Page 82
Camcorder Accessory Order Form (For U.S.A. customers) Please photocopy this form when placing an order. 1. Camcorder Model # 2. Items Ordered Accessory # Description Price Each Quantity Total Price Date Discover Customer Signature Make Check or Money Order to: PANASONIC ACCESSORIES (Please - Panasonic PVGS59 | Digital Video Camera - English/ Spanish - Page 83
is wrong with the unit and any symptom it is exhibiting. Mail this completed form and your Proof of Purchase along with your unit to: Panasonic Services Company 410B Airport Road Elgin, IL 60123-9333 Attn: Camcorder Repair Others 83 - Panasonic PVGS59 | Digital Video Camera - English/ Spanish - Page 84
visit Panasonic Web Site: http://www.panasonic.com For assistance in Puerto Rico call Panasonic Sales Company (787)-750-4300 or fax (787)-768-2910. In-Home service, which vary from state to state. If a problem with this product develops during or after the warranty period, you may contact your dealer - Panasonic PVGS59 | Digital Video Camera - English/ Spanish - Page 85
-Sunday 10 am-7 pm, EST. For hearing or speech impaired TTY users, TTY : 1-877-833-8855 Accessory Purchases Purchase Parts, Accessories and Instruction Books online for all Panasonic Products by visiting our Web Site at: http://www.pasc.panasonic.com or, send your request by E-mail to: npcparts@us - Panasonic PVGS59 | Digital Video Camera - English/ Spanish - Page 86
Dry cell batteries are also excluded from coverage under this warranty. This warranty is extended to the original end user purchaser only. • Our Customer Care Centre at (905) 624-5505 or www.panasonic.ca • A Panasonic Factory Servicentre listed below: Richmond, British Columbia Panasonic Canada Inc - Panasonic PVGS59 | Digital Video Camera - English/ Spanish - Page 87
Guide/Guía Para Uso Rápido Precauciones para su seguridad ADVERTENCIA: Para evitar incendios y descargas eléctricas, no exponga este equipo a la lluvia ni a la humedad. Su Camcorder FCC, utilice solamente el cable de interfaz blindado cuando conecte una cámara de video digital a una computadora de - Panasonic PVGS59 | Digital Video Camera - English/ Spanish - Page 88
completamente la batería. • Debido a que la batería no se cargará cuando el cable de entrada de cc esté conectado al adaptador de ca desconéctelo del adaptador apaga, se ha terminado la carga. 2 Coloque la batería cargada en el Camcorder. 1 2 Abrir la cubierta de la ranura de tarjeta 3 . 3 Mientras - Panasonic PVGS59 | Digital Video Camera - English/ Spanish - Page 89
de grabación de cinta. • Se visualiza la indicación [ GRABACIÓN EN LA CINTA] en la pantalla. (PV-GS39/ (PV-GS29) PV-GS59) 2 Mueva el joystick [◄] 1 para rebobinar el cassette. 1 (PV-GS39/ (PV-GS29) PV-GS59) 2 Presione el botón de inicio/parada de grabación. • Comienza la grabación. 3 Mueva el - Panasonic PVGS59 | Digital Video Camera - English/ Spanish - Page 90
37 Blank Search 31 Built-in LED Video Light 33 C Camcorder Accessory Order Form 82 Camcorder Accessory System 81 Charging the Battery 15 Cinema Mode 39 Condensation 73 Cue Playback 46 Customer Services Directory 85 D Date/Time Setting 21 Digital Zoom 36 DPOF Setting 50 Dubbing 54 - Panasonic PVGS59 | Digital Video Camera - English/ Spanish - Page 91
Recording 33 Sensor tag 17 Shutter Speed 42 Slide Show 48 Slow Motion Playback 46 Sound Volume 45 SP/LP Mode 29 Spanish Quick Use Guide 87 Sports Mode 40 Spotlight Mode 40 Still Advance Playback 47 Surf & Snow Mode 40 T Time Code 79 V Variable Speed Search 46 - Panasonic PVGS59 | Digital Video Camera - English/ Spanish - Page 92
Company, Division of Panasonic Corporation of North America One Panasonic Way Secaucus, New Jersey 07094 Panasonic Sales Company ("PSC"), Division of Panasonic Puerto Rico, Inc. Ave. 65 de Infanteria, Km. 9.5 San Gabriel Industrial Park Carolina, Puerto Rico 00985 Panasonic Canada Inc. 5770
-
 1
1 -
 2
2 -
 3
3 -
 4
4 -
 5
5 -
 6
6 -
 7
7 -
8
-
9
-
10
-
11
-
12
-
13
-
14
-
15
-
16
-
17
-
18
-
19
-
20
-
21
-
22
-
23
-
24
-
25
-
26
-
27
-
28
-
29
-
30
-
31
-
32
-
33
-
34
-
35
-
36
-
37
-
38
-
39
-
40
-
41
-
42
-
43
-
44
-
45
-
46
-
47
-
48
-
49
-
50
-
51
-
52
-
53
-
54
-
55
-
56
-
57
-
58
-
59
-
60
-
61
-
62
-
63
-
64
-
65
-
66
-
67
-
68
-
69
-
70
-
71
-
72
-
73
-
74
-
75
-
76
-
77
-
78
-
79
-
80
-
81
-
82
-
83
-
84
-
85
-
86
-
87
-
88
-
89
-
90
-
91
-
92
 |
 |
Before attempting to connect, operate or adjust this product, please
read these instructions thoroughly.
LSQT1000 B
PV-GS59
PV-GS39
PV-GS29
Digital Video Camcorder
Operating Instructions
Models No.
Spanish Quick Use Guide is included.
Guía para rápida consulta en español está incluida.
For assistance, please call : 1-800-211-PANA(7262) or, contact us via the web at: http://www.panasonic.com/contactinfo
(PV-GS59 Shown)
For assistance, please call : 1-800-561-5505 or visit us at www.panasonic.ca
P
PC