Panasonic PVGS70D PVGS70D User Guide - Page 18
POWER SUPPLY, CHARGING TIME AND AVAILABLE RECORDING TIME, Using the AC Adaptor, Using the Battery
 |
View all Panasonic PVGS70D manuals
Add to My Manuals
Save this manual to your list of manuals |
Page 18 highlights
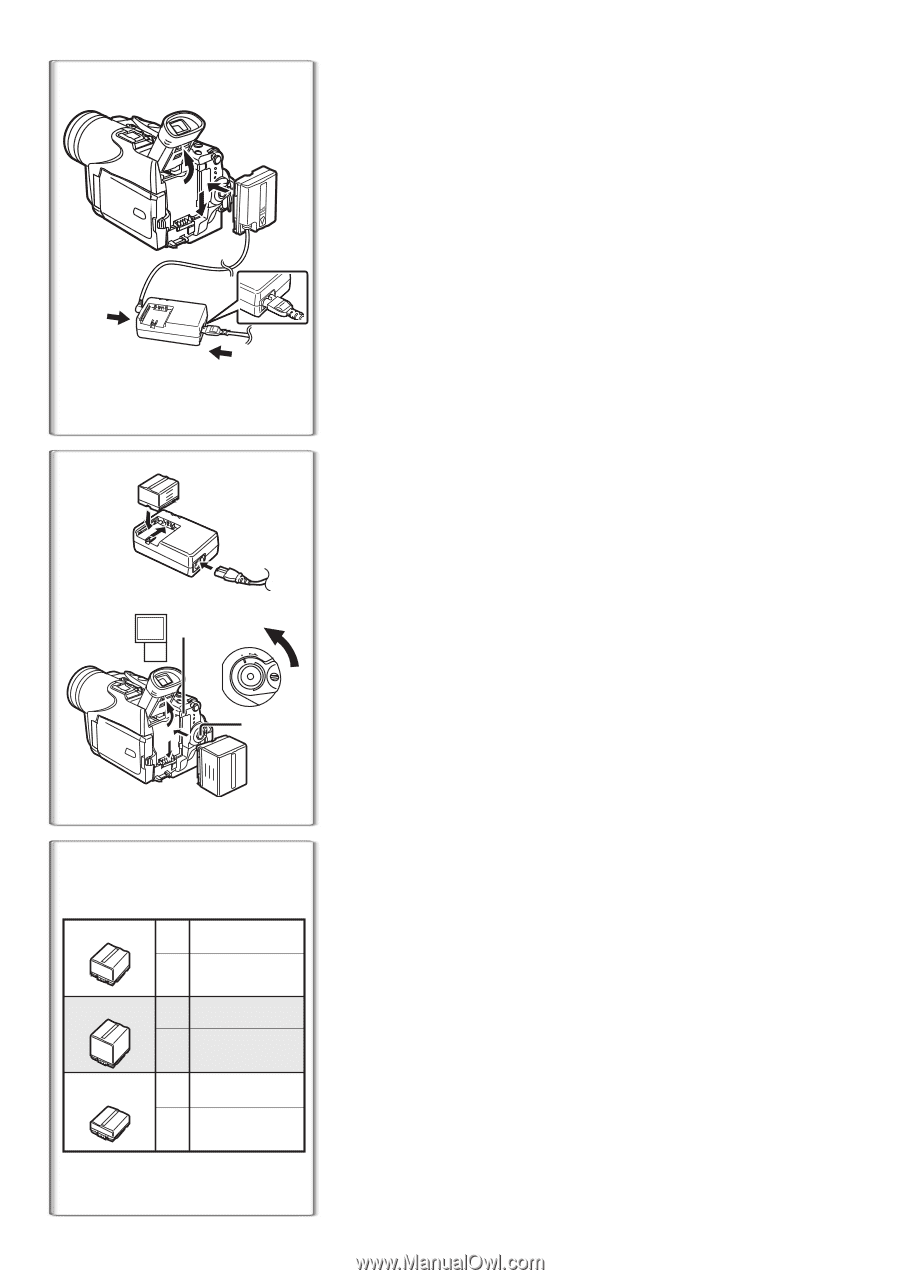
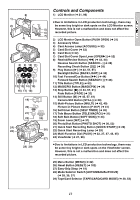
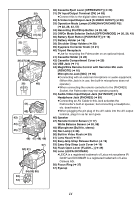
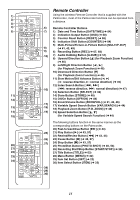
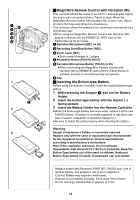
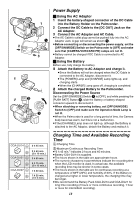
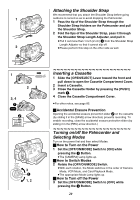
1 1 2 3 1 2 2 PUSH BATT OFF ON MODE 1 CGA-DU14 A 2 h 45 min. B CGA-DU21 A 2 h 50 min. (2 h 10 min.) 3 h 55 min. B CGA-DU07 A 4 h 15 min. (3 h 15 min.) 1 h 30 min. B 1 h 25 min. (1 h 5 min.) Power Supply ª Using the AC Adaptor 1 Insert the battery-shaped connector of the DC Cable into the Battery Holder on the Palmcorder. 2 Connect the DC Cable to the [DC OUT] Jack on the AC Adaptor. 3 Connect the AC Adaptor and AC Cable. ≥The AC Cable's outlet plug cannot be pushed fully into the AC Adaptor Jack. A gap will remain as shown 1. ≥Before connecting or disconnecting the power supply, set the [OFF/ON/MODE] Switch on the Palmcorder to [OFF] and make sure that [CAMERA/VCR/CARD PB] Lamps are not lit. ≥Battery cannot be charged if DC Cable is connected to AC Adaptor. ª Using the Battery Before use, fully charge the battery. 1 Attach the Battery to AC Adaptor and charge it. ≥Since the Battery will not be charged when the DC Cable is connected to the AC Adaptor, disconnect it. ≥The [POWER] Lamp and [CHARGE] Lamp lights up, and charging starts. ≥When the [CHARGE] Lamp goes off, charging is completed. 2 Attach the charged Battery to the Palmcorder. Disconnecting the Power Source Set the [OFF/ON/MODE] Switch 1 to [OFF], and while pressing the [PUSH BATT] Button 2, slide the Battery or battery-shaped connector upward to disconnect it. ≥When attaching or removing battery, set [OFF/ON/MODE] Switch to [OFF] and make sure the Operation Mode Lamp is not lit. ≥When the Palmcorder is used for a long period of time, the Camera body becomes warm, but this is not a malfunction. ≥If the [CHARGE] Lamp does not light up, although the Battery is attached to the AC Adaptor, detach the Battery and reattach it. Charging Time and Available Recording Time A Charging Time B Maximum Continuous Recording Time ≥"2 h 45 min." indicates 2 hours and 45 minutes. ≥Battery CGA-DU14 is supplied. ≥The hours shown in the table are approximate hours. ≥The numeric characters in parentheses indicate the recording time when the LCD monitor is used. In actual use, the available recording time may be shorter in some cases. ≥The hours shown in the table are for continuous recording at a temperature of 68xF (20xC) and humidity of 60%. If the Battery is charged at a higher or lower temperature, the charging time may be longer. ≥We recommend the Battery Pack CGA-DU14 and CGA-DU21 for long time recording (2 hours or more continuous recording, 1 hour or more for intermittent recording). 18
-
 1
1 -
2
-
3
-
4
-
5
-
6
-
7
-
8
-
9
-
10
-
11
-
12
-
 13
13 -
 14
14 -
 15
15 -
 16
16 -
 17
17 -
 18
18 -
 19
19 -
 20
20 -
 21
21 -
 22
22 -
 23
23 -
24
-
25
-
26
-
27
-
28
-
29
-
30
-
31
-
32
-
33
-
34
-
35
-
36
-
37
-
38
-
39
-
40
-
41
-
42
-
43
-
44
-
45
-
46
-
47
-
48
-
49
-
50
-
51
-
52
-
53
-
54
-
55
-
56
-
57
-
58
-
59
-
60
-
61
-
62
-
63
-
64
-
65
-
66
-
67
-
68
-
69
-
70
-
71
-
72
-
73
-
74
-
75
-
76
-
77
-
78
-
79
-
80
-
81
-
82
-
83
-
84
-
85
-
86
-
87
-
88
-
89
-
90
-
91
-
92
-
93
-
94
-
95
-
96
-
97
-
98
-
99
-
100
-
101
-
102
-
103
-
104
-
105
-
106
-
107
-
108
-
109
-
110
-
111
-
112
-
113
-
114
 |
 |